6 Unforgivable Heat Pump Installation Mistakes Everyone Should Avoid

Published on: 16 April 2021 Last Updated on: 30 December 2024
Heat Pump Installation Mistakes

Have you thought of acquiring a new heat pump?

A heat pump enhances the energy production in your house. And, just the same way you take your time researching for the best model, Is how you need to go about as you look for the right technician. When you invest in a new heat pump, ensure you are more cautious while hiring an installer.

If the installation is not done appropriately, the equipment may fail to function as expected. Reaching out to a professional installer is vital as you will be able to save extra cash on the expensive repairs.

You can get high-quality air conditioning installation by checking out https://americanhomewater.com/ac-installation/.  What are the must-know heat pump installation mistakes everyone should avoid?

new heat pump

1. Using Incorrect Furnace Size:

Size is supposed to be of great importance in regards to an HVAC system with a heat pump not being an exception. Selecting a pump that’s of the wrong size can lead to unwanted outcomes in your house.

What can happen if it is very small or very big?

For a smaller one, it will not switch on and off most of the time though you can still use it for some time to acquire the room temperatures you want. You can do this to enable it to deplete the extra energy. And when it’s very large it will go through fast and short cycles. This will in turn exert more pressure towards the blower motor.

Therefore having the wrong size of a heat pump will cause insufficient cooling or heating of your residence. This will in turn lead to irritating levels of humidity and unequal temperatures in the house.

The pump can also get damaged unexpectedly apart from the rising electricity bills. When the blower motor breaks down, this leads to a ripple- effect which also impacts the remaining inner parts of the pump.

There is a need for periodic repairs until it’s time to do a complete replacement of the heat pump.

●  How Can You Get The Right Size?

You can acquire the right size if you work with a highly regarded technician dealing with heating and air conditioner repairs.

The contractor will inspect your house and the system and then recommend the most ideal unit to replace it with. You’ll also get advice on the amount of conditioned air every room requires for heating and cooling.

Before you get one, take note of the devices generating heat in your home, household members, and their preferred temperatures.

Furthermore check your home’s insulation, windows, residential square footage, and the local climate. You can opt for the pump ratings of its energy efficiency.

2. Malfunctioning Duct Installation Process:

Did you know there are instances when the contractors have it rough while putting in place new ductwork? Some go to an extent of employing poor workmanship to undertake the role. They also utilize cheaper tools. Setting up the ducts incorrectly will leave gaps and cracks.

At some point, there may be the use of a weak sealer like the tape rather than a long-lasting one. And in this instance, get ready to have an experience of the leaking ducts more sooner than you thought.

For sure, this will raise the energy bills since the heated and cooled air gets cluttered. There are also issues related to humidity, more dust, and disturbing noise.

3. Opting For a Firm Without  NATE Certified Technicians:

Who can even think of contacting the wrong technician?

Come to think of it, why should you choose an installer with the lowest proposal without getting more information about the certifications or a service provider?

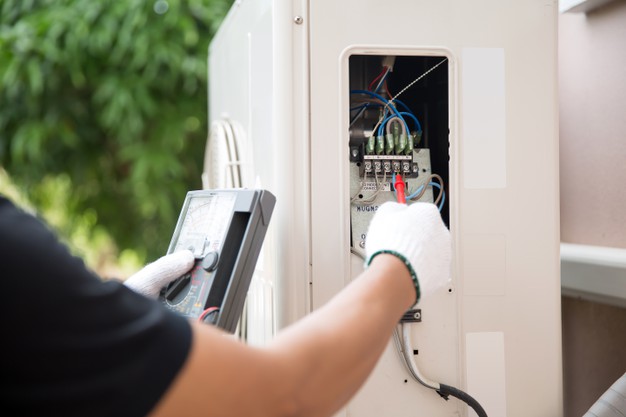
Before settling on one, confirm if they are NATE or MCSA certified, hence you will get quality services related to the installation process. Also consider examining whether the installer is experienced, currently training, or even ask for a reference for an equivalent job as the one you are offering.

4. Thermostat Installation In The Unwanted Spot:

The area you position the thermostat is very important and it will influence how your HVAC will be operating.

The most well-known fault of the installation of an air conditioner is placing the device in the wrong locale. This is why most of the conditioners do run extra hard as opposed to how they need to be functioning.

Consider understanding where the thermostat will be properly placed. You can opt for a place where the sun shines less often or farther from the air vents. If you control its temperature a lot it will be more correct and the AC will function without any glitches.

5. Unsuitable Refrigerant Charge:

Erroneous heat pump installation can lead to some refrigerant-based problems. And in case a unit is short of a refrigerant then it implies the technician did not add sufficient amounts in it. The leaks next to the seals may also be more noticeable.

Especially on the sections, the refrigerant lines attach to the other elements.  This is also due to wrong installation procedures. These circumstances show the heat pump is situated where there are bunches of tension, where the compressor is. This can cause a substantial rise in the cost of electricity.

The low levels of the refrigerant can also deter the evaporator coil from heat absorption and therefore promote the freezing of moisture. The issue can be well dealt with by enabling the ice to melt or rubbing ice off. You need to contact your contractor to inspect the heat pump in case of any leaks and put in the additional refrigerants.

6. Devising a Poor drainage System:

When the AC is running, there can be quite a considerable amount of moisture. In case this is not filtered the right way, it can affect the staff closer to it.

There can be musty smells, mold growth, backed-up tubes, and damaged drywalls among others. Putting up bad drainage is often known to be among the major AC mistakes and some houses are experiencing these kinds of problems.

In case of any queries regarding the drainage, always talk to a professional. This will help you confirm if all the things are well placed in response to the predictable subsequent years.

Read Also:

  • How To Save Money On Your Air Conditioning Costs This Summer
  • AC Repair Austin: Tips on How to Choose an AC Unit
  • Don’t Get Caught in a Heatwave: 5 Signs That Your AC Is About to Go Out

Content Rally wrapped around an online publication where you can publish your own intellectuals. It is a publishing platform designed to make great stories by content creators. This is your era, your place to be online. So come forward share your views, thoughts and ideas via Content Rally.

View all posts

Leave a Reply

Your email address will not be published. Required fields are marked *

Related

UTV Radios

The Role Of UTV Radios In Enhancing Your Outdoor Adventure Experience

Adventure is synonymous with the outdoors and Utility Terrain Vehicles (UTVs), but so is unpredictability. Unforeseen situations can arise, and when they do, reliable communication becomes indispensable. A good UTV radio is your lifeline, your link to the outside world, and your assurance of safety. It connects you to your group, helps coordinate efforts, and ensures you are never truly alone, no matter how remote the trail. And that's where UTV radios such as the Renegade X from Oxbow Gear come into play, acting as a bridge between convenience, communication, and safety. Understanding UTV Radios Designed for the rigors of the wild, UTV radios need to be resilient, trustworthy, and built to withstand everything nature throws at them. The Renegade X Radio doesn't just tick these boxes; it goes above and beyond. The innovative device incorporates a built-in Bluetooth chip that facilitates connectivity with your favorite listening devices. By leveraging this feature, you can now enjoy the convenience of a helmet intercom combined with the extended range of two-way radio transmission, even in the most challenging terrains. Safety Enhancement Safety is paramount when you're exploring the great outdoors, and a UTV radio is a crucial tool in ensuring this. The Renegade X Radio boasts an impressive 25 miles line-of-site range and a 1-5 miles backcountry range, ensuring that help is always within reach, regardless of where you are. Moreover, its robust design is a testament to its reliability. The internal face of the radio is sealed with a waterproof membrane to protect the mic and speaker from freezing. The Push-To-Talk (PTT) button is also entirely sealed, keeping moisture out even on the wettest days. Increased Connectivity Diving into an adventure in the great outdoors often means leaving behind the comfort and convenience of reliable connectivity. However, with Oxbow Gear's Renegade X radio, you won't have to compromise on keeping in touch with your team. In the midst of the thrill and adrenaline that outdoor adventure brings, the importance of seamless communication in enhancing the overall group experience can easily be underestimated. With the Renegade X's 22 channels and 121 sub-channels, coordinating with your team becomes effortless, no matter how far they might be. Whether it's to relay a newfound trail, a scenic spot, or a potential hazard, communication is critical. This enhanced connectivity fosters an atmosphere of camaraderie and collaboration, effectively transforming an already thrilling journey into an unforgettable shared experience. Enriched Group Experience Beyond the realms of functionality and safety, UTV radios also play a significant role in augmenting the pleasure derived from your adventures. A tool designed for ease and efficiency, the Renegade X comes packed with features designed to make your outdoor journey smoother and more enjoyable. For instance, the voice activation function ensures that your hands remain free to steer, navigate and explore while you communicate with your group. Coupled with the promise of a future remote PTT button pairing mode, this feature is designed to minimize interruptions, allowing you to fully immerse in the adventure. These capabilities not only contribute to a safer ride, but they also work together to make the experience more enjoyable and less stressful. In this way, the Renegade X stands as a testament to how technology can truly enhance our interaction with the great outdoors. With every feature meticulously crafted, it embodies the perfect blend of practicality and pleasure, serving to amplify the joy of exploration for every adventurer. More Enjoyable And Stress-Free Adventures Choosing the right UTV radio is just as crucial as having one. Aspects such as durability, range, and user-friendly interface are paramount. The Renegade X stands out in this regard with its rugged design, extended battery life courtesy of its power saver technology, and a highly intuitive user interface. The removable lithium-ion battery provides 36+ hours of use, ensuring that the radio stays powered through your long outdoor trips. Choosing The Right UTV Radio For Your Adventure In conclusion, UTV radios significantly enhance the overall outdoor adventure experience by ensuring safety, fostering group coordination, and providing a seamless communication experience. They are not mere accessories but essential gear that amplifies your enjoyment while providing a safety net. So, as you plan your next outdoor adventure, remember to prioritize communication. The Renegade X radio from Oxbow Gear, with its innovative design, rugged build, and advanced features, might just be the adventure partner you've been seeking. Explore the possibilities and choose the UTV radio that aligns perfectly with your needs and enriches your adventures. Read Also: Prepare Your Solar Panels for the Fall 10 Steps To Take To Set Up Solar Panels At Home How Much Do You Save With Solar Panels? The Ultimate Guide

READ MOREDetails
Managing Peak Call Volumes

Effective Strategies For Managing Peak Call Volumes In Inbound Call Centers

In the fast-paced and dynamic world of Business Process Outsourcing (BPO), managing peak call volumes in inbound call centers is a critical challenge. Peak call volumes can arise due to various factors, such as seasonal fluctuations, marketing campaigns, or unforeseen events. To ensure seamless customer service and maintain operational efficiency during these high-demand periods, BPOs must adopt effective strategies. In this article, we will explore non-promotional approaches to address the challenges associated with managing peak call volumes. Data-Driven Forecasting and Planning One of the key pillars of effective call volume management is accurate forecasting. BPOs should leverage historical data and advanced analytics tools to predict peak call times accurately. By identifying patterns and trends, BPOs can proactively allocate resources, adjust staffing levels, and streamline operations to meet the expected surge in call volumes. Implementing a data-driven forecasting model enhances the overall responsiveness of the call center, minimizing the risk of being overwhelmed during peak periods. Flexible Workforce Management Creating a flexible workforce is essential for managing peak call volumes. BPOs can implement strategies such as cross-training agents on multiple skill sets, enabling them to handle a variety of inquiries during high-demand periods. Additionally, adopting a flexible scheduling system that allows for real-time adjustments based on call volume fluctuations empowers call centers to efficiently manage resources. This approach ensures that staffing levels align with demand, preventing overburdened agents and long customer wait times. Technology Integration for Efficiency Embracing cutting-edge technologies can significantly enhance the efficiency of inbound call centers during peak periods. Implementing Interactive Voice Response (IVR) systems, chatbots, and virtual assistants can help address routine inquiries, freeing up human agents to focus on more complex customer issues. Furthermore, cloud-based solutions enable scalability, allowing BPOs to quickly adapt to changing call volumes without the need for extensive infrastructure investments. Empowering Self-Service Options Encouraging customers to utilize self-service options can alleviate the pressure on inbound call centers during peak times. Providing easily accessible FAQs, online knowledge bases, and tutorials empowers customers to find answers to common queries independently. By promoting self-service options, BPOs not only enhance the overall customer experience but also reduce the influx of routine inquiries, enabling agents to focus on more intricate customer interactions. Real-Time Monitoring and Adjustments Real-time monitoring is crucial for managing peak call volumes effectively. BPOs should invest in monitoring tools that provide insights into call queue lengths, average wait times, and agent performance. With this data at their fingertips, call center managers can make informed decisions and implement on-the-fly adjustments to ensure optimal service levels. Constant vigilance and adaptability are key components of successfully navigating peak call volume scenarios. Conclusion In the ever-evolving landscape of BPOs, managing peak call volumes is a critical aspect of delivering exceptional customer service. By employing data-driven forecasting, fostering a flexible workforce, integrating technology for efficiency, promoting self-service options, and implementing real-time monitoring, BPOs can navigate high-demand periods seamlessly. These non-promotional strategies focus on improving operational resilience and customer satisfaction, ultimately contributing to the long-term success of inbound call centers in the BPO industry. Read Also: Top 4 Creative Team Building Ideas for a Call Center Industry This 2020 Cloud-Based Call Centers Vs. On-Premises Call Centers Why Your Business Needs Call Center Tracking

READ MOREDetails
steam disk write error

How To Troubleshoot Steam Disk Write Error? [Fixed]

Steam is a well-known name in the video gaming industry. It is a social gaming website, which allows you to play, buy, and discuss games. If you are using steam for some time, then there is a lot to know about it. Have you ever faced the Steam disk write error? Are you looking for the solution to Steam disk write error windows 10? Are you unable to solve the issue? This article will help you with multiple solutions in order to remove the error. Go through the steps and enjoy an interruption-free gaming experience.        What Is The Steam Disk Write Error? While you are updating or downloading any game you bought from the Steam Platform, you may face the Steam disk write error. At the time you are attempting to download or install a new game, this message can appear on the screen. You also can face the same issue when you are trying to update a game that you have installed earlier. In case your game needs an update, at the time of launching the game, the screen will show this error. Reason For Steam Disk Write Error? Whenever Steam is not able to download and save the data of the game to the storage drive of your computer during a new installation or an update. One of the messages mentioned below will appear on the screen, Any error occurred at the time of updating the  game_title Any error occurred at the time of installing game_title The steam disk write error can happen, when There are no defects on the hard drive. The Steam folder or drive is write-protected. There are outdated or steam corrupt disk files in the Steam directory. Your firewall or antivirus is blocking Steam from saving and downloading data.  Fixing Steam Disk Write Error If you have encountered the steam error while downloading, error while installing, updating, or launching the Steam game and want to know the ways of fixing disk write error steam, here are the answers #1. Restart The Steam Open the Steam window Click the word “Steam” on the top-left corner The Dropdown menu will open For Windows, click on “Exit,” and for Mac, click on “Quit Steam.” Again open Steam. In case you have been logged out, log in another time Check for the Steam disk write error is gone or not #2. Restart Your PC Click on the start icon Power Icon Restart #3. Clear All Download Cache Open steam Go to “settings.” Click on “downloads.” Select the option “clear download cache.” Reopen and check if it is working or not #4. Repair All The Steam Disk Bad Sectors EaseUS Partition Master to check bad sector Install it Click on the disk which you want to check Click “surface test.” It will red mark the bad sectors. In case of any error, it is a good idea to replace the drive or clone it to another HDD apart from the steam disk write error SSD. You can take help from EaseUS Partition Master to replace the failing disk. After opening the EaseUS Partition Master, select the disk, which you want to clone. Click on “Clone” Select your destination or SSD/HDD whenever you want to clone it Click on “Next” Click on “Continue” to wipe out all data. If you have any valuable data, take a backup of it. Click on “Autofit the desk” or “Edit disk layout” or “Clone as the source.” Click on “Execute the operation.” Click on “Apply” to solve the steam disk write error #5. Run As Administrator Go to your Steam folder Right-click on “Steam.exe” Click on “Properties” Select the tab named “Compatibility.” Click in “Run this program as an administrator.” Click on “Apply” then “OK.” See whether the Steam disk write error is solved or not #6. Move The Game Folder Sometimes transferring the game to a healthy drive can solve the issue. But here, manual transferring will not work. You can use EaseUS Todo PCTrans for transferring the file.  Connect your computer with the destination drive Select the games that you want to transfer Now transfer them to the destination drive #7. Confirm Integrity For Steam Game Files  Reboot the system Launch Steam Click on the “Library” tab Right-click on the game that is causing the error Select “Properties” Click on the “Local Files” tab Click on the “Verify Integrity Of Game Files…..” button It will take some time to verify the game files Once the verification is done, try to install the updates and see if the Steam disk write error is showing or not.  #8. Remove The Write Protection From The Steam Drive For Steam Disk Write Error Press “Win + R.” Type cmd Command Prompt will open. Type “disk part” there Press “Enter” Type “list disk.” Press “Enter” Type “select disk 0.” Press “Enter” Type “attribute disk clear read-only.” Press “Enter” After the write protection process is done, type “Exit.”  Press “Enter” The disk part window will close.  #9. Some Other Fixes Of Steam Disk Write Error Apart from all the steps mentioned earlier or techniques, there are two more ways to eliminate the Steam disk write error. You can uninstall Steam and reinstall it. In order to uninstall  Go to “Control panel.” Open “Add or Remove programs.” Search for Steam and select it Click on the “Remove” After selecting the automatic option, click on “Next.” Click “Finish” Once the uninstallation is completed, you can install it again. For installing Steam, follow the below steps. Visit https://store.steampowered.com/about/ Click on “Install Steam” After the download is completed, click on “Open” or “Run.” Follow the on-screen instruction to install Steam. Open steam and log in. Final Talk Though you have tried and everything to resolve the issue, it is not working. You can seek help from Steam’s official support. Opt for the Steam support team. You also can visit the community forum of Steam for any further or additional help. Apart from the above-mentioned nine solutions of steam disk write error, if you know any other practical solution, do let us know.   More Resources: The Complete Guide To Choosing VPS Hosting Best Server Management Tips for Startups Best Bulk Sd Cards Of 2020 – Review And Buying Guide

READ MOREDetails