Can We Grow Carrots All Year Around?

Published on: 23 June 2017 Last Updated on: 11 September 2024
carrot

Carrots are root vegetables. They vary from purple to red in color but most commonly found are bright orange ones. The orange color of carrot is due to its high content of beta-carotene. This helps suffice our body with necessary levels of vitamin A, which is required for proper functioning of our immune system.

Yes, we can grow carrots all year round! Also, you may grow it anywhere, even in our small kitchen garden or as a potted plant.

You must know how to grow and harvest carrot before you start the procedure of producing carrots yourself. I conducted various kinds of research including reading online resources and talking to farmers in my town before going ahead with carrots plantation. This is so because carrots are a low-acid plant and can catch contamination easily, which may make it inappropriate for human consumption.

When can we Grow Carrots?

image001

Carrots are biennial plants that are they grow twice in a season. However, the seeds and flowers grow only in cold season. They take ten to twelve weeks to reach their full growth. They can be sowed in spring just before two weeks of the last frost date.

In cold climate, we can continue to plant them every three weeks till mid-summer. Then again they can be sowed in summer for winter products that are due in next ten to twelve weeks.

Preparing the soil

image003

First, you need to judge the solid where you want to plant your carrots. If the soil is sandy or clay soil, then it is not appropriate for growing carrots. Sandy soil and clay soil cannot retain nutrients and lacks good soil structure, which makes them inappropriate for growing carrots. Salty and loam soil is the best kind of soil for growing any vegetables. There is another variety of soil that is chalky soil. This is also not appropriate for growing carrots due to its alkaline nature.

Read also: Does Organic Gardening Improve Soil Quality?

Sowing Carrots

image005

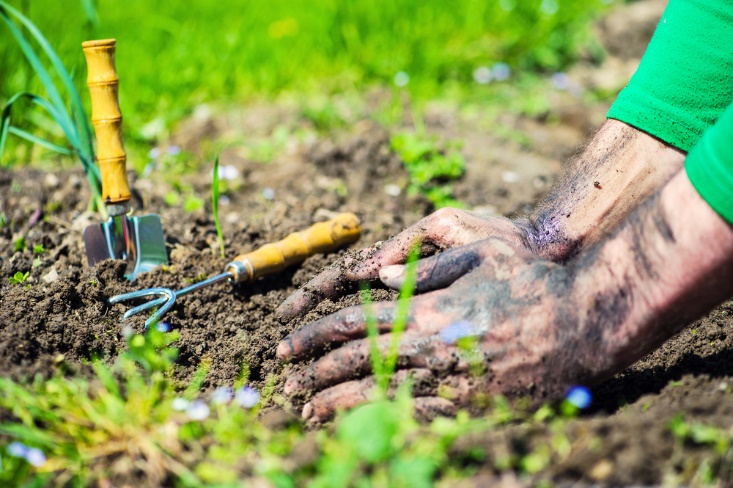
Before sowing carrots, you need to dig in the soil well to about twelve to fifteen inches. Once done, you can introduce some earthworms and crawling critters who make the soil appropriate for growing carrots.

Earthworms consume the organics from the soil and then scatter it throughout the soil to make the soil more fertile. Similarly, crawling critters would keep the bugs and insects away from the soil from harming the crop. You should be cautious about using chemicals to kill insects as they also take away the good part of the soil. Always organic gardening is recommended for the growth of any crop as organic gardening improves soil, its overall structure and gets it ready for next cycle as well.

  • You can sow your carrot seeds into the sowing beds created three inches apart.
  • The carrot seeds are very small so to distribute them evenly; you can mix them up with the sand and then sprinkle them into the sowing
  • Cover the field with some warm blanket or a shield to avoid the tiny creatures from ruining your crop.
  • This should be kept covered for at least three weeks to let the healthy growth of the crop.

Carrot Sprouts

image007

While you decide to plant carrots, you should also be aware of how a carrot sprout looks like to differentiate it from other sprouts or just weed. The sprout is breaking out of the soil may be of cabbage or potato or some grass. Well, then how does carrot sprouts look like? You can very easily identify them. From the perspective of their appearance, they look like ferns or palm leaves.

Well if that’s not all for you, then you can take the leave in your palm and crush it with your nails. Now smell the crush, and it will be like one of carrot. That’s how you can very easily identify the carrot sprouts from other growing vegetables and weeds in your kitchen garden.

Harvesting Carrots

image009

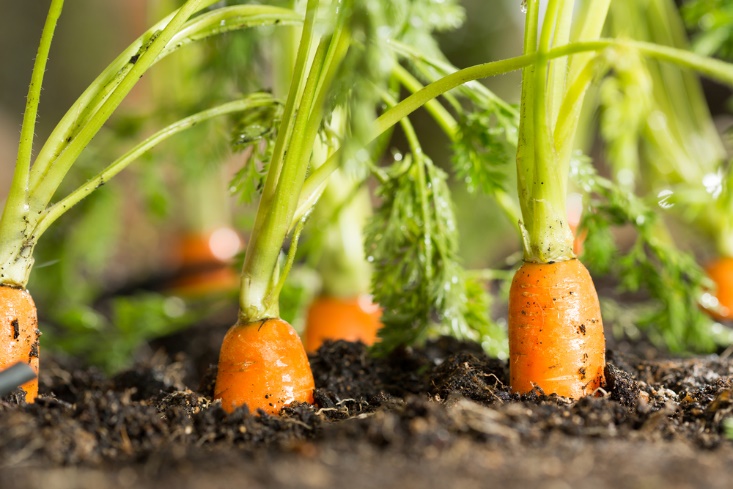
You can judge the growth of the carrots by looking at their roots. The size of the roots is a good indicator of the growth of your carrots. You can pull them out in three weeks to enjoy baby carrots of wait for next ten to twelve weeks for fully grown carrots.

Storing Carrots

image011

Now is the question of how to store carrots for prolonged use. You can seal the carrots in a polythene bag and store them in the coolest part of your refrigerator. One should never wash carrots until they need to be used as added moisture ruins carrot structure earlier. You can also store carrot in a box and cover it with a layer of sand. This will also help you preserve carrots for long.

You can very well enjoy your garden-fresh carrots all year round once you know how to sow and harvest them. You can use them in a variety of ways in your kitchen like caramelize then with sugar syrup or bake a carrot cheesecake or eat them raw as part your daily salads.

We have a lot of questions making rounds by our readers; therefore, in case, you have any further questions on how to grow carrots, or anything related to sowing or harvesting or storing them, then please comment below.

Read also:

Content Rally wrapped around an online publication where you can publish your own intellectuals. It is a publishing platform designed to make great stories by content creators. This is your era, your place to be online. So come forward share your views, thoughts and ideas via Content Rally.

View all posts

Leave a Reply

Your email address will not be published. Required fields are marked *

Related

money tree

Smart Fun Gardening: How to Take Care of a Money Tree

The beauty of gardening is to see your seedlings grow into healthy beautiful plants. Some of the plants we grow in our homes have natural meanings attached to them while others we grow them to remind us of something special. Money tree which is also known as Pachira aquatic is a tree grown to symbolize prosperity and good luck. The money tree can grow up to 60 feet tall when it naturally grows outdoor, but when we decide to domesticate it, we limit its growth to 6 or 7 feet tall. There natively grow in South, and Central American swamps and you can determine the age of the tree by its size. In many customs of the world, the tree is linked to prosperity and positivity. It creates a positive aura that allows for economic benefits to flow into the family. However, caring and doing regular maintenance can become difficult for normal human beings and families. This is why a good idea is to opt for growing trees with Tree Service Stockton. They are professionals who can take care of everything from planting to regular pruning and fertilizers. This will ensure that your money tree will always be healthy. Image of money tree that symbolizes prosperity How to grow a money plant can be easy, but how to take care of the five trunks braided tree can be a challenge. The braided trunk is a symbol of a lock that locks in your prosperity and good luck. Here are tips on how to take care of a money tree: Where to Grow A smaller pot is preferred for the growth of your money tree because it regulates the growth of your tree and also controls water and fertilizer. Big pots make it easy for you to overwater the plant. Your pot should have a proper drainage system and if you suspect that’s not the case then drill more holes at the bottom of your pot. DynaPOT 2 Gallon Garden Planting Aeration Fabric Container is a nice choice because it is eco-friendly and has a perfect drainage system. Also, place your tree in a place with indirect light because direct sunlight makes the leaves vulnerable to scorching. However, if you notice that the leaves are turning yellow or withering then expose them to more light because that is an indication of light deficiency. Fluorescent light can do the magic if you are growing the tree inside your house or at the office. Glossy and healthy leaves of Pachira aquatic Money tree grows well in moderate to high humid regions that why they mostly grow in South and Central America. When you domesticate the plant regulate the humidity at about 50% and above. Wet pebbles are a great way of maintaining humidity for your plant all you need to do is place the pot on a basin with wet pebbles. Also, you have to retain the room temperature around 16-25°C. When there is no enough humidity in the room the plant will respond by turning its leaves dry crispy. Read also:  5 Essential Tips To Designing A Beautiful Front Yard Garden Fertilizer and Watering When it comes to domesticating the money tree, you get a challenge of water and fertilizer ratio and how often you should add them to the plant. This tree needs moist soil but not wet to grow well. So you will need to water it after 7-10 days or when you notice that the top 3-4 inches of the soil are dry. Then thoroughly water your plant until water comes from the drainage system, but you have to avoid watering up to the trunk because the stem may start to rot. However, you have to cut down on water during winter because the growth is slow at this time of the year. When you see the leaves of your plants turning yellow, and you have put them in the right lighting condition then it may be an indicator or overwatering your plant. [embed]https://www.youtube.com/watch?v=txHs21rkED0[/embed] How to grow and care for your money tree During spring and summer, you can add water-soluble fertilizer that is diluted by half after every two weeks. Whether you want to use an organic or inorganic fertilizer that’s a personal choice that does not have a significant impact on the plant. The Grow More 5010 All Purpose Fertilizer 20-20-20 is a multi-purpose fertilizer that contains all the micro and macronutrients your tree will need for healthy growth. Read also: Does Organic Gardening Improve Soil Quality? Pruning and Shaping Pruning is one of the easiest steps when it comes to taking care of your money plant. You can use a clean pair of scissors or prune shears to remove yellow or damaged leaves and also side branches that could disrupt the braiding process. The pruning process is usually done during spring and summer to allow the plant to produce new leaves.                               Image of a well braided Pachira aquatic Do the braiding (shaping) of the money tree while the plant is still young and flexible. In the wild nature takes its course and braids the tree at a particular stage. Continue braiding the tree as it grows and ties a knot at the end of the braid to secure it. Repotting As the tree grows the roots also grow, and that’s why it is recommended that you report your plant after every two years. However, when the tree has reached your desired size, you can just report in the same sized pot with fresh soil. Mix your soil with peat moss to help in retaining moisture and sand to help in drainage. Avoid moving the plant too much because it gets shocked and responds by losing leaves or leaves turning yellow. How to Propagate Propagation should be done during spring because the growth rate is at its peak during this season. Chose a stem that contains not less than two leaf nodes. Sanitize a pair of scissors or pruning shears and chop off the stem then place it in a hormone rooting powder. When you the stem is well-soaked place it in a well moist pot mix. Give it time because it takes several weeks to start rooting. [embed]https://www.youtube.com/watch?v=QlZVZkKy6IY[/embed] How to propagate money tree It is easier to take care of your money tree if you know the favored conditions and how to troubleshoot any problems. The Pachira aquatic gives out various signs if they are not satisfied with the conditions that you place them. The soil that you plant your tree in is critical because it needs to have the ability to retain moisture throughout. Like most plants, the money plant is prone to aphids, mealybugs, and scale insects which will affect their growth. How to get rid of mealybugs can be a bit hectic if they infest your garden but you can use systemic insect control to treat your plant in case you notice the infestation.

READ MOREDetails
kitchen-2619008_960_720

Installing A Kitchen Tile Splashback – The Basics

Adding wall tiles to a backsplash can be a really simple and effective way to spruce up your kitchen sink area, as well as protecting the surface as well. Here we look at the basics. Home improvements needn't be expensive, all it takes is a little research and time and you can make a significant difference to the house you live in. Choosing tiles for a kitchen splashback can be a really simple and effective way to spruce up your kitchen sink area, as well as protecting the surface as well. For a project like this, you are likely to need little more than a couple of days to complete it, and a minimal amount of money to achieve a great result, depending on the equipment you already have. Before You Start Prepare The Wall Before you start, clear everything out of the way that may obstruct the job and/ or get broken or damaged while you work. You should also check that the wall is good for tiling as well – chances are you will choose porcelain tiles, which are heavier than more traditional ceramic tiles so the walls need to be up to support their weight. If there is any level of condensation you must wait for the wall to completely naturally dry out before you begin tiling. If the drywall you're working with isn't sound, you must repair it before you do any tiling. Plan The Design You'll need to plan your design before you can purchase your equipment or begin the project. Measure how high you want the backsplash to be from the countertop and consider the type of tiles you would like to use. If you are unsure, take a look at sites like Pinterest for inspiration. Get Your Equipment When buying your equipment, especially your wall tiles, try to start with more than you need. With porcelain floor tiles or wall tiles, it is always good to have extras in case some get damaged during the job or even years after and you need a replacement tile that matches. In order to determine how much tile requires you need to measure the length and width of the area, you are putting a backsplash on. Simply multiply the length by the width to get your desired wall tile amount. If you don't know what type of equipment you need for the job, speak to an advisor at the shop or warehouse and they will be able to advise you on the best tools for the job. Read also: Close Look At Top 5 Roofing Materials – Pros And Cons Install Once you have done all the correct preparation, it's time for you to install your backsplash. Safety First The first thing you need to do is make the area you are working in safe. All electrical appliances nearby should be either turned off if they are permanent fixtures, or moved away if they are temporary. Read also: Making Your Office Safer For Workers Clean The Area Using a clean cloth, gently wipe the area with warm water and let it dry naturally. Apply The Adhesive Using the manufacturer's instructions, apply your tile adhesive using a tile trowel. Make sure the adhesive is spread thinly and only apply enough adhesive for the area you are tiling, or it will dry before you have applied all the tiles. Lay The Tiles Place the first tile at the bottom of the backsplash in the middle. Firmly push the tile on to encourage it to settle into the adhesive and use a level to make sure it isn't wonky. Use a spacer or piece of cardboard on each corner of the tile and push them into the adhesive well. Continue to lay the tile's row by row, taking care to remove any adhesive that pushes up through the tile gaps. Ensure you are leaving enough room for grout and checking constantly that the tiles are level. Cut Tiles Away In A Separate Area Depending on the equipment you are using, you need to ensure you follow all safety procedures to ensure you are working safely. Ensure you only score tiles where the scored section won't be showing, and only score tiles when you need to, as the measurements needed may change as the job progresses. Wipe Once all the tiles have been laid you can wipe away any adhesive that has seeped out using a clean, damp cloth. Leave The Tiles To Dry You must leave the tiles to dry according to the time stated by the adhesive manufacturer. Trying to skip this process will result in an uneven backsplash and tiles that will not remain stable. Grout When mixing grout you should be wearing appropriate safety equipment such as gloves, goggles and a mouth mark. Grout the tiles precisely and carefully, taking care to wipe away any excess once it becomes firm. Once the grout has dried, you can then wipe the tiles off completely. Well Done! You should now have a fancy new backsplash to enjoy in your kitchen! Remember, if you take the time to do the job right, you should end up with a well-done backsplash that will look fantastic and last for years to come.

READ MOREDetails
Pool in the Fall

8 Reasons to Build Your Pool in the Fall

When you start thinking about buying and installing a nice swimming pool, of course, you want to make sure that the installation process goes right. That means accounting for things like temperature and how busy the construction season is. Summer is pool season, so many homeowners opt to try for a spring installation. But our pool builders in south Florida would caution homeowners that fall is actually the best time for a pool install. 8 Reasons to Build Your Pool in the Fall You may be thinking that fall seems like an odd time to install a pool, but there are a few good reasons why it is a perfect time. Let’s take a look at 8 of them. 1. Construction Season Spring and summer are the busiest seasons for construction workers and contractors, including pool companies. By waiting until fall, you are likely to enjoy a much shorter install time. With fewer jobs to bounce between, your pool installers are more likely to be able to devote their full attention to your build. 2. Temperature Fall temperatures are mild and make it easier to work outside. This is especially true in places like Florida where summer temperatures can be scorching hot. In the fall, your pool construction team will be able to concentrate on the task at hand, rather than feeling overheated or worried about how long they have left in the day. 3. Landscaping Think about what sort of weather you want to be working outside in. Once your pool is installed, you will likely want to do some landscaping, maybe place some furniture, or do some planting. Why not take advantage of the cooler temperatures and enjoy fall in your backyard with your new pool? 4. Pricing At the end of the summer season – which is the height of pool season – you may be able to negotiate a better price on materials and labor. Often, pool companies have overstocked items or discontinued inventory that is less expensive. You may also be able to check out pre-owned items. 5. Weather Conditions Pool construction during spring is often thwarted by rapidly changing weather conditions. This can mean delays in your pool installation. If you are hoping to have your pool installed by a certain month or date, spring storms can be a very real concern. Related Reads: Swimming Pool Cleaning and Maintenance: Cheap Online Pool Supplies 6. Ready-made Summer Fun By installing your pool in the fall, you can start enjoying your pool as soon as the temperatures are warm enough for your liking. Or, any time of year if you opt for a heated pool. In Florida, temperatures start to warm up in early spring, and by having your pool installed the previous fall, you have more time to enjoy the warm weather and pool fun. 7. Why Not Add a Hot Tub? Have you considered adding a hot tub to your pool installation? If so, think about how much you will enjoy the cooler fall and winter evenings in your new hot tub with the view of your new pool. 8. Tax Considerations A pool is a major purchase and is considered a home improvement. It can also increase your property value. Home improvements like adding a pool can be claimed on your taxes. If you install your pool in the fall, you will be able to claim it on the taxes you file in early spring the following year. Imagine relaxing by your new pool enjoying the sun and the knowledge that you got tax benefits from your installation. Of course, not everyone wants to miss this pool season in order to do a fall pool install. But these eight considerations are certainly worth considering before you hire your pool contractors. The best way to decide when is the best time is to contact a pool builder in your area. Read Also: What is the Right Age to Start Swimming Lessons? All You Need to Know About Pool Maintenance Services Risks of Imbalanced Swimming Pool Chemistry

READ MOREDetails