6 Easy Ways To Make Your Home More Appealing To Buyers

by

29 July 2022

Home Improvement

Make Your Home More Appealing

Are you planning on selling your home? There are several ways to make it more appealing to buyers, and this guide looks at some of them. These include adding more plants, repainting your walls, and upgrading your appliances.

Keep reading if you want to find out more.

Checkout Six Easiest Ways To Make Your Home More Appealing To Buyers:

Home Look Better

1. New Paint Job

Paint jobs can make your home more appealing to buyers. However, this trick doesn’t cost a lot of money and is one of the most effective choices on our list.

Although you could go for the same color as you had before, we would advise you to go for a shade that’s in trend.

You could add a bit of value to your home by being wise with the paint type you choose. However, go for energy-efficient options, they would help lower your energy bill by bouncing heat.

2. Indoor Plants

Having plants around the house can make it more appealing. They would give your home a more modern feel, and make it feel green too.

Just be mindful to not go overboard and have too many plants – bugs are a risk. Also, having too many plants in a home can increase its humidity. This is not what you want, unless you live somewhere that’s very dry.

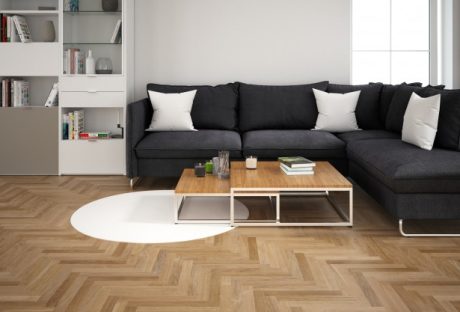
3. Remove Any Carpeting

Do you have wooden floors? If there are carpets on them, go ahead and remove them. Hardwood floors are very popular right now. However, you could especially get a good price for your house if the wood is high-end, like timber or oak. Let it shine.

4. Upgrade Your Appliances

New appliances will not only tempt more buyers but will also increase property value. You are advised to splurge on the appliances to get the most bang for your buck. Be mindful and make purchases that will go with your home’s color palette.

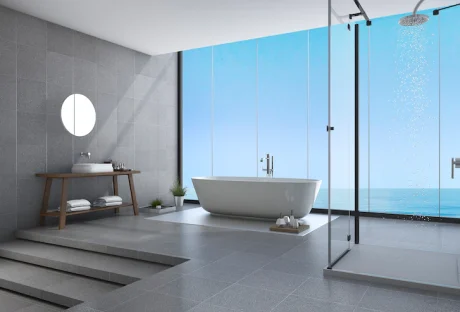
5. New Windows and Doors

Just like adding new appliances will help, so will installing new windows and doors. They can make your home look newer, and completely revamp its style. If you’re looking for Doors or windows in Collingwood, Clearview, Adjala or Bradford, these towns have a lot of sellers to work with, so be wise with who you choose.

As replacing your windows is a more major suggestion, we would advise you to look for sellers that offer cheaper rates. If you’re in Ajax windows company are known to offer cheaper rates. You might benefit from working with a shop in this town.

6. Stage Your House

Hiring a staging company wouldn’t hurt. They would store your furniture away and bring in their own. In addition, they would bring specific pieces to make your home look better and complement its features. 

Final Thoughts

Considering all of the points that were run through, what do you think? There are several ways to make your home more appealing to buyers. Some of them include new paint coats and buying new appliances and windows too. Hopefully, you found everything that was discussed useful.

Read Also:

Arnab is a professional blogger, having an enormous interest in writing blogs and other jones of calligraphies. In terms of his professional commitments, He carries out sharing sentient blogs.

View all posts

Leave a Reply

Your email address will not be published. Required fields are marked *

Related

Your Blinds

5 Ways To Keep Your Blinds Cool And Protected All Summer Long

Let's face it: The summer sun is intense. When the temperatures start to rise, you'll want to keep your outdoor blinds in Melbourne shut tight so that your home stays cool. But what about when you have a big window and want to let in some natural light? When it comes to window treatments, not all blinds are alike. Picking your blinds type is not very difficult to choose, but you have to know for which purpose you are using the blind. What Are The Blind’s Purposes? The best blinds for summer heat can affect the temperature in your home and protect your family from UV damage. Window blinds such as no fixing blinds are a great addition to any home. Whether they're used to help protect your furniture from the damaging rays of the sun, or if they're used to add a decorative touch to a room, there are many reasons that people opt for blinds. In the summer, however, blinds can be extremely hot. If you've ever been near a south-facing window in the middle of summer, you know how much heat the sun can generate. Unfortunately, this heat can penetrate through your blinds and make your home uncomfortable. It can also damage them over time. 5 Tips To Keep Your Blind Cool And Improve Heat Protection If you’re still deciding on blinds for your home, then first know what type of protection you want. And if you are living in a scorching climate, then your work is not going to stop after selecting the blinds. Along with that, you also gave to keep your blind cool.  Here are five ways to keep your blinds cool and protected all summer long. 1. Don't Hang Them In Direct Sunlight Direct sunlight can make your blinds fade prematurely and may damage them over time.  Try to hang your blinds on the side of the house that gets the least amount of sunlight, or hang curtains over them during the day to block out harmful rays. 2. Keep Them Clean Dust and dirt build-up can cause your window treatments to look dingy over time, so be sure to regularly wipe down your blinds with a feather duster or soft cloth.  If you have wooden or fabric blinds, use a damp sponge or cloth to remove any dirt, then let them air dry completely before putting them back up. 3. Use A Vacuum Attachment For Dusting If you're having trouble getting rid of the dust on your blinds with a feather duster, try using the brush attachment on your vacuum cleaner instead!  It makes quick work of stubborn dust and helps push the dirt down so it can fall away from the slats easily. Some of the eco-friendly blinds need regular cleaning and maintenance. Keep maintaining these procedures for better health. 4. Use A Heat-Resistant Cleaner Cleaning your blinds is a great way to refresh your home and make it more inviting, but you don't want to damage them by using the wrong cleaner.  A heat-resistant window cleaner is the most effective way to ensure that your blinds are clean without damaging them. They are designed specifically for use on hot surfaces and won't leave any streaks behind on your shades. 5. Block The Light One of the best ways to keep your blinds cool is by blocking out the sun's rays. Bali Blinds has UV-blocking products like VertiCell cellular shades that block light from entering through the sides, top and bottom of window coverings.  This helps keep your home cooler in the summer months, which means you won't have to turn on the air conditioning as often. Conclusion: If you want to keep your blinds cool, then follow these seven tips. Not only the blinds along with the blinds material, but you also have to pick the right attachments that will improve the functions of the blinds. The blinds are not like the regular curtains. The functions are different. However, there are many options for selecting the blind material. You can shift to an eco-friendly choice for creating the blinds. So what type of blinds do you have in your house? Read Also: Top Home Cleaning Tips Vancouver House Cleaning Services with Local Home Cleaners Near You Easy Home Styling Ideas To Beautify Your Living Space Top Useful Tips On How To Make Your Home Allergy-Free

READ MOREDetails
Color Concrete

A Simple Guide in Choosing the Right Color for Concrete

The success of any business stands on a strong foundation. The chances are that today on your way to the office, you have stepped on concrete floors and probably wondering why some have concrete color on them. Concrete is a strong foundation that also needs some pampering for it to keep holding the building and roads that stand on them. When you take a stroll and notice, some buildings have concrete showing some pigmentation. One natural concrete color that is common in the market today is the integral color concrete that is easy to use because you only add iron oxide to the concrete when simultaneously mixing in a mixing truck or by hand. Features Other still call it the concrete dye or concrete pigmentation. The infusion of the color gets inside materials to give a lasting and a fade resistant color. The ideal place to use it is on slabs that experience high levels of traffic. One notable thing about this concrete color is that you will not notice road chippings. Another good thing about this pigmentation is the background color and the power of contrasts using varying combinations Environment-Friendly Concrete colors are environment-friendly because you can mix the variety of colors and pour the pigments on any environment with a matching color. The packaging is in convenient bags that dissolve in water; therefore, no need to think about recycling. The colored concrete ensures that future chips do not explode due to abrasions or frictions from car tires. The finely ground iron oxide pigments are mixed with concrete before pouring on the ground. The blending of the available color varieties is loaded depending on the cement used on each yard. Loading Percentages In most cases, you will find the label reading 1 percent, 2 percent, 3 percent, and 4 percent. The 1 percent is what most people refer to as economy loading and is excellent for use in places that need soft colors and enough concrete color to remove the old paint. The 1 percent works well with dark and contrasting colors. The 2 percent produces strong colorations, and you can tell that what you are seeing is a color. Desirable for interior floor works and does not use any contrasting colors. The 3 and 4 percent are a solid color combination, and there is no doubt that they give a lasting impression. Not suitable for stamping because they do not have enough contrasts from their antique products. Concrete color packaging is done per yard so no need of taking your calculator because every bag you have represents a yard. When seeking to purchase concrete color, make sure you know how to estimate a yard that you can use to calculate the number of bags you need in relation to the yard estimation. It is important to note that the type of sealers affects color composition. Sealers that can dissolve will enhance and make the color darker and will closely match the color inside the package. The extraction of concrete color comes from the natural and synthetic metal oxides with no fillers or extenders. You can select a color of choice by combining bags to get a specific color mix. Read Also: 5 Factors To Consider In Choosing The Right Floor Colors 4 Tips For A Successful Home Renovation

READ MOREDetails
how to install faucets

How To Install Faucets And Sinks

Installing a new sink is an uncomplicated and quick task. The process is relatively easy, and you can do the installation part by yourself with a bit of experience. Then how to install faucets? Though some complicated kitchen faucets require professional installation, many of the kitchen fixtures can be installed easily.  Here is a guide on how to install faucets and sinks.  Materials Needed   In order to install the kitchen faucet and sink set, you will need the following list of things: a sink, a faucet or tap, a basin wrench, a strainer set, pump pliers, a screwdriver, a crescent wrench, a spatula, plumber's putty, silicone sealant, a bucket, a flashlight, and a set of towels.  How to install faucets, and this reason is nearby if you wish to enlarge the opening within the countertop. It is also necessary to know how to clean bathroom sinks to maintain hygiene.  Step By Step Guide To Install Faucets And Sinks If you are looking for durable, sturdy, and premium quality faucets, it is best to choose Oltsw taps.  Here, we have mentioned the steps to know how to install faucets and sinks.  Step 1: Measure and mark the layout of the kitchen’s sink Place the counter's back edge in the center of the sink within its cabinet. If the sink contains a template, align it along the mark on the counter. This is the first step of how to install faucets. Place the back edge one and a half inches parallel to the counter. Trace around it; proceed to the subsequent degree. If there is no template, use 2-inch tape to stipulate the sink location. Mark the middle of the sink on its back edge. Lay the sink inverted on the counter. Align the mark on the sink and the one on the counter together.  Step 2: Mark the cut lines on the counter The cut line marking is the second phase of how to install faucets. The employing a straightedge to attach the marks, you will find yourself with an oblong outline on the counter of the sink's hole. To approximate the radius of the corner of the sink, round off the corners by hand. Take a slightly wider bit than the jigsaw blade (½-inch bit is typically enough). Then, at each junction of the cut-out lines, make sure to drill a hole inside the radius.  Step 3: Use a jigsaw to cut the sink opening Place a jigsaw blade into a front hole and cut along the marked line to the back hole. Repeat on the opposite side. Lay a scrap of wood some inches longer than the cut-out across the sink area. Screw through the piece and into the cut-out waste to stop it from binding the saw blade or falling. Cut along the cut lines marked at the front and back and remove the cut-out piece. Make sure that the fit of the sink in the countertop is set. If it is necessary, trim the opening with the jigsaw.  Step 4: Install the kitchen faucet Set the sink the wrong way up on a padded sawhorse or counter. Then, feed the tap's supply tubing and tailpiece through the gasket, which helps seal the faucet to the sink. Screw the washers and mount them on the lower side sink deck. This is the pre-final step of how to install faucets. Just make sure that the tap can swing for a whole area across the sink deck before tightening mounting nuts.  Step 5: Attach The Strainer Over Applied Putty Put the sink up, apply a thick roll of the plumber putty under the strainer edge, and push it up through the sink's drain hole. Slip the housing (if your strainer has one), gasket, and washer onto the filter and against the lower side of the sink. Dab the pipe-joint compound and expose the opening threads.  Thread the locknut onto the strainer by hand, then tighten it with pliers while holding the filter in situ. Fit the gasket onto the tailpiece of the sink drain and attach it to the strainer through its slip nut. Tighten the nut using a hand while holding the filter.  Step 6: Set the sink and connect the water supply Remove the tape, and pull it toward the center of the hole. With the sink still, the wrong way up, press a bead of silicone tapping around the lower side of the sink's brim. Turn the sink upright and set it on the hole of the countertop.  Make sure that the front of the sink is parallel with the front fringe of the countertop. Adjust it, if necessary. Next, use the corn-head supply tubes or the braided stainless-steel hoses to connect the tap and shut off the valves. Now, attach the required sprayer hose to the faucet's threaded tailpiece.  Step 7: Connect The Drain Pipes Assemble the trap adapter on top of the sink-drain tailpiece. Cut and dry-fit the length of the PVC pipe and attach the trap adapter to the trap and the drain elbow to the waste line. Then slide the web on the tailpiece to finely tune the length and alignment of the pipe.  Take the drain pieces apart. Clean the cut ends with a utility knife. Use a PVC primer to coat it and its mating pieces. Let it dry and hold for 30 seconds. Now you are finishing the process of how to install faucets. Conclusion The essential features of kitchens and bathrooms are the sink and faucets. The sink and faucets need to be installed properly to avoid any damage and issues later on. Taking this into account, we have mentioned how to install faucets with significant steps to be followed while installing sinks and kitchen faucets. Additional reading: Small Kitchen Storage Ideas Know About The Type Of Kitchens According To Different Size Different Types of Conversions to Make the Most of Spare space  

READ MOREDetails