How to Harvest Lettuce: A Step-by-Step Guide for Fresh and Crispy Salads

how to harvest lettuce

Since lettuce plants grow best in cool growing seasons, most lettuce varieties are classified as spring or fall greens. However, if the longer days are keeping your lettuce plant producing leaves well into the summer and it hasn’t bolted yet, here are some excellent tips to follow to maximize your harvest.

Taking individual leaves off the plant is one way to increase its yield. Alternatively, you could sow in succession every two weeks in the early spring or fall to continue the harvest. To offer lettuces shade and protection from the hot summer sun and high temperatures, a third method is to interplant with a taller crop. Lastly, cultivators should seek out cultivars known for their slow bolting, like the looseleaf varieties “Slobolt” and “Sierra.”

Here is how to harvest lettuce so you can eat some leaves right away and encourage the plant to continue growing more.

How To Harvest Lettuce?

Harvesting Lettuce

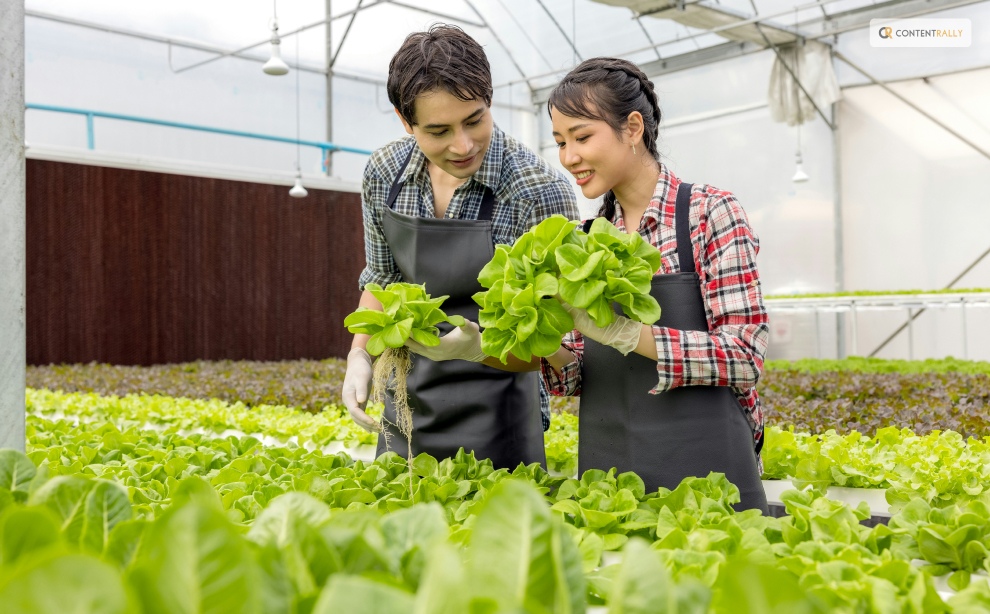
If you want to harvest lettuce and do not know how to go about it, here are all the details. Follow the steps closely to get the healthiest and crispiest lettuce for your salads and sandwiches.

Plant Looseleaf Varieties

Your lettuce variety should be ready to harvest in 35 days, according to the seed packet, which means you should have large enough leaves to pick a little more than a month after planting. By regularly picking the outer leaves, you may be able to extend the harvest until late June if you sow seeds in March or April.

Begin Harvesting Early in The Season

Young lettuce plants will be harmed by light frost, but mature plants can withstand it. If you live in an area where there is no winter frost, you can plant early and begin harvesting the outer leaves when they get to be 4 or 6 inches long. Your harvest can last up to 30 days longer if you plant and harvest early.

Pick Lettuce in The Morning

It is ideal to harvest lettuce early in the day to avoid the leaves wilting due to the intense heat. The leaves are crispest and flavorful in the morning because they contain the most water.

Look For Plants with Large Outer Leaves

The center of the crown is where the new growth starts on the lettuce. You must remove the largest, oldest leaves that are about 4-6 inches long. You will find these leaves on the outside of the plant.

Cut or Pinch The Outer Leaves

At 1/4 to 1/2 inch from the base, pinch off each outer leaf. To break the leaf off the crown, apply just enough pressure with your thumb and forefinger. Another option is to use a sterile, sharp scissor or snipping tool, though there is disagreement about whether doing so accelerates the browning of cut edges.

Harvest Until it Flowers

When older, mature leaves are consistently removed, the lettuce plant is encouraged to grow new leaves in their place. Harvesting individual leaves is possible until the plant produces a flower stalk, which indicates that it is ready to bolt and set seed. Lettuce turns bitter once it bolts.

When to Harvest Lettuce?

When to Harvest Lettuce

As soon as the lettuce is large enough to pick, it can be harvested. A seed packet will typically tell you how many days it will take to harvest. For the “cut and come again” method of harvesting loose leaves, standard-size varieties are the most effective. When outer leaves are 4 to 6 inches tall, that’s the best time to begin harvesting.

There are many varieties of lettuce seeds available, including blends and mesclun mixes. The best varieties to plant for a continuous harvest are called bi-colored, spotted, or loose-leaf lettuces in green and red or burgundy tones. The following are some varieties you might want to try:

  • Black Seeded Simpson
  • Green Salad Bowl
  • Freckles
  • Lolla Rossa
  • Gourmet Mesclun Blend
  • Deer Tongue
  • Garden Leaf Blend

Loose leaf lettuce varieties yield the best results from the cut-and-come-again method. Red, green, and oak leaf lettuce are a few examples. Additionally, you can wait to pick until a full head has matured or harvest early leaves from loose-heading varieties like butterhead and romaine.

When and How to Gather Lettuce Heads

When and How to Gather Lettuce Heads

The growth habit of head lettuce is akin to that of cabbage. In order to form a dense, rounded, or clumped shape, younger leaves emerge from the center, and older leaves form layers. There are two types of head lettuce: loosehead (similar to romaine) and crisphead (like iceberg).

  • Let the crisphead varieties mature for a single harvest and keep an eye on them in accordance with the days to harvest specified on the seed packet. When the heads are dense and the appropriate size, they are ready to be picked.
  • If you remove the outer leaves once or twice, loosehead lettuces will still head. However, the size of the fully mature head may decrease as a result. These lettuces can produce a head of looser layering or wrapping leaves (butterhead) or a clump of tall, straight leaves (romaine).

Remove crispheads by chopping off the stem just below the center. Loose heads can be trimmed similarly or removed, with roots and subterranean stems cut back to the leaf base, depending on size.

What Happens If a Flower Stalk Bolts

A lettuce plant will eventually shoot up a flower stalk in the center, a sign that it has reached the end of its life and is ready to bolt, or bloom, and set seed. Though they might still be edible, the lettuce leaves are starting to get tough and bitter. There is no stopping flowering once this process has begun. Throw away the plant and plant again if the weather permits.

Types of Lettuce

Types of Lettuce

There are four types of lettuce you can choose from when choosing which to grow: leaf, butterhead (loosehead), romaine, and head lettuce.

When it comes to cultivation and harvesting, the main distinction is that leaf lettuce crops yield several harvests, whereas head lettuce varieties, such as iceberg, romaine, and butterhead, only yield one harvest. Leaf lettuces are, therefore, a favorite among home gardeners since you can grow them in raised beds, on the ground, or in patio containers.

Keep in mind that lettuce is a cool-season crop, so you should schedule your harvest for the spring when the temperature is still cool. Such temperatures are usually around 70 degrees. Find out when the first frost occurs in your area each fall and plant appropriately. Starting fall crops from seed indoors and moving them outside as the weather cools down may be the best option.

Seek out head lettuce cultivars such as Crisphead and Iceberg that you can grow from seed. In roughly six weeks, the lettuce will reach maturity and be ready for harvest after the seeds have germinated in 10 to 21 days.

One loose butterhead variety that you can grow from seed or seed tape is called Buttercrunch. It takes 65 days to be ready for harvest.

Vivian is one of the romaine varieties that yields soft, flavorful leaves. Directly sow seeds in the garden in the spring. Start seeds indoors in the fall and transplant them to your garden.

Varieties of loose-leaf lettuce grow quickly and are enjoyable to experiment with in salads, sandwiches, and other culinary creations. Look for mesclun mixes and heirloom cultivars such as “Black Seeded Simpson.” Many come in simple-to-grow seed tapes that can be harvested in roughly seven weeks.

How to Harvest Leaf Lettuce?

How to Harvest Leaf Lettuce

When the weather gets chilly, you can harvest salad from a leaf lettuce crop in your home garden whenever you’re ready to eat. You can harvest an entire crop of lettuce at once by waiting for it to mature. However, cutting fresh lettuce leaves off as they grow is the easiest way to prepare them for consumption at any time.

Depending on the variety, lettuce leaves should be harvested when they reach a length of 3 to 6 inches. Gather leaves continuously until the lettuce plant “bolts.” This indicates that the plant has focused its energy on developing seeds and flowers, and as a result, the leaves typically develop tough stems and a bitter taste.

How to Harvest a Full Head of Lettuce?

How to Harvest a Full Head of Lettuce

A lettuce plant can continue to grow until it produces a full head of leaves. Use the “one and done” approach when harvesting head lettuce. Just make a clean, above-soil knife cut across the entire head of lettuce at the base of the plant. For this, a harvest knife comes in handy.

Remember the seed packet and note the maturity or harvesting days. As your plants get bigger, keep an eye out for indicators of maturity, which are typically firm, full heads. Harvest in the spring before it gets too hot, usually when the daytime highs hit 70 degrees Fahrenheit. The bitter taste of the leaves and the mushy head of lettuce can result from warm weather.

How to Store Lettuce?

How to store lettuce

When the lettuce is inside, you can use a colander to wash the leaves and thick cotton towels to dry them so you can use them in salads and sandwiches. In case you cultivate a lot of lettuce, investing in a salad spinner would be wise. It helps dry and wash Lettuce quickly.

Lettuce leaves without water should be refrigerated. For most greens, store the leaves in a loose plastic bag for approximately a week. When the salad greens are ready to be eaten, give them a good rinse in several runs of cold water and then pat dry.

How to Harvest Lettuce Microgreens?

How to Harvest Lettuce Microgreens

Microgreens are incredibly simple to harvest! When the first true leaves appear, after ten to fifteen days of planting the seeds, they will be ready. When the microgreens are two to three inches long, harvest them if you are measuring them by height.

Investigating the flavor profiles of the microgreens at various heights is enjoyable. Cut the entire plant ½ inch above the soil line with a pair of scissors or grass shears. If you need more inspiration, check out our many other interesting gardening tips for growing microgreens, like growing lettuce microgreens!

How to Harvest Romaine Lettuce?

How to Harvest Romaine Lettuce

The leaves of romaine lettuce (also known as cos) have the perfect amount of crunch or crispness. The lettuce plant’s outer leaves can be harvested as it grows. The leaves can be chopped off one to two inches above the ground. Gathering these tender green leaves now will give the lettuce more time to ripen before full plants can be harvested.

Before Romaine lettuce reaches maturity, it can take 55–70 days to grow from seed. To determine when the lettuce is ripe, examine it directly. When the romaine lettuce leaves are 6 to 8 inches tall, the ribs are firm and juicy, and the leaves have formed a tightly compacted head, the lettuce is ready for harvesting. To test if the lettuce head is firm, squeeze it.

Overripe head lettuce will be tough, while young head lettuce will be soft. Harvest by making a cut an inch above the ground, saving the crown for a subsequent harvest. You can harvest the lettuce head by digging up the entire plant if it is nearing the end of its garden lifespan.

Read More: Everything You Need To Know About Harvesting Basil!

Loose Leaf lettuce

Loose Leaf lettuce

The harvest window for leaf lettuce varieties is quite broad. After planting, the young, baby lettuce leaves can be harvested 25 days later, and the plant will mature fully in 50–60 days. Make sure your crop is harvested prior to it bolting.

Since you can harvest loose-leaf lettuce more than once during the growing season, it’s ideal for repeated harvesting. You can chop the entire lettuce plant 1-2″ above the soil line once the leaves reach 4″.  In 10 to 15 days, fresh leaves that have sprouted from the base will be ready for harvesting again if the crown is left intact.  Try spreading out your seed sowings and doing multiple sowings to ensure a consistent harvest all season long.

If you want to preserve the crisp flavor of the young baby greens, you should sow them again. Another method of harvesting involves leaving the inner leaves to grow while pruning the young leaves on the outside of the head for greens. When the plants are 4 inches tall, you can begin harvesting lettuce by cutting them just above the soil line.

Crisphead Lettuce

Crisphead Lettuce

When grown locally, crisphead or iceberg lettuce makes for incredibly tasty salad greens.  You might not get a whole head of lettuce, but this can be a cut-and-come-again harvest.  A single harvest is more appropriate for this green lettuce. After planting, there is a 50 to 75-day window for harvest.

Iceberg lettuce can be harvested as soon as the head appears before the outer leaves turn brown and as soon as the center feels firm, and the leaves are compacted tightly. Before the crisp lettuce starts to open and the seed stalk starts to form, harvest it. More importantly, if you see the lettuce beginning to bolt—a common issue in hot weather—or the seed stalk, harvest it right away.

Harvesting iceberg lettuce is best done by digging up the entire plant and then cutting off the stalk. Because of its thick stem, this lettuce plant can be challenging to harvest while it is still in the ground.  If you decide to harvest the lettuce while it’s still in the ground, please take care not to harm it.  You can cut the stem just below the leaves by lifting the lettuce upwards.

Wrapping Up

Nothing compares to the sheer satisfaction of harvesting and regrowing fresh, new lettuce from the same plant. You are far superior to other lettuce owners if you can figure out how to harvest lettuce correctly so that it keeps growing.

Thus, if you want to become a rich lettuce farmer, make sure you constantly and meticulously follow all the above steps! If you have thoughts to share or questions to ask about how to harvest lettuce, then please leave a comment below. We would love to hear from you.

Read Also:

Ankita Tripathy loves to write about food and the Hallyu Wave in particular. During her free time, she enjoys looking at the sky or reading books while sipping a cup of hot coffee. Her favourite niches are food, music, lifestyle, travel, and Korean Pop music and drama.

View all posts

Leave a Reply

Your email address will not be published. Required fields are marked *

Related

Moving Company

Great Tips for Picking the Right Moving Company

When the time comes to move, most people don’t really know where to start and how to pack and move methodically. The worst of all is that they don’t know what to look for when searching for a moving company. How to pick the right company to help you move? After all, it’s not like you do that every day. That is why we reached out to professionals at Move Central in San Diego. They share some of the points you should look into when choosing your moving company. Here are Great Tips for Picking the Right Moving Company: 1. Shop Around Some people are quite satisfied to call a single company, get a quote, and immediately accept the deal and go through with the move. Whereas that might save you some time, it may not be so beneficial for your wallet and your overall experience. Most experts will tell you that you should shop around. Ask at least 3 companies for a quote with the same parameters and see what each of them offers. Some may be more expensive, but include insurance or wait times as a bonus, whereas others might be cheap, but not offer any additional benefits outside the most basic transportation service. Once you have your quotes, compare them, determine what your priority is and go for the one which fits your needs the best. If you don’t see what’s out there, you may end up missing out on some perks. 2. Ask Around Americans tend to move a lot more and more easily than most other nations, including Canada. Whether it is job prospects, climate, or something else, you are much more likely to move upwards of 10 times over your lifetime. That gives you a pretty good advantage when it comes to picking a moving company. Chances are that you know people who moved recently. Ask your friends, family, or colleagues about their experiences with moving companies. Online reviews are a great resource, but they can only tell you a part of the story. With your friends and family, you can ask about details that may be omitted in an online review. 3. Insured and Licensed Is the Best Way to Move In order to ensure that your move goes without a hitch and problem, you should only hire reputable moving companies, rather than going for a Craigslist ad or something similar. The reason is simple – reputable moving companies are insured and licensed by The U.S. Department of Transportation Federal Motor Carrier Safety Administration. Whether you are moving out of state or just looking for a local move, it is easy to check if the company is licensed. A reputable company will certainly promote that and offer proof, but if you want to ensure, there is a website to check that manually. 4. Ask for Some Details If you have decided on a company that sounds reasonable to you, you can have them come over and give you a quote. This is an ideal opportunity to ask them for details and observe them working. If they don’t seem professional or aren’t sure of what they are doing, it is possible that they are not as skilled as their online ads suggest. Another big point to remember is that a reputable moving company will certainly have their own moving vans, and likely some uniforms for their workers. That may seem like a small thing, but if the company is serious about the business, they need to be willing to invest in the equipment – in the case of moving companies, it is a moving van, dollies, and similar loading and unloading equipment. Whatever company you end up hiring, have a great move, and enjoy your new home. Read Also: Factors To Consider While Preparing For A Move A List of Last-Minute Things You Should Check before You Move House

READ MOREDetails
How to Choose LED Lights

How to Choose LED Lights for Every Room in Your Home

The lighting you choose for every room in your home impacts the overall mood and appearance of the space. In the same way that light from the sun energizes your body, the light coming from bulbs inside your house will also affect your focus and energy. Therefore, in choosing lighting fixtures for your home, you need to consider the purpose of each room and the most suitable lighting to install. How to Choose LED Lights for Every Room in Your Home: 1. Brightness and color of LED lights: There are LED bulbs that emit blue light which helps increase focus and alertness. Those that emit yellow light, on the other hand, induces a feeling of relaxation and calmness. LED bulbs with lower temperatures typically produce a warmer, yellow light and in contrast, lamps with higher temperatures have a cool white glow similar to the appearance of daylight. 2. LED lights for bedrooms: Bedrooms are supposed to be more relaxed and peaceful. In choosing an LED bulb to retrofit a bedroom, look for bulbs with a color temperature from 2,700 to 3,000 K. These tend to be warmer and produce a calming atmosphere. If you are unable to fit an entire room with new LED bulbs, you can retrofit an old lighting fixture using an LED bulb that is compatible with the existing installation such as an E27 LED bulb. 3. LED lights for a home office: In a home office, you will want lighting that helps in maximizing productivity. As mentioned earlier, LED lights with a touch of blue help you feel more alert and awake. That is why in most office and commercial spaces, bright white LED lights mimicking daylight are often used. In selecting a place for installing LED bulbs, make sure that these are not directly above computer screens to avoid unwanted shadows or glare. 4. LED lights for living rooms: The living room is typically a multi-purpose space used in entertaining and relaxing. As such, there needs to be a mixture of light sources to create the proper atmosphere and ambiance depending on the occasion. As much as possible, avoid bright LED lights for living rooms and try to incorporate features such as dimmer switches and spotlights. If you will be adding adjustable spotlights or recessed downlights, install them near walls and corners to avoid shadows. 5. LED lights for dining rooms and kitchens: Dining room lighting should not be too bright as it can be too distracting to the diners. Install LED lights with warmer temperature and dimmable features to adjust the ambiance of the room according to the time of day. On the other hand, kitchen lighting needs to be functional; thus, blue-light LED bulbs are perfect for kitchens. Adjustable spotlights are also perfect if you want them over specific work areas so that you can concentrate bright light only when needed. If you have a breakfast bar or a small dining area in the kitchen, make sure that there is separate lighting overhead to have a layered lighting scheme that complements the purpose of each area. Read Also: A Rundown Of The Basic Led Lighting Las Vegas Electricians Share Fun Lighting Ideas For Your Home Unique Military Hardware Concept Integrated Into Lumitact Flashlights Create A Stunning Outdoor Space With These Residential Landscape Lighting Tips

READ MOREDetails
how to harvest dill

How to Harvest and Preserve Dill for Year-Round Use?

The tender, fern-like leaves of dill almost beg to be touched. If you want to cook them, trim the fresh dill foliage and gather the seeds for pickling. Or you can chop the feathery leaves and yellow umbels for attractive bouquets of homegrown flowers. In addition, black swallowtail caterpillars love to feed on it. Its tiny yellow blooms are great at drawing in a wide range of pollinators. Dill grows as an annual for summer harvests in USDA Hardiness Zones 2–8. In other parts, it may self-seed and is hardy in the winter in Zones 9–11. Here is everything you need to know about how to harvest dill. Keep reading for a comprehensive guide. How to Harvest Dill? Fresh dill clips easily, but it soon starts to droop. Sounds familiar to Cilantro, right? Its flower umbels may look lovely in a mixed bouquet, but after a few hours, don't be shocked if they start to wilt. When harvesting dill for recipes, use it as soon as possible because its flavor starts to fade after a few days. Cut off the flower stalks of dill after the yellow blooms have faded but before the seeds start to ripen and come away from the umbel. Cover the entire flower head with a small paper bag that has a few tiny holes for ventilation. Hang the plant upside down in a cool, dry place. Watch for the seeds to fall and collect them in the bag's bottom. The seeds should be kept in a cool, dry, and dark area in an airtight glass container. When and How to Plant Dill? Dill grows best outside and is simple to start from seed. Plant the seeds directly into the ground, 1/4 inch deep and spaced 1 to 2 inches apart, in the springtime following the last frost. If you want the dill plants to be able to self-sow, plant the seeds in tufts so the seeds can fall and sprout the following year. Or you can plant them in rows spaced about 6 inches apart. You might want to think about succession planting if you want a reliable supply of dill. During the growing season, start by planting a small number of seeds from the packet at a time and then a few more every week. Typically, seeds take 7 to 14 days to germinate. Also, dill can be grown from transplants grown in nurseries planted in the ground or in containers in spring. You can plant dill outside a few weeks before the last predicted spring frost because it can withstand light frost. To achieve lush growth and stop crowded seedlings from producing seed heads, which stops the production of foliage, thinning is essential. Every 12 to 24 inches, reduce the number of seedlings to just the strongest one once they reach 3 or 4 inches in height. As they get bigger, some start to flop. Plants can be kept upright by placing a stake or a sturdy twig in the ground close to the plant's base. To loosely secure the plant to the stake, use garden twine. You can start the dill seeds indoors four to six weeks prior to the last frost. And you can move the seedlings to the ground once the risk of frost has passed. Transplanting mature dill does not work well, so plant your seedlings where they will be able to grow and thrive. Where To Plant Dill? Dill should be planted in a spot with well-drained soil and at least 6 to 8 hours of daily full, direct sunlight. Particularly for cottage gardens, the delicate foliage gives garden beds and borders textural interest. Choose a location for your dill that will shield it from the wind if possible. Just like spinach, high winds can easily damage its stalks if you do not stake the dill. You can plant dill's fragrant foliage in perennial garden container plantings. Or you can plant them alongside other herbs or vegetables in a traditional kitchen garden. In an edible garden, cruciferous vegetables such as Brussels sprouts, collard greens, broccoli, and cabbage are good companion plants for dill. Dill draws beneficial insects like ladybugs and bees and drives away common brassica pests like loopers and cabbage worms. But avoid planting dill close to carrots. Carrots can be stunted by dill, and because they are closely related, dill can cross-pollinate with carrots to produce inferior hybrid plants. Planting dill close to tomatoes is also not recommended. Mature dill will probably stunt your tomatoes' growth, even though some studies have indicated that tomatoes and dill can be beneficial companions when they are young. How to Propagate Dill? Seed is the most effective method of dill propagation. Cuttings can also propagate Dill, though this isn't as dependable. Seed: Direct sow the dill seeds in early spring at a depth of 1/4 inch in a prepared garden bed. Dill does not tolerate transplanting well. Thin the seedlings so they are 12–24 inches apart when they are 3–4 inches tall. Cuttings: Using shears or scissors, cut off the stem with at least 3 to 4 inches of new growth to take a dill cutting. Place the cutting in a water-filled container, making sure to remove any leaves below the water's surface, and allow the roots to grow for two to three weeks. Fertilizer and rooting hormones are not required. Plant the dill in a container or on the ground once the roots are 2 to 3 inches long. Is Dill a Type of Weed? No, I am not talking about WEED weed (read: marijuana). Although dill isn't technically a weed, some individuals and spice companies call the plant dill weed, possibly due to its feathery leaves. Dill weed is a dried or fresh foliage plant. Flower umbels are yellow and used to make dill seeds. How Should Dill Be Stored for Optimal Quality? You can keep fresh dill in the fridge by wrapping its leaves in a moist paper towel. Or you can tuck its stems into a container of water. Fresh dill can be frozen by submerging it in water in ice cube trays. Place the cubes in cooked dishes that have enough moisture to withstand them. Dill seeds and leaves can also be easily dried for later use, though the flavor is a lot more muted. Water and Soil Sow dill in soil that is moist but well-drained. If there is a lot of clay in your soil, add organic matter to the top few inches to aid in drainage. If you have trouble with poor soil drainage, plant this herb in raised beds or containers. Growing dill requires proper irrigation. As the seeds germinate, keep the soil evenly moist. Dill plants require one to two inches of rain or extra water each week once they begin to grow. Humidity and Temperature Dill tolerates temperatures as low as 25ºF, but 70ºF is the ideal temperature for it. Dill often bolts, sending up flower stalks to set seeds when temperatures rise. This annual herb dies after it flowers and produces seeds. Get rid of the flowers to prolong the plant's growing season. Apply Fertilizer While most herbs, including dill, don't require extra fertilizer, you can give them once or twice during the growing season by applying a balanced 10-10-10 fertilizer. When planting, either mix a liquid fertilizer with water or etch a time-release fertilizer into the soil. Refer to the product label for instructions on how much to use. Trimming Dill should be pruned early in the growing season to prevent limb bending. Cut off the top leaves of the plant to promote more growth of the lower leaves. Food preparation and cooking can be done with anything that has been pruned. Repotting and Potting You can grow dill in pots on a sunny balcony or deck, even if you don't have an outdoor garden. Due to the deep taproot that dill plants have, choose a container that is at least 12 inches deep. Because clay and terracotta pots don't retain as much moisture as plastic or glazed ceramic pots. They are ideal for growing dill. Make sure the container you select has good drainage and is big enough to allow you to space your plants 12 to 24 inches apart. It is best to start over in a new, larger container. Especially if your dill plant outgrows its current one because it does not take well to transplant. If the temperature where you are planting is not too high, you can keep planting seeds into the summer. Types of Dill Dills can be of many types with each of their distinct looks and flavors. Here are the three different types of dill you can grow in your kitchen or backyard. Long Island Mammoth Also known as Long Island Mammoth this one is an old-time favorite. Its fern-like leaves can be dried and stored for a long time, or they can be harvested fresh. It produces big clusters of yellow flowers with flat tops. They turn into brown seed heads, and they can reach a height of five feet. Fernleaf Grown to a height of only 18 inches, Anethum graveolens, or Fernleaf, is a highly productive dwarf variety. It works well in container gardens or small in-ground beds. Its feathery, delicate foliage has a great flavor of dill. From midsummer into fall, it blossoms. Bouquet The 'Bouquet' cultivar produces plants up to thirty inches tall with fine bluish-green foliage. The enormous, six-inch-diameter yellow flower heads are ideal for drying, creating an enduring arrangement. Or you could chop them for fresh floral arrangements. How to Keep New Dill Fresh? Dill weed quickly wilts after harvesting and gradually loses its distinctive flavor and aroma. If you know how to store your freshly harvested dill, this shouldn't be a problem. Here are two straightforward techniques that you can use: Put It in the Crisper Drawer of the Refrigerator Loosely wrap the recently cut and cleaned leaves in damp kitchen towels before putting them in a container or sealed bag. Put the container in the crisper drawer of the refrigerator, which has a lower humidity than the other sections of the appliance. Utilize the herbs before they begin to wilt and dry out, which should happen in a few days. Put It in Water To make this method function, when harvesting the herb, you must cut off the entire stem. After gathering the stems, put them in a glass of water and seal the opening with a plastic bag. Every day, change the water. Unlike potatoes, dill leaves can remain fresh for up to a week when stored in this manner. How to Freeze Fresh Dill? Freezing is the best way to preserve extra dill for later use if you've harvested more than you can use at once or in a few days. Dill freezes most effectively when chopped into smaller pieces and added to ice cube trays with just enough water to cover the freshly minced dill. This allows the herbs to be kept for four months or longer. This will ensure you always have dill on hand for when a recipe calls for it. How to Dry Fresh Dill? Dried fresh dill is a popular method if you're searching for another way to store dill for a long time. The herb has many uses, even though it won't have as much flavor as when it's fresh or frozen. All year long, you can use it as a herb in cooked dishes or to make tea. Stick to hang-drying if you don't want much of the flavor to be lost. This is a very easy method to use. All you must do is gather a few dill leaves and then bind them with a string. Later, place them in an area with adequate ventilation upside down.  Place them in an airtight container once they're crumbling and dry. Even though fresh dill is always preferable, make sure to save some for later use. Particularly if you don't have a year-round indoor herb and spice garden. Wrapping Up Growing dill is a great way to add flavor to fish and seafood dishes. A little goes a long way because fresh dill leaves have a strong licorice flavor. It is best that you add dill toward the end of cooking, in salads, or as a garnish for soups. Because once cooked, it tends to lose its flavor. If you have thoughts to share or questions to ask about how to harvest dill, please leave a comment below. We would love to hear from you! Read Also: Asparagus 101: When, How, And How Often To Harvest? How To Harvest Sunflower Seeds: A Fun And Easy Activity For The Whole Family How TO Harvest Lemongrass: Tips AND Tricks FOR Growing AND Using This Versatile Herb

READ MOREDetails