Published on: 19 July 2018
Last Updated on: 15 July 2024
A brewing burner is unquestionably the first major investment you make once you venture into home beer brewing. Acquiring a high-quality home brewing burner is imperative. A substandard one will not only compromise the taste and quality of your beer, but it will also turn into an exciting hobby into an annoying nightmare. An excellent brewing burner guarantees uniform heat distribution, and it’s instrumental in preventing scorching. It also hastens the boiling process, substantially lowering the amount of time you spend waiting around. Here are considerations to make when purchasing the best brewing burner.
1. A number of BTUs Generated:
BTUs are units for measuring the amount of heat generated by the burner. Generally, one BTU adds one degree Fahrenheit to a pound of water that is at room temperature. You will find burners with BTUs of between 55,000 and 210,000. Bear in mind that a bigger burner doesn’t always translate to a better operation. While high BTU output is ideal for all kinds of grain brewing, certain lower output models are more reliable due to their ability to distribute heat more efficiently. Read more reviews about your prospective burner before making a purchase decision.
2. Quality of Metal Used:
All models of brewing burners are built from either cast iron or stainless steel. Cast iron is a bit thicker and tougher but weighs more and can rust easily. Thus, cast iron models are not suitable for outdoor brewing. However, if you are looking for a lighter model or you want to do lots of outdoor brewing, then a stainless steel model will serve you well.
3. Windscreens:
If you expect to do a lot of outdoor brewing, you should go for a model that has a durable windscreen. It will shield your flame and keep it lighting even when a strong breeze comes. Windscreens guarantee a smooth boil and make home beer brewing a sensational experience.
4. Height:
Outdoor propane burners tend to have longer legs compared to your traditional stove. The long stand allows you to brew your beer comfortably without compromising the health of your back. However, you should go for a model that sits nearer to the ground, if you will be dealing with a huge batch of boiling wort. Models with shorter stands are sturdier than those with longer stands.
Top 3 Brewing Burners:
1. Edelmetall Bru Burner:
This burner has lovely copper accents and stylish nameplate. It is made of refined stainless steel and copper. It produces a maximum of 72,000 BTU per hour. This burner boils a huge kettle of wort within a few minutes.
2. Bayou Classic KAB4 Banjo Burner:
This brewing equipment offers a high amount of uniform heat. It generates more than 100,000 BTU, which is sufficient heat to boil a couple of gallons within minutes. Its 22-inch cooking surface can accommodate most brew kettles. It comes with a 4 ft rubber hose, a brass control valve, and 30-PSI regulator.
3. Dark Star 2.0:
This propane burner can generate about 65,000 BTU of heat an hour. This burner is easy to use, and it can heat a maximum of 15 gallons of brew. This 6-inch diameter burner comes with an adjustable regulator, a wind guard, and lighter power.
Choosing the best brewing burner is all about addressing your needs. Look for a model with features that are most crucial to you. Other than quick boil times, a quality burner offers a big surface area that can comfortably hold large brew pots.
Content Rally wrapped around an online publication where you can publish your own intellectuals. It is a publishing platform designed to make great stories by content creators. This is your era, your place to be online. So come forward share your views, thoughts and ideas via Content Rally.
The floor is often considered to be the most important surface in a building. As the base of all the rooms in your house, it is the starting point from which your home’s style and mood will flow.
Because of this, selecting the ideal material for your flooring will definitely be challenging.
However, once you have chosen your flooring material or materials, you can focus on the next step of completing this particular surface of your home: the color.
Whether you are choosing the best hues for your concrete floor coatings or the right finish for your hardwood floors, here are some tips to help you narrow down your options and make the right decision:
1. The size of the room:
The color you choose for your floor can make a room look more spacious and grand, or more intimate and warm.
As such, if you want a small bathroom, a narrow hallway, or any small room to look and feel more spacious, choose a light color for your floor. If you are looking for ideas to adapt your kitchen to give it a warmer, cozier vibe, opt for dark, earthy hues.
2. The mood you want the space to have:
Since color can affect a person’s mood, you have to choose hues for your floor that won’t work against the vibe or atmosphere of the room.
For instance, if you want the kitchen to be lively and vibrant, you can choose bolder colors for the floor. In case you want your bathroom to double as a spa, opt for colors that are calming and soothing, such as light blue or green hues.
3. The users of the room:
If you have a baby that is starting to eat solids or small kids, expect lots of spills and mess to be present on your floor all the time. As such, at this time, it would be best to have a light-colored floor in the room that they will frequent such as the kitchen.
This is because floors with light colors are easy to clean and can also hide more dirt and dust than you might think. They are perfect for areas of your home that handle a lot of traffic.
Lighter colors are also more effective in hiding marks, scratches, and fading that occur post-installation. They are, therefore, great if you have pets too.
4. The amount of natural light space receives:
Lighting also plays an important role in enhancing or diminishing the appeal of your floor.
This is because colors can change the way they look when exposed to different types of lighting. Additionally, some colors reflect and absorb light better than others. If you choose the wrong color for your floor, you will give it the wrong mood and appearance.
In case a room lacks natural light, choose a light color to brighten the space. If a room is flooded with ample natural light, you can create a sense of drama by opting for black or dark brown flooring.
And to be sure you will be happy with the floor’s true hue, look at the sample colors you like in the morning, noon, and night and by artificial light.
5. The furniture:
Lastly, your living room, kitchen, and other rooms won’t stay empty permanently so don’t forget to consider the furniture, decors, and other items you will place in them.
This means thinking about the color of the furniture and rugs you may be placing. If you plan on having an accent wall or displaying art pieces, consider them when choosing your floor color as well.
When choosing your floor colors, bring some elements that you already know will go into the room. These can include a throw pillow, framed pictures, a throw rug, etc. These items will help you make the right decision.
If you want to showcase some design furniture, you will do well to go for natural hues since they will create a neutral canvas and allow the piece to take center stage. Red tones, on the other hand, give a sense of luxury and as such, go well with grand, antique furnishings.
Choosing the right floor color means considering various elements that are already present and will be in the room. However, don’t be afraid to combine colors and experiment with different combinations. After all, your floor will also reflect your personal style and preference.
And if you are still having a hard time choosing your floor color, you can always ask your builder, interior designer, and decorative paint supplier for their recommendations.
Read Also:
How Long Does Vinyl Flooring Last?
How To Decorate A Room With No Cost
List Of Most Durable Kitchen Flooring
Secrets To The Perfect Bedroom Light
What You Must Know About Wood Flooring?
Use Floor Polishing For Keeping Your Flooring Looking New
Five Bedroom Rug Ideas – Area Rugs And Decorating Ideas
Hardwood Timber Flooring: Gives A Classic Look To Your Home
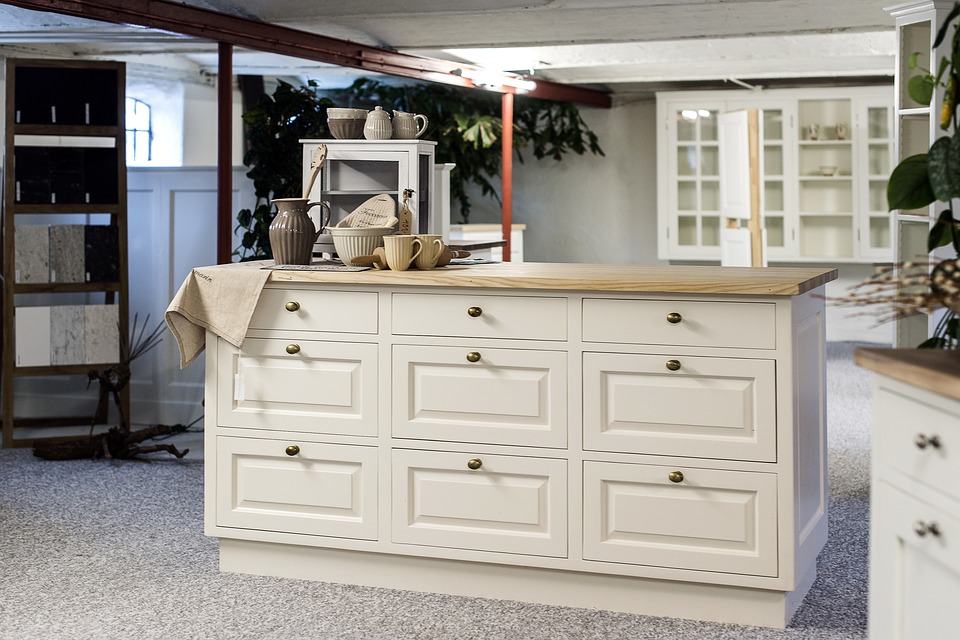
Among the defining factors of your kitchen’s overall look are its cabinets. After all, in kitchen design, the cabinetry often serves as an anchor, the thing that ties every other design elements together to create a seamless look. As such, beyond style, what’s more, important is to choose the right materials for your kitchen cabinet.
Reliable flat pack kitchen contractors can offer you a variety of kitchen cabinet material choices. Moreover, they can also recommend suitable materials and even combinations of materials to suit both style and practical function. Here’s a quick look into the most common materials used by cabinet makers.
How to Choose the Right Kitchen Cabinet Materials for Your Project:
Hardwood Cabinets
You could say that hardwood kitchen cabinets are the grandfather of all kitchen cabinets. One of the main draws of using hardwood is that, because it’s a natural material that varies in grain from piece to piece, every kitchen cabinet will be equally unique. There are no two trees that are exactly alike, which means that even cabinets made from the same kind of hardwood will have subtle differences. Another benefit of hardwood is that it’s not only durable. It’s also easy to repair. Even inexperienced carpenters can DIY procedures like sanding, staining, or refinishing. Finally, there’s a wealth of options to choose from. Popular hardwood species include jarrah, marri, birch, cherry, maple, and oak.
When it comes to downsides, however, the most common disadvantage people cite is that hardwoods tend to be heavy. As such, if you want pure hardwood cabinets, you have to make sure that there’s a sturdy enough structure to support them. Another drawback of hardwood kitchen cabinets is that they’re expensive, especially if you want fully customized designs. Some Perth kitchen cabinet makers will suggest combining hardwoods with other materials to help drive down the cost.
Are hardwood cabinets right for your kitchen? If budget isn’t an issue and you want beautiful, long-lasting cabinets, hardwood is the best choice. Hardwood is also great for busy kitchens since it’s a heavy-duty material.
Medium-Density Fibreboard Cabinets
Medium-density fibreboard or MDF has gained popularity in the world of cabinetry, especially since IKEA has long been using it for their own kitchen cabinets and other furniture. The material is a composite of recycled wood fibers and wax, bound together by resin. The boards are made through high-pressure CNC milling, resulting in strong and dense material.
Indeed, MDF is a versatile substrate, able to be painted, veneered, lacquered, laminated, or treated with almost any process or substance. MDF is also proven to be resistant to cracking and is considerably smoother than plywood.
The one downside of MDF is that it needs to be properly sealed. Otherwise, it has a tendency to warp. You can use carpenter’s glue for this purpose, especially if you’re going to paint over the material. For some waterproofing, you can use the wood sealant, varnish, or a coat of moisture-resistant paint.
Are MDF cabinets right for your kitchen? Those looking for more affordable yet high-quality alternatives can turn to MDF. Contemporary kitchens and those who love to DIY and customize will also benefit from MDF cabinets.
Plywood Cabinets
Plywood is made from multiple thin layers or plies of wood that are bound together by a combination of glue, heat, and pressure. The adjacent layers are rotated so that the grains are facing alternate directions. This technique, called cross-graining, enhances the material’s strength in all directions. Moreover, it helps prevent shrinkage and expansion, minimizes splitting of the layers (when nailed at the edges), and reduces warping.
Many cabinet makers consider plywood excellent material. Apart from the benefits mentioned above, plywood is also moisture-resistant, light but sturdy, flexible, and easy to install. In case the cabinets get damaged, plywood is also quite easy to repair through DIY methods. Finally, plywood is also much less expensive compared to even the most affordable hardwood.
Do remember that making plywood cabinets is all about choosing the right thickness. You’d want to use a thicker material on drawer bottoms, for example, or you risk it cracking or splitting if you put heavier items in it. Your kitchen cabinet maker likely already knows this, of course, but just make sure that you tell them what you need so they use the correct types of material. Also, ask where they source their plywood. Note that some lower-quality products may have gaps between the individual plies.
Are our plywood cabinets right for your kitchen? Plywood is ideal if you’re working with a stricter budget but don’t want to compromise on quality. You may also want to consider plywood if you’re making your own cabinets since it’s an easy material to work with.
Particleboard Cabinets
Particleboard is often compared to plywood. Also called low-density fibreboard (LDF) or chipboard, particleboard is engineered from various recycled wood products like wood chips, sawdust, and wood shavings. These materials are glued together, then pressed and extruded to create sheets. As a final touch, particleboard is laminated or given a wood veneer for a better-looking appearance (as plain particleboard can be, well, plain-looking).
The primary advantage of using particleboard for kitchen cabinets is that because it’s made from scrap materials, it’s very cheap. It’s also very lightweight. However, particleboard also tends to be on the lower end of the durability scale, especially when subjected to tension. Moreover, the material is prone to moisture damage and is not built to withstand sagging. Nonetheless, you can still find high-quality particleboards that are quite sturdy. Ask your kitchen cabinet maker to help you find the best ones.
Are particleboard cabinets right for your kitchen? If your kitchen doesn’t see too much action and you don’t have any heavy equipment, particleboard cabinets and shelves will more than suffice.
Stainless Steel Cabinets
Finally, there’s stainless steel. Not many households opt for this material for kitchen cabinets. In fact, these are often seen only in industrial, professional-level kitchens. Nonetheless, stainless steel is an ideal material in the kitchen, both for cabinets and general usages like shelving and racks. It’s durable, doesn’t expand or contract, and resistant to most kinds of damage. Stainless steel can be difficult to clean, however, but it’s very hardy so it can withstand a lot of scrubbing and even harsh chemicals. This makes sterilizing a breeze. Nonetheless, you should also note that stainless steel cabinets tend to be expensive, sometimes costing even more than hardwood.
Are stainless cabinets right for your kitchen? Do you consider yourself a chef in your own right? Do you often cook, not just for yourself but also for your family and friends? If you do, then stainless steel kitchen cabinets are perfect for you.
Many of these materials, except perhaps for stainless steel, can be customized and combined with plenty of other materials, so the style isn’t the biggest issue. Therefore, in the end, choosing the right kitchen cabinet materials all boils down to two primary considerations: your budget and how often you’re going to use your kitchen. When you focus on these two, the decision will become simpler.
Contact kitchens now for quality flat pack kitchens
Read Also:
Kitchen Renovations Must be Done at Regular Intervals
7 Tips for Getting Rid of Clutter in Your Home
Top Secrets That Slash Your Kitchen Remodeling Bill in Half
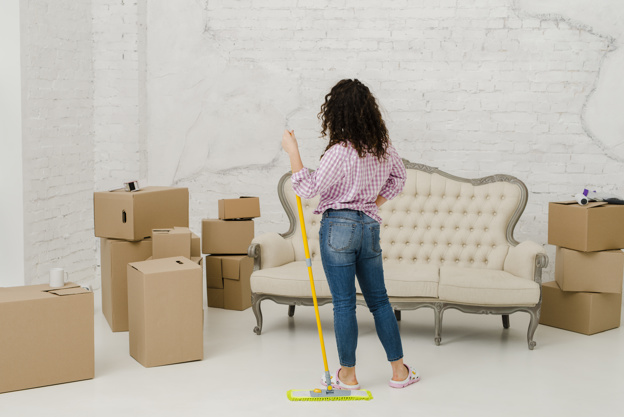
Changing home is a stressful and demanding endeavor itself, you have to think about so many things – packing, organizing transport, and of course, cleaning. You need to clean your new place unless someone was kind enough to do it for you, but still, a second-round might come useful.
And of course, you need to clean your old home and leave it in decent condition for the new tenants. Otherwise, you may not get your deposit back. In case you are selling your own place, it is also an important criterion which will make your former home much more attractive to the potential buyers.
Unless you hire professional help, cleaning your old place is definitely not going to be easy, but there are a few things that can make the experience a bit less stressful and burdensome as recommended by move out cleaning professionals.
Start from the Top
A common mistake many of us make while cleaning is to start from the floors, as they usually do represent the biggest item on the list. However, if you start from the floors, and then move up to walls, corners, and surfaces, guess what – you will have to clean the floors all over again.
So, be wiser than that and start this excruciating business from the top. This will save you a lot of time and energy. Also, when talking about directions, always start the cleaning from the back, that is from a wall towards the door, so you don’t end up stuck in one small uncleaned place, like on an island, having to cross all the wiped space to go back, and potentially soil it all over. It sounds funny, but this has certainly already happened to some of you, and you will definitely want to avoid it this time.
Change the Approach
When cleaning, everyone mostly likes to do the job room by room. However, this usually takes way more time than actually cleaning segment by segment, which is task by task. For instance, if you are wiping floors, it is better to do it in the whole house while you are at it, instead of moving to a different segment in the same room. This approach is much more efficient so take it into consideration once you start you moving out clean up.
Have Everything at Hand
In situations where time is really precious and you don’t have the liberty to take too long because a lot of other things are waiting, good organization is everything. You will definitely need different cleaning chemicals such as glass cleaners, disinfectants, baking soda, vinegar, and others, as well as cleaning equipment like cloths, vacuum cleaners, brooms, dustpans, brushes, and others.
The first important step is not to pack any of these along with the rest of your stuff. The second is to actually know where they are and to organize them as much as possible so you don’t have to lose too much time searching for them. As professional home cleaners at Maid Easy say that good organizational skills can shorten the time it takes to clean the whole house significantly.
“Dry” Cleaning First
Make sure you first do the “dry” cleaning such as swiping, dusting, and vacuuming to remove all the dust and other dirt in that way. If you apply wet cloth or a brush, you will just make bog, rather than clean something. The best option is to dust all the corners and surfaces first, swipe any bigger mess, and then finally vacuum to give it the final touch. After this, you may proceed with “wet” cleaning activities.
Once you are done with the old place, you can apply all these tips to your new home. Even if the previous tenants or owners have cleaned it, you will probably want to make sure it is spotless. Of course, if repeating the same process all over again is just too much for you, you can always ask the professionals for help, at least for one of these cleaning actions.
Read Also:
How Cleaning Helps Us Feel Better and Why We Don’t Do It
7 Advantages of Hiring a Residential Cleaner
What You Need to Look for When Hiring House Cleaning Service