5 Must need Accessories for a Firearm Owner

Published on: 26 February 2020 Last Updated on: 12 September 2024
Never Keep a Loaded Gun

When the talk is about guns and firearms, it is highly recommended that you stay careful and protective. Here are five awesome must need accessories that a firearm owner should keep ensuring safety. These are inexpensive and add extra value to your firearm. To know 5 must need accessories for your firearm, keep reading.

5 Must need Accessories for a Firearm Owner

1. Sling:

When it comes to firearms, a sling means a form of strap or harness specifically designed to allow a user to carry his gun comfortably with his body. There are different types of slings for a gun available in the market such as a traditional two-point sling, ching sling, three-point sling, single-point sling, etc. Different types of slings offer different advantages and disadvantages. So, before buying, know your and your firearm’s needs and buy accordingly.

2. Gun case:

Gun case

While it is an open secret that owning a firearm is quite an expensive hobby, so you would surely want to keep your gun safe so that you can use it for a lifetime. A gun case is a container or box which provides your gun with an extra layer of security from unauthorized access, spillage, scratch, or dropping. It also safeguards your firearm from dust and dirt and maintains its finish. Before buying a gun case, make sure it suits your gun model and the quality remains optimum.

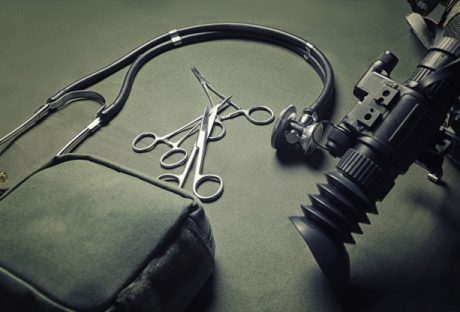
3. Gun cleaning kit:

Gun cleaning kit is something essential to keep your gun in good health. A gun cleaning kit is a box that contains a set of tools to be used for different purposes. You can clean your gun after a few uses or oil it regularly so that it holds its functionality to the optimum level for years. Apart from that, with a single cleaning kit, you can take good care of your multiple firearms. Before buying a gun cleaning kit, do not forget to check what tools it offers.

4. Trigger guard:

Trigger guards are small and custom-fit pieces that slip over on the trigger to safeguard your gun from any unintended discharge. In general, trigger guards come with a paracord lanyard to help it remove quickly and safely. As trigger guards totally cover your gun’s trigger and nicely attach with your firearm, so it is a very good option for pocket carry. Using it is also very simple; attach the lanyard with your belt loop or belt and when necessary, just press the lanyard to snap off the trigger guard. Adding to that, these trigger guards come with different colors to add some extra coolness to your firearm.

5. Empty-chamber indicator:

Empty-chamber indicators are brightly colored plastics that indicates whether your firearm is loaded or unloaded. The indicators slide into the chamber and make the firearm unworkable. While you are on the range and place your firearm on the bench, these empty-chamber indicators let other shooters know that your weapon is unloaded and harmless. These are a great and helpful tool while kids are around your firearm.

Read Also:

Content Rally wrapped around an online publication where you can publish your own intellectuals. It is a publishing platform designed to make great stories by content creators. This is your era, your place to be online. So come forward share your views, thoughts and ideas via Content Rally.

View all posts

Leave a Reply

Your email address will not be published. Required fields are marked *

Related

Mastering Troubleshooting For Power Tools

Mastering Troubleshooting For Power Tools: Your Comprehensive Guide

Power tools have become indispensable for professionals and DIY enthusiasts, making tasks more accessible and efficient. RYOBI stands out as a reliable choice among the numerous brands in the market. However, like all power tools, RYOBI devices can occasionally encounter issues. In this guide, we'll explore techniques for troubleshooting for RYOBI power tools and power tools in general, focusing on the common problems and solutions that can apply to various brands and models. Power Issues Begin by examining the power source. Ensure that the cord is securely connected for corded tools and that the battery is adequately charged for cordless ones. For persistent issues, inspect the tool's switch for damage or debris. Also, check for loose or frayed wires and replace them as needed. If you're dealing with a cordless tool and it's not turning on, the battery might be the culprit. Before assuming the worst, try charging the battery fully and then attempt to use the tool. Sometimes, a drained battery can give the appearance of a malfunctioning tool. Consider using a different, fully charged battery if this doesn't work. If the device still doesn't work, the issue may be with the tool itself or the charger. Loss Of Power In Power Tools Power loss may result from a worn-out or damaged motor or brushes. Inspect the brushes for signs of wear and tear and replace them if necessary. Clean the air vents and cooling fans to prevent overheating, which can lead to power loss. If your tool still experiences power loss after checking the brushes and vents, it may be due to an issue with the motor. Motors can wear out over time, mainly if the tool is used heavily. In this case, it might be necessary to replace the engine, which is a job best left to professionals unless you're experienced with power tool repair. Overheating Overheating can damage your tool and pose safety risks. Proper maintenance is crucial in such cases. Ensure air vents are clean and unobstructed. If overheating persists, consider shorter usage intervals and allow the tool to cool down between sessions. Regularly check for proper lubrication in moving parts and replace worn-out components. Excessive heat buildup in a power tool often indicates it's being pushed too hard or used beyond its recommended capacity. Pay attention to the tool's specifications and try to match it with the right type of work. If you frequently overheat a device, consider upgrading to a more robust model that can handle the demands of your projects. Vibrations And Noise Vibrations and noise can indicate loose or damaged components. Tighten all screws, bolts, and nuts. Inspect the blade or bit for damage and replace it if necessary. Lubricate moving parts following the manufacturer's recommendations to reduce friction and noise. Excessive vibrations and noise are annoying and can indicate potential safety hazards. Loose parts in power tools can lead to accidents or damage to the tool. Regularly inspect your tool for loose fasteners and tighten them as needed. If you notice unusual vibrations or noise persisting after this, it's advisable to have the device checked by a professional technician. Battery Troubles Battery issues can stem from a lack of use, overcharging, or a faulty battery. Always follow proper charging and storage guidelines from the user manual. If battery performance remains subpar, consider investing in a replacement battery. Batteries, especially rechargeable ones, have a finite lifespan. Over time, they can lose their ability to hold a charge effectively. If your cordless tool's battery life has significantly decreased, it may be time to invest in a new battery pack. Make sure to recycle old batteries properly, as they can be hazardous to the environment. Blade/Bit Issues In Power Tools Dull or damaged blades/bits can hamper performance. Sharpen or replace them as needed. Ensure you're using the appropriate type of blade/bit for the material at hand, as using the right one can lead to efficiency and damage. The blade or bit's quality and sharpness directly impact your power tool's performance. When you notice a decrease in cutting or drilling efficiency, it's time to inspect and maintain these essential components. Regularly sharpen blades or replace them if they're excessively worn or damaged. Also, be mindful of the material you're working with, as using the wrong type of blade or bit can result in subpar performance and even safety hazards. Trigger Sticking Disassemble the tool's handle and clean the trigger mechanism. Lubricate moving parts with a manufacturer-recommended lubricant. If the problem persists, consult your user manual or contact the manufacturer's customer support. A sticking trigger can be a frustrating issue, and it can also be a safety concern. Before attempting any repair, ensure the tool is disconnected from its power source. Disassemble the handle carefully and clean the trigger mechanism. Lubricate any moving parts as recommended in the user manual. If the issue persists, consult the manufacturer's customer support or take the tool to a professional repair service. Conclusion These tips are not limited to RYOBI tools; they apply to various power tool brands and models. Always refer to your user manual for specific guidance and safety precautions. Safety should be your top priority when troubleshooting and repairing power tools. Read Also: Home Warranty Plans: How To Choose The Right One We Buy Houses Companies Saving Homeowners From Foreclosure Top Fixer-Upper Improvement Ideas That Make A Huge Impact

READ MOREDetails
Soldering Iron

How to Use a Soldering Iron

Of all techniques and methods used to join surfaces, metal sheets, Iron, and other objects together, soldering is highly preferred because it does not cause any type of damage to the items being joined together. This is because the solder used to stick them together has a lower melting point than most metals and it offers durable yet reversible bonds between the items. In addition to that, although there are a few key differences between the two types of soldering gear used, they share a similar trait and they’re both easily operable, which we will discover more in this article What Is Soldering? There are several types of soldering using different filler metals called solder, but, they all use the same concept which is heating a filler metal between two items so that it melts and fills the seam between the two items. Soldering is done using either individually bought soldering gear, which allows you to choose the type of tool that is most suitable for the project you are planning to work on, or a soldering station which usually is a standard combination of a soldering iron and a power supply. Soldering Iron  In order to learn how to use a soldering iron, one must first know its basic parts and the science behind its mode of operation. It is simply a tool that connects to a power supply, it consists of a handle that doesn’t conduct heat and a tip that heats up very quickly to high temperatures so it can melt the solder, it also cools down fast. To Be More Specific, The Main Parts Of Soldering Iron Are: Soldering tip: All soldering irons contain iron tips which are the only part that heats up; it doesn’t ooze out the solder as most people think, it simply heats the metals being joined so that when the solder is applied, it melts, but more often than not, the solder would stick on the tip. Luckily, most tips are interchangeable so, you can replace your tip in case of damage or in case you need a specialized tip to suit your uses; bear in mind that tips vary in size and shape, thus, they vary in their uses as well. Wand: The wand is the handheld part of the iron that the tip is attached to. It can be made from a large number of materials that poorly conduct heat or isolate it completely so as to prevent heat from the tip from transferring to the part where the wand makes contact with the skin. Inside the wand, there are wires and metal contacts that conduct and convert the electricity from the power outlet to heat. The contradicting functions of a wand are the reason why most people prefer to buy high-quality wands from renowned brands. Of course, there are other extras and accessories like brass sponges, cradles, and tip tinner which can be purchased individually or found in soldering stations which is actually one of the advantages of soldering stations; but, the two main parts will always remain the tip and the wand. Step 1: Safety First of all, before using a soldering iron, you must be familiar with standard safety precautions since the iron tends to get really hot; not to mention the fact that solder is literally molten metal. So, it would be smart of you to wear protective gear such as; safety goggles and protective gloves, because your fingers are most likely to come into contact with the tip during the first few times. You also should keep in mind to tie your hair and avoid wearing loose-fitting clothes. Moreover, it is preferable to work in a well-ventilated area since some types of solder contain lead which produces toxic fumes, it is also important to thoroughly clean your hands after handling lead-based material. Step 2: Preparing The Tip The tip should be regularly cleaned of any old solder because when old solder solidifies, it turns into a heat isolator due to oxidization resulting in a totally inefficient and highly wasteful soldering process. Not only that but also, slow heating means that you will have to hold the iron to the items being joined for a longer time; it would be highly inconvenient for you and very damaging for sensitive objects like PCBs. So, when the iron is fully heated, softly drag the tip against a sponge to remove old solder. You want to aim for a shiny tip. After cleaning the tip, you should “tin” the tip; to make it last longer and conduct heat better through newfound layers of solder. Same as above, on a fully heated iron, apply a little piece of solder and lightly coat the tip with tinner; then, immediately start soldering while cleaning and tinning the tip between every couple of joints for maximum conductivity and efficiency. Step 3: Actual soldering With your dominant hand holding the iron and the other holding a piece of solder, touch the area where the object comes into contact with the solder and hold it there for about a second then slide the solder underneath the tip while pushing the solder rod further according to how much solder you need. Then, make sure to pull back the solder first while holding the tip in position until all the solder melts; it usually takes about five seconds or less. Solder cools down fast so, you will not need to blow on the joint since it will only lead to a weak joint which can be identified by its oxidized, unclear, and grainy appearance. What you want to get is a smooth connection, not a lump. Finishing touches : After you’ve had enough soldering for the day, clean and in the tip again before you put it into storage, it helps increase its lifespan. As you may have noticed, soldering is not that hard of a task, it only requires soldering gear, steady hands, and concentration. So, go ahead, start soldering, and don’t be afraid to get creative. Read Also: Is Polyester Stretchy? – Its Materials & Properties [Detailed Explanation] Top 6 Different Types Of Scarves Names And Its Benefits How to Thicken Chili – Tried and Tested

READ MOREDetails

Five Essential Kinds of Gear to Prepare before Going to Shooting Ranges

So you’ve just bought a gun and are itching to try it out in your nearest shooting range. Before you go full-on Rambo, you may want to inspect your gear first to ensure you have everything you need. You could be missing a few pieces of essential equipment. While most shooting ranges have gun shops, their merchandise usually comes at a premium. It’s cheaper and better to take your own gear with you. Not only will you save a significant amount of money, but you also won’t be forced to practice with equipment previously used by strangers. Read also: What Is An Airsoft Gun? If it’s your first time going to the range, chances are you only have a few ideas as to what you should bring aside from your gun. As a pro tip, here are some of the equipment you need when going to a shooting range. 1. Lots and Lots of Ammo : Prepare your ammo to get the most of your time in the range. Gun shops in ranges tend to mark up their ammo prices, so it’s more frugal to buy bullets outside the range. Generally, it’s a good idea to bring more ammo than you need. The thrill of shooting can make one eager for another round, and the next thing you know, you’ll have gone through your ammo supply like as if it were water. Thus, buy a lot of ammo in advance, buy .22 ammo in bulk, buy 9mms, buy all the ammo you need. 2. Eye and Ear Protection : Gunshots are extremely loud. Normal fire, even with low-caliber handguns, can reach 140 decibels. That’s enough to cause permanent hearing loss. Compare that to an idling bulldozer (idling, not in active use), which has a loudness of around 85 decibels, a noise level that can damage the ears if it continuously penetrates the ears. By contrast, a single gunshot is enough to cause hearing loss. That’s why every shooter needs some form of ear protection. They can be earplugs or noise-canceling earmuffs. The eyes are other related and equally vulnerable part. There are a lot of reasons for wearing protective eyewear when in the range. One is that the spent gunpowder can enter and burn the eyes, potentially causing permanent damage. To include a set of shooting glasses or goggles with your shooting gear. 3. Binoculars or Spotting Scope : It’s no fun shooting if you can’t confirm a hit, and it’s dangerous to walk to your target if there are other people practicing. You’ll either need a binocular or a spotting scope to check your target, especially if it’s placed at a distance. There are pros and cons between binoculars and spotting scopes. But they generally have the same use. What to bring depends on your personal preference. 4. Shooting Targets : Shooting ranges frown upon plinking, which is using improvised materials like tin cans and bottles for target practice. One reason is that they can shatter and spread, making it a headache to clean up and remove them from the range. Thus, it’s common etiquette to use standard targets, like paper bullseye targets for new shooters. All ranges sell standard targets, but like with ammo, they come at a premium. It’s cheaper to buy targets from outside. You can even print your own paper targets. If you want to spice it up a bit for more fun, you can try different types of targets. Some shops sell targets that explode into chalk or dust when hit; others have spinning targets for those seeking a challenge. 5. Maintenance Tools : Nothing kills a good time at the range than a gun getting jammed does. If your gun ever breaks down on you, don’t let it end your day. Get your tools and fix it. Some folks at the range can even help you out. But repairs aren’t possible if you didn’t take your tools along with you. That’s why you should always take your gun maintenance tools with you whenever you’re going to the range. Are You All Set and Geared Up? Going to a shooting range can be intimidating, especially for first-timers. Even seasoned shooters can forget to take a few items to the range. Just remember to include these five in your shooting gear, and you’re sure to have a blast at the range.  

READ MOREDetails