How To Troubleshoot The Alexa Not Responding Issue? [Fixed]

Published on: 20 March 2021 Last Updated on: 27 December 2024
Alexa device issue

Alexa is a virtual assistant, which works with an echo dot in order to fulfill all the demands of its users. With its thousands of attractive features, Alexa has made the life of its users super easy and also entertaining at the same time. 

With its hi-tech features, Alexa can do almost everything from controlling smart home lights to set reminders, playing songs, jokes, news, quizzes, and much more things. But due to some reasons, you may find your Alexa not responding to the commands that you are giving it. 

Do not worry if you are facing the Alexa not responding issue. Here we have the most effective and easiest troubleshooting steps to fix this issue. 

Troubleshoot The Alexa Not Responding Issue:
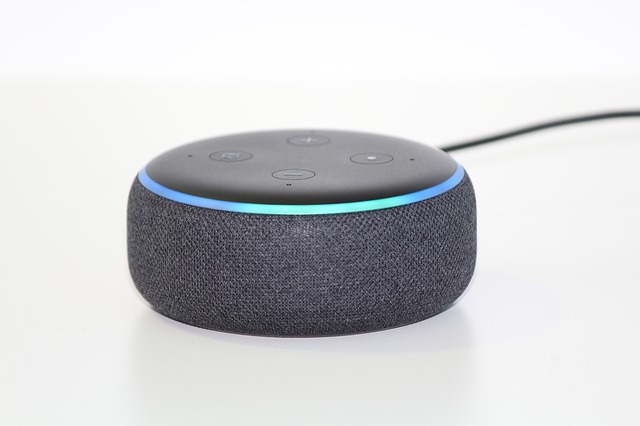
Troubleshoot The Alexa imageHere are the troubleshooting steps that you need to follow for solving the Alexa not responding issue with your echo dot. There are a bunch of reasons for what you may be facing this Alexa not working issue. 

So, let’s head towards the troubleshooting steps. 

1. Check The Microphone Button

There are many instances when we find that the reason behind Alexa not responding is because the microphone is damaged or we forget to turn the button on. The microphone button is one of the most common reasons for this issue. 

So, check the microphone button first. If the issue persists and it seems that everything is totally fine there. You can step to the next process. 

2. Reboot The Device

This is one of the most effective and easiest ways in the whole troubleshooting process of Alexa is not responding issue. There is not much trouble, all you need to do is just restart the device and the issue will get resolved. But this restarting has a definite name called power drain, and it is more than just powering off the power button and power on it again. 

Here is the step-by-step guide for the power drain process.

  • First, you need to check the power light. In case it is showing blue light, that means the device is able to hear you but simply the Alexa device is unresponsive to your commands. 
  • Disconnect the power cable from the power source for at least 30 seconds.
  • Wait for a little while, and after that, connect the power cord again with the power outlet.
  • Now, when your device is ready completely, try to give it any command again.
  • If the issue is resolved, then it is fine. But in case the issue of Alexa not responding continues, head to the next step. 

3. Echo Dot Hard Reset

In case the above described troubleshoot does not work for your echo dot. Here is the step-by-step guide to hard reset.

  • You will find the reset button at the bottom of the device. You can use a pin to press the button.
  • As soon as you press the button, the device will power off.
  • Here, you need to wait for a little and then power the device on again.
  • All the settings of the device will then reset to the original. 

4. Disable And Enable Alexa Privacy

If Alexa not responding after all the above-mentioned troubleshooting steps, now is the time to enable Alexa privacy and in order to do so, follow the below steps.

  • You will find a button at the end of Alexa’s nucleus screen. You need to press the button.
  • This button is to enable the privacy of Alexa. If you press the button again, the device will hear you again.
  • Give a command to Alexa in order to check whether the issue is resolved or not. 

5. Check Your WiFi Connection

Behind the “Alexa not responding” issue, there is a huge chance that maybe your wifi connection is not working properly. That is why Alexa is finding it difficult to respond to your commands. 

Well, let me tell you that if you do not have a proper internet connection, there will be no use for this Alexa device. So, check the router now. In case you find anything wrong, contact your network service provider. 

6. Try Changing The Position 

In case you have placed your echo dot device far from your router or in someplace where it is having issues connecting with the router. This can be the main reason why you are experiencing “Alexa not responding.” 

Make sure that you are placing Alexa within the wifi range. The place should be accessible to yours as well so that your echo dot device can connect with the network properly and also can hear you clearly. 

7. Set Echo And Smartphone On The Same Network

Always keep in mind that the smartphone that you are using and Alexa have to be connected within the same network. In case they are connected with different routers or your phone is not connected with the router’s network, you will face the “Alexa not responding issues.” Connect both of them on the same router’s network in order to resolve the issue. 

8. WiFi Congestions

If you have connected a lot of devices within the same router’s network, it may create the “Alexa not responding” issue. Due to excessive wifi congestions, your echo dot is not able to respond to your given commands. Remove or disconnect some other devices, and then try to give your device command and check if the issue is resolved. 

Still Alexa Not Responding?

All the steps that I have told you in this troubleshooting guide are enough for resolving Alexa not responding to voice issue. But if you face the same problem after performing all the troubleshooting steps. You should contact Alexa customer care. Call on the Alexa helpline number and ask for help. 

More Resources: 

Mashum Mollah is the feature writer of Search Engine Magazine and an SEO Analyst at Real Wealth Business. Over the last 3 years, He has successfully developed and implemented online marketing, SEO, and conversion campaigns for 50+ businesses of all sizes. He is the co-founder of Social Media Magazine.

View all posts

Leave a Reply

Your email address will not be published. Required fields are marked *

Related

Mastering Troubleshooting For Power Tools

Mastering Troubleshooting For Power Tools: Your Comprehensive Guide

Power tools have become indispensable for professionals and DIY enthusiasts, making tasks more accessible and efficient. RYOBI stands out as a reliable choice among the numerous brands in the market. However, like all power tools, RYOBI devices can occasionally encounter issues. In this guide, we'll explore techniques for troubleshooting for RYOBI power tools and power tools in general, focusing on the common problems and solutions that can apply to various brands and models. Power Issues Begin by examining the power source. Ensure that the cord is securely connected for corded tools and that the battery is adequately charged for cordless ones. For persistent issues, inspect the tool's switch for damage or debris. Also, check for loose or frayed wires and replace them as needed. If you're dealing with a cordless tool and it's not turning on, the battery might be the culprit. Before assuming the worst, try charging the battery fully and then attempt to use the tool. Sometimes, a drained battery can give the appearance of a malfunctioning tool. Consider using a different, fully charged battery if this doesn't work. If the device still doesn't work, the issue may be with the tool itself or the charger. Loss Of Power In Power Tools Power loss may result from a worn-out or damaged motor or brushes. Inspect the brushes for signs of wear and tear and replace them if necessary. Clean the air vents and cooling fans to prevent overheating, which can lead to power loss. If your tool still experiences power loss after checking the brushes and vents, it may be due to an issue with the motor. Motors can wear out over time, mainly if the tool is used heavily. In this case, it might be necessary to replace the engine, which is a job best left to professionals unless you're experienced with power tool repair. Overheating Overheating can damage your tool and pose safety risks. Proper maintenance is crucial in such cases. Ensure air vents are clean and unobstructed. If overheating persists, consider shorter usage intervals and allow the tool to cool down between sessions. Regularly check for proper lubrication in moving parts and replace worn-out components. Excessive heat buildup in a power tool often indicates it's being pushed too hard or used beyond its recommended capacity. Pay attention to the tool's specifications and try to match it with the right type of work. If you frequently overheat a device, consider upgrading to a more robust model that can handle the demands of your projects. Vibrations And Noise Vibrations and noise can indicate loose or damaged components. Tighten all screws, bolts, and nuts. Inspect the blade or bit for damage and replace it if necessary. Lubricate moving parts following the manufacturer's recommendations to reduce friction and noise. Excessive vibrations and noise are annoying and can indicate potential safety hazards. Loose parts in power tools can lead to accidents or damage to the tool. Regularly inspect your tool for loose fasteners and tighten them as needed. If you notice unusual vibrations or noise persisting after this, it's advisable to have the device checked by a professional technician. Battery Troubles Battery issues can stem from a lack of use, overcharging, or a faulty battery. Always follow proper charging and storage guidelines from the user manual. If battery performance remains subpar, consider investing in a replacement battery. Batteries, especially rechargeable ones, have a finite lifespan. Over time, they can lose their ability to hold a charge effectively. If your cordless tool's battery life has significantly decreased, it may be time to invest in a new battery pack. Make sure to recycle old batteries properly, as they can be hazardous to the environment. Blade/Bit Issues In Power Tools Dull or damaged blades/bits can hamper performance. Sharpen or replace them as needed. Ensure you're using the appropriate type of blade/bit for the material at hand, as using the right one can lead to efficiency and damage. The blade or bit's quality and sharpness directly impact your power tool's performance. When you notice a decrease in cutting or drilling efficiency, it's time to inspect and maintain these essential components. Regularly sharpen blades or replace them if they're excessively worn or damaged. Also, be mindful of the material you're working with, as using the wrong type of blade or bit can result in subpar performance and even safety hazards. Trigger Sticking Disassemble the tool's handle and clean the trigger mechanism. Lubricate moving parts with a manufacturer-recommended lubricant. If the problem persists, consult your user manual or contact the manufacturer's customer support. A sticking trigger can be a frustrating issue, and it can also be a safety concern. Before attempting any repair, ensure the tool is disconnected from its power source. Disassemble the handle carefully and clean the trigger mechanism. Lubricate any moving parts as recommended in the user manual. If the issue persists, consult the manufacturer's customer support or take the tool to a professional repair service. Conclusion These tips are not limited to RYOBI tools; they apply to various power tool brands and models. Always refer to your user manual for specific guidance and safety precautions. Safety should be your top priority when troubleshooting and repairing power tools. Read Also: Home Warranty Plans: How To Choose The Right One We Buy Houses Companies Saving Homeowners From Foreclosure Top Fixer-Upper Improvement Ideas That Make A Huge Impact

READ MOREDetails
Night Vision Weapon Sight

What To Look For In A Night Vision Weapon Sight?

Most operations performed by the tactical members of Military & Law Enforcement are done in a low, failing, or altered light. Night vision weapons sight offer the high ability to set up the target, motivate & shoot with a pinpoint at an accurate point across the long distance during the night. As we have noticed from the pointers we are going to mention below, Several considerations are there to bear in mind when choosing the right type of night vision sights, and it relies on certain requirements or the kind of operations they may deploy. Here is the list of some parameters and a proper guide to consider while deciding or picking up a weapon sight as given below: Things To Look For In A Night Vision Weapon Sight When choosing a night vision weapon sight, a set of features need to be looked upon. Some of those features include – Resolution The soldiers or the tactical teams need to confirm that they are sighting the right target. That’s why it’s important to check the resolution of the night vision sight weapon they are getting. The resolution stands for the amount of detail someone can get through the 12-weapon sight. The measurement unit for resolution here is lp/mm (line pairs per millimeter) When considering the resolution, it’s important to note what works best for the tactical team. Here are a few resolutions and the levels of their capacity – 640 x 480: Here’s a good resolution to help the team identify the target and ready a shot. 1280:  this resolution is the best for providing exceptional image quality and target. 384 x 288: If you are going for this resolution instead, this will only provide basic thermal imaging. It’s good enough to understand if there’s a target in the place or not. Optics Quality And Electronics: The optics quality plays a huge role no matter whether it is a thermal sight or weapon sight as it hampers the performance at the top. 0 The weapon sight is a perfect combination of top-notch quality, fast optics, latest generation, and infra-red sensitivity that offer high resolution, a wider FoV, and clear vision to the operator that allows improving the device’s capability. Probably, the size, specs, and resolution of the device are the important ones and judge the quality of the device perfectly. Zoom & Magnification: The idea of choosing the maximum magnification when it comes to choosing a weapon sight, but the better one is the low magnification usually. Higher magnification results in a smaller view, and a weapon device with 4x magnification have-it-all. Thus, weapon sight is recommended. Image intensifier tubes: I2 tubes are accountable for the light amplification rather than anI2 sight. Across all years, I2 tubes are advanced and better than Generation 1 or 2 to all the newest Gen 2+ as well as three tubes. These tubes are produced by a handful of companies across the globe and the labels are different in each one. The most advanced versions of I2tubes are Gen 2+ and Gen3 responsible for a clear vision in low light, which will be measured as SNR and Ip/mm for resolution of the modern weapon sight as available on www.defendandcary.com. Weapon sight range: For tactical use, weapon sights are mounted on snipers, rifles, carbines, and LMGs with a primary motive to set up, aim, obtain, and shoot at a target during the conditions of low visibility or types of special missions. Generally, they ought to be chosen to complement an effective variety of weapons that will be used in the future. If the weapon sights have the longest ranges, then it results in larger, more expensive, heavier, and not optimal at all. Ergonomics control and easy to use: Weapon sights are too easy to use anytime and ought to be exposed to all controls while adjusting for magnification, windage, and elevation. Here’s an important point of consideration if you are getting a night vision weapon sight. Typically, it shouldn’t be a problem if you are using a tripod to aim and shoot on a still target. But, if you have to do a lot of moving around with the night vision weapon, you need something lightweight. But, it’s also important to consider that the night vision sight that is lightweight will have lesser magnification. Also, since we are talking about ergonomics, the lens size is also something we must talk about. If you have a large-sized lens, the FOV ( field of view) will become narrow. With a shorter lens, you have a wider FOV but a shorter distance. So, it’s important to first note what you need in the night vision weapon sight. Additional Factors To Consider While all the different parameters explained above are important, there are other parameters as well. You can go much deeper with your points of consideration when choosing the perfect night vision weapon sight. Mounting: one of the things to consider is whether you can mount the night visitation weapon sight on the weapon or not. Spectral Range: the range of light this weapon sight can detect is also another important area you need to consider. Display Resolution: if the display resolution isn’t up to the mark, the users won't get the right output. Field of View: It’s important to consider the field of view of the weapon's sight vision. Start-Up Time: The sight should also get ready quickly. When considering a night vision weapon sight, the start and off time are also important to consider. Wrapping Up: In the end, you need to make sure that all weapons work in a better way, and also, these pointers are covered under the same. These are the main things to take into account. First, it’s best to understand the type of operation you need the night vision weapon sight for. When it comes to imaging sights, the weapon-mounted night vision sights are the best. They are also the most waterproof ones to use. However, there are different other types of weapons sights, each serving a unique purpose. Hopefully, you found this article useful. Do share your feedback about the type of weapon sight that you think is the best. Read Also: What is an Airsoft Gun? Everything You Need To Know About Concealed Carry Holsters Not Sure How to Keep Gun Safe at Home? These Tips Work! 5 Must need Accessories for a Firearm Owner    

READ MOREDetails

Five Essential Kinds of Gear to Prepare before Going to Shooting Ranges

So you’ve just bought a gun and are itching to try it out in your nearest shooting range. Before you go full-on Rambo, you may want to inspect your gear first to ensure you have everything you need. You could be missing a few pieces of essential equipment. While most shooting ranges have gun shops, their merchandise usually comes at a premium. It’s cheaper and better to take your own gear with you. Not only will you save a significant amount of money, but you also won’t be forced to practice with equipment previously used by strangers. Read also: What Is An Airsoft Gun? If it’s your first time going to the range, chances are you only have a few ideas as to what you should bring aside from your gun. As a pro tip, here are some of the equipment you need when going to a shooting range. 1. Lots and Lots of Ammo : Prepare your ammo to get the most of your time in the range. Gun shops in ranges tend to mark up their ammo prices, so it’s more frugal to buy bullets outside the range. Generally, it’s a good idea to bring more ammo than you need. The thrill of shooting can make one eager for another round, and the next thing you know, you’ll have gone through your ammo supply like as if it were water. Thus, buy a lot of ammo in advance, buy .22 ammo in bulk, buy 9mms, buy all the ammo you need. 2. Eye and Ear Protection : Gunshots are extremely loud. Normal fire, even with low-caliber handguns, can reach 140 decibels. That’s enough to cause permanent hearing loss. Compare that to an idling bulldozer (idling, not in active use), which has a loudness of around 85 decibels, a noise level that can damage the ears if it continuously penetrates the ears. By contrast, a single gunshot is enough to cause hearing loss. That’s why every shooter needs some form of ear protection. They can be earplugs or noise-canceling earmuffs. The eyes are other related and equally vulnerable part. There are a lot of reasons for wearing protective eyewear when in the range. One is that the spent gunpowder can enter and burn the eyes, potentially causing permanent damage. To include a set of shooting glasses or goggles with your shooting gear. 3. Binoculars or Spotting Scope : It’s no fun shooting if you can’t confirm a hit, and it’s dangerous to walk to your target if there are other people practicing. You’ll either need a binocular or a spotting scope to check your target, especially if it’s placed at a distance. There are pros and cons between binoculars and spotting scopes. But they generally have the same use. What to bring depends on your personal preference. 4. Shooting Targets : Shooting ranges frown upon plinking, which is using improvised materials like tin cans and bottles for target practice. One reason is that they can shatter and spread, making it a headache to clean up and remove them from the range. Thus, it’s common etiquette to use standard targets, like paper bullseye targets for new shooters. All ranges sell standard targets, but like with ammo, they come at a premium. It’s cheaper to buy targets from outside. You can even print your own paper targets. If you want to spice it up a bit for more fun, you can try different types of targets. Some shops sell targets that explode into chalk or dust when hit; others have spinning targets for those seeking a challenge. 5. Maintenance Tools : Nothing kills a good time at the range than a gun getting jammed does. If your gun ever breaks down on you, don’t let it end your day. Get your tools and fix it. Some folks at the range can even help you out. But repairs aren’t possible if you didn’t take your tools along with you. That’s why you should always take your gun maintenance tools with you whenever you’re going to the range. Are You All Set and Geared Up? Going to a shooting range can be intimidating, especially for first-timers. Even seasoned shooters can forget to take a few items to the range. Just remember to include these five in your shooting gear, and you’re sure to have a blast at the range.  

READ MOREDetails