How to Brew the Best Beer with an Electric Brew System

Published on: 30 June 2022 Last Updated on: 19 February 2025
Electric Brew System

So you’ve decided on joining the ranks of America’s finest craft brewers and create your very own handcrafted, completely original product from the ground up. Good for you! It’s a big first step to take for any small business or venture, especially when it comes to the intricate and detail-intensive process of brewing alcohol for consumption.

Obviously a lot goes into making beer, but even more goes into making a good one. Think about the last six or seven glasses or cans you’ve drank and really decide if any of them actually hit the spot, quenched your thirst, or tickled your pallet. Probably not. That’s because most commercial alcohol is absolutely garbage compared to even the smallest craft brewery’s offering, these days.

Alcohol has been fermented and drunk for recreational, medicinal, and religious purposes since the literal beginning of recorded time. The early cavemen gathered grain, fruit, vegetables, and other food in large clay jars and let them ferment under the hot sun for days or weeks until delectable nectar was produced from the slurry. Click here if you want to know more about the history of beer: https://en.wikipedia.org/wiki/History_of_beer

However, in modern times, the process has gotten a bit more complicated; and for good reason. Health and safety standards take precedence in food and alcohol-making facilities as these areas are prime for bacteria outbreaks like e-coli, swine flu, etc. Because of our advances in science, we’ve never before had facilities as safe and compliant in history as the ones that exist in most large-scale and craft brew houses alike.

But enough about the grandiose stage stuff. We’re here to focus on the approachable, beginner’s stages, and “I’m interested but kind of nervous and scared” level of commitment in the process. Don’t worry, though. This is where absolutely everyone starts, so there’s no shame in being nervous. You want to impress your friends and clients, not gross them out!

Brewing

Brewing in 5 Steps

  1. The Dream
  2. The Equipment
  3. The Ingredients
  4. The Staff
  5. The Process

1. The Dream

If you’re not starting here then you’re not doing it right. You should be passionate about brewing and you should have the dream always in your heart and at the front of your mind. It’s an intense, life-consuming process and should be respected.

Outside of that, creating alcohol is in essence creating drugs. Not only is alcohol a drug, it’s one of the most dangerous drugs in the world. Follow this link for strategies on how to avoid impaired driving. You can both enjoy your business and also ensure the safety of your clientele, especially if you have a tasting room or area.

Most people give up after this stage once they get to the next step. If that’s true for you then maybe creating your own alcohol was never truly in the cards for you. Everyone has their own destiny and you’ll find yours eventually.
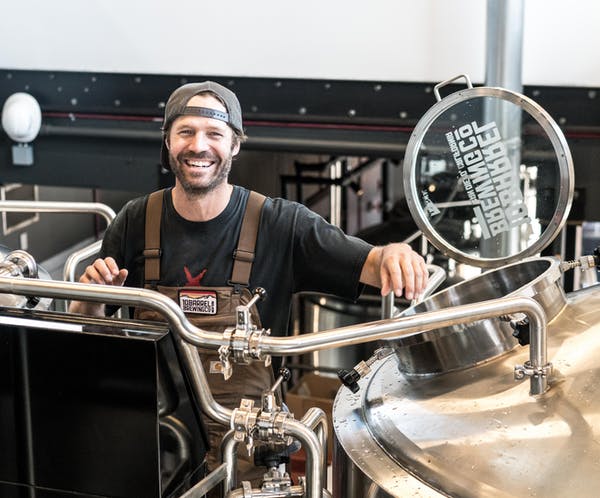
2. The Equipment

Now here’s where things get tricky. Here is where you’ll need to decide on the style and scale of your establishment. Is this a small, homey-style craft brewery with a few barrels at a time? Or is this the kind of place you see expanding into a factory setting with metal tanks, electrical monitoring equipment, and automated machinery?

Depending on what state you live in there are different permitting requirements for creating your own food and alcohol from your home or small business for the purposes of human consumption. Call your local county clerk’s office for more information and make sure to check the federal regulations on the sale of alcohol.

For larger, more industrial projects, you’re going to need a lot more than permits. You’re going to need large scale infrastructure or machinery like what ABS Commercial deals with. Brew masters all over the country have their preferred methods, but everyone needs to be using certified, food-grade surfaces, machinery, and materials for their production.

3. The Ingredients

Here’s where the game gets fun and interesting. This stage should be the whole reason you’re doing this to begin with. Perhaps you’ve had one-too-many glasses of beer that tastes like old dishwater rung out of a used rag into a cold glass, or maybe you’re just craving a profile that doesn’t exist to your knowledge in the general market.

For some easy, small batch stuff, check out these home brew recipes and see if there’s something you’d like to try out. They’re perfect for beginners. Otherwise, all you need to do to start is simply Google a base-profile beer you want to create. Is it a lager, an ale, an IPA, etc.? Once you’ve got the base figured out, you can start playing with things like your own ingredients.

Ideas and recommendations: try cinnamon and apple in a batch for a nice, Christmas-style beer that’s sure to appease the masses. You could also try pumpkin and nutmeg for another holiday-inspired alcoholic beverage that’s sure to delight.

4. The Staff

Once you’ve gotten to this stage, it’s time to decide the scale of the help you’ll need. Is this the sort of process you think you’ll be able to take care of yourself or is it something you’ll need to outsource some help from. Most breweries and alcohol businesses have teams of people working round the clock as most of the machinery is sensitive and dangerous, and thus shouldn’t be left unattended.

If you’re planning on hiring and training a small staff, legally you will be required to pay them and establish your business as a corporation. This opens up a whole different can of worms that can only be figured out depending on what the state’s laws that you are in are. Unfortunately the United States differs greatly from state-to-state on these issues, further confusing the matter.

5. The Process

The process can be long and difficult, even for professionals in the industry. Every new type of beverage will be a different and new process for the team, or you, to learn. Remember, yeast is a living thing and can be temperamental. You and your team need to respect it for the life that it creates.

The Brewers Association of America has an up-to-date list of safety tips and guidelines to follow in your taproom or brewpub. These things need to be followed in order to ensure the safety of not only you and your team, but your clients and the public as well.

Craft breweries are springing up everywhere and the market is opening up for new entrepreneurs every day, so don’t miss out on the achievable opportunity of making a name for yourself in the beer world and start today!

Additionals:

Content Rally wrapped around an online publication where you can publish your own intellectuals. It is a publishing platform designed to make great stories by content creators. This is your era, your place to be online. So come forward share your views, thoughts and ideas via Content Rally.

View all posts

Leave a Reply

Your email address will not be published. Required fields are marked *

Related

beer drinking

7 Modern Day Beer Drinking Etiquettes You Should Know

Imagine a pub setting in the earlier days. Beer served in a pint glass with packets of greasy peanuts and a jukebox playing music in the background. In recent years, the scene has changed. Now, you have hipster, craft ale, and gastropubs that are dominating the arena. The common misconception of beer is that it's fairly straightforward. There's nothing sophisticated about the taste since the main goal is to get drunk. However, beer brewing is an art in itself. Artisan brewers made it their life's mission to change the way beer is viewed and consumed. From simple, large beer pints, beer is now better served in unique beer glassware. Sampling beer is a big part of beer culture now. One reason for this is the myriad of flavors that are available in the market today. Your grandfather simply didn't have the luxury of options when it came to beer or glassware! With the pub culture constantly changing, what should you know when it comes to beer drinking etiquette? Here are seven beer-drinking rules for most modern-day pubs: Make Sure Everyone Has Their Beer Before proposing a toast, make sure that everyone has their beer ready. Whether they are holding a can, small unique beer glassware, or bottle, make sure that everybody has a drink in their hand. Say No to Warm Beer “Thou shalt not offer warm beer.” The drinker can’t appreciate the aroma and taste if the beer is not served at the right temperature, which is between 3 to 5 degrees Celsius. Make sure to keep the beer chilled before serving. Be Choosy with The Glass It’s also discouraged to pour the beer in any glass. Each type of alcohol requires the right glass to enhance the flavor. While some of these glasses may look great, a beer would look out of place in a champagne glass. Most beer drinkers know what kind of beer glass is appropriate to enjoy the aroma and taste of the beer. Be a gracious host and choose the right glass for the beer. Keep the Foam Never scrape the beer foam away. The foam keeps the taste of the beer. And as you chug it down, let the beer head touch your tongue. You can enjoy the flavor better when you do that. Don’t Order Beer for Someone Else Beers have different flavors and characteristics. In the same vein, beer drinkers have different tastes. So let others order their beer out of respect for their preferences. Let them decide the flavor they want. Never Pour Beer in A Frozen Glass In the same manner, don’t accept beer in a frozen glass. While beers taste best when chilled, it’s the beer that needs chilling not the beer glass. Freezing the glass kills flavor so you or your guest will not enjoy the taste. Don’t Blindly Follow the Crowd You drink beer for the aroma, taste, and experience. Don't succumb to peer pressure by blindly ordering what everybody else is drinking. If you want your beer sweet, light, or soft, go for it! Unless, of course, somebody else is picking up the tab. Keep these rules in mind the next time you drink with your friends or the next time you host a party at your home. Also, if you have been using beer pints, get rid of them and order your beer glasses today at Cheers All. Enjoy shopping with their extensive beer glass collection that will leave you in awe. Read Also: The Best Red Wine That Suits Your Taste The Advantages And Disadvantages Of Non-Alcoholic Spirits

READ MOREDetails
Blackheads

Top 4 Natural Combination for You to Eliminate Blackheads

Having a bright glowing and flawless skin is one short way to bring you confidence when communicating with others. But let’s face it; it is a very difficult task since our skin is exposed to many pollutants, dirt, sunlight and countless other harmful factors. One common skin problem to be named is blackheads which are annoying and potentially stressful to deal with. Many people resort to cleaning strips to pull out those annoying blackheads, but they also bear the risk of irritated or dried skin, not to mention the fact that these products are pricey and painful to remove. In this article, we provide some natural ways you can try to get rid of blackheads. One common feature of these formulas is that they all use all-around, simple, natural and safe ingredients. 1. Egg White Mask Egg white, also called glair gained its popularity as number one blackheads remover thanks to its ability to wipe off dirt, dead skin cells. Plus, egg white can visibly tighten your pores and whiten your skin tone. How to use: Prepare an egg white, add 1 teaspoon of honey for better moisture. Apply one thin layer of egg white to your face, place a strip of tissue paper to your face. Allow it to dry completely then gently peel the mask. The peeling will pull out the blackheads. If you want a thicker mask, apply the second and third layer using the same method. The key point is to let it dry properly. 2. Turmeric and Mint The benefit of turmeric to blackheads removal can be attributed to its powerful antibiotics, antiseptic and anti-inflammatory properties. It can easily absorb excess oil, eliminate dead skin cells and brighten the tone; while mint can soothe the skin with its cooling effect. How to use: Make a mixture of 2 teaspoon of turmeric powder and 3 teaspoons of mint juice to create a paste. Apply the mixture and keep it on for 15-20 minutes before rinsing your face with water. Perform twice a week for best result. 3. DIY Peel off Mask with Clay As it turns out, those expensive peeling masks they sell out there are not hard to make. You can totally make yourself a peeling mask to get rid of blackheads with some charcoal powder and glue. This mask can sweep away all the dirt and impurities that block your pores and dry out excessive oil. How to make: Mix one tablespoon of activated charcoal powder with enough glue to make a thick yet spreadable paste. Open the pores by dabbing with a warm cloth in your face about 1 to 2 minutes. Apply the paste on blackhead affected areas. Let it dry completely and slowly peel off the mask. 4. Baking Soda This versatile ingredient never fails to surprise us. The antiseptic quality not only makes it an excellent exfoliant that can sweep away all the dead skin cells and impurities that cause blackheads. It is also a great tool to neutralize the pH of the skin. How to use: Make a paste from baking soda and some water. Apply the mixture on your face and let it dry for about 15 minutes before rinsing with water. Perform this formula once or twice a week, you will find those ugly blackheads disappear in no time. 5. Lemon and salt Lemon deserves a spot in this list because it can remove the deepest blackheads. The acid citric in lemon makes it a good exfoliant and brighten the skin tone by burning the topmost layer of skin cells; while salt which antibacterial properties help fight against germs and bacteria worsening the situation. How to use: Mix ½ teaspoon of lemon juice, 1 tablespoon of sea salt and 1 teaspoon of honey. Use this mixture to massage your face, and then wash with cool water. It is safe to perform this action twice a week. The change you see is incredible. However, don’t forget to apply sunblock every day. Read also: Top 7 Superfoods For Healthy Skin And Hair 5 Protein Enriched Food To Improve Mental Health Top 4 Natural Combination for You to Eliminate Blackheads (Infographics)  

READ MOREDetails
Baked Chicken Thighs Recipe

Garlic Butter Baked Chicken Thighs Recipe

These days, all the love goes to boneless skinless chicken breasts. Maybe because they cook quickly, they are healthy and they are cheap. Baked Chicken Thigh Recipe is very delicious. How about making a case for skin-on bone-in chicken thighs, because honestly, they are all-around better. Thighs are better because they contain more fat and as you know fatter means more flavor. Skin-on together with dark meat is a bit more extra fat, which makes a huge difference in the flavor. Is there really any delicacy more delicious than a crispy chicken skin? Chicken thighs are not difficult in cooking, but compared to chicken breasts, they need a little more style especially if you want to bake them. Just follow the below simple rules and you will never have to sit through a single boring chicken dinner. Baked Chicken Thigh Recipe Procedure You Need To Follow  Pat the chicken thighs dry: This easy procedure makes a big difference when going through a garlic butter baked chicken thigh recipe because while baking, moisture forms steam that will provide you pale, flabby skin rather than delicious golden skin. Pick up a couple of paper towels and dab the thighs on each side. Let the chicken thighs come to room temperature: Placing out your chicken thighs to reach room temperature delivers huge things as the end result. Basically, if you bake your chicken cold, the outside cooks quicker than the inside which is colder, and the outside will be overcooked by the time the piece at the center reaches up to room temperature. Basically, it is simple to overcook chicken thighs when they are cold, therefore forming dry meat. The process does not take long, so you do not need to worry. Chicken thighs are quite tiny, so they will only take about thirty minutes to arrive at room temp. If you take them out at a similar same time as you preheat the oven, you will be good to go! Generously season the thighs: In a baked chicken thigh recipe, the thighs are better when seasoned generously. Season each side using salt and remember to not season the inside. While the thigh cooks, the salt will dissolve its way inside it, thus entirely flavoring every piece. Salt assists the meat in maintaining its moisture, making the thighs more juicy and plumper. Garlic Butter Baked Chicken Thigh RecipeIngredients One unsalted butter maintained at room temperature One lemon zest Ground black pepper Five minced cloves garlic Kosher salt One tablespoon freshly chopped parsley, for garnish One tablespoon fresh thyme leaves One lb. quartered baby potatoes Three lb. bone-in, skin-on chicken thighs One lemon, slit into rounds Garlic Butter Baked Chicken Thigh RecipeDirections: Preheat your oven up to 425 degrees and pat the chicken thighs dry using a paper towel. Season the meat using pepper and salt. Stir thyme, lemon zest, garlic, and butter together inside a medium bowl. Rub the butter mixture on the chicken thighs. Put chicken thighs, potatoes and lemon rounds inside a 9"-x-13" baking dish. Bake the thighs until it registers 160°F on an instant-read thermometer, about thirty-five minutes. Read Also: 7 Surprising Benefits Of Alkaline Foods 6 Tips To Improve Your Cooking Overnight 10 Best Protein Shake Recipes For Weight Loss

READ MOREDetails