Published on: 04 May 2020
Last Updated on: 23 January 2023
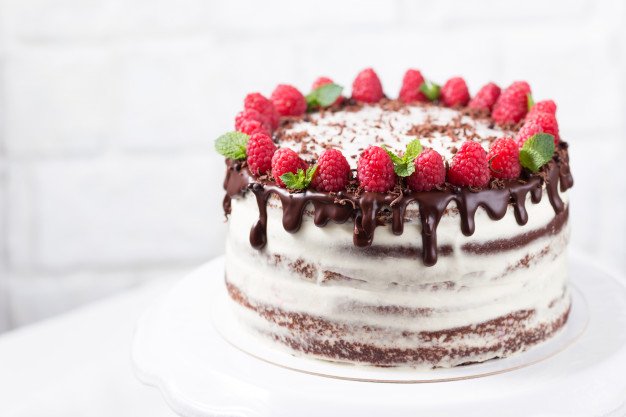
Whether you make cakes for friends and family or run a business supplying cakes for celebrations, you’ll know how much work goes into making each and every one of your creations. That’s why it’s so important to package your cakes in a way that keeps them in perfect condition, so they can be taken home by the customer or delivered to a venue without getting squashed or the decorations getting ruined. Here are some tips to help you properly pack your cakes.
Here are The Best Ways Cake Makers Can Pack Their Cakes:
1. Use cake boxes
Those who are serious about running a cake business should consider looking for wholesale cake boxes, which are a good way of packing up your treats. You need to ensure you get the right size box for the best results. A box that is too big will mean the cake can move around and get damaged, but you should leave a little extra space to be able to take the cake in and out of the box.
Also, consider the kind of products you’re selling and what type of box would work best. For example, you can buy boxes for cupcakes, individual slices, and even wedge-shaped boxes for bakeries that offer takeaways.
Presentation is key when it comes to cakes. If you’re selling cakes that are given as gifts, choose boxes with windows so the product can be seen, and consider using decorative touches such as bows.
2. Secure cakes for transport
It’s also important to make sure cakes are secure when you pack them, as they are likely to be transported in a car or carried around. You should use a cake board, which can be decorated nicely for a professional finish, as this will stop the cake from rattling round in the box.
3. Transport cakes carefully
If you are delivering the cake yourself, here are some ways you can keep it looking good:
Never stack a tiered cake before you put it in your car or van – put each tier in separate boxes then stack at the venue
Place the box on a flat surface, for example, in the boot of your car
Make sure there aren’t any other objects in the boot that could squash your cake
Use a non-slip surface such as a yoga mat underneath the cake box
Drive carefully and avoid sudden braking
4. Finish off the cake box with decorations
While a plain cake box is nice and neat and professional, you may also want to add some decorative touches, especially if you’re making themed seasonal cakes. For example, during the Christmas period, you could add a red bow or sprig of holly, or during the wedding season, you could add a trim of lace. This will just finish off the presentation and make sure it looks special.
When it comes to making cakes, presentation is everything, so it’s worth spending a little more to get high-quality boxes and ensuring things like cake boards are used, so when the cake arrives at the customer’s home, everything is perfect.
Mashum Mollah is the feature writer of Search Engine Magazine and an SEO Analyst at Real Wealth Business. Over the last 3 years, He has successfully developed and implemented online marketing, SEO, and conversion campaigns for 50+ businesses of all sizes. He is the co-founder of Social Media Magazine.
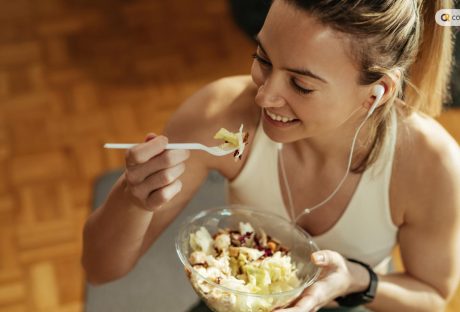
When you are into bodybuilding, your primary goal is to build muscles through weightlifting and proper nutrition. Bulking is a part of the bodybuilding process. However, bulking requires proper nutrition along with weightlifting. You need to consume the best bulking foods to ensure the right nutrition.
In this article, you will learn about the best bulking foods. Here, this article will explain the key nutrients bulking nutrients and the best protein sources.
Apart from that, you will also learn about the best fat and carbohydrate sources useful for bulking. Finally, you will also get some tips for effective bulking. Hence, to learn more, read on to the end of the article.
Why Is Bulking Integral To Bodybuilding?
Generally, bodybuilding involves two phases: bulking and cutting. In the former, the goal is to gain weight and build muscles, while the latter consists in reducing body fat.
Basically, bulking is a dietary process where you consume excess calories for muscle growth and weight gain. In fact, it is a common approach that athletes and bodybuilders use to increase their strength and muscle mass.
Hence, bulking refers to an increase in calories that your body consumes when it is in the process of intense weight training.
It is the stage where you gain muscles in your body. Here, you have to consume more calories than your body needs. However, you do it for a set period of time (4-6 months).
The extra calories that you consume works as a necessary fuel for muscle growth. Moreover, it provides strength to your body through weight training.
Best Bulking Foods: A General Overview
In bulking, your focus should be to give your body more energy than it consumes, thus creating a calorie surplus.
Meanwhile, this surplus creates extra energy, with the help of which your body creates muscle mass. Moreover, this energy helps you repair damaged tissues and fuel intense workouts.
Actually, bulking is one of the most important aspects of muscle growth. This is because if you build muscles, you must provide your body with enough energy. This way, it can build and repair damaged muscle tissues after your workout.
However, just because you are bulking, it does not mean that you have to consume as much food as possible. In fact, you must choose the best bulking foods and count your macronutrients. This way, you can support your muscle growth and minimize fat gain.
Key Nutrients For Bulking
If you want to achieve a clean bulk, you have to make smart food choices. In fact, if your choice of food is poor, it will lead to “dirty bulking.” As a result, you will end up with a lot of accumulated fat and minimal muscle gain.
In fact, in healthy bulking, you must consume quality foods and minimize your fat gains. This is because your goal is to maximize your muscle gain and ensure proper metabolism.
When bulking, you must focus on protein, carbohydrates, and healthy fats. Here is a breakdown of each nutrient you need for muscle gain:
Proteins
The importance of protein in muscle growth and repair is the highest. This is because proteins are the building blocks of muscles. Hence, in your bulking phase, aim to have a higher protein intake.
Consume 1g of protein for each pound of your body weight. For example, if your body weight is 180 lbs, consume 180 grams of protein each day when you are bulking.
Some good sources of lean protein include lean meats, eggs, poultry, fish, dairy products, lentils, beans, etc.
Carbohydrates
Carbohydrates help you in providing energy for intense workouts. Also, it helps create a bulk in the muscles. Basically, carbs replenish the glycogen inside your muscles.
However, when you are bulking, take 1.5 grams of carbs for 1 lb of your weight. For example, if your body weight is 180 lbs, consume 250-270 grams of carbs daily when you are bulking.
When choosing carbs for bulking, focus on consuming complex carbohydrates. These include brown rice, whole grains, fruits, sweet potatoes, and vegetables.
Fats
Healthy fats are necessary for overall health and hormone production. Apart from that, it also helps in nutrient absorption. Hence, to consume healthy fats, you can include sources like nuts, seeds, avocados, olive oil, fatty fish, etc.
Best Protein Sources For Bulking
The following are some of the best protein sources when you are in your bulking phase:
Lean Meats: Some good sources of protein are chicken or turkey. This is because they have less saturated fat than red meat. For instance, you will get 18-25 grams of protein from 100 grams of chicken breast.
Dairy Products: Generally, Greek yogurt, cottage cheese, and milk have high protein and high calories. Hence, they help you to build muscles faster. Apart from that, cottage cheese helps you in muscle recovery and growth due to its slow and steady dissolution.
Fish and Seafood: Fishes like salmon, tuna, and shrimp are high in protein and healthy fat. Hence, you can consider consuming them from time to time.
Eggs: Eggs are a good and fast-acting source of lean protein. Also, it contains healthy cholesterol. However, do not consume the egg yolk (yellow part) more than 2 in a day as it will increase cholesterol in your body. Meanwhile, you can consume multiple egg whites of boiled eggs in a single day. In fact, this is a good source of lean protein.
Plant-Based Proteins: Plant-based proteins are lean and healthy at the same time. Some good sources of such protein are beans, lentils, tofu, and tempeh.
Protein Supplements: If you eat too much, you will feel bloated at the end of the day. Hence, you need protein supplements that will help you supplement the shortage of protein that you consume in a day. Some examples of protein supplements are whey protein, casein protein, and plant-based protein powders.
Best Carbohydrate Sources For Bulking
Here are some of the best bulking foods for carbohydrates that will help you during the bulking phase:
Sweet Potatoes: a great post-workout snack that contains nutrients and fibers. Also, it will help you restore glycogen levels in your body.
Fruits: Different types of fruits come with various nutrients and carbohydrates. Apart from that, fruits also add antioxidants to your body. For instance, a good fruit option to consume after a workout is a banana.
Whole Grains: You can find whole-grain bread and pasta helping you consume complex carbs. Generally, they contain more vitamins, fiber, and minerals. Apart from that, you can also choose brown rice to get good-quality carbs.
Legumes and Quinoa: Quinoa, beans, and lentils are excellent sources of carbohydrates.
Best Fat Sources For Bulking
Here are some of the best bulking foods for healthy fats that you can use during your bulking phase:
Nuts and Seeds: Some essential and healthy sources of fats are almonds, chia seeds, walnuts, and flaxseeds.
Oils: For instance, coconut oil, olive oil, and avocado oil are great additions when considering fat for your diet. Hence, try to use coconut oil and olive oil in your cooking. This way, you can increase healthy fats and additional calories.
Avocados: Avocadoes are rich in healthy fats and nutrients. Basically, they contain monounsaturated fatty acids that add healthy calories and fat to your diet. Also, it is a source of antioxidants and vitamin E.
Fatty Fish: Salmon, mackerel, and sardines are fatty fishes that help you remain healthy and achieve clean bulk. Also, a large dose of omega-3 fatty acids, can improve your joints and cardiovascular health.
Dairy: Full-fat yogurt and cheese help your muscle restore glycogen stores. This helps more in the muscle-building process.
Tips For Effective Bulking
The following are some of the major tips for effective bulking:
Meal Frequency: Eating multiple times a day is important to ensure a good flow of nutrients and faster metabolism. Hence, make sure to eat small multiple times throughout the day.
Caloric Surplus: Always count your calories and your nutrients. For instance, if you see a caloric surplus to support muscle growth, you will have more energy for intense workouts and repairing damaged tissues.
Hydration: Since you are working out and eating a lot, you must stay hydrated. This will support overall health and performance.
Consistency: When you are in your bulking phase, be consistent with your diet and workout. Moreover, make sure to adjust your Intake. For instance, you can tweak calorie and nutrient intake based on progress and goals.
Common Mistakes To Avoid
To ensure efficient bulking, here are some common mistakes you must avoid:
Do not eat too much quickly, as it will get difficult to cut later on.
Make sure there is not a big gap between the two meals.
Getting ample rest will not be helpful for your muscles. Basically, your muscles need to get rest for growth. Hence, it would help if you got enough sleep when you are working out regularly.
Do cardio at least once a week. This helps you increase your appetite and helps you break down your calories faster.
Summing Up
Now you know the best bulking foods to help you grow your muscles and gain muscle weight. However, your nutrient intake and workout must go hand in hand. Only then will you get your desired results.
Do you have more suggestions on the best bulking foods to consume? Please share your ideas and opinions in the comments section below.
Read Also:
From Gym To Workplace: A Complete Guide To Lead A Healthy Lifestyle
What Are the 5 Components of Fitness? – Let’s Find Out
8 Home Gym Systems You’ll Want To Try Out
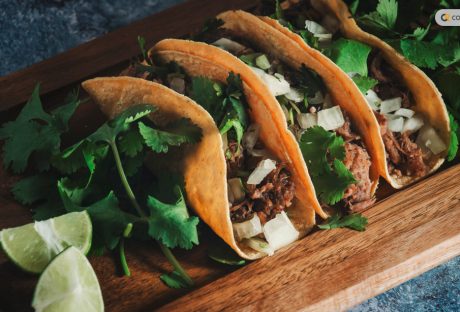
Mexican food is famous for its spices and flavors.
However, many people are confused about whether they can include Mexican food in a healthy lifestyle or not. Actually, there are plenty of misconceptions about Mexican cuisine.
In fact, healthy Mexican food options are many, and you can easily include certain dishes into your balanced diet.
In this article, you will learn about various healthy Mexican food options to include in your balanced diet. Apart from that, you will also get to know the health benefits of each item.
Moreover, this article will also explain why people commonly misunderstand Mexican food as unhealthy. Hence, to learn more, read on to the end of the article.
A General Overview of Healthy Mexican Cuisine
The Mexican cuisine is famous for its rich flavors, diverse ingredients, and cultural significance. Hence, there are multiple healthy food options available as well.
Actually, a lot of Mexican food has a lot to teach us about nutrition. In fact, apart from the staple food items, there are quite a lot of additional factors to consider.
For example, there are some special healthy Mexican ingredients, including pumpkin, chia seeds, cactus, etc., which are quite popular among health-conscious people.
Apart from that, you will find a lot of vegetables in Mexican food. These include tomatoes, avocados, bell peppers, chili peppers, etc.
Hence, there is never a shortage of vitamins, minerals, and fibers. Additionally, many traditional Mexican food items include lean protein sources, like chicken, beans, and fish. Basically, you can use them as excellent options to maintain a healthy diet.
Why Is Mexican Food Often Misunderstood As Unhealthy?
Generally, the misconceptions about Mexican foods are due to the way many restaurants and food stalls prepare them in the US. For instance, you will frequently find high amounts of cream, cheese, and fried items on top of ingredients.
The following are some of the major reasons why many people misunderstand Mexican food as unhealthy:
Many Mexican restaurants in the US offer dishes that have large portions of sour cream, cheese, and deep-fried items. Hence, this increases your calorie count after consumption.
In many cases, Mexican dishes do not use lard. In fact, there are many healthier cooking options.
Restaurants generally serve large portion sizes of Mexican dishes. So, obviously, they contribute to overeating. Therefore, if you want to eat healthy at a Mexican restaurant, you might face difficulties.
When it comes to healthier food options, there are many dishes you can consider – legumes, grilled meats, vegetables, whole grains, etc. Basically, when you want to have Mexican food, you must make healthy choices.
For example, you must choose lean protein, grilled items, and control cheese and cream portions. This way, you can enjoy Mexican food even when you are maintaining a balanced diet.
15 Healthy Mexican Food Items And Their Health Benefits
The following are some of the best and healthy Mexican food items for you if you are on a balanced diet:
1. Beans
This is a staple source of fiber, protein, and iron for Mexicans. Apart from that, it also helps you to stay full.
Additionally, if you consume it on a regular basis, it will help you lower your cholesterol levels. Moreover, beans also help you to boost your heart health and help to maintain blood sugar levels.
2. Guacamole
The major health benefit of guacamole comes from avocados. Basically, avocadoes are monounsaturated fat and hence help to lower bad cholesterol. Also, since avocados have high fiber, it helps you to maintain your digestive tract.
Additionally, there is also no risk of colon cancer. Moreover, avocados also ensure eye health and skin health and prevent inflammation.
3. Salsa
Salsa is a good addition to your diet. With it, you can add more flavor to your food without adding excess sugar, salt, or additional fat.
Apart from that, it also contains various vitamins and minerals. In addition to that, salsa is also high in fiber and antioxidants. As a result, it will help you to remove harmful toxins from your body.
4. Grilled Chicken
Grilled chicken is a lean and high-quality protein option. Hence, it can help you to build and repair your muscle tissues.
Apart from that, it will help you to maintain a healthy immune system and facilitate muscle growth. In addition to that, lean chicken also improves your bone health and helps you fight infection in your body.
5. Sweet Potato and Black Bean Quesadillas
Basically, sweet potatoes are full of nutritional qualities. For instance, it is rich in fiber, vitamins, and minerals. Apart from that, they also add a little sweetness to the quesadillas.
As a result, it complements the earthy flavor of black beans. On the other hand, black beans come with a good amount of protein.
6. Vegetarian Enchiladas
When you make enchiladas with whole grain tortillas, vegetables, beans, and lean protein, you can control the calories. Basically, enchiladas offer you a balance of fiber, protein, and other essential nutrients.
Moreover, you can also boost your protein and vitamin intake if you want. However, one tortilla of vegetarian enchiladas contains 580 calories (approx.).
7. Brown Rice
Brown rice is primarily a whole grain which will help you reduce the risk of stroke or any other heart diseases. This is because of the presence of magnesium.
Moreover, it also helps in controlling blood sugar since brown rice has a lower glycemic index than white rice. Furthermore, vitamins and minerals also ensure a healthy immune system.
8. Grilled Vegetables
Grilled vegetables are filled with vitamins and minerals. Also, when you grill vegetables, it reduces the amount of fat in vegetables. As a result, it becomes easier to digest. Moreover, with grilling, you can bring out the natural sweetness of vegetables.
9. Cilantro Lime Cauliflower Rice
If you want a low-calorie, grain-free carb, the cilantro lime cauliflower rice is a better option. Moreover, the recipe is vegan and gluten-free.
This can be a great alternative to traditional white rice. Apart from that, due to the presence of vitamins and minerals, it is a healthy Mexican food option.
10. Corn on the Cob
Due to its high fiber content, corn helps in maintaining bowel health and helps in preventing constipation.
Apart from that, corn also contains antioxidants, folate, potassium, and plant sterols. This will help you to lower cholesterol levels. Apart from that, it will also help you to support heart health.
11. Zucchini
Zucchini has high fiber and water content. This helps in the digestion process and reduces the risk of constipation. Additionally, since zucchini is low in carbs, it also helps you to regulate blood sugar levels.
12. Fresh Tomatoes
Generally, tomatoes contain potassium, which helps to regular blood pressure in the body. Moreover, since they release antioxidants, they can also help prevent cancer.
Additionally, if you consume a tomato-rich diet, you can ensure better digestion. Furthermore, you will have an improved immune system.
13. Shrimp Ceviche
Shrimp ceviche is healthy because it is high in protein content. Apart from that, it also comes with a good number of vitamins and minerals.
As a result, it not only helps to build muscles but also ensures bone health, immunity, and nerve function. Moreover, if you are following a low-calorie diet to lose weight, shrimp ceviche is a healthy Mexican food option.
14. Pozole
It is a stew that is rich in protein. Here, for each cup you consume, you get 18 grams of protein. Additionally, it also contains fiber.
However, you can add more fiber to it by adding vegetables like avocado or cabbage. This will help you to digest your food better.
15. Chicken And Vegetable Tacos
Since chicken is a lean source of protein, it provides amino acids for muscle building. Moreover, it is also a good source of vitamin B. On the other hand, vegetables are rich in fiber, vitamins, and minerals. Hence, with a combination of chicken and vegetables, you can have a healthy diet.
Try Your Favorite Healthy Mexican Food Now
Hence, you can see that there are plenty of healthy Mexican food options. However, this is not common in the US because most Mexican restaurants in this country serve Mexican food items with a lot of oil, spices, and cream.
Hence, it looks unhealthy to common people. Therefore, if you want to have a healthy Mexican diet, you have a lot of choices.
Do you have more suggestions on healthy Mexican food items? Please share your ideas and opinions in the comments section below.
Read Also:
Eat Your Heart Out A List Of Restaurants That Are Open On Christmas
7 Benefits Of Eating Protein Rich Snacks
Tips to Lose Weight Naturally
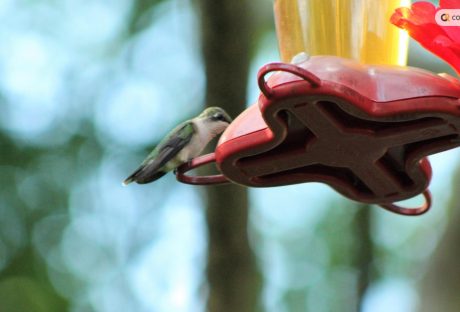
It always feels good to see a hummingbird in your garden. To see more of them in your garden, you can keep hummingbird nectar/food in a jar in your garden.
In fact, with a simple hummingbird food recipe, you can make their lives easier. All you need is a few simple ingredients.
In this article, you will learn how to make hummingbird food with simple ingredients. Apart from that, this article also discusses hummingbird nutrition and the steps you can take to set up your bird feeder.
Finally, you will learn how to attract more hummingbirds to your garden. Hence, to learn more, read on to the end of the article.
Understanding Hummingbird Nutrition
There are a variety of food options a hummingbird needs to meet its nutrition. Although they are one of the smallest birds in the world, they burn a lot of their calories by fluttering their tiny wings. Generally, a hummingbird flutters its wings 90 beats per second to maintain its momentum.
Hence, you can see that hummingbirds need to eat a lot. In fact, to satisfy their daily calorie requirements, these birds even consume half of their body weight. Basically, they feed on bugs and nectar every 10-15 minutes. Also, they visit 1000-2000 flowers per day.
The following are the things that hummingbirds feed on:
1. Nectar: This is the primary food source of hummingbirds. Basically, it consists of 20% sugar and 80% water. Generally, hummingbirds get their nectar from cardinal flowers, bee balm, salvia, and petunias.
2. Insects: For their protein needs, hummingbirds feed on insects. This is also a source of fat and salt for hummingbirds. In fact, nectar does not provide those nutrients. Basically, hummingbirds hunt insects by finding them from flowers, leaves, or tree bark. Sometimes, they also attack insects midair or pluck them from sticky saps.
3. Spiders: Generally, hummingbirds also feed on spiders for protein. However, they are generally small spiders.
4. Tree Sap: When the amount of nectar is low, hummingbirds drink tree sap from tree bark. Generally, woodpeckers drill wells on tree barks to get tree saps.
Hummingbird Food Recipe
Basically, by offering hummingbird nectar, you can help them with their post-workout meal.
Hence, follow the below hummingbird food recipe to make nectar:
Ingredients
The following are the ingredients you need to make hummingbird nectar:
Filtered Water: 4 Cups
Regular White Sugar: 1 Cup (If possible, use organic sugar for the recipe)
Procedure
Here are the steps you must follow to make hummingbird nectar:
1. Get four cups of water in a saucepan and bring it to a boil.
2. Once the water reaches the boiling point, take the water off the heat. Add sugar to the boiling water.
3. Stir the mixture until the sugar completely dissolves in the water.
4. The nectar is ready. Now, you must let the nectar cool completely.
5. Get a hummingbird feeder and place the mixture inside the feeder. Make sure to hang the hummingbird feeder outside (in your garden) to attract hummingbirds.
Essential Factors To Consider
The following are some of the major factors you must consider before you start making nectar with the hummingbird food recipe:
Make sure to change the nectar every four days with a new nectar. This will ensure that the nectar is fresh. Also, remember not to use food coloring in the nectar. Let it be as natural as you can.
Regularly check the bird feeder every time you change the nectar inside it. Look whether there is a gray mold inside the feeder base or not. Also, check whether any ant has crawled inside the feeder to consume sugar water.
If you check any dirt or ants inside the hummingbird feeder, throw the bird food away. Basically, it is not good for the birds to drink dirty nectar. In fact, there is a high chance that the birds will not feed on the nectar anyway.
To clean the feeder, rinse it with warm water. Then, put some bleach into the water inside. This will allow you to clean the feeder with a brush easily.
Once you clean the feeder, rinse it thoroughly with fresh water. Moreover, allow the water to dry.
After that, please fill up the feeder with food and place it outside.
Enhancing The Hummingbird Experience
Enhancing the hummingbird experience, you can attract more hummingbirds to your garden/balcony/porch.
The following are some of the steps you must follow if you want to enhance the hummingbird experience:
1. Change The Food Regularly
Make sure to change the food every 3-4 days. This is because nectar spoils quite fast, especially when the weather is hot. In fact, if the weather is above 30 degrees Celsius, make sure to change the nectar regularly. Also, make sure to keep the feeder in the shade. This will prevent the sugar from fermenting.
2. Use The Right Amount Of Ingredient
You can make hummingbird nectar with just water and sugar. However, you must ensure the water-to-sugar ratio is 4:1. Then, boil the water and add the sugar. After that, mix them until the mixture is perfect. After that, you must let the mixture cool before you add it to the feeder.
3. Avoid Honey
Generally, honey can ferment fast and becomes a great place for mold to grow quickly. Moreover, they can be sticky and get on the feathers of hummingbirds. Hence, it is better to avoid honey.
4. Add Another Feeder
Although hummingbirds are small and cute, they can be incredibly aggressive and territorial when confronting other hummingbirds. Hence, to avoid conflict among hummingbirds, it is better to add a second feeder if you want to ensure every hummingbird gets the opportunity to have the nectar.
5. Clean The Feeders
Make sure to clean the feeders every week. Moreover, if you have hot weather around, clean the feeders twice every week. While you clean, ensure the vinegar-to-water ratio is 1:4. Also, rinse the feeders well before you refill. Furthermore, while rinsing, do not use dish soap. This is because they can leave harmful residue on the feeders.
Setting Up Your Hummingbird Feeder
The following are the steps you must take to set up your hummingbird feeder:
Make the nectar by checking the hummingbird food recipe in the previous section.
Hang the feeder in your garden at the start of spring. Generally, hummingbirds migrate through your area in the spring. Also, leave the feeder up after the hummingbirds migrate in the fall.
Hang the feeder in a place where it is visible for hummingbirds to see. Also, make sure to place the feeder in an area where you can have a good look.
Clean the nectar every 3-4 days and clean the feeder thoroughly each time you change the nectar. This way, you can prevent dust and mold from getting into the feeder.
Sugar water is safe and helpful for hummingbirds. Basically, it is quite similar to the natural nectar that hummingbirds find in flowers.
If you want to make your own feeder, use an old spice container, bottle, mason jar, or wine bottle.
Attracting More Hummingbirds
Here are some of the major ways you can attract hummingbirds to your garden:
1. Offer Hummingbird Food/Nectar: If you make sugar water and keep it in a feeder in your garden, you can attract many hummingbirds in your area. To make this item, you can see the hummingbird food recipe above.
2. Keep Water: Generally, hummingbirds also like to bathe. Hence, you can keep some water in a pot/jar to allow hummingbirds to access water for bathing and drinking.
3. Perch Area: You can leave small branches and sticks on your trees and plants. This will allow hummingbirds to perch on.
4. Plant Flowers: There is no alternative to pure nectar that flowers have. Hence, this attracts hummingbirds a lot. For instance, you can use hummingbird sage, honeysuckle, bee balm, and more. Also, you can add other types of flowers to your garden.
5. Keep Other Animals Out: If you have a pet cat/dog in your home, keep them inside. This is because they can bother hummingbirds or even end up killing them.
6. Avoid Pesticides: Pesticides are repellants for hummingbirds as well as insects. Hence, make sure not to use them or use them minimally.
Make Your Hummingbird Food Now
Now, you can make hummingbird nectar with the help of the hummingbird food recipe in the article. However, make sure to change the food every 3-4 days. Also, ensure to clean the jar every time you change the food. This way, you can ensure clean food for hummingbirds.
Do you have more suggestions on how to make hummingbird food? Please share your ideas and opinions in the comments section below.
Additional Resources:
Is Indian Food Healthy? – Major Nutritional Benefits of Indian Cuisine
15 Healthy Mexican Food Items With Immense Health Benefits
The Importance Of Proper Cutting When Preparing Meals