8 Baking Essentials For The Home Cook

Published on: 26 July 2022 Last Updated on: 31 October 2022
Baking

Getting into baking as a home cook can be pretty daunting, especially when faced with a plethora of options and tons of confusing advice.

You might just be standing in the store staring at the different products wondering whether you’re supposed to buy a mixing bowl or a souffle dish. Believe us; you wouldn’t want to end up with drawers full of unuseful stuff.

So if you are a newbie looking for some advice for your baking journey, besides taking up some bakery courses, continue to read on and learn about some essentials you need.

List of Top 8 Lucrative Baking Equipment For Home Cook

1 – Measuring Cups

Measuring Cups

This one might be a no-brainer, but many people skip the basics when starting with baking.

If you’re wondering why you can’t save some money by just using the same cup to measure everything – well, there are different measuring cups for wet and dry ingredients. Mixing those will make accurate measuring difficult and mess up your whole recipe.

For sticky ingredients like honey and peanut butter, you can look into adjustable measuring cups, which are super convenient and prevent product waste.

2 – Spatulas

Spatulas

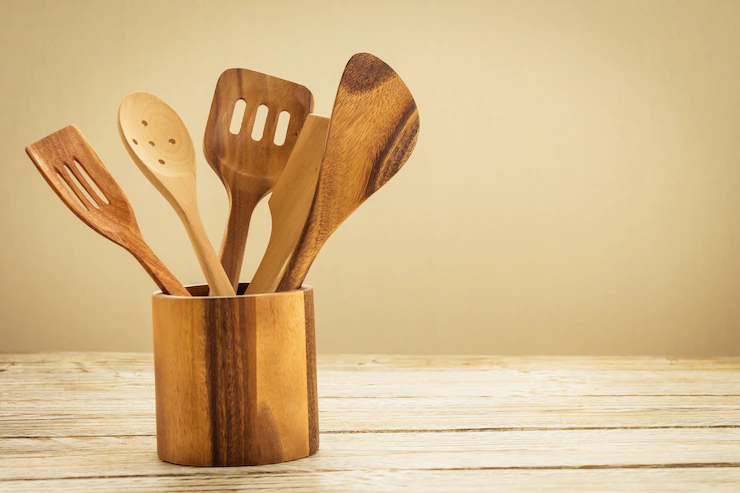
There are varying uses of spatulas when it comes to baking.

Whether scraping, stirring, or lathering, you’ll find yourself repeatedly reaching for this handy tool. All the options might confuse you, so let’s narrow it down to the basics. Ideally, you need spatulas that are: a) flexible and b) heat resistant.

Even within those categories, there are many different options you can explore. So if you want to get into more detail, you can find out about the different kinds of spatulas here.

As for between wooden and rubber spatulas, we’d recommend rubber. There are specific rubber spatulas that are meant to be heat resistant. So you get the best of both worlds. But if you are looking for more of an eco-friendly option, wooden spatulas are also great.

3 – Baking Pans

Baking Pans

Pans work as the base on which you start building up your dish, there is no baking without pans, and you can’t get away with just getting one and calling it a day. But that doesn’t mean you have to start buying every type of pan you can get your hands on. So again, we’ll focus on the essentials.

Muffin tins are a must and versatile since they can be used to make much more than the usual cupcakes. You can start with a smaller 6-cup pan or go up to 12 if you work with the smaller goodies more often.

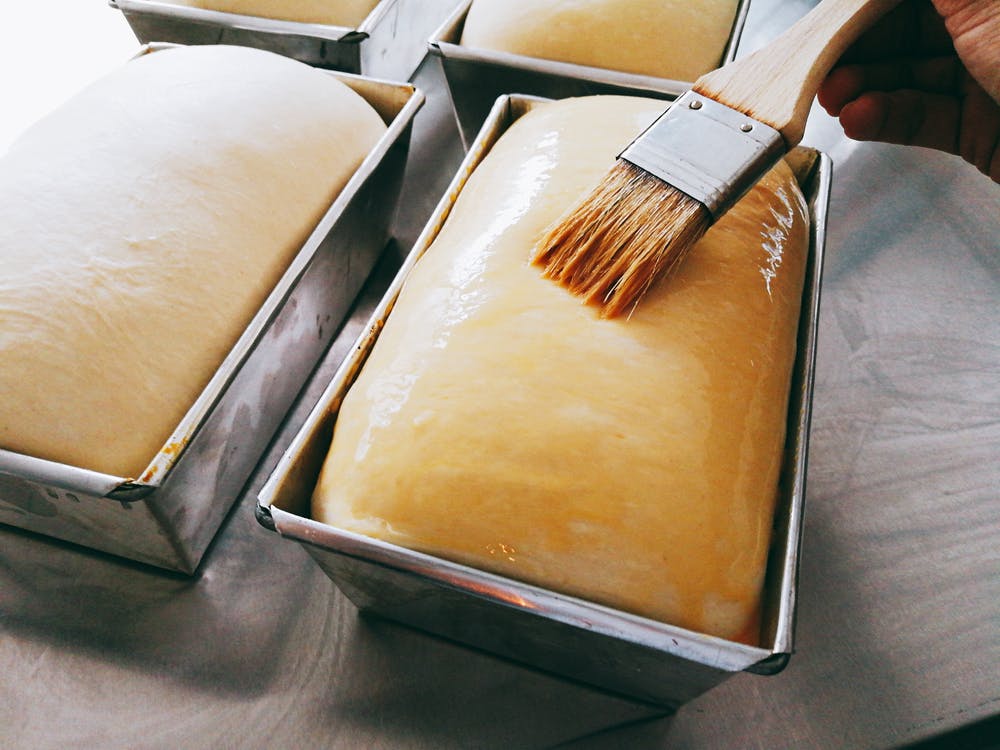
Loaf tins are also very important to have, and it’s a purchase you won’t regret. The possibilities are endless, and we recommend going for a non-stick one on the lighter side.

4 – Mixers

 Mixers

Mixers are tools that can be a bit heavy on your wallet, but it’s definitely worth the price. Many consider stand mixers the best option and have many pros: they’re fast, thorough, and all-around convenient. The con? They can’t fit into everyone’s budget.

If a stand mixer doesn’t fit your budget, handheld mixers, specifically electric ones, are certainly not a bad choice. They don’t hurt your finances and are easy to store as well. While not as fast as stand mixers, they still get the job done fairly quickly.

5 – Kitchen Scales

 Kitchen Scales

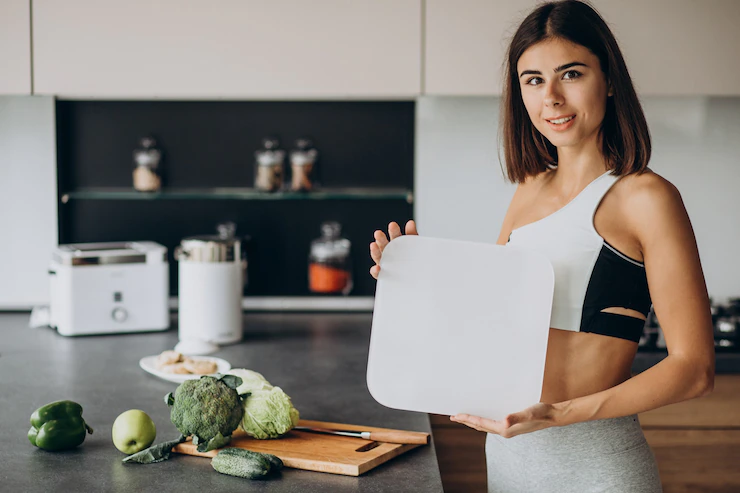
Regarding accuracy, there is no tool better than digital kitchen scales. While you can certainly go for manual ones, the accuracy won’t quite compare to digital ones. Measuring weight proves to be much more accurate than measuring volume.

Whether your top priority is appearance or taste, accurate measurements are essential for both. It also cuts down a lot of the work you have to put in after you’re done baking by decreasing the number of dishes used. If you’re an experienced baker, a digital scale is a must since almost all professional bakers use it.

6 – Pastry Brushes

Pastry Brushes

Pastry brushes might seem like something you should skip over, but they’re an essential item, and you’ll regret not getting one. Pastry brushes are best used for tasks that require a more delicate touch, like glazing, coating with melted butter, and greasing pans.

They can even be used to clean your dish by brushing off excess coating. They’re fairly easy to use and don’t make a mess, as the bristle soaks up liquids.
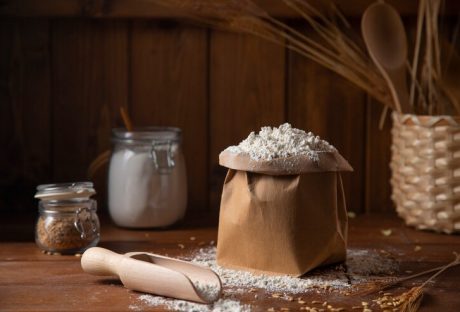
7 – Sifters

Sifters

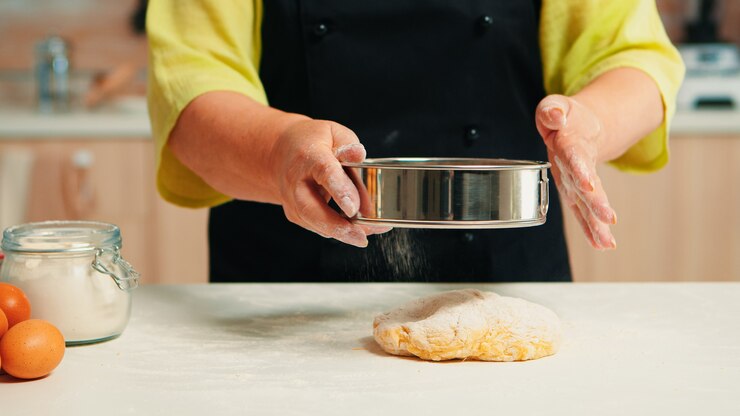
If you’re working with flour and sugar, you need a sifter or a sieve. The fine mesh allows you to sift sugar and flour, which is an important step in making brownies and cakes. Many recipes require your flour to be super fine, and the sifter is the perfect tool for achieving it.

Dusting the tops of cakes or similar baked goods with icing sugar also becomes super easy when you have a sieve. Plus, it’s very affordable and can last for years.

8 – Rolling Pins

Rolling Pins

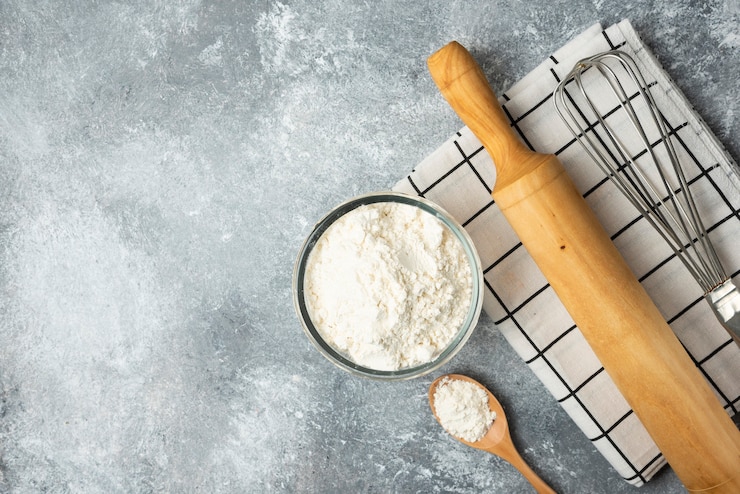
Getting a rolling pin seems fairly straightforward, but a fair amount of options are available for different preferences and types of recipes. Rolling pins with no handles and tapered edges are preferred because they can give you super smooth and even dough.

These are called french style pins. Pins with handles are great for speed since you have better control over your movements. Going for more than one size will be helpful if you work with a lot of icing. Mini pins help when you need to be more careful and work with an intricate design.

When it comes to material, wood is the best way to go since the flour sticks to it, making the process a lot easier.

Conclusion

So here’s our list of baking essentials you need if you’re a home cook! We understand how stressful it can be to be faced with so many options and wanting the best while trying to stay within budget. Still, if you stick to the basics, you’re already equipped for most recipes. You can add to your tools as the need arises, and that’s how you make sure you aren’t getting things that will do nothing but take up space. We hope you found this helpful and happy baking!

Additionals:

Content Rally wrapped around an online publication where you can publish your own intellectuals. It is a publishing platform designed to make great stories by content creators. This is your era, your place to be online. So come forward share your views, thoughts and ideas via Content Rally.

View all posts

Leave a Reply

Your email address will not be published. Required fields are marked *

All Comments

Your article helped me a lot, is there any more related content? Thanks!

Related

Home Cooking

Lift Your Home Cooking: Mysteries From HMD Bar And Grill’s Kitchen

Have you ever wondered how restaurants are able to churn out amazing dish after dish that tastes like it was prepared by a culinary master? The secret is out – professional chefs have tricks up their sleeves that take cooking to the next level. At HMD Bar & Grill, the team works hard behind the scenes using expert techniques and methods to create memorable meals for customers. Take a look at the kitchen masters who shared their cooking secrets with us: hmdbarandgrill.com. In this series, you’ll get an exclusive backstage pass into the kitchen to unlock mysteries behind popular ingredients, explore useful cooking hacks, and pick up skills that will inspire you to become a home cooking hero. Your friends and family won’t believe the dishes you’re able to whip up after learning the pro tips and secrets in these articles. Get ready to lift your home cooking game to new heights! Secrets from the Professional Kitchen Marinate meats for maximum flavor Chefs marinate proteins like steak, chicken, and fish for at least 24 hours to infuse them with complex flavors. Try a tangy citrus marinade, an herbaceous chimichurri, or an Asian-inspired mixture of soy sauce, rice wine, and spices. Sear, then finish in the oven For extra tender and juicy meats with a crisp exterior, our chefs first sear cuts of meat on the stovetop in a hot pan with oil. Then they finish cooking the meat in a moderate oven. This works great for thick pork chops, beef roasts, and whole chickens. Add umami boosters Ingredients like soy sauce, miso, Parmesan cheese, sun-dried tomatoes, and mushrooms enhance the savory umami flavor of dishes. Chefs incorporate umami boosters into sauces, rubs, and marinades to create bold, crave-worthy flavor. Finish with fresh herbs A sprinkle of just-chopped parsley, cilantro, basil or mint adds a burst of freshness and vibrant color. HMD chefs garnish many of their dishes with fresh chopped herbs right before serving. This simple step makes a big impact on flavor and presentation. A touch of sweetness Chefs know that a bit of sugar or fruit can enhance savory and spicy flavors. They’ll add a spoonful of molasses or honey to barbeque sauces, a diced mango to salsa, or a bit of maple syrup to a mustard glaze. Just a touch of sweetness is all you need. Cooking and Presentation Secrets To make your home cooking shine like the pros at HMD Bar & Grill, it's all about technique and presentation. First, master the art of seasoning. Taste as you go and season gradually until flavors pop. For extra flavor boosts, use fresh herbs, citrus zest, or chili peppers. Balancing sweet and savory, spicy and tangy is key. With proteins like steak, chicken, or fish, brush on flavorful sauces or crusts before cooking and garnish artfully after. For example, brush grilled shrimp with garlic herb butter and garnish with lemon wedges and fresh parsley. Elevate side dishes with special touches too. Toss roasted or steamed veggies in browned butter, toasted nuts or breadcrumbs. Or top mashed potatoes with crispy shallots, chives, and cheese. For desserts, focus on height, color, and texture. Layer cakes, stack cookies, or get creative with toppings like crushed candies, chocolate shavings, or whipped cream. With professional techniques and artful presentation, your home cooking will become a masterpiece. Dive into the mysteries of flavor balancing and garnishing to make every bite as stunning as the food at HMD Bar & Grill. Your guests will think you have a secret culinary double life! Insights into HMD Bar & Grill's Kitchen 1. Ingredient selection The quality of ingredients is key. HMD chefs handpick the freshest produce, sustainably sourced meats and seafood, and artisanal cheeses from local providers. At home, choose organic and in-season whenever possible. Premium ingredients make a world of difference in flavor and texture. 2. Balancing flavors A dish should have a balance of flavors - sweet, salty, bitter, sour, and umami (savory). HMD chefs carefully calibrate flavors in each dish. For example, a sweet glaze might balance a bitter vegetable, or a tangy citrus pair nicely with a rich cut of meat. Think about how you can achieve flavor balance and contrast in your own cooking. A squeeze of lemon or lime juice is an easy way to brighten up and balance the flavor of many savory dishes. 3. Presentation How a dish looks is just as important as how it tastes. Here chefs artfully arrange each component on the plate to make an attractive presentation. At home, pay attention to color, texture, and negative space on the plate. A sprinkle of chopped herbs, a swipe of sauce, or an edible garnish can elevate your dish from homestyle to restaurant quality. Presentation is the first impression, so make it count! Following the techniques and tips from the pros in Bar & Grill’s kitchen is sure to make you a better home cook. Experiment with premium ingredients, practice balancing flavors, focus on attractive presentation, and your cooking skills will reach new heights. Your dinner guests will surely be impressed! Elevate Your Culinary Game To elevate your home cooking, start by investing in high-quality ingredients. Fresh, seasonal produce and artisanal ingredients will make a world of difference in flavor and texture. Shop at local farmers' markets or specialty stores for the best options. Learn proper cooking techniques Things like properly searing meat, making pan sauces, and using herbs to garnish can take a dish from good to restaurant quality. Study cooking shows or take a class to master techniques. Get the right tools A good chef’s knife, kitchen shears, immersion blender, and other gadgets designed for home cooks will make cooking more enjoyable and help you achieve professional results. Experiment with different flavors and cuisines Try making dishes from various culinary traditions to expand your repertoire. Combining flavors from different cultures in one dish, known as fusion cooking, is a great way to be creative in the kitchen. Pay attention to the presentation How a dish looks is just as important as how it tastes. Use garnishes, interesting plateware, and thoughtful plating to make your home cooking look polished and appealing. Practice The only way to really improve your cooking skills is to do it often. Try cooking the same dish over and over again. Check out the cooking and serving tips. Over time, the more you work at it, the better your skills will be. High-quality products, cooking methods, proper equipment, attention to detail, and consistency are the keys to professionalism. Your friends and family will be amazed at your power! Conclusion That’s all, friends. The secret behind the delicious food at HMD Bar and Grill is no longer a secret. With expert advice, you can take your home cooking to new heights. Be creative, try new flavors, and don’t be afraid to venture out into the kitchen. Invite your friends to try it. You might make a good home cook! Practice, explore, and enjoy your culinary skills. Read Also: How To Cook Sausage That Tastes Like Heaven 8 Baking Essentials For The Home Cook How To Cook And Eat Frozen Squid

READ MOREDetails
kashkaval cheese

All you need to know about kashkaval cheese

Particularly popular in the Mediterranean and Eastern Europe region, kashkaval is a semi-hard yellow cheese. It derives its name from the Italian cheese “Caciocavolla”. Kashkaval cheese is made from cow’s milk or ewe’s milk. The version made from cow’s milk is called Kashkaval Vitosha. The one made from ewe’s milk is called kashkaval Balkan. There is also a variety that uses a mixture of both of these types of milk. The cheese made from the mixture of these two kinds of milk is called kashkaval Preslav. The different names of kashkaval: Kashkaval is very popular in countries such as Romania, Bulgaria, and Macedonia. This variety of kashkaval cheese is also to be found widely in countries such as Turkey, Hungary, and Croatia. Each country has a different name for this variety of cheese though. While the Turkish refer to this cheese as “Kasra”, the Greeks call it “Kasseri”. The Romanians, on the other hand, call it “Cascaval”. Kashkaval belongs to the pasta filata cheeses. This means that the curd is given a hot bath during the production process. This semi-hard yellow cheese or Kashkaval cheese is allowed to age for a good six months. This lends it a piquant and spicy flavor on the one hand and salty flavor on the other. In taste, it is very similar to the cheddar cheese that is widely popular in the United Kingdom. The Kashkaval cheese is also famously referred to as “the cheddar cheese of the Balkans”. Popular kashkaval recipes: The slightly hard texture of this yellow cheese makes it perfect for grilling and grating. It is thus generously used in salads, pizzas, appetizers, and lasagna. One of the famous Eastern European street food made with the kashkaval cheese is kashkaval pane. It is favored for its portability and thus preferred as an appetizer or served in clubs and bars. It is essentially fried cheese made with simple and easy to find ingredients such as flour, breadcrumbs, and eggs apart from the kashkaval cheese itself. Served hot right off the pan it is known for its crunchy, melty goodness! Another popular Bulgarian recipe made with Kashkaval cheese made in Eastern European homes is the Bulgarian cheese banitza or banitsa that is also served as an appetizer. It is can also be served in the main course alongside other dishes. It is similar to a Greek cheese pie or a Serbian burek. To make this you will need two cups of crumbled kashkaval, 2 eggs beaten, 16 sheets of filo dough, 6 tablespoons of plain yogurt, two sticks of unsalted butter and chopped green onions and sea salt for garnishing. To make this recipe, you will need to combine the cheese, yogurt, and eggs in a large bowl and beat them until they are smooth. The next thing to do is fold one filo sheet in half and brush it with melted butter. Portion out the filling in the sheets making either a cigar-shaped roll or an S-shaped scroll. Remember to fold up the bottom edge first and then roll it up until you are looking at a tight cylindrical shape. Repeat the process with the remaining sheets. Sprinkle with chopped green onions and sea salt if desired and place on a parchment-lined pan. The next thing to do is bake these goodies in a pre-heated oven for about 20 minutes until they are brown and crisp. Serve hot with your favorite wine and your recipe is bound to be a hit among your guests in gathering or with your family when you are gearing up for a fun evening with food and wine! The bottom line is kashkaval is a popular cheese and can be replaced with cheddar for a slightly exotic dish or simply whipped up in an omelet! Read Also: Easy Breakfast Ideas for Type 2 Diabetes Please Pass the Cheese! 7 Awesome Benefits of Cheese

READ MOREDetails
How to harvest potato

How to Harvest Potatoes: A Complete Guide from Planting to Storage 

If there is something that I have learned in life, it is about gardening. Well, almost everything if not all. And if there is one thing that took me some time to master, it was knowing how to harvest potatoes at home!  Potatoes are one of the most versatile and popular vegetables in the world. They can be cooked in many different ways, such as boiled, baked, fried, mashed, or roasted. Moreover, they are also rich in carbohydrates, fiber, vitamin C, potassium, and antioxidants. But how do you grow and harvest your own potatoes at home? You see, potatoes are not like cilantro or other plants. These are tubers.  In this article, I will show you everything you need to know about how to harvest potatoes, from planting to storage. So, if that is something that you are interested in knowing, then I have you covered! Keep on reading this blog till the end to learn more...  How to Plant Potato Seeds or Tubers?  The first step in how to harvest potatoes is to plant them. You can start with either potato seeds or tubers. Potato seeds are small, round, and black, and they are usually sold in packets. Potato tubers are the actual potatoes that you eat, and they have eyes or buds that can sprout new plants. You can buy certified seed potatoes from a nursery or garden center, or use organic potatoes from the grocery store.  Here are some if the steps that you must take to plant them:  Planting Potato Seeds  To plant potato seeds, you need to sow them indoors in pots or trays filled with moist potting soil. Place them in a sunny spot and keep the soil moist but not soggy. The seeds will germinate in about two weeks and produce small green shoots. When the shoots are about 3 inches tall, you can transplant them outdoors in your garden or in containers.  Planting Potato Tubers  To plant potato tubers, you need to cut them into pieces, each with at least one eye. You can do this a few days before planting to let the cut surfaces heal and prevent rotting. Alternatively, you can plant whole small potatoes with several eyes. To prepare the soil, you need to loosen it and add some organic matter, such as compost or manure.   You also need to make sure the soil is well-drained and slightly acidic, with a pH of 5.0 to 6.0. You can use a soil test kit to check the pH level and adjust it with lime or sulfur if needed.  Planting Potato Pieces  To plant the potato pieces, you need to dig a trench about 4 inches deep and 12 inches wide. Place the pieces about 12 inches apart, with the eyes facing up. Cover them with 3 inches of soil and water well. As the plants grow, you need to hill up the soil around them to cover the lower stems and prevent the tubers from being exposed to sunlight, which can turn them green and bitter. You can also mulch the soil with straw, leaves, or grass clippings to retain moisture and suppress weeds.  How to Care for Your Potato Plants?  The second step in how to harvest potatoes is to care for your potato plants. You need to water them regularly, especially during dry spells, to keep the soil moist but not waterlogged. You also need to fertilize them every two weeks with a balanced organic fertilizer, such as fish emulsion or seaweed extract. Also, you can add some wood ash or bone meal to provide extra potassium and phosphorus, which are essential for tuber formation.  You also need to protect your potato plants from pests and diseases, which can reduce your yield and quality. Some of the common potato pests are:  Colorado potato beetles, which are yellow and black striped insects that feed on the leaves and can defoliate the plants. You can handpick them and drop them in a bucket of soapy water, or use an organic insecticide, such as neem oil or pyrethrin.  Potato leafhoppers, which are small, green, winged insects that suck the sap from the leaves and cause them to curl and yellow. You can spray them with a strong jet of water, or use an organic insecticide, such as garlic or hot pepper spray.  Wireworms, which are thin, brown, worm-like larvae that bore into the tubers and cause holes and tunnels. You can trap them with pieces of carrot or potato buried in the soil, or use beneficial nematodes, which are microscopic worms that parasitize and kill the wireworms.  Common Potato Diseases  One of the most common reasons why a potato cannot grow or survive is the diseases. If you were wondering what some of these can be and how to deal with them, I have you covered!  Some of the common potato diseases are:  Late Blight: It is a fungal disease that causes brown spots on the leaves and stems, and black or brown lesions on the tubers. It can spread rapidly and destroy the entire crop. You can prevent it by planting resistant varieties, avoiding overhead watering, and removing any infected plants and tubers. You can also use a fungicide, such as copper or sulfur, as a preventive measure.  Scab: This is a bacterial disease that causes rough, corky patches on the tubers. It does not affect the taste or edibility of the potatoes, but it reduces their appearance and storage quality. You can prevent it by planting resistant varieties, maintaining a slightly acidic soil pH, and avoiding excessive nitrogen fertilization.  Potato Virus Y: Lastly, this is a viral disease that causes mosaic patterns, mottling, or yellowing on the leaves, and misshapen or knobby tubers. It can reduce the yield and quality of the potatoes, and it can be transmitted by aphids or infected seed potatoes. You can prevent it by planting certified virus-free seed potatoes, controlling aphids, and removing any infected plants and tubers.  How to Determine When Your Potatoes Are Ready to Harvest?  The third step in how to harvest potatoes is to determine when they are ready to harvest. This depends on the type and variety of potatoes you planted, and the size and maturity you want. There are two main types of potatoes: early and late. Early potatoes are ready to harvest in about 10 to 12 weeks (about 3 months) after planting, and they produce small to medium-sized tubers that are tender and thin-skinned. They are best for boiling, steaming, or roasting.  Late potatoes are ready to harvest in about 15 to 20 weeks (about 4 and a half months) after planting, and they produce large, starchy tubers that are firm and thick-skinned. They are best for baking, mashing, or frying.  Early Harvesting  To harvest early potatoes, you can start digging them up when the plants begin to flower, or when the lower leaves start to yellow. You can use a garden fork or a spade to gently lift the plants and tubers from the soil, or you can use your hands to feel for the tubers under the soil. You can harvest as many or as few potatoes as you need, and leave the rest in the ground until you are ready to use them. You can also harvest some of the young, tender leaves and stems, which are edible and nutritious.  Late Harvesting  To harvest late potatoes, you need to wait until the plants have died back completely, or until the first frost. This allows the tubers to develop a thicker skin, which helps them store better. You can use a garden fork or a spade to dig up the entire row of plants and tubers, or you can use a potato digger, which is a special tool that lifts and separates the tubers from the soil. You need to be careful not to damage or bruise the tubers, as this can cause rotting or spoilage.  How to Dig Up, Cure, and Store Your Potatoes?  The final step in how to harvest potatoes is to dig up, cure, and store your potatoes. This is important to preserve the quality and shelf life of your potatoes, and to prevent them from sprouting, rotting, or shrinking. Here are the steps to follow:  Digging Up  After digging up your potatoes, you need to brush off any excess soil and remove any damaged, diseased, or green tubers. Do not wash your potatoes, as this can remove the protective skin and invite bacteria and fungi. You can wash them just before cooking or eating them.  Curing  You need to cure your potatoes for about two weeks in a cool, dark, and well-ventilated place, such as a basement, garage, or shed. This allows the skin to harden and heal any minor cuts or bruises and enhances the flavor and texture of the potatoes. The ideal temperature for curing is between 50°F and 60°F, and the ideal humidity is between 80% and 90%. You can spread your potatoes in a single layer on a newspaper, cardboard, or wooden crate, and avoid exposing them to light, which can turn them green and bitter.  Storing  You need to store your potatoes in a cool, dark, and dry place, such as a cellar, pantry, or closet. The ideal temperature for storage is between 40°F and 50°F, and the ideal humidity is between 65% and 70%. You can store your potatoes in paper bags, cardboard boxes, mesh bags, or wooden crates, and check them regularly for any signs of sprouting, rotting, or shriveling. You can also store your potatoes in a root cellar, which is an underground or partially underground structure that maintains a constant temperature and humidity. Additionally, you can also store your potatoes in a clamp, which is a mound of straw, hay, or leaves covered with soil, that insulates and protects the potatoes from frost and rodents.  Wrapping It Up!  If you want to know about how to harvest potatoes, I hope that this blog has been of help to you. However, if there are any other queries related to the same, please feel free to let me know. All that you need to do is scroll down till you reach the bottom of the page. Then leave your comments and suggestions in the box below. And I will be there to answer them all for you! Read Also: How to Harvest Lettuce: A Step-by-Step Guide for Fresh and Crispy Salads Everything You Need To Know About Harvesting Basil!

READ MOREDetails