There are a million types of snacks in the world. Some of them are healthy, some are not. If you are in the process of obtaining a much slimmer figure, then you should probably avoid the unhealthy ones. Of course, once in a while, you can have a bag of potato chips or a chocolate bar. Make sure that this doesn’t a routine. On the other hand, if you need to snack between meals, then you need to focus on healthier snacks so you won’t gain weight. People have become more and more obsessed with Almond Butter Packets.
It radically tastes like almonds. The flavor is appealing to be richer in a nut taste. Some people prefer peanut butter, some prefer almond butter, and many are like me and admire both. If you like almonds, then you’ll most likely become a fan of almond butter for ingredients or just to have as a bite.
Moreover, a healthy snack can be some fruit, rice cakes, granola bars, etc. But have you tried the almond butter packets? People have become more and more obsessed with them, and there’s a reason for it. If you haven’t heard of them, then you should probably go online and discover their tasty secrets. Surely, someone of your surroundings has tasted them. All you need to do is ask. If you want to find out more, then continue reading this article. Before you know it, you will be stacking your pockets with them as well. All you need to do is give them a chance.
Here are some of the reasons why you need to try them:
Delicious Taste
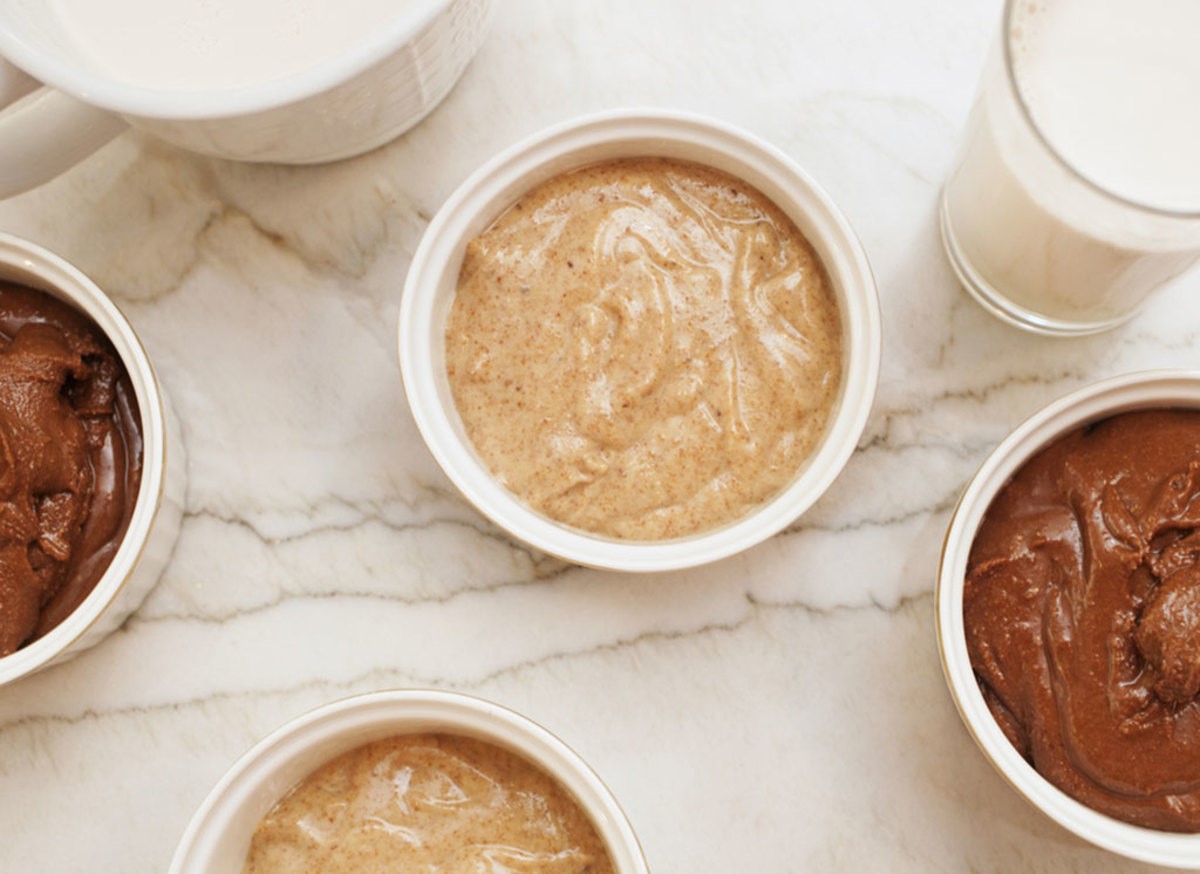
If you love food that tastes more sweet than salty, then these are the packs to go for. They have a creamy texture incorporated with different types of flavors. Some of the flavors are mixed with several ingredients, while others have just one. All you need to do is squeeze the pack and the delicious mixture will appear right away. Taste it and find out if you like them or not. Surely you will! Just make sure to avoid those that might cause you an allergic reaction, because a lot of people are allergic to different types of nuts.
Small Packaging
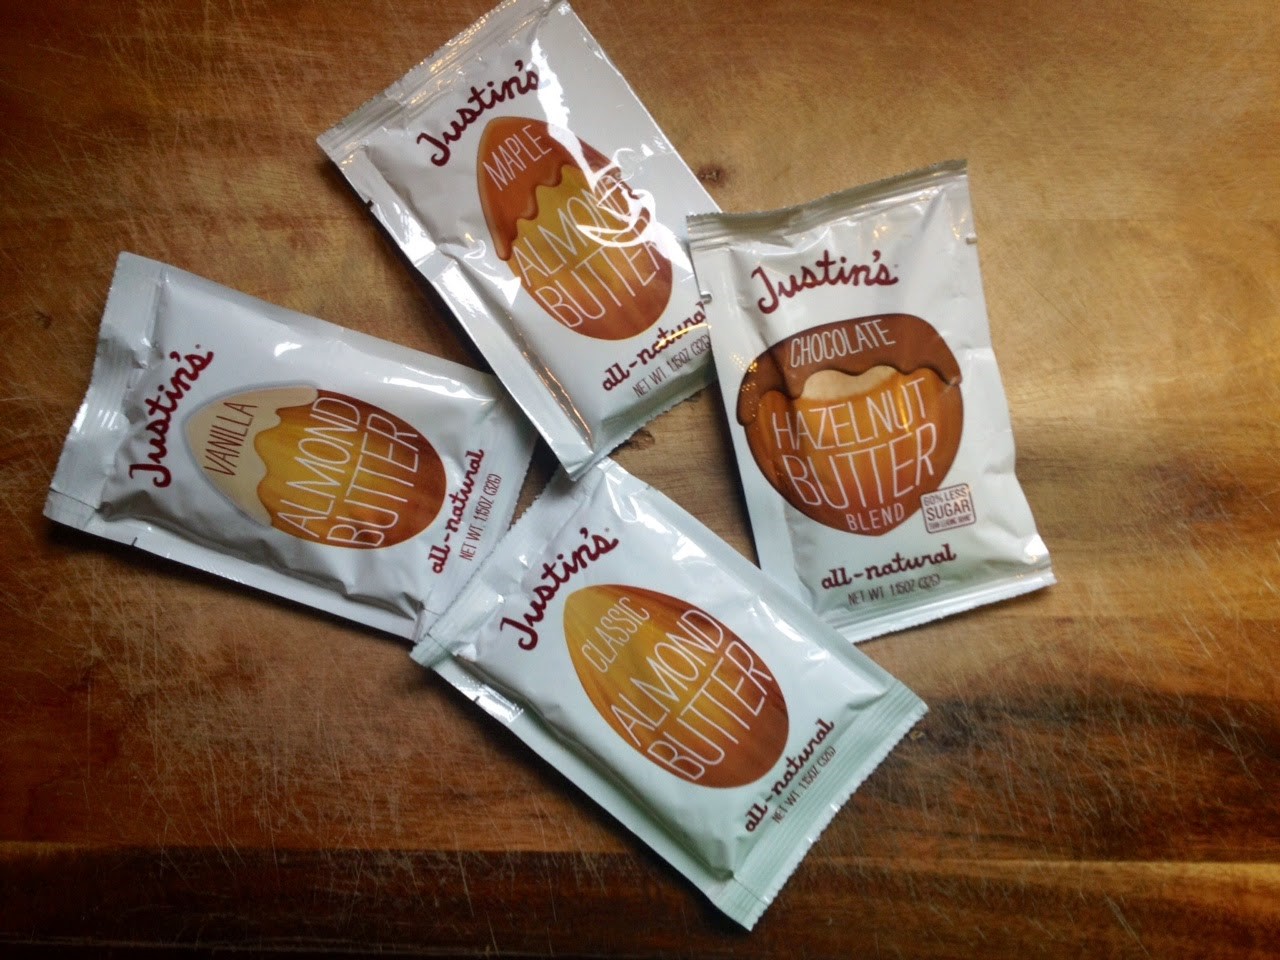
The great thing about these snacks is that they come in small packages. This way, they won’t weigh heavily on you and you can carry them wherever you want. You can place them inside your pocket. Another alternative is to place them in a suitcase for work, rucksack for school, lunchbox for your kids, etc. You don’t have to carry just one, take several with you and enjoy them throughout the day. Therefore, go online and order a stack of them because they are extremely affordable.
Healthy Snacks
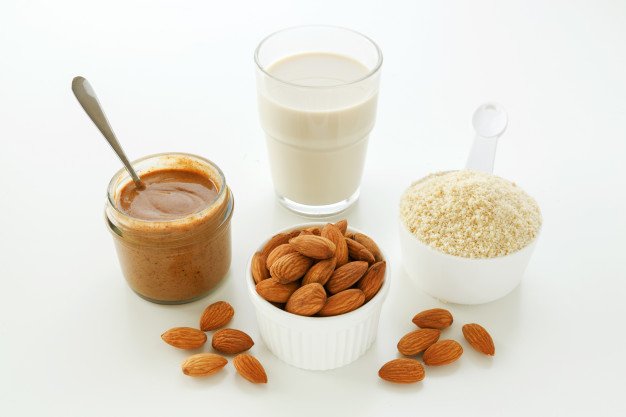
One of the main reasons why people buy them is because they are healthy. They contain all kinds of vitamins, proteins, and fibers that come with each ingredient. Some of them contain eggs as well, and we all know that eggs are filled with protein. You can easily incorporate them into your healthy diet plan. Once you are done with a good workout, you can have one after a meal. You can eat them whenever you want because they will not make you gain weight. Plus, they taste great, so you won’t have to feel guilty about eating so many of them. Read this article to find out more details about the topic.
Almond butter resembles to have gained a cult developing in current years. Not only is it tolerant in taste, but it comes packed with protein, fiber, and healthy fats, vitamin E, potassium and magnesium.
Affordability
If you plan on ordering an entire stack, then the total cost would be somewhere between 19 to 22 dollars. This, of course, depends on which brand sells them and how many there are in a stack. As you can see, you can easily afford them and enjoy a delicious snack along the way. You can also find them in a supermarket. Just make sure to look through the shelves thoroughly. If you don’t like their taste, then you can always turn back to granola bars and rice cakes. But there’s hardly any person that doesn’t love at least on flavor.
You can easily buy Almond Butter packets as it is very cheap in price and enjoy yourself with your family and friends whenever you are hungry or in leisure time. Also, it is very healthy for everyone.
Desserts
Some of the packs you can incorporate in desserts. The almond butter will truly give that unique taste to your brownies or cake. How cool is that? People love almonds; expect those that are allergic to them. But the butter is delicious. You can also check for reviews from other people or recipes so that you can make the best dessert ever.
Content Rally wrapped around an online publication where you can publish your own intellectuals. It is a publishing platform designed to make great stories by content creators. This is your era, your place to be online. So come forward share your views, thoughts and ideas via Content Rally.
If you have been dreaming a lot about sausages lately, I am sure the thought of how to cook sausage has also struck your mind. Well, let me tell you that cooking this tasty, meaty delicacy does not require any top-notch skill. Check out own the grill for additional grilling strategies, guides, and tips on making the perfect grill recipes
To cook sausages perfectly, what one requires is patience. It has been found that people often face many challenges while cooking sausages. These issues can be that while the exterior of the sausages gets cooked, the insides remain raw. You can also StoneFryingPans for more info on cooking.
Also, the sausages might end up being dry, or the casings might split as well. However, I earnestly request you not to worry. Since I am here now, I will guide you to understand and learn every aspect of cooking perfect sausages. You can also visit how-to-boil.com for more information about the same.
What Is A Sausage?
A sausage is a meat product, or to be more specific, a type of forcemeat. It is generally composed of ground meat, such as beef, pork, and even poultry. Some seasonings, herbs, and spices are also added for flavors.
These forcemeats are then enclosed in a casing made of animal intestines or synthetic materials. A huge variety of sausages are available across the world that are native to the places where they are found.
What Are The Different Types Of Sausage?
There is a basic classification of sausages based on a lot of features. From the types of ingredients used to the various cooking procedures, all are taken into consideration while differentiating between sausages.
It can be primarily classified as cooked, fresh, and dry sausages. Sausages also vary according to regional influences. American sausage, Italian sausage, German sausage, and many more sausages have been extremely popular around the world.
Some of these are Cumberland sausage from the UK, Haggis from Scotland, Saucisson and Chipolata from France, Bratwurst sausage from Germany, Chorizo sausage from Spain, Mortadella sausage from Italy, and many more.
Various Ways Of How To Cook Sausage
The best way to cook sausage is to tailor it to the preferences of your taste buds. You would also find sausages that could be eaten raw like the Chorizo. However, most other sausages need to be cooked before consumption.
Whether you want to know how to cook breakfast sausage or some Italian sausage, let me tell you that these can all be cooked in a similar way. Now, with the evolution of modern cookery, many recipes have been developed for cooking sausages. But, here we will focus on the basic methods of sausage cookery:
How To Boil Sausage?
Boiling a sausage is one of the easiest ways to learn how to cook the sausage. If you are thinking boiling a sausage is some very difficult task, then you are wrong. It is as simple and similar as boiling any other food item.
Boiling a sausage will allow the hot water to pierce through the meat and cook the interior part more evenly. It will have a soft, tender texture rather than a crispy one.
Ingredients Required:
Sausages
Water
Salt
Procedure:
Take a saucepan and fill it with enough water.
Increase the heat and bring it to a boil.
With the help of tongs, place the sausages in the saucepan.
Reduce the heat and keep it on simmer.
Add some salt to the water.
For flavoring, you can opt to add some wine, beer, or stock.
Cover the pan with a lid.
Let the sausages cook for about 15-30 minutes, depending on the size.
Remove the lid, take the sausages out and dry them with some paper towel.
How To Grill Sausage?
Grilling is a form of high-temperature cooking that allows the food to get cooked by the application of dry heat. In this method of cooking, the heat might be applied from above, or below, or even from the sides. It is often stated by health professionals that grilling sausage might lead to the formation of potentially hazardous compounds in the food.
However, nothing beats our love for sausages, so you might compromise on your health a bit this time. Grilling the sausages will eventually turn them brownish in color with grill marks on the body.
Ingredients Required:
Sausages
Oil
Salt and pepper
Procedure:
For this cooking method, the most important thing that you need is a griller.
Make sure the temperature is higher on one side while lower on the other.
As the griller gets heated, spill and spread a tablespoon of oil over it.
Use tongs and place the sausage on the hotter side of the grill.
Grill them for a minute or two and cook on both sides to get the marks.
As they acquire a deep-brownish color and start to burn, immediately move them to the cooler side of the grill using tongs.
On this side, cook the sausages slowly for about 10-15 minutes.
When they are done, remove from the grill and sprinkle some salt over.
How To Bake Sausage?
Baking is a great way that can help you learn how to cook sausage in the oven. Baking is also a dry method of cooking that involves the application of high heat. This method makes the sausages taste more interesting than ever.
There are also very few chances of the item getting burnt in an oven. Here, the heat is gradually distributed from the surface to the interiors of the food. A baked sausage often has a crispy texture and appears to be light-brownish in color.
Ingredients Required:
Sausages
Butter
Garlic
Salt and pepper
Fresh herbs
Cheese
Procedure:
Preheat the oven to 350°F.
While the oven is heating, take a baking tray and brush it with a very little amount of butter or oil.
If you want to make it more delicious, you can brush some butter over the sausages and add some chopped garlic to them.
Place the sausages evenly apart on the tray.
Put the filled tray inside the oven.
Let the sausages get cooked for about 30-40 minutes, depending on the size.
You can turn the sausages once in between to get them evenly cooked.
Once they are cooked, take the sausages out.
Sprinkle some freshly chopped herbs and some grated cheese over the sausage.
Final Thoughts
Well, I haven’t seen you cook yet, but I am certain that you have learned about the basics of how to cook sausage after reading this article. Aren’t these methods excessively simple? Yes, I knew you would agree with me.
So when the love for sausage is there, and the grill is on fire, what on earth is stopping you? It is your time to relish such a delectable piece of food.
More Resources:
Cooking Tips: Simple Fundamental Cooking Ideas To Make Food
Smaller Sized Meal Portions for Dogs
How To Start A Food Truck Business And Earn Money From It In 2021
Even though it is acceptable to consume whiskey neat or on the rocks, a whiskey cocktail is a delightful alternative for drinkers of any age, gender, or nationality. Everyone appears to enjoy the classic and contemporary cocktail concoctions that bars and nightclubs serve.
Well-known whiskey cocktail recipes, such as the Old Fashioned, Irish Coffee, and Manhattan will be a delight to recreate at home. And while the list of popular alcoholic beverages is constantly evolving and expanding, there are a few that every skilled bartender should know by heart.
These whiskey cocktail recipes highlight the versatility and quality of whiskey, which wine enthusiasts have enjoyed for several decades. This is the ideal starting point for a home bartender seeking to master whiskey cocktail recipes.
14 Whiskey Cocktail Recipes For Home Bartenders
1. The Old Fashioned
According to cocktail historian David Wondrich, the Old Fashioned is a descendant of the oldest cocktail. In 1806, it was created with a small amount of water, sugar, liquor, and a few dashes of bitters.
2. Whiskey Sours
The Whiskey Sour recipe is a traditional and excellent option. It is a classic because the fruity red wine and smoky-sweet bourbon are perfectly balanced. The sour lemon flavor will complement the whiskey and syrup's sweetness. It would be best to serve it chilled by shaking it with ice cubes. You can also add egg whites to your shaker to create a unique mouthfeel; you may skip it if it's not for you.
3. The Manhattan
In the world of whiskey, a Manhattan is a classic. It's made with a traditional blend of sweet Vermouth, rye whiskey, and bitters. It serves as the basis for many classic whiskey cocktails and is as vital to whiskey as the martini is to gin.
4. Irish Coffee
Original Irish coffee is a delicious way to spice up your coffee after dinner or on a cold winter night. This whiskey cocktail recipe demonstrates that great drinks require little effort and only high-quality ingredients. It's just coffee, Irish whiskey, and brown sugar with freshly whipped cream on top.
5. Vieux Carre
According to wine experts from an Edwards liquor store, the Vieux Carre is a sophisticated whiskey cocktail that combines cognac, sweet Vermouth, and Benedictine. Although it is a New Orleans classic, you do not have to be in the city to appreciate it. Additionally, stick to the recipe to ensure a refined flavor balance.
6. John Collins
This whiskey-based cocktail recipe is an excellent choice for happy hour, consisting of whiskey sour and club soda. After mastering this recipe, you can create any alcoholic beverage you desire.
7. High Ball
A highball is a two-ingredient cocktail that is both refreshing and delicious. Ginger ale pairs well with blended whiskeys, rye whiskeys, and bourbons. It is optional, but you can add club soda to lighten the flavor.
8. Mint Julep
The mint julep, a whiskey drink recipe classic, is one of the most refreshing drinks you will ever taste. It requires fresh mint, sugar, your preferred bourbon, and a muddler. This recipe is so popular that it has inspired numerous julep variations.
9. Whiskey Cobbler
What is the best way to dispose of the fruit in your refrigerator? Make a cobbler with whiskey. Use seasonal fruits to sweeten and garnish your whiskey, then add club soda. You can also choose to drink it straight.
10. Fancy Whiskey Cocktail
This rendition of a classic is delectable and refreshing. This sophisticated whiskey cocktail recipe with orange liqueur, sugar, and bitter is as good as any contemporary recipe and is ideal for mixing whiskey.
11. Algonquin Cocktail
The cocktail Algonquin is an excellent illustration of how whiskey and pineapple can coexist. The dry Vermouth in the tropical whiskey martini combines the two flavors. It is a wonderful way to enjoy summertime meals due to its complex flavor.
12. Whiskey Tonic
All types of soda water are used in simple whiskey cocktail recipes. Dry soda is an excellent choice, particularly when combined with Irish whiskey. On the other hand, tonic water is the most popular.
13. New York Sour
You can enjoy the New Your Sour with bourbon or rye whiskey. This cocktail mimics the whiskey sour by adding fresh lemon juice and simple syrup to the whiskey sour base. The floating red wine elevates the flavor and appearance of this cocktail.
14. Sazerac
Sazerac is a distinct flavor of rye whiskey. Simple ingredients such as sugar, bitters, and anise liquors such as absinthe complement the spiced rye.
Key Takeaway
These recipes can serve as building blocks that you can update, modify, and make your own as you hone your bartending skills at home. Since there is no specific version of any given cocktail, you're free to make a version of your own. Consider all the suggestions above and enjoy your concoctions in the comforts of your home.
Additional:
7 Daring Party Drinks to Try This Winter
Tips to Follow When Ordering Alcohol Online
If there is something that I have learned in life, it is about gardening. Well, almost everything if not all. And if there is one thing that took me some time to master, it was knowing how to harvest potatoes at home!
Potatoes are one of the most versatile and popular vegetables in the world. They can be cooked in many different ways, such as boiled, baked, fried, mashed, or roasted. Moreover, they are also rich in carbohydrates, fiber, vitamin C, potassium, and antioxidants.
But how do you grow and harvest your own potatoes at home? You see, potatoes are not like cilantro or other plants. These are tubers.
In this article, I will show you everything you need to know about how to harvest potatoes, from planting to storage.
So, if that is something that you are interested in knowing, then I have you covered! Keep on reading this blog till the end to learn more...
How to Plant Potato Seeds or Tubers?
The first step in how to harvest potatoes is to plant them. You can start with either potato seeds or tubers. Potato seeds are small, round, and black, and they are usually sold in packets.
Potato tubers are the actual potatoes that you eat, and they have eyes or buds that can sprout new plants.
You can buy certified seed potatoes from a nursery or garden center, or use organic potatoes from the grocery store.
Here are some if the steps that you must take to plant them:
Planting Potato Seeds
To plant potato seeds, you need to sow them indoors in pots or trays filled with moist potting soil.
Place them in a sunny spot and keep the soil moist but not soggy.
The seeds will germinate in about two weeks and produce small green shoots.
When the shoots are about 3 inches tall, you can transplant them outdoors in your garden or in containers.
Planting Potato Tubers
To plant potato tubers, you need to cut them into pieces, each with at least one eye.
You can do this a few days before planting to let the cut surfaces heal and prevent rotting. Alternatively, you can plant whole small potatoes with several eyes.
To prepare the soil, you need to loosen it and add some organic matter, such as compost or manure.
You also need to make sure the soil is well-drained and slightly acidic, with a pH of 5.0 to 6.0.
You can use a soil test kit to check the pH level and adjust it with lime or sulfur if needed.
Planting Potato Pieces
To plant the potato pieces, you need to dig a trench about 4 inches deep and 12 inches wide.
Place the pieces about 12 inches apart, with the eyes facing up.
Cover them with 3 inches of soil and water well.
As the plants grow, you need to hill up the soil around them to cover the lower stems and prevent the tubers from being exposed to sunlight, which can turn them green and bitter.
You can also mulch the soil with straw, leaves, or grass clippings to retain moisture and suppress weeds.
How to Care for Your Potato Plants?
The second step in how to harvest potatoes is to care for your potato plants. You need to water them regularly, especially during dry spells, to keep the soil moist but not waterlogged. You also need to fertilize them every two weeks with a balanced organic fertilizer, such as fish emulsion or seaweed extract. Also, you can add some wood ash or bone meal to provide extra potassium and phosphorus, which are essential for tuber formation.
You also need to protect your potato plants from pests and diseases, which can reduce your yield and quality. Some of the common potato pests are:
Colorado potato beetles, which are yellow and black striped insects that feed on the leaves and can defoliate the plants. You can handpick them and drop them in a bucket of soapy water, or use an organic insecticide, such as neem oil or pyrethrin.
Potato leafhoppers, which are small, green, winged insects that suck the sap from the leaves and cause them to curl and yellow. You can spray them with a strong jet of water, or use an organic insecticide, such as garlic or hot pepper spray.
Wireworms, which are thin, brown, worm-like larvae that bore into the tubers and cause holes and tunnels. You can trap them with pieces of carrot or potato buried in the soil, or use beneficial nematodes, which are microscopic worms that parasitize and kill the wireworms.
Common Potato Diseases
One of the most common reasons why a potato cannot grow or survive is the diseases. If you were wondering what some of these can be and how to deal with them, I have you covered!
Some of the common potato diseases are:
Late Blight: It is a fungal disease that causes brown spots on the leaves and stems, and black or brown lesions on the tubers. It can spread rapidly and destroy the entire crop. You can prevent it by planting resistant varieties, avoiding overhead watering, and removing any infected plants and tubers. You can also use a fungicide, such as copper or sulfur, as a preventive measure.
Scab: This is a bacterial disease that causes rough, corky patches on the tubers. It does not affect the taste or edibility of the potatoes, but it reduces their appearance and storage quality. You can prevent it by planting resistant varieties, maintaining a slightly acidic soil pH, and avoiding excessive nitrogen fertilization.
Potato Virus Y: Lastly, this is a viral disease that causes mosaic patterns, mottling, or yellowing on the leaves, and misshapen or knobby tubers. It can reduce the yield and quality of the potatoes, and it can be transmitted by aphids or infected seed potatoes. You can prevent it by planting certified virus-free seed potatoes, controlling aphids, and removing any infected plants and tubers.
How to Determine When Your Potatoes Are Ready to Harvest?
The third step in how to harvest potatoes is to determine when they are ready to harvest. This depends on the type and variety of potatoes you planted, and the size and maturity you want.
There are two main types of potatoes: early and late.
Early potatoes are ready to harvest in about 10 to 12 weeks (about 3 months) after planting, and they produce small to medium-sized tubers that are tender and thin-skinned. They are best for boiling, steaming, or roasting.
Late potatoes are ready to harvest in about 15 to 20 weeks (about 4 and a half months) after planting, and they produce large, starchy tubers that are firm and thick-skinned. They are best for baking, mashing, or frying.
Early Harvesting
To harvest early potatoes, you can start digging them up when the plants begin to flower, or when the lower leaves start to yellow.
You can use a garden fork or a spade to gently lift the plants and tubers from the soil, or you can use your hands to feel for the tubers under the soil.
You can harvest as many or as few potatoes as you need, and leave the rest in the ground until you are ready to use them.
You can also harvest some of the young, tender leaves and stems, which are edible and nutritious.
Late Harvesting
To harvest late potatoes, you need to wait until the plants have died back completely, or until the first frost.
This allows the tubers to develop a thicker skin, which helps them store better.
You can use a garden fork or a spade to dig up the entire row of plants and tubers, or you can use a potato digger, which is a special tool that lifts and separates the tubers from the soil.
You need to be careful not to damage or bruise the tubers, as this can cause rotting or spoilage.
How to Dig Up, Cure, and Store Your Potatoes?
The final step in how to harvest potatoes is to dig up, cure, and store your potatoes. This is important to preserve the quality and shelf life of your potatoes, and to prevent them from sprouting, rotting, or shrinking. Here are the steps to follow:
Digging Up
After digging up your potatoes, you need to brush off any excess soil and remove any damaged, diseased, or green tubers.
Do not wash your potatoes, as this can remove the protective skin and invite bacteria and fungi. You can wash them just before cooking or eating them.
Curing
You need to cure your potatoes for about two weeks in a cool, dark, and well-ventilated place, such as a basement, garage, or shed.
This allows the skin to harden and heal any minor cuts or bruises and enhances the flavor and texture of the potatoes.
The ideal temperature for curing is between 50°F and 60°F, and the ideal humidity is between 80% and 90%.
You can spread your potatoes in a single layer on a newspaper, cardboard, or wooden crate, and avoid exposing them to light, which can turn them green and bitter.
Storing
You need to store your potatoes in a cool, dark, and dry place, such as a cellar, pantry, or closet. The ideal temperature for storage is between 40°F and 50°F, and the ideal humidity is between 65% and 70%.
You can store your potatoes in paper bags, cardboard boxes, mesh bags, or wooden crates, and check them regularly for any signs of sprouting, rotting, or shriveling.
You can also store your potatoes in a root cellar, which is an underground or partially underground structure that maintains a constant temperature and humidity.
Additionally, you can also store your potatoes in a clamp, which is a mound of straw, hay, or leaves covered with soil, that insulates and protects the potatoes from frost and rodents.
Wrapping It Up!
If you want to know about how to harvest potatoes, I hope that this blog has been of help to you. However, if there are any other queries related to the same, please feel free to let me know.
All that you need to do is scroll down till you reach the bottom of the page. Then leave your comments and suggestions in the box below. And I will be there to answer them all for you!
Read Also:
How to Harvest Lettuce: A Step-by-Step Guide for Fresh and Crispy Salads
Everything You Need To Know About Harvesting Basil!