The Best Smart Home Devices

Published on: 30 June 2022 Last Updated on: 12 September 2024
Smart Home Devices

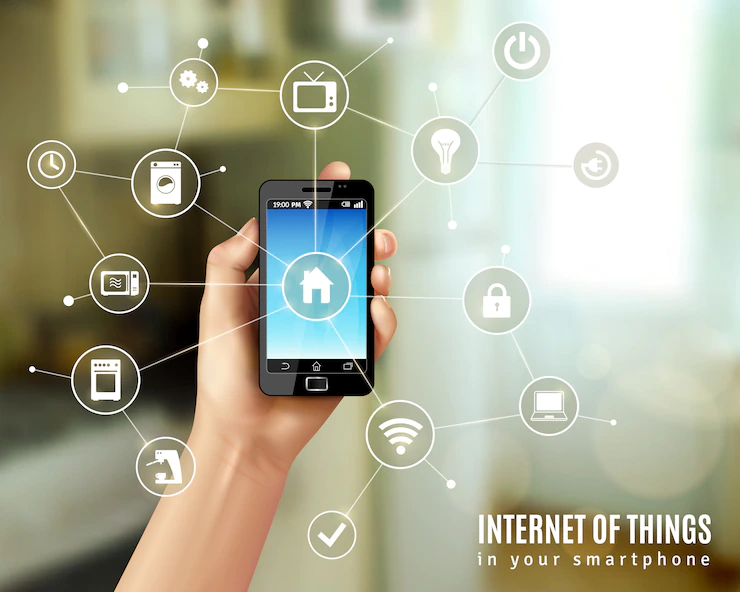
A modern home seems useless without having the best smart home devices.

This is the main reason most homeowners like to install smart home devices.

That makes their home a better place to live, what you understand by the best smart home devices. From the door to the alarm everywhere, you will require intelligent equipment like familychristiandoors.

Let’s have a look at the definition of smart home devices.

Top 10 Smart Home Devices For Your Home:

What do you understand by the name of the smart home? The fact is when you are having a smart home you can complete every household work within a very small time frame.

Here are the names of the top ten most popular smart home devices which can easier your living styles.

1. Honeywell Thermostat:

A great choice for those who want to save money on their energy bills, the Honeywell thermostat can be controlled remotely via a smartphone or tablet.

thermostat

It also features a 7-day programmable schedule, so you can always keep your home at the perfect temperature.

2. Wifi Router:

A must-have for any smart home, a wifi router allows you to connect all of your devices to the internet without having to rely on Ethernet cables.

Wifi router:

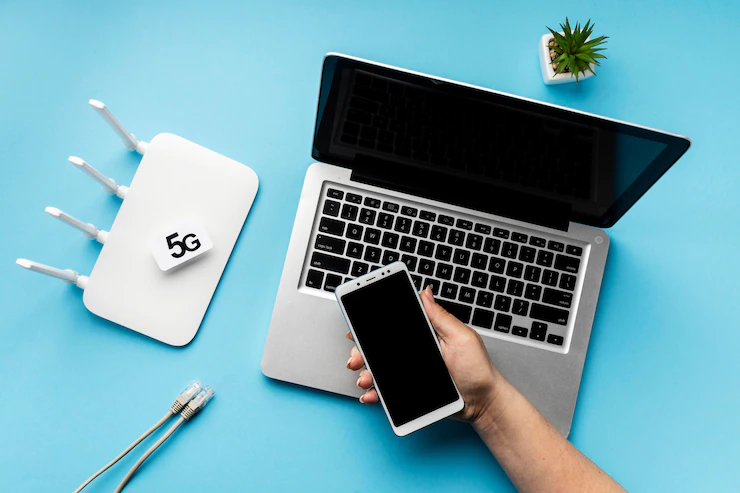
It also provides a better range and speeds than other types of routers, making it ideal for large homes or homes with multiple floors.

3. Smoke Detector

A vital part of any home safety system, smoke detectors can alert you to fire even when you’re not at home.

Smoke Detector

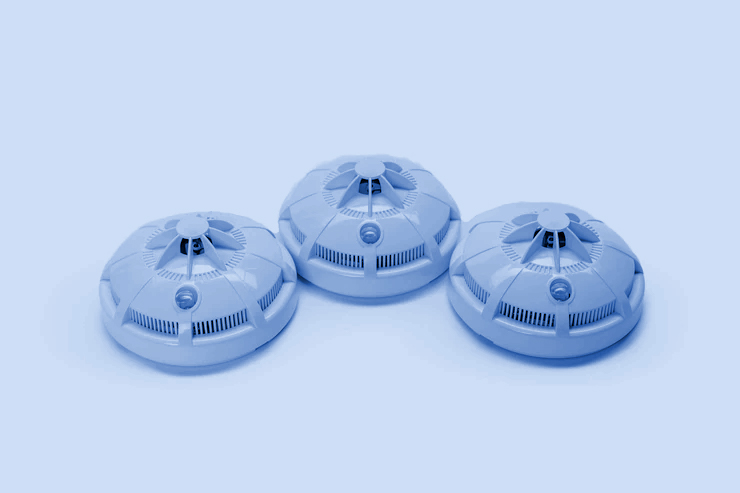
Many smart smoke detectors also feature carbon monoxide detection, so you can be sure your family is safe from both fires and poisonous gas.

If you’re looking for a reliable, wired smoke and carbon monoxide detector, the google nest protect wired is a great option.

4. Smart Light Bulbs

One of the simplest ways to make your home smarter, smart light bulbs can be controlled remotely via a smartphone or tablet.

Smart light bulbs

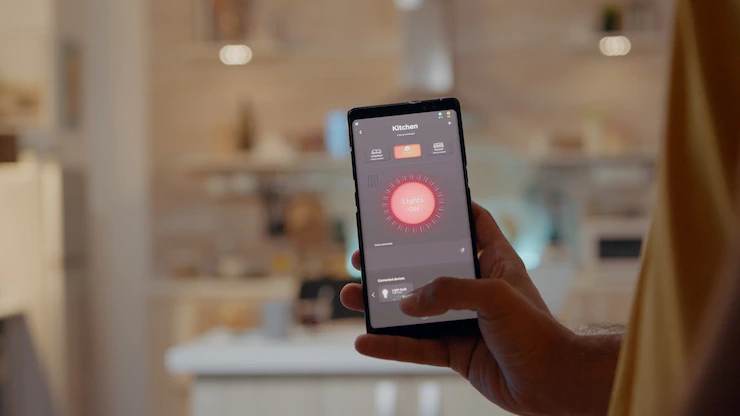
They can also be set to turn on and off at specific times, or even change colors to suit your mood. Looking for an energy-efficient way to light your home? LED light bulbs are a great option! energy efficient led light bulbs use less energy than traditional ones.
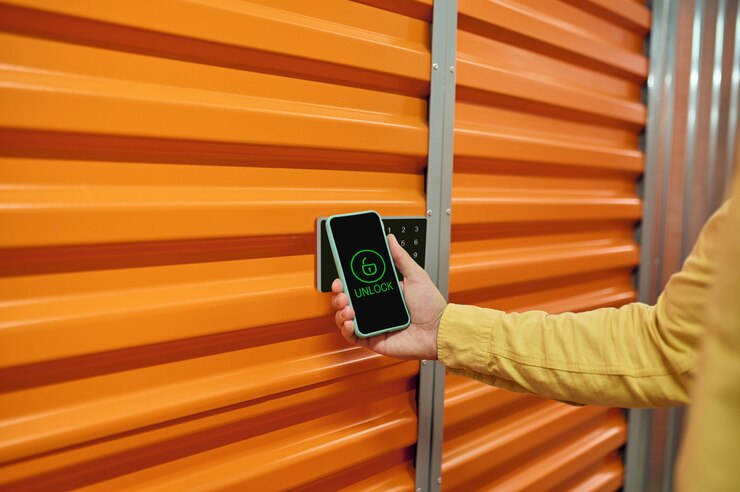
5. Smart Door Locks

A great way to increase security in your home, smart door locks allow you to remotely lock and unlock your doors as well as see who is coming and going.

 Smart door locks

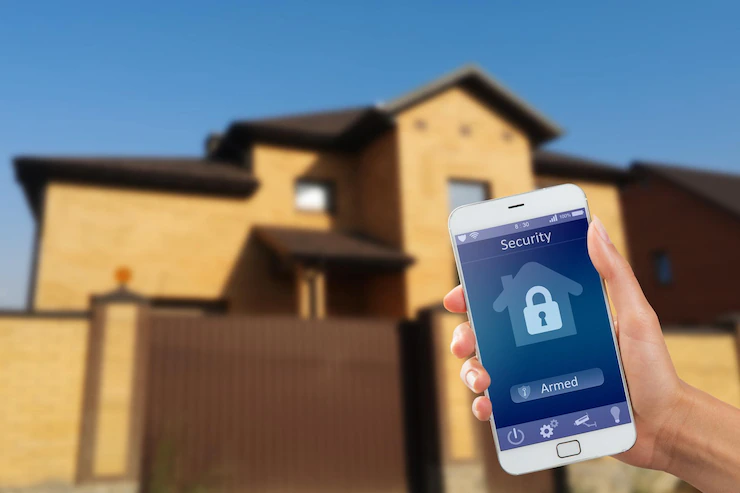
Some models even allow you to grant access to specific people for specific periods of time.

6. Smart Thermostats

As well as being able to save you money on your energy bills, smart thermostats can also be controlled remotely via a smartphone or tablet.

Smart thermostats

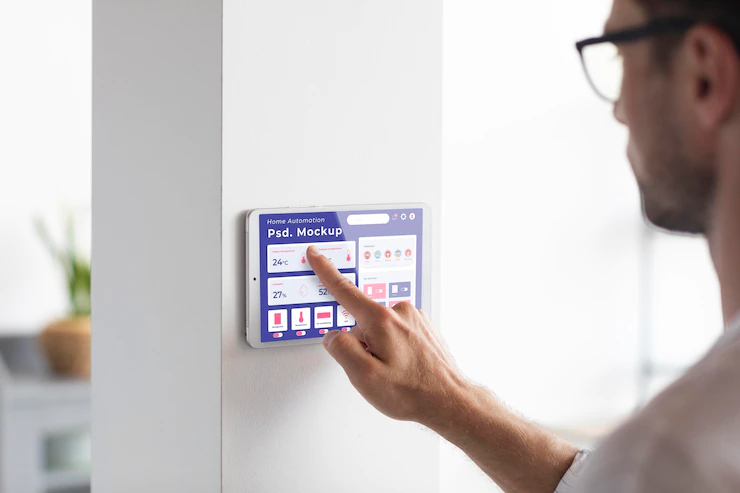
Many models also feature heating and cooling schedules that can be customized to suit your needs.

7. Home Security Cameras

A great way to keep an eye on your home, security cameras can provide peace of mind whether you’re at home or away.

Home security cameras

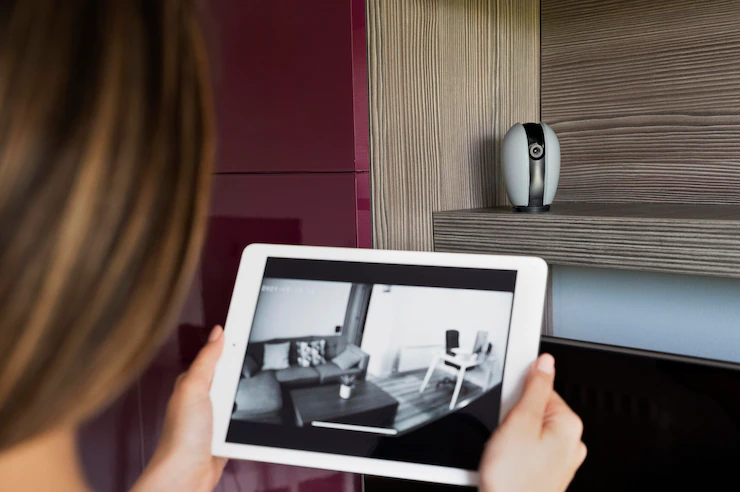
Some models even allow you to view live footage from your smartphone or tablet.

8. Wireless Speakers

The perfect way to enjoy music in any room of your home, wireless speakers can be controlled remotely via a smartphone or tablet.

Wireless speakers

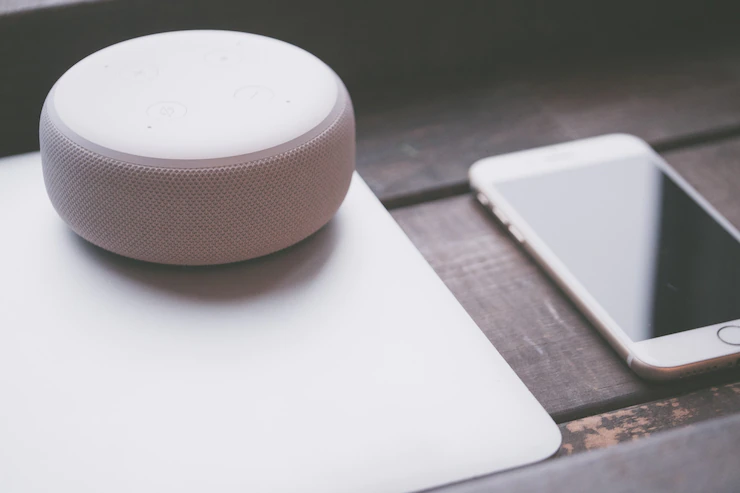
They can also be linked together to create a surround sound system for your TV or home cinema.

9. Water Leak Detectors

Water leak detectors are an important part of any home’s plumbing system. They can help you save money on your water bill, and they can also prevent serious damage to your home.

Wireless speakers

There are a few different types of water leak detectors on the market, but the most common is the float switch. This type of detector is installed in there are many advantages to using smart home devices. They can help you save energy, stay connected, and automate your home.

If you’re like most people, you probably don’t give much thought to your garage door. But what if your garage door could be smarter?

10. Smart Garage Door

A smart garage door opener can make your life more convenient and secure. With a smart garage door opener, you can control your garage door from your smartphone, tablet, or computer. You can also get alerts if your garage door is open or closed, and set timers to automatically close the door.

Smart Garage door

If you’re looking for a smart garage door opener, check out our top picks. We’ve got options for every budget, including models from Chamberlain, Genie, and more.

Pros Of Installing The Smart Home Devices

There are many advantages to using smart home devices. They can help you save energy, stay connected, and automate your home.

Here are some of the advantages of installing smart home devices at your home.

  • Smart home devices can help you save money on your energy bills by making your home more efficient. Hence you can also use smart devices to stay connected to your family and friends, even when you’re away from home.
  • Automating your home with smart devices can make your life easier by controlling your lights, locks, and thermostat from your smartphone or tablet.
  • If you’re looking for ways to save money, energy-saving smart devices are a great option. Smart thermostats can help you regulate the temperature in your home, so you’re not wasting energy heating or cooling an empty house.
  • Smart lights can also be programmed to turn off when you’re not home, so you’re not needlessly using electricity.
  • If you want to stay connected to your loved ones, there are plenty of smart devices that can help. therefore they use the smart doorbell comes. You can see who’s at your door, even when you’re not home.

Smart security cameras can also be placed around your home to keep an eye on things while you’re away. And if you have young kids, you can use a smart baby monitor to check in on them from anywhere.

Frequently Asked Questions!!! (FAQs):

Q1: Is A Smart Home Actually Worth It?

Yes, a smart home will make your life easier. The devices which are performing based on voice commands are improving your quality of life. The most important part is enhancing the convenience.

Q2: Are Smart Homes Going To Save Money?

Smart home devices are not just making your life simple. Your safety and security of the houses will also increase. But smart homes are increasing the energy use ratios. People can get all sorts of help by simply taking the facilities.

Q3: How Much Do You Have To Invest For An Entirely Smart Home?

The average four-bedroom flats and the three-bath homes require nearly $15,000. Investments. But for luxury apartments, costs are much higher. That cost is going to touch the bar of $10,000 to $150,000.

Wrapping It Up:

All of these smart home devices are designed with the latest smart technologies. So if you want to lead the order fast convenience life style. Then these are the most essential items you need. But every smart device requires a well-revised maintenance system. So it will be better to tap on that point. What is your opinion? Do not forget to share your opinion through the comment section.

Additionals:

Content Rally wrapped around an online publication where you can publish your own intellectuals. It is a publishing platform designed to make great stories by content creators. This is your era, your place to be online. So come forward share your views, thoughts and ideas via Content Rally.

View all posts

Leave a Reply

Your email address will not be published. Required fields are marked *

Related

aeropress machine

How to Make Coffee with Aeropress Machine

 The Aero press is one of the most straightforward gadgets that you can use to make your morning coffee faster. Invented in 2009 by Engineer Allan Adler, the Aeropress machine has gained popularity due to its small size, high portability and efficient speed in brewing coffee. Due to its portability, you can carry the device to your camping escapade, fishing, or any sporting coffee. With the Aeropress machine, you can have your coffee anywhere at any time. How to assemble an Aeropress machine Remember, you can buy your Aeropress coffee maker from a trustworthy place. Some of the accessories that come with the coffee machine include: The Aeropress device which is a plastic plunger Cap that should get placed at the end of the AeroPress device The fillers which should be used alongside the cap A scoop that should be used to measure the coffee A funnel to put the beans and neatly organize them in the chamber Paddle to be used in stirring the coffee Once you have acquired all the accessories of the AeroPress machine, here is how to assemble the machine: Step 1: Push the plunger of the machine out of the chamber Step2: Remove the filter and put it in the filter cap Step3: By twisting the filter cap, put it into the chamber Step4:  Put the chamber on top of a stand. Put the chamber on a sturdy mug and ensure it stands firmly. Put the ground coffee in the chamber. Step5: Share properly to ensure the coffee is leveled correctly. Step 6:  Add water to the chamber. Ensure the water fill up to level 1. At this point, you are ready to brew the coffee. If you want hot coffee, use hot water, but if you need cold coffee, use cold water. Remember, with the AeroPress machine, the coffee taste is determined purely by the water's temperature. If you use boiling water, it will make your coffee bitter. The manufacturer's recommendation is to use water at 175 degrees. Though it is not practical to achieve the exact temperature, you can boil the water and allow it to cool down before using it. Also, ensure that you use high-quality coffee bean; preferably, coffee beans that have been ground recently. The coffee bean should be finely ground. How to brew coffee If you have everything in place, the process of brewing coffee should take less than two minutes. There are two ways to make coffee using the AeroPress machine; the inverted way, and the usual way. Both methods make delicious coffee, but one is faster. Equipment required Electric stove and kettle The AeroPress machine; stirrer, funnel, and scoop A coffee grinder Small pitcher, or a mug Timer Original method Start by boiling the water. Remember, boil the water and let it cool for a minute since the coffee maker works best at a temperature of 175 degrees. Grind your beans. Depending on the amount of coffee that you want to make, grind the beans accordingly. For the two cups, grind at least two spoonfuls of coffee. Remember, you must grind the coffee until its fine. Ensure the filter is wet. After assembling the Aeropress machine, put paper filler inside the cap. Place the device on top of a mug and dab the filter with warm water. Place the warm funnel on top of a mug and dispense the coffee. After pouring the coffee, remove the funnel. Add warm water. Ensure you add the water until it gets to the marked line in the machine. Remember, the water should be recently boiled and cooled. Using a spoon or a paddle stirrer, stir the coffee until it dissolves. Insert the plunger by pressing it down till a hiss is heard. If you fill any resistance, pause briefly. Push the plunger gently until it reaches the ground. 8. Remove filler cap while pushing the plunger. This should eject the used coffee while rinsing the seal. Dilute and taste your coffee. Depending on how you want your coffee to taste, add more water. The Aeropress machine makes concentrated coffee. Thus you can split the concentrated coffee and make more cups. Reverse method Reverse method is similar to the standard process but with few adjustments. Here is the method: Start by assembling the Aeropress machine. Remember, in this method, and the machine must get assembled in an upside-down manner. Put the plunger in the chamber, flip the device upside-down, and don't put the cap and the filter. Put the funnel and pour the ground coffee. Use fine coffee grits enough for the amount of coffee needed. Next, add boiled water until you fill the filter. Remember, you should boil the water and let it cool for a few minutes. using a spoon or a paddle, stir the coffee gently. Steep the coffee for at least one minute. Place the paper cap and tightly screw it into the chamber Carefully, flip over the machine. Remember, this should get done accurately and quickly. After flipping, place the device on a mug Taste the coffee and dilute as desired. Remember, both ways make concentrated coffee, thus add water until you get the desired coffee. The Aeropress machine features as the most resourceful and most efficient coffee maker. It is less fussy and makes minimum noise; hence, you can use in places that require minimum noise. The machine is also highly affordable, with some brand costing less than twenty dollars on amazon. It is light and highly durable; thus, it can last long and give you value for money. It is easy to assemble and clean, even if you don't have any technical knowledge. The only downside of this machine is that you can only make two cups of coffee. Thus, if you are hosting a party, or your household has more than two people, then you will be forced to make the coffee several times. How to make coffee: [embed]https://www.youtube.com/watch?v=jlCUYNe9pes&t=100s[/embed] Read Also: 10 Best Coffee Places In The US How You Can Create A Coffee House Experience In Your Own Home 7 Fantastically Unusual Uses Of Old Coffee Beans Monthly Best Coffee Subscription

READ MOREDetails
Alexa device issue

How To Troubleshoot The Alexa Not Responding Issue? [Fixed]

Alexa is a virtual assistant, which works with an echo dot in order to fulfill all the demands of its users. With its thousands of attractive features, Alexa has made the life of its users super easy and also entertaining at the same time.  With its hi-tech features, Alexa can do almost everything from controlling smart home lights to set reminders, playing songs, jokes, news, quizzes, and much more things. But due to some reasons, you may find your Alexa not responding to the commands that you are giving it.  Do not worry if you are facing the Alexa not responding issue. Here we have the most effective and easiest troubleshooting steps to fix this issue.  Troubleshoot The Alexa Not Responding Issue: Here are the troubleshooting steps that you need to follow for solving the Alexa not responding issue with your echo dot. There are a bunch of reasons for what you may be facing this Alexa not working issue.  So, let’s head towards the troubleshooting steps.  1. Check The Microphone Button There are many instances when we find that the reason behind Alexa not responding is because the microphone is damaged or we forget to turn the button on. The microphone button is one of the most common reasons for this issue.  So, check the microphone button first. If the issue persists and it seems that everything is totally fine there. You can step to the next process.  2. Reboot The Device This is one of the most effective and easiest ways in the whole troubleshooting process of Alexa is not responding issue. There is not much trouble, all you need to do is just restart the device and the issue will get resolved. But this restarting has a definite name called power drain, and it is more than just powering off the power button and power on it again.  Here is the step-by-step guide for the power drain process. First, you need to check the power light. In case it is showing blue light, that means the device is able to hear you but simply the Alexa device is unresponsive to your commands.  Disconnect the power cable from the power source for at least 30 seconds. Wait for a little while, and after that, connect the power cord again with the power outlet. Now, when your device is ready completely, try to give it any command again. If the issue is resolved, then it is fine. But in case the issue of Alexa not responding continues, head to the next step.  3. Echo Dot Hard Reset In case the above described troubleshoot does not work for your echo dot. Here is the step-by-step guide to hard reset. You will find the reset button at the bottom of the device. You can use a pin to press the button. As soon as you press the button, the device will power off. Here, you need to wait for a little and then power the device on again. All the settings of the device will then reset to the original.  4. Disable And Enable Alexa Privacy If Alexa not responding after all the above-mentioned troubleshooting steps, now is the time to enable Alexa privacy and in order to do so, follow the below steps. You will find a button at the end of Alexa’s nucleus screen. You need to press the button. This button is to enable the privacy of Alexa. If you press the button again, the device will hear you again. Give a command to Alexa in order to check whether the issue is resolved or not.  5. Check Your WiFi Connection Behind the “Alexa not responding” issue, there is a huge chance that maybe your wifi connection is not working properly. That is why Alexa is finding it difficult to respond to your commands.  Well, let me tell you that if you do not have a proper internet connection, there will be no use for this Alexa device. So, check the router now. In case you find anything wrong, contact your network service provider.  6. Try Changing The Position  In case you have placed your echo dot device far from your router or in someplace where it is having issues connecting with the router. This can be the main reason why you are experiencing “Alexa not responding.”  Make sure that you are placing Alexa within the wifi range. The place should be accessible to yours as well so that your echo dot device can connect with the network properly and also can hear you clearly.  7. Set Echo And Smartphone On The Same Network Always keep in mind that the smartphone that you are using and Alexa have to be connected within the same network. In case they are connected with different routers or your phone is not connected with the router’s network, you will face the “Alexa not responding issues.” Connect both of them on the same router’s network in order to resolve the issue.  8. WiFi Congestions If you have connected a lot of devices within the same router’s network, it may create the “Alexa not responding” issue. Due to excessive wifi congestions, your echo dot is not able to respond to your given commands. Remove or disconnect some other devices, and then try to give your device command and check if the issue is resolved.  Still Alexa Not Responding? All the steps that I have told you in this troubleshooting guide are enough for resolving Alexa not responding to voice issue. But if you face the same problem after performing all the troubleshooting steps. You should contact Alexa customer care. Call on the Alexa helpline number and ask for help.  More Resources:  Benefits Of Having A Cordless Vacuum Cleaner At Home What is type c cable, and is it worth buying

READ MOREDetails
Hearing Aid

Hearing Aid Devices: The Ultimate Guideline

Hearing loss is one of the most emerging issues in the world right now!! There are no age boundaries for developing this condition. And you must have seen many people wearing a device on their ears. -Yes, like earphones!!! But those are not earphones. Instead, those are hearing devices people with mild or severe hearing loss use. Deafness, partial deafness, or sudden hearing loss disable people from hearing to sudden sound frequencies. Researchers are still on the go to find the perfect remedy for hearing loss but are still far from achieving the goal!!! Until now, one of the most effective remedies for deafness has been hearing devices or hearing aids. Therefore, through this article, I’ll tell you what hearing aids are and what you should grab for your hearing loss. So read till the end to the “ULTIMATE GUIDELINE” of hearing aids!!!! Hearing Aids: What Is It? These are small devices that people wear behind their ears. Hearing aids are designed in such a way that they can amplify or make the sounds louder. Therefore, those who face issues in hearing or communicating can easily use them. The specialty of these devices is that they can help you hear in both noisy and quiet environments. This device has three different compartments: a microphone, an amplifier, and a speaker. The microphone captures the sound, converts it into electrical signals, and sends it to the amplifier. The amplifier then boosts the sound and releases it into the ear with the speaker’s help. These are the essential functions of a hearing aid device, which don’t cost much. How Can It Help? The primary job of this device is to help you hear sounds so that you can easily communicate with the people around you. It can be challenging for many people, especially those with severe hearing loss. Just imagine, there was a time when you used to communicate with your friends and family, but now you cannot communicate at all because you cannot listen to what they say. Painful, isn’t it? The same thing happens to those who suffer from such conditions. But these hearing aids can be a gift to their “soundless lives.” They can hear people speaking, and they also communicate with them. Before these devices were invented, those who had hearing loss isolated themselves and put them away from environmental communications. That’s because they feel embarrassed to show up in front of the public. But now, with these hearing devices, they can relive the moments that they thought were lost!!!! How Will You Know If You Need An Aid? In this case, you can always go for a check-up with your audiologist, who will help you carry out a hearing test. These tests can also be carried out online. The benefit of an online hearing test is that you don’t have to go to the clinic; instead, you can take the test just by sitting at home. But make sure when you are taking these tests the rooms are pin-drop silent. Otherwise, you won’t be able to take the test correctly, and it will affect your test results. Also, keep in mind to use good quality earphones for these tests. I suggest you go to the clinic and talk with the audiologist directly, as he’ll help you out with this hearing issue!!!! As they are highly professional, they’ll help you with all the ins and outs regarding this matter!!! Types Of Hearing Aids That You Can Get There are various types of hearing aids that you’ll find!!!! These have different features and designs. Each suits another purpose, but one common thing between all these devices is that they will help you hear again.0 Behind-The-Ear: These hearing aids are made up of hard plastic, and it’s worn behind the outer ear. All electronic compartments stay behind the ear. The tube that’s connected to the hearing aid is put inside the ear. The sound then passes through the line and into your inner ear. A new version of the device has no sort of outer fits; instead, it’s open-fit, making it look like a “Bluetooth Earphone.” And this new version of the device is also very reliable!!! These devices are used by people of all ages who suffer from ”mild” hearing loss or partial deafness. In-The-Ear: These devices are more high-tech than the behind-the-ear devices. People of all ages also use in-the-ear hearing aids and are only applicable for mild deafness. The hearing aid is directly connected to the outer ear, and in this device, you’ll also find an extra feature that’s the “telecoil.” Telecoils are tiny magnetic coils that help the user receive the sound through the circulatory instead of the microphone. This can be very helpful to people, especially when they talk over the phone or are in crowded places. But it’s highly recommended for adults of all ages but not for young children as the casing of this hearing aid might need to be replaced often as the size of the ear increases. Canal: Canal aids come in two forms: the “in-the-canal” and “completely-in-canal.” The in-the-canal is designed so that it easily fits the shape and size of a person’s ear. The completely in-canal is more advanced as this hearing aid directly fits into the ear canal, keeping it hidden. The best part of this aid (completely-in-canal) is that people will not see this device; hence, there will be no chance for them to identify whether you are suffering from hearing loss or not. But the only issue that you might face is adjusting these devices as they are tiny in size. These devices are not usually suggested for young children. Moreover, this device should only be used for mild or moderate hearing loss and only when your audiologist will recommend it!!! I hope this article will now give you a complete guide to hearing aid devices!! Choosing Hearing Aids: 5 Things To Consider Before Buying You must explore the options of hearing aids you have before you choose something. There’s more to it than just the types of aids available in the market. Here are a few things to remember when choosing a hearing aid. Get Yourself A Checkup. First, get your hearing tested and checked by a specialist. If the reason for your hearing problems is temporary, then they’ll help you decide accordingly. But, if it’s because of earwax or infections, then they might rule out the need for one. Consult With An Audiologist The best thing would be to take a referral to an audiologist from your doctor. They’ll check your hearing abilities and adjust a device tailored to your needs. This might be for one ear or for both. Ask For A Trial Period When getting a hearing aid, make sure that you are buying one with a trial period. This is important since you don’t know if the product you are buying will fit you or not. If it’s not your size or feels discomforting, you may want to exchange it. That’s why it’s important to know whether there’s a trial aid or not. Also, consider if the amount of the device’s trail period is adjusted to the final price or not. It’s also good to consider if they have a refund policy. Think For Future Needs When considering a hearing aid, consider one that’ll work with increased powers. If your hearing capability reduces, you’ll need something better to help you listen. But, if you have to change it, then it’s better to opt for other options. Check For A Warranty Some hearing aids provide you with a warranty for a period. Also, in that period, check if you can claim part replacement or get any technical problems solved through their technicians. Warranty periods and terms are also considerable parameters for choosing the right hearing aid. How Much Does Hearing Aid Cost? Hearing aids cost around $1000 to $3500. If you are getting one that costs around $3000, then you’re spending around $5.50 to $6 dollar per day for the next 4 years. However, it does not necessarily have to be of the same price since the price range starts at $1000. Bottom Line No two products are the same. So, when buying your hearing aid, first consider what helps your health. Take help from your audiologist in choosing the right specifications. Then, take your budget and warranty into consideration. In many cases, you can also get your hearing aids insured when they are expensive. But the best results won’t come until you keep using them and adjust your hearing capabilities with their help. Read Also: Important Habits to Protect Your Ear Health and Hearing Headphones vs Earbuds: How to Choose for the Best Music Experience

READ MOREDetails