Crafting Personalized Inflatables: Aligning Designs With Your Unique Taste And Preferences

Published on: 13 October 2023 Last Updated on: 10 September 2024
Personalized Inflatables

Do you want an inflatable in your own personal design? That’s a great choice!

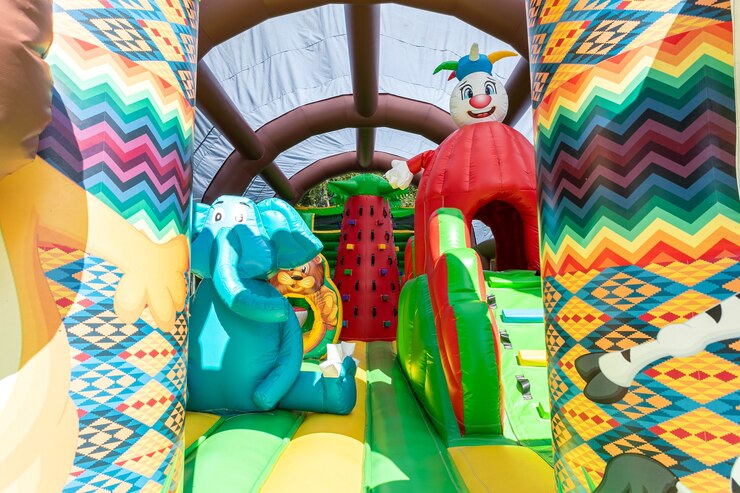
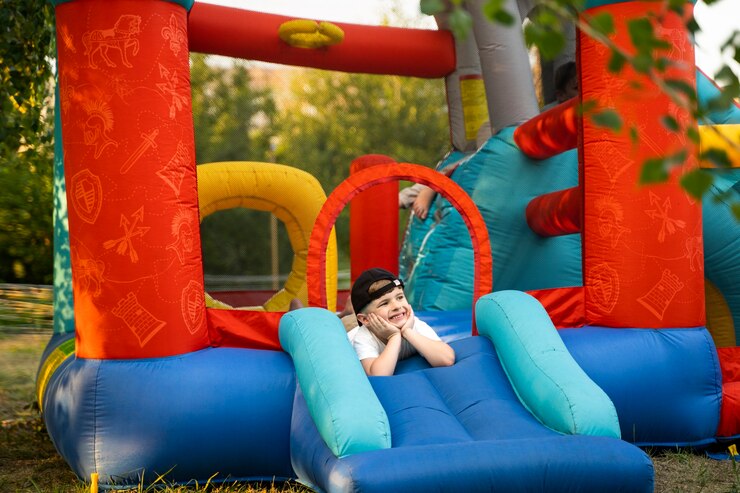
Or maybe you want an inflatable sign for your business. Or maybe you’re looking for something more fun, like a bounce house or an inflatable slide. Whatever you need, there is a wide variety of options to choose from. And if you can’t find what you’re looking for on the market, you can have it custom-made. How cool is that?

Two of the most defining benefits of inflatables are their versatility and customizability. Versatility, because they can be used in a variety of settings, from indoor parties to large festivals. You can use them for party decoration, amusement park rides, advertising, and many more. And customizability, because they can be made to match your vision. If you have a specific need or preference, you can simply give your designs to an inflatable manufacturer and have it done in that exact image. You can choose the size, shape, color, and design of your inflatable.

The ability to customize inflatables allows you to add a personal touch and create a unique design that is not available anywhere else. In this article, we will explore the idea of crafting inflatables that reflect your unique tastes and preferences, helping you to create designs that express your individuality.

Let’s dive into it.

Why Personalized Inflatables?

Why Personalized Inflatables

The market is already saturated with generic inflatable designs. If you go online or visit inflatable stores, you will find almost the same designs everywhere. So if you want to stand out, you need to be different from the rest. And to be different, you need to be unique. Your custom inflatable design should not be ordinary, or else you will run the risk of looking like everyone else and having no special edge.

Here are some more reasons to consider crafting personalized inflatables.

Uniqueness

Crafting your own personalized inflatable designs helps you to get a one-of-a-kind design that nobody else will have now – and in the future. This gives you a sense of exclusivity, as you know that your inflatable is unique and that no one else has the same one.

Express Your Individuality

It also allows you to express your own personal style and creativity, as you can choose the colors, patterns, and design elements that you want. As a result, your inflatables become an extension of your personality. This can be particularly valuable for businesses that want to advertise their brand identity to potential customers. For instance, if they want to appear as a fun brand, they can use certain blow up inflatables or replicas of their products to mesmerize potential customers and get them hooked on it.

Memorability

Something that stands out is sure to be remembered. People will remember the unique inflatable that caught their eye and was different from the others. So if you want to create an inflatable that truly leaves a lasting impression on people, you should definitely consider creating a personalized inflatable.

How to Craft Personalized Inflatables

How to Craft Personalized Inflatables

The process of creating your own personalized inflatables begins when you have a clear idea of what you want. It may seem like a daunting task, but don’t be discouraged; the inflatable manufacturer will handle most of the heavy lifting. With the right guidance and a touch of creativity, your unique inflatable vision can come to life.

Here is a simple breakdown of the process.

Choose the Right Type of Inflatable

Consider your specific needs and goals when choosing an inflatable. What do you need it for? Will you be using it for a business exhibition? If so, you may want to consider a product replica, inflatable signage of your business logo, or regular inflatables designed with your brand elements.

The Design Concept

Think creatively about your inflatable design. What message do you want to communicate, or what theme do you want to explore? You could sketch it out on paper or simply describe your ideas to an inflatable manufacturer. They will have a designer create a visual representation of your concept.

Material and Size

Once you are happy with the design, you can move on to choosing the material for your inflatable. PVC and nylon are the most popular choices, but you should make your decision based on your needs. Both materials have different strengths and prices. Nylon is generally stronger than PVC. So if you need something that can withstand rough handling and the test of time, nylon may be a better choice. However, keep in mind that it is more expensive.

The size is also important. You need the exact size of the inflatable that meets your needs, as this will help ensure that it fits properly and is not too small or too large.

Measure the dimensions of the area where you want to put them.

Complete Your Order

Make payment. Then wait. It usually takes a while for your inflatable designs to be manufactured. Finally, when your inflatable is ready to go, make sure to inflate it properly according to the instructions provided. Then sit back, relax, and watch as your inflatable designs come to life! Just remember to take good care of your inflatable so that it lasts as long as possible.

In Conclusion

If you think the world is already too full of generic designs, then personalized inflatables are the way to go. With these custom creations, you can express your individuality and capture attention like never before – whether it’s for personal celebrations, marketing campaigns, or special events. Trust me, they’re sure to make an impact!

Read Also:

Ankita Tripathy loves to write about food and the Hallyu Wave in particular. During her free time, she enjoys looking at the sky or reading books while sipping a cup of hot coffee. Her favourite niches are food, music, lifestyle, travel, and Korean Pop music and drama.

View all posts

Leave a Reply

Your email address will not be published. Required fields are marked *

Related

Website Design

SEO Website Design Tips for Small Businesses

As a small business owner, you may feel like you need to do everything at once. Build your site, generate great content, advertise, keep up with search engine algorithms, learn who your audience is, learn who your competition is – and on and on that list goes. At these stressful moments, it is important to step back and remember the adage “slow and steady wins the race”. Your business wasn’t built overnight, and neither will your digital marketing be. The key to effectively marketing your small business is knowing where to put your efforts first. Website design is one of the most important elements of that and is a great place to start. Once you have the basics of your web design ironed out, you can do more work here and there to complete your digital marketing strategies over time. Not sure where to start? Our Nashville web designers offer six tips for getting started. SEO Website Design Tips for Small Businesses 1. Learn how Google Crawls Your Site As you are building your website and planning for your future in digital marketing, it is important to understand how Google crawls your site. That means understanding what it is that Google looks for on websites when they rank them in search engine results. Google’s algorithms change routinely, but there are a few concepts that are always the same – such as SEO and website design. When ranking websites, Google looks at factors like: Utility and usability (user-friendliness, page load speed, graphics loading, etc.) Content (quality long-form content) Long-tail keywords Related key terms Backlinks Internal linking strategy Optimized media 2. Choose a Clean and Simple Layout As you get started with website design, one of the best ways to start is by choosing a clean and simple website layout. You want users to be attracted to your site and engaged with it, but you don’t want it cluttered or distracting. Choose a design that speaks to your brand and mission. Choose a color scheme that matches your logo and branding. Make sure your font is easy to read.  Use the same template style for all pages. 3. Make Sure Your Site Performs Yes, Google crawls and ranks based on SEO, but they also crawl and rank based on performance. That means you should make sure your site is optimized for fast page load speed, mobile use, and image speed. If your site only works on a computer, you will lose an endless number of possible mobile users. 4. Use a Consistent Layout and Formatting Web design is just one aspect of building your brand. You should make sure that your website layout and formatting is consistent with other marketing materials, such as social media. Being consistent helps you establish your brand and makes you easily recognizable to customers from various platforms. 5. Use Every SEO Opportunity Search engines match up results with websites based on their optimization and relevance to the search term. That means you should use every SEO opportunity you have. That means including your keyword in the page title, meta description, and URL. If your page is titled “Best Dog Toys”, your meta description should include that phrase, and your URL should be something akin to www.yoursite.com/best-dog-toys. 6. Add Alternative Text on Your Images Alternative text, or ALT text, is an SEO tactic that seems small but can have big results. When you add an image to your webpage, you will have an option to add ALT text or an ALT tag. You want to put your keyword in that box so that search engines know that your image also links to your keyword for the page. Your images are indexed just like content. Put It All Together As you can see, there are many aspects to web design. For a small business, one of the best things you can do is to make a plan for where you will start and what goals you want to accomplish here and there. By using these six tips as you build your website, you will have a solid foundation for your digital marketing that will last a long time. For the latest trends and challenges in SEO click: https://whitepeak.io/blog/seo-trends-challenges-2022/ Read Also: Tips on Building Your Resume for a Website Design Company How to Design an Effective Company Website 7 Rules of Effective Ecommerce Web Design

READ MOREDetails
Motion Graphics

Special Stock Motion Graphics Effects

Video content is more popular than ever before. Netflix has popularised the idea of binge-watching our favorite TV shows while video-sharing social platforms like YouTube and TikTok have seen the format reach new heights. While more people are watching videos today, we’re also seeing more people creating them. This is due to both the availability and accessibility of modern video editing platforms and the ease at which they can be uploaded online and shared with the world. If you want to start making your own videos, making use of motion graphics can be a fantastic way to stand out from the crowd. Let’s take a look at some of the best special stock motion graphics effects and discuss how they can be used in your videos. 1. Lower thirds As the name suggests, lower thirds of motion graphics appear in the lower third section of your video. These play an important role; they can be used to convey key information without distracting the viewer from what’s happening in the center of the screen. We see lower thirds of graphics all the time, often far more regularly than we realize. For example, when watching a news bulletin, the lower thirds of graphics are used for things like naming an on-screen speaker, summarising a current news story, or providing breaking updates from across the world. In the news, these lower-thirds graphics are referred to as chyrons. If you’re an amateur video maker, chances are you’re not going to be tasked with editing news shows for terrestrial television. So, what else can lower thirds be used for? On platforms like YouTube, growing a following of subscribers is important, and generating lots of comments and likes on your videos can help it perform better in search results and in recommended content. Lower thirds of graphics can be used as calls-to-action, encouraging viewers to subscribe to your channel, to like the video, or to comment and start a discussion among other viewers. Lower-thirds graphics can also be useful if you’re making informative content like tutorials. They can be used to convey further information to your viewers and to deliver tips, tricks, and reminders, without obscuring the primary focus of the video itself. 2. Overlays Motion graphics effects come in a huge variety of different styles, whether you’re looking for CapCut effects or Premiere Pro effects.  One type of motion graphic effect you’re going to come across is the overlay effect. As the name suggests, overlay effects are placed over the main section of the screen, unlike lower-thirds effects which are localized to the bottom of the screen. What are overlay effects used for? This is a broad question, there is such a range of overlay effects out there, and each can be utilized to serve a different purpose. Text overlays are among the most common types. These place text directly in the center of the screen and can be used for transitioning between scenes or to deliver vital information to the viewer. Overlay effects can also include things like graphs, charts, and infographics. These are particularly common in corporate videos and in marketing material, they can be used to clearly and concisely convey complicated information in an engaging and informative way. Using an overlay effect can also be an artistic choice. They can filter footage to make it look more cinematic, with added depth and grain, or to change the color balance to suit the mood and atmosphere of your video. 3. CapCut CapCut is a video editing app made by TikTok parent company ByteDance. With over 200 million monthly users, it’s one of the fastest-growing apps in the world and is taking full advantage of the booming video creator marketplace. CapCut offers deep editing functionality, but the focus is on encouraging users to edit fun, engaging videos quickly and to share these across social media. One of the best ways to make your videos more engaging and to help them stand out in an increasingly oversaturated digital landscape is to use CapCut motion graphics. These can come in the form of small, animated figures that dance and move around, giving your content a playful, casual feel that will make your viewers feel happy and comfortable. CapCut motion graphics can also include things like arrows and pointers. These can be particularly useful for information tutorial videos, where certain elements might need to be highlighted to help viewers follow the tutorial correctly. 4. Slideshows Slideshows are perhaps the most basic form of motion graphics, but they still have a place in today’s world. Slideshows are simple sequences of images. They can be used to tell a story, convey a message, or simply show off some exciting, eye-catching images. Much of the creativity in slideshows comes from the transition effects used as one slide moves to the next. However, be careful not to overdo it with these transitions, as this can detract from the content of your slideshow. Conclusion Motion graphics are an incredibly important part of video editing. Use this guide to learn all about the different types and how they can be used in your videos. Read Also: Movavi Video Suite Review: A Comprehensive Tool to Create Videos Ways To Fix YouTube “Something Went Wrong” Prompt! The Ultimate Streaming Guide to Watch TV Online

READ MOREDetails
bootstrap templates

Bootstrap Templates and Allied Tools to Make Your Web Presence Easy and Instant

It is no secret among online business marketers and website builders that the Bootstrap templates and themes could be their first option in terms of building a web presence. There are many reasons why people tend to use handy Bootstrap templates as: Primarily, most of the designers tend to use this as boilerplate. Bootstrap is out there with us for long, and people are so familiar with it. Many find it much riskier to switch to other options unknown to them. Bootstrap is time-tested, and it also found to be valid. It is a tool, which is time-tested and can also pave a strong foundation for websites. An endless collection of classic Bootstrap templates now helps you construct any type of website you want. It also has high flexibility and rich features, so irrespective of a regular blog or portfolio site, you can get it all here. The community around Bootstrap is so immense and extensive. This constantly expanding expert community will give you plenty of choices and unrelenting support for any issues. Most importantly, Bootstrap is a freemium product and also boasts of its high quality. You will come across countless free templates of Bootstrap, which won’t disappoint you at all. All these could act as a quick fix to your web development problems from time to time. In addition, they will also give you the apt solutions on which you can build safely. Some important things you need to know about Bootstrap 4 themes As we have already seen, Bootstrap is a very powerful but freemium CSS framework with an impressive selection of jQuery plugins, components, layouts, and UI/UX elements. The primary thing about Bootstrap is that it can be availed for free by the users. Now, the extreme popularity of Bootstrap has also urged web developers and designers from across the globe to land on this platform and uses it as a top choice in their projects. If you are also planning to use framework or workflow tools in your web projects, one should always make a note about the updated version of Bootstrap. The latest update is Bootstrap 4, which comes with a custom set of tools and features for the users to benefit from. The new version Bootstrap will certainly help the developers to create business websites flawlessly with ease. A few key things to remember while using Bootstrap You should know that there are different types of Bootstrap 4 themes and templates available out there, both official and third party. So, if you consider using one, always make sure that you do a thorough baseline analysis to identify the best theme for your purpose. In fact, with an abundance of choices, it will always be difficult for a customer to feel overwhelmed about the choice and get confused. This will be more so in case of the beginners who don't have an idea about how to make use of the best Bootstrap 4 template for their purpose. If you are among one of those amateurs who are confused about Bootstrap 4 templates, here we will discuss a few handy things which will help you out in making the right choice. When to consider using a Bootstrap template? The ones who are into website design or the developers who are applying the CSS, as well as a markup of Bootstrap, would have some basic default designs handy. Many don't want to customize Bootstrap, which also isn't ideal as it will make your site look similar to many others out there. So, the best move is to take any of the Bootstrap templates which are useful for you and then customize it to match your needs as well as to look unique. When it comes to choosing a default template, the design may not seem to be very appealing because the providers tend to make those pretty simple with some basic features embedded. So, to bring a professional look to the website, you should try to work further on it and customize it. For this, designers need to pay attention to the CSS framework to make the end product more stylish. There are many tools to help you customize the Bootstrap templates. Tools to customize Bootstrap themes It is so easy to create Bootstrap templates and themes, but it may be confusing if you don't use the right tools. In the case of beginners, it could be somewhat difficult until they get a good grip on it through practice. Adding to it, they also need to pay close attention to the fine details to set things right, which is time-consuming. Fortunately, many tools are there to help these novice Bootstrap web builders to create customized Bootstrap templates quickly and easily. Let's explore some such tools. Sublime Text This tool has a fair number of features to help web development. On using this tool, you can get quick access to many quick windows for the project code. Adding to it, you can also see the codes which you have written on the panel. Anvil The same group of developers had developed both Anil and Hammer, and you use both these tools independently. Anvil could work the best for the localhost servers, which could further let you preview the themes and choose the best for your purpose. Hammer As we said above, Hammer could be used in combination with Anvil or independently. It is a Mac-based development tool that comes with a handful of features to develop Bootstrap themes and static sites. With this tool, you can ensure that you make use of various HTML in the standard templates for further customization. Hammer could also be used to compile the languages like CoffeeScript, SASS, JavaScript, Markdown into CSS, and HTML, etc. SASS If you are planning to create a template of design a full-fledged website, then you may know that the Bootstrap 4 framework is built primarily on the SASS (Syntactically Awesome Style Sheets). In simpler terms, SASS is a wonderful scripting language that could be interpreted to CSS. You should also note that SASS is a scripting language used in almost every case. There are many other tools too to be used for customization of Bootstrap as Grunt, Harp, Bootply, Brix.io, Bootstrap Starter Kit, etc. which could be handy for the developers and designers. All this help to pay attention to the crucial elements of Bootstrap customization and help you build the most relevant and user-friendly websites. Read Also: Adrian Rubin Tells How To Bootstrap Business In The Photography Niche Major Financial Problems That Can Affect A New Business

READ MOREDetails