
How To Design Your Custom Banner That Works

Published on: 06 March 2023 Last Updated on: 29 July 2024
Custom Banner

Whether you want to attract new customers or promote an event, a custom banner can be a powerful way to drive your message. But how do you design one that works?

The first step is to consider your marketing goal. Once you know what you're trying to achieve, all of your other decisions will fall into place.

Here Are Four Prime Steps To Design Your Custom Banner:
Design Your Custom Banner

1. Colors

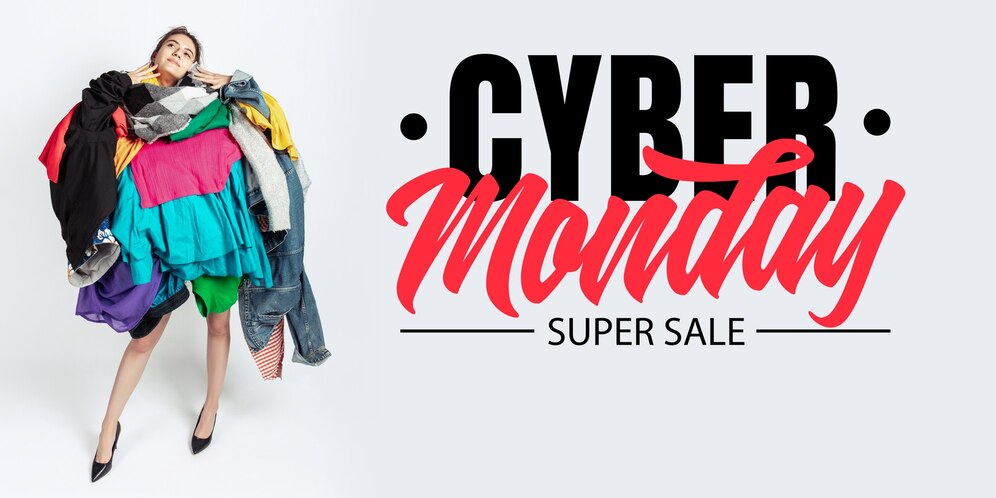
When designing a custom banner, you want to be sure to choose colors that will help grab your audience's attention. The wrong colors can make your banner look dull, while too many can take away from your message.

When it comes to choosing the right colors for your banner, the best approach is to use bright hues that stand out against a neutral background. These can be anything from radiant yellow to fiery red.

A contrasting color like this makes your sign more eye-catching and helps potential customers identify it from a distance. It also helps create a visual hierarchy to help your audience better understand what you're advertising.

For example, a fast food chain might use a combination of yellow and red for advertising its products because it's easy for people to recognize and remember. It's also a great contrast to the black background of their logo.

You should also consider the type of font you'll be using for your custom banner printing. If your banner is intended for a small business, for example, it might be best to stick with plain text that's easy to read from a distance.

If your banner is intended for an event, a more detailed font might be a good choice. However, if you're designing a one-time-use banner, it's best to avoid putting too much information on it.

This is because people don't have time to read a lot of information at once, so it's important to keep it brief. Generally, you'll want to have a big font for your primary message and smaller text for any additional information, such as a description of an event or a contact number.

The next thing you should keep in mind when choosing colors for your custom banner is how far the colors will be from each other. The farther the colors are from each other, the more likely they'll be to confuse people or distract from your main message.

For this reason, it's important to choose a background color that compliments your business theme and a font that's easy to read. A quality online banner printing company can provide you with advice and recommendations for the perfect colors and designs for your business.

2. Typefaces

Custom banners are one of the most effective advertising mediums for reaching new customers. But it’s important to design them right. This means choosing the best typefaces and keeping them simple enough to be read quickly by people driving by or walking by your store.

The most important thing to remember when designing your custom banner is to choose a font that’s easy to read. There are many different font types to choose from, and selecting the right one can make or break your design.

There are five main types of typefaces: Serif, Sans-Serif, Script, Condensed, and Italic. Each has a unique personality and can be used for different purposes.

Serif typefaces typically feature slight decorative strokes at the ends of letters, which give them a traditional appearance. They’re popular for brands and products that want to create a sophisticated, classy, and trustworthy image.

Another important consideration is the typeface’s weight. Font weights range from thin (also called hairline or light) to black, with a lot of different options in between.

Using too thick or too thin fonts can make it difficult for people to read your message, and can even confuse them. Using too light or too dark can also have the same effect, so it’s crucial to know which option is most suitable for your needs.

The best fonts for a custom banner are those that are easily readable in all sizes. For example, Verdana is a widely used typeface that’s easy to read on smaller devices.

Sans-Serif typefaces are generally preferred for large banner signs that will be seen outdoors. These fonts are usually bold, but they can also come in regular and italic styles.

They’re often used for titles and call-to-actions, but they can be a bit on the thin side when it comes to body text. If you’re planning on adding a lot of copy to your custom banner, it may be best to use a font like Quattrocento Sans.

If you’re looking for a banner that mimics the look of typewriter letters, Veteran Typewriter is a good choice. This font is easy to read and emulates the typewriter letters that are commonly found in magazines.

3. Backgrounds

If you want to make sure your banner is eye-catching, the background is a key component. You can choose from a range of options, including illustrations, color overlays, and custom backgrounds.

When choosing a background, keep in mind that the size of the image will affect how it looks when printed on your banner. The best type to use is a vector file since these files can be scaled without losing image quality. It's also a good idea to save your design as a flattened file in Photoshop or Illustrator before sending it to a printing company.

Another important consideration is glare. If the background of your banner is too bright or dark, it can cause your logos to appear distorted. You can avoid this by using an off-white color for your background, which will absorb light and minimize glare.

It's also a good idea to choose a background that complements the main text and logos on your banner. This will ensure that your brand's colors stand out from the rest of the background, and your logos will pop.

A background can also help convey a specific message, such as a call to action. For instance, if your business is based at an unremarkable location, a colorful banner could help you draw attention to your building and services.

The right banner will communicate your message quickly and clearly. Whether you're promoting a new event or announcing a product launch, it's important to make your banner easy to read from a distance. This means avoiding fonts that are too chunky and contrasting colors and sizes.

To design your custom banner, start by selecting a template from Canva's collection. Once you've done this, you can add images and other elements to your design.

Before you start adding your elements, take some time to think about your message and what action you want people to take after they see your banner. This will guide the rest of your design and ensure that your message is clear and impactful.

You can use Canva's free templates to get started on your design, or you can create a more professional look with a paid account. The site has thousands of images, so you'll be able to find the perfect one for your banner. You can even search for specific graphics if you'd like to incorporate a specific piece of artwork into your design.

4. Images

If you're designing a custom banner for your business, it's important to use images that will grab the attention of viewers. The right images will help your message get across, entice people to visit your site and encourage them to take action.

When designing a banner, you can either use a pre-made template or create your own from scratch. There are several factors that go into designing a banner, including color, text size and placement, and image quality.

One of the best ways to make your banner stand out is to use contrasting colors. For example, a white background with red or yellow text will draw the eye. This will also make your message pop out in a crowd of competitors' ads.

You can also add photos to your banner from the Web by using an online image editor. Kapwing, for example, is a collaborative image and video editing platform that allows you to use copyright-free content from huge image libraries like Unsplash and Pexels.

Once you've selected the photo you want to use for your custom banner, resize it to fit your dimensions. You can do this by using the "Resize" button on the toolbar or by manually inputting the appropriate picture sizes.

After you've resized the image, it's time to decide on a background color. You can choose a color that fits your brand's colors or another neutral shade that complements your design. You can change the color of your background in several places, including the Banner Styling menu and in your template's guide.

When deciding on a background color, be sure to consider the opacity of your banner's text and graphics. A light background will make your text and graphics harder to read and will be less noticeable, while a dark background can help the elements of your banner stand out from the rest of the page.

Once you've finished selecting your background color, it's time to add text to your banner. You can add text with the Text tool (the big letter "T" in the toolbar), or by clicking on the banner to access its text editing bar. This way, you can add any text to your custom banner and modify its size, fonts, and colors.

Read Also:

Arnab is a professional blogger, having an enormous interest in writing blogs and other jones of calligraphies. In terms of his professional commitments, He carries out sharing sentient blogs.

View all posts

Leave a Reply

Your email address will not be published. Required fields are marked *

Related

domain registration

Here’s What You Should Know About Domain Registration

A website is essential today to grow your business in this technological era. To launch a website, you need domain registration and name, which helps the visitors identify and visit it. A domain name acts as an address and guides the customers or visitors to your website. This demands a business to create or find a suitable name to bring traffic to its website and increase its sales.  For a business to improve its brand image, a website with a good domain name and design and high-speed hosting services are important. Therefore, searching for a distinct domain using a search tool and buying it from a reliable source helps you do the domain registration at an affordable price.  3 Factors Which You Have To Know About Domain Registration Nevertheless, finding a suitable domain requires you to put some effort into creating a name that represents your business, brand, service, or product.  The IP address of your website consists of several numbers, which are not easy to remember. A domain registration name replaces the series of numbers to help one remember a website’s address easily.  A name that is easy to remember needs to follow certain requirements. Here are some points to consider when choosing a domain name.  1. Choose A Perfect Domain Name  To have your domain easy-to-remember and accessible to your customers, choose short names that include keywords related to your business or industry. For better traffic, your website anime selections are essential. Avoid using hyphens, numbers, or special characters because they will confuse Internet users, who will find them difficult to type or remember when they search your website online.   Moreover, you need to do the domain registration and name with the right extension, which can be any of the generic top-level extensions such as .com, .org, .net, online, .site, .club, .biz, .info, .host, etc. The domain extensions will help give your business and brand more visibility and reachability. 2. Use The Domain Name Search Tool To Find A Perfect Name With more than 2 billion websites on the web, it is not easy to just register domain instantly. To help you with it, you can get the assistance of a domain name service provider, who can offer you a domain name search tool, which will help you find the availability of your desired domain.   To use the tool, you need to enter your preferred name in the tool’s search bar and click on the ‘search' button. If the mentioned name is available, the page will redirect you to the purchase page or else. You will be prompted with the message “domain name not available.”   In such cases, you can change the spelling or change the extension and search until you get the domain registration. Relevant niches names are the best pick as the website’s names. 3. Protect Your Domain From Malicious Intrusions  A domain registered or bought should be safeguarded from malicious intrusions. Once the domain registration is done, all your personal data provided for registration is available for the public to view.   Keep your domain secure. All the search engines are giving the maximum preferences to secure websites. The security maintained is not only giving your customer a safe place for transactions. It is also going to boost the positions of your websites. To avoid viewing it, you can shield your information with security tools like the privacy and protection scans available with the registrar or web hosting service provider. By paying extra, you can opt for privacy protection. Conclusion: For your domain registration, you must have to follow these things and factors. Because you are doing the analysis about the registration process, you will have to know more about it. But if you have any plan to set up an e-commerce based website, you have to analyze the websites’ risky factors especially. And build the website as secure as possible. So take a look at the characteristics and investigate everything before going for the registration process. Read Also: SEO Website Design Tips for Small Businesses Tips on Building Your Resume for a Website Design Company How to Design an Effective Company Website 7 Rules of Effective Ecommerce Web Design

READ MOREDetails
Web Flow Designer And Editor

Key Differences Between A Web Flow Designer And Editor

Webflow is a website-building platform that provides a user-friendly interface, enabling users to design and develop websites without programming knowledge. Webflow offers a wide range of features to make the website-building experience enjoyable and efficient. Two commonly used tools in Webflow are the Webflow flow designer and the Webflow editor. Although they are both integral parts of the Webflow platform, they are quite different. Thus, understanding the key differences between webflow editor vs designer will help you to make the most of the Webflow platform. This article explores the key differences between web flow designers vs editors. Webflow Designer Overview Webflow Designer is an intuitive, easy-to-use tool for creating stunning websites. Its drag-and-drop interface makes it suitable for professional web developers and beginners. It is responsible for the design of the layout, colors, fonts, and other elements that constitute the visual appearance of your site. Users can customize their design using the extensive library of website design templates and components that gives them unlimited options for web design. You can also use this tool to customize your website to fit your needs and preferences by creating visual elements like buttons, images, text, headers, menus, and more without learning code or syntax. Additionally, Webflow designer allows users to add any desired functionality to their sites, giving them complete control over their website structure. Although experienced developers can further customize their design using CSS, additional tools are not necessary. Webflow designer gets the job done perfectly. Webflow Editor Overview Webflow editor is a content management system (CMS) on the Webflow platform. It allows Webflow developers to edit and manage website content. Its easy-to-use interface allows you to create blog posts, web content, page descriptions, and landing pages without a hassle. This tool is not tied to the website structure, so you can manipulate content without changing the site’s structure or design. As such, content managers and marketers can create and manage content on the CMS without accessing the site’s core elements. Moreover, you don’t need to consult the developers and designers to create or manage content. Thus, the CMS saves you time by reducing the points of contact and makes content management flawless. Webflow editor is also an SEO-friendly tool. It allows you to optimize your website content and pages for search engines, making ranking much easier. For instance, you can optimize the page URL, meta title, and description tags for your keywords. Doing so increases the visibility of your content to search engine crawlers and gives you an edge over your competitors. The Key Differences Between A Web Flow Designer And Editor WebFlow Designer and Editor are powerful tools that allow users to build and maintain a website. However, they are distinct in their core functions and capabilities. The two terms can be confusing, especially if you are a beginner on the platform. The following differences between web flow designer vs editor will help you distinguish them so that you can use them for the best web-building experience. Functionality Webflow Designer is a visual tool that lets users design their websites from the ground up. It has numerous features, such as drag-and-drop building, custom CSS and HTML control, and a wealth of pre-built blocks and elements. WebFlow Editor, on the other hand, is a content management system (CMS) that provides an interface for creating and managing content. It offers the ability to add, edit, delete, and sort content without altering the base design of the website. With the editor, users can add pages, posts, images, and other media items to their site and set up menus, sidebars, and other customizable features. Room For Coding One exciting feature of the Webflow designer is the drag-and-drop functionality that lets you create a professional-looking site even without coding knowledge. Nevertheless, the designer allows programmers to add their code to the existing templates. This option is excellent for customization, so you can tune your site design to fit your preferences. However, the Webflow cms editor does not have the option for additional code. The reason is that the CMS doesn’t require a user to change the website design or the core structure. You can add only content blocks such as text and images – that don’t need programming. Learning Curve Another factor differentiating Webflow designer vs editor is the training curve involved in learning the two tools. Although Webflow is easy to use, the Webflow designer is harder to learn than the editor. This is true, especially if you want to design a professional site. You might want to learn tools like CSS and HTML to create custom elements for your site. The Webflow editor is easier to use and doesn’t require learning many concepts. The CMS has user-friendly features that make content management less taxing. Collaboration Another factor to consider when distinguishing a Webflow designer vs editor is collaboration ability. The Webflow designer is for web developers and designers and does not allow members to collaborate when working on a site. On the other hand, the Webflow cms editor allows members of your marketing team to edit and optimize content. Content writers, SEO experts, and marketers can collaborate and undertake marketing campaigns, increasing efficiency and effectiveness. Final Thoughts Webflow is a user-friendly platform for building professional websites. It has two main tools – Webflow designer and editor that make modern web development easier than ever. The Webflow designer is responsible for the web design, while the editor is a cms for creating and managing website content. Read Also: Key Components for Your Marketing Stack How To Foolproof Your Digital Marketing Strategy? Why Email Marketing is the BEST Digital Marketing Outreach in Singapore

READ MOREDetails
Ecommerce Software Development Trends

Ecommerce Software Development Trends

In the past year, eCommerce has expanded from being something that would guarantee convenience to become somewhat of a necessity. In fact, according to experts, it has been one of the major avenues that have kept the global economy going. When the pandemic hit and lockdowns ensued, policymakers quickly realized that Ecommerce could be a major way for enabling people to access resources. Even before the pandemic hit, Ecommerce commerce was growing at staggering double-digit growth rates. According to UNCTAD, global Ecommerce has hit 25 trillion in 2018! For businesses, this means an exciting new opportunity. You can either take your physical brick-and-mortar store online or you can simply start an eCommerce platform and become an aggregator. In this resource article, we are going to focus on the best Ecommerce software development trends for businesses. List of 5 Major Ecommerce Software Development Trends 1. The Rise of Ecommerce Platforms- Retail software development has benefitted from the emergence of easy and simple eCommerce platforms. You do not need to spend a ton of money to start your own venture. You can easily choose between great platforms like WooCommerce, Shopify, Joomla, and BigCommerce. This has made it easier for people with lower investments to get into business in a short time. 2. The Growth of PWAs to boost Ecommerce- Ecommerce is all about the app experience. The rise of smartphones and internet technologies have made it possible to create immersive shopping experiences in apps. However, just like the last point, small businesses cannot afford to break the bank in terms of custom app building. Enter PWAs or Progressive Web Apps. These mimic the website experience like an app. 3. Voice Search Influencing Ecommerce- Look around you. There is a huge proliferation in the number of smart devices we are using to communicate with the internet. From home assistants like Alexa to connected Car technology and Google Assist on our phones, we are speaking to search engines and allowing them to help us. Ecommerce web development should take into account the role of voice search. Advanced implementations now use custom AI software development to understand intent behind voice queries and deliver more accurate results 4. Social Media and Omnichannel Ecommerce Sales- You would have heard your friends or relatives bragging about how they got a great lamp from Facebook’s Marketplace. In fact, for experts, this is the next logical step in the evolution of eCommerce. As a business that is looking to get into this field, you must focus on omnichannel eCommerce sales and marketing. This can open up entirely new avenues for sales. 5. The Impact of Augmented Reality on Ecommerce- Tech innovators and software developers are now looking at ways and means of creating as realistic an eCommerce buying experience as possible. This is why Augmented Reality or AR is going to become the next big thing in eCommerce software development. People want to see how they would look if they would be able to have a virtual try for the products they buy. The Ecommerce Software Development Support System: What is it? While the above technologies are some of the biggest trends in the eCommerce software development ecosystem, there is more that meets the eye. Every developer or entrepreneur who has started an Ecommerce venture knows one thing for sure- it is all about the experience. To support this, there are three major verticals that you need to take into consideration. In this section, we are going to list them down- The Cloud Support- When you are hosting an Ecommerce website you are handling tons of data and details that not only need lightning-fast processing speeds but also guarantee a safe and secure environment. This is where the Cloud becomes important when it comes to creating a good user experience for the platform. Payment Solutions Providers- The growth of Ecommerce happened around the same time when the Fintech industry started booming. The better the payment solutions providers, the easier and comfortable will be the user experience. As a business, you will have to pick the ones that can benefit the business to the greatest possible extent. Mobile Commerce- Do you think that the Ecommerce industry would have taken off in the way it did if smartphones did not exist? Probably not. This is why mobile or M-commerce has become such an integral part of Ecommerce software development. Mobile responsiveness, experiences, and speed are what make a good platform great. The Bottom Line: There is a reason why the advent of new technology is taking Ecommerce software development to new heights. In this article, we have tried to look at some technologies that are redefining the Ecommerce ecosystem. We have also looked at technologies that are considered as the bare foundations that help in setting up an Ecommerce platform that is solid in terms of UI and UX. If you have any other questions that you want us to answer, drop them in the comments section below.  

READ MOREDetails