Fax Over the Internet

Published on: 11 August 2020 Last Updated on: 30 November 2023
Fax Over the Internet

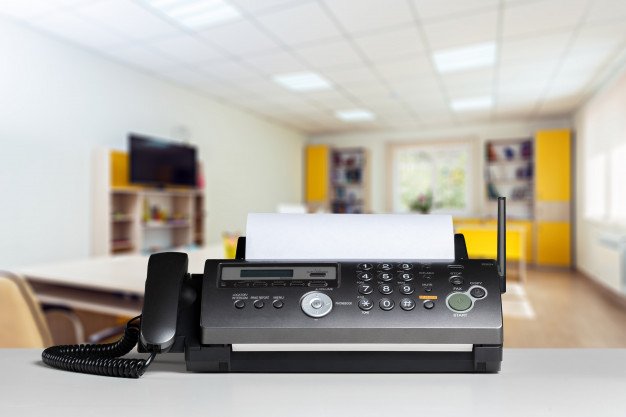
Being able to send a document with a push of a button was groundbreaking in modern technology. Faxing became one of the quickest and easiest ways to send a document from one place to another. With snail mail being too slow and email not being secure, so that leaves us with the decade-old but always reliable fax.

But who uses fax machines nowadays? You’d be surprised that even startups are still using a fax machine. But without a fax machine how am I going to send or receive a fax? Luckily for you, the internet provides a wide array of fax online setup and faxing over the internet like Hottelecom.biz. It’s easy, fast, and reliable, without that much effort.

So how do you Fax over the internet?

The process is simple. You send fax, using the internet connection at hand. It does not require you to have a physical fax machine. Unlike your typical fax machines which require a fax machine and a phone line connected to it, all you need is a network and a device to process and send the fax over the internet and an online faxing set-up and you’re good to go.

So how do you get started?

Step 1: The all-important internet:

Of course, to be able to send a fax over the internet you would need the most key component, which is an internet connection.

Step 2: A online faxing service:

You can easily sign in to one of the numerous online fax service providers on the internet, A simple Google search will throw up multiple results. Go to the platform, check the credibility, and complete the signup process by entering your details. It is as simple as that.

Step 3: Attaching your document(s) to your email or to a new fax message:

This process is relatively simple and involves you adding the email to the fax. This is why you do not require a physical fax machine. A simple works just fine.

E.g: 1xxxxxxxxxx@onlinefaxservice.com

The issue here is the time taken by the software to convert the message or email into a fax. It depends on how big the message is. However, once it is sent, you will be notified in the same email id you had given at the time of signing up on the form.

Advantages of Faxing online:

So you know the what and the how, all you need is the why.

  1. Send fax anywhere and anytime – All you need is an internet connection, a computer or mobile phone, and your document and you can fax anywhere and anytime.
  2. Saves you money – Without the need for a fax machine, you could save a small amount of fortune for what you would have been paying for such as the equipment, the maintenance, the phone charges, and so on.
  3. It’s easy- Setting up and using it relieves you of the hassle. All you need is a mobile phone or a computer with an internet connection and you can be faxing online in no time. There is available software to aid you in this process too so there is no need to worry.
  4. It enables you to send a fax through only a mobile phone –  Didn’t bring your laptop or no computer in sight? Use your mobile phone for your faxing needs. Many online faxing services provide mobile apps so you can fax them on the go. Making your phone camera as a scanner you would be able to scan documents and send them through your mobile phone.
  5. It keeps your files organized and on the go – Unlike the traditional way of faxing where you receive a ton of files printed on paper, how are you going to keep track of all these files if you’re having 10 faxes a month? With online faxing, it keeps all your documents in one app using cloud storage and on the go. Well, you can go for print and apply label systems to ensure better printing on your own. It can be a handy solution to uplift your document management process.
  6. You can do search results directly – Say goodbye to manually searching through all your documents in folders, cabinets, even in storage. You could find faxes in a matter of seconds with the help of the search bar on your computer or the mobile application.

Online Faxing is easy, simple, and efficient. Use online faxing today and have efficiency in your own hands.  Having online faxing would be an advantage to your business as it will help you check your faxes online and would help you keep things organized as well as having fewer paper trails. It will minimize expense and manpower to do so thus it is highly encouraged in our business now. We need to adapt to technology thus it will give so much advantage in our part.

Read Also:

Mashum Mollah is the feature writer of Search Engine Magazine and an SEO Analyst at Real Wealth Business. Over the last 3 years, He has successfully developed and implemented online marketing, SEO, and conversion campaigns for 50+ businesses of all sizes. He is the co-founder of Social Media Magazine.

View all posts

Leave a Reply

Your email address will not be published. Required fields are marked *

Related

com.android.phone has stopped

How To Fix Com.Android.Phone Has Stopped Error In Your Phone?

We all have a mobile phone, and it almost runs smoothly until and unless there some glitches or issues happen. And com.android.phone has stopped is one of them. Are you also facing these issues? Are you looking for ways to fix it? Here, in this article, I will guide you with some easy and simple steps that you can try at home really quickly for fixing this issue. Generally, at the time of receiving a call, this com.android.phone has stopped issue occurs and shows an error message “unfortunately the process com.android.phone has stopped.” Fix Com.Android.Phone Has Stopped Error In Your Phone Here, I will tell you the easy steps to fix the com.android.phone has stopped the issue. You can try all these techniques on any android phone, including Samsung, Xiaomi, and many more. So, let’s get started with the fixes.  1. Reboot Your Phone When you are sending a text message or making calls, or opening any app, this com.android.phone has stopped eros happens. In case you are facing this issue for the first time, you can try restarting your device. After you have done rebooting your phone, check whether the eros is still there or not. In case the error still persists, do not worry; I have some more options to fix this error. So, let’s look into other available options.  2. Clear App Data And Cache Clearing your cache and data for the phone app can help you in fixing the com.android.phone has stopped error. Follow the steps to perform this solution. To open the apps list, click on the Menu option. Select the Settings icon from the list. Go to the Devices section. Search and tap on Apps, or App Manager, or Application Manager.  Now select the app for which you want to clear data from the App window. Once the Storage section opens, tap on the option names Clear Data. Tap on the Clear Cache button under the Cache section. Reboot your phone. Check if the issue is solved or not. If the issue is still there, go on to the next option. 3. Clear Data And Cache Of The SIM Toolkit If you are facing com.android.phone has stopped error, you can try to fix the issue by clearing the cache and data of the SIM toolkit. Follow the below-mentioned steps to do this. Go to the Settings menu. Select Apps. Tap on SIM Toolkit. Tap on Clear Data and also on Clear Cache. Reboot your phone. Now check if the issue is fixed or not. In case you are still facing the issues, try the next option. 4. Stop Automatic Updates Some users also state that stopping the automatic date option has solved the com.android.phone has stopped error. In order to do that, follow the below-mentioned steps. Tap on Play Store. Now tap on the Menu icon. Tap on the Settings option. Now tap on Auto-update apps. Choose the option of Do not auto-update apps. Reboot your phone. Once your phone turns on, check whether the issue is still there or not. If the error continues to show, try the following option to fix it. 5. Wipe The Cache Partition Wiping the cache partition also has helped many users to fix com.android.phone has stopped error. Sometimes, if caches get corrupted, but the system keeps using them continuously, some issues like this happen.  As you can not delete the cache one by one, you need to delete the entire directory in order to solve this issue. And for doing that, you need to follow the steps that I have mentioned here. Power off your phone. Now, press and hold the Home and Volume Up keys. Now press and hold the Power key. Now release the Power key but keep holding the Home and Volume Up keys.  Now release both the buttons and wait for around 30 seconds to 60 seconds until the Android logo shows. Using the Volume Down key select the option Wipe cache partition.  Now press the power key for selecting the option. Now using the Volume Down key go to the Yes option and again press the power button to select it. Now, wait till the time wiping your cache partition finishes. After it completes, no go to the Reboot system now, and for selecting it, press the power button. It will take longer to reboot your phone. Once your phone reboots, check if the problem is fixed or not. If the issue is still there, here is another option for you to try.  6. A Factory Reset If you have tried all the fixing options that I have mentioned till now and still you are facing com.android.phone has stopped error, there is one last option for you. You can factory reset your phone to fix this error.  In case you do not know the process of factory reset your phone, follow the steps below. First, you need to power off your android phone. Now press and hold the Home key, Volume Down button, and Power button at the same time. Your phone will boot into recovery mode. Now use the Volume Up and Volume Down button to scroll through the entire menu. Go to the option, Wipe Data or Factory Reset. To select it, press the Power button. For confirming the reset, go to the option Yes and select it.  Once the reset process is complete, and the same recovery mode menu screen will open. Select the Reboot system now option. I believe this will fix the com.android.phone has stopped error.  Final Tips If you are facing com.android.phone has stopped error in your phone, try all the fixing options that I have mentioned here in this article. Any one of these 6 options will surely fix the issue you are facing, and your phone will be back again into proper functioning. Make sure you are backing up all the necessary data before starting with all these steps.   FAQ( Frequently Asked Questions)  How do you can cast from Firefox to Chrome cast?  If you want to enable the casting you can connect to the Wifi on the Chromecast. You can connect to the cast Icon of the video. Choose the device to cast too. How do you can cast Firefox on your TV?  All you need to do is to send the Cast to play button on the device Icon to play the playback controls on the URL. Where is the Cast button on Firefox?    There are certain steps you have to follow for playing the video to view the control buttons. First, you need to start the videos and you need to view the cast or the control button. Click on the top of the screen tap on the cast button. From the menu option select the fire TV device. The video will start playing on the Fire TV.   More Resources:- Best iPhone Spy Apps Without Jailbreaking. 8 Incredible Tricks That You Didn’t Know Your iPhone Can Perform. How To Use Chromecast From Firefox – Step By Step Guide In 2021

READ MOREDetails
how to cancel Walmart plus

How To Cancel Walmart Plus? – Step By Step Guide

How to cancel Walmart plus subscription? If this is something that you have been searching for, then you have reached the right place. What Is Walmart Plus? Answering the question, “how to cancel Walmart plus?” Want to know how to unsubscribe from Walmart Plus? I will teach you the following ways to cancel your Walmart subscription. How to cancel Walmart Plus online via a web browser How to cancel Walmart Plus on app How to cancel Walmart Plus account by phone How To Cancel Walmart Plus Membership Online Via a Web Browser? Image Source: techowns.com Here’s how to cancel Walmart Plus account online using your web browser. Go to the Walmart website and log in to your account. Click your name in the top-right corner. Select Walmart+ from the dropdown menu. Click Manage membership. Click Cancel Walmart+ at the bottom of the page. An easy tip during your free trial period is to wait until the last day to cancel your Walmart membership. The site may offer you an additional 15 days before confirming your cancellation. If you want to extend your membership, choose the Extend free trial option. If not, choose the Cancel free trial option. Remember, Walmart will charge your credit or debit card for the membership cost if you don’t cancel your free trial before it ends. How To Cancel Walmart Subscription On App? Image Source: techcult.com Here’s how to cancel a Walmart subscription on the mobile app. Open the Walmart app on your mobile device and log in to your account. Tap Pickup and Delivery on the home screen. Click the menu icon (the three lines) at the top-left corner of your screen. Choose Walmart+ under Pickups and Deliveries on the window that pops up. Your account information will appear. Tap Cancel Walmart+ Trial or Account at the bottom of the page. After confirming your cancellation, Walmart will notify you that you’re no longer a Walmart+ member. You can continue using your benefits until your current pay cycle ends. Walmart won’t charge you after your Walmart+ account expires, but you can no longer access the benefits of the membership program or subscription service. How To Cancel Walmart Plus Free Trial Period By Phone? Image Source: doctorofcredit.com You can cancel your Walmart Plus free trial or paid membership by calling Walmart Customer Care at (800) 924-9206, available daily from 8 AM to 10 PM CST. How to Login To Walmart Plus? Image Source: keepsolid.com In case you want to log in to Walmart Plus, it is important that you follow these steps. Visit the Walmart Plus website on your browser. Click on Start your free 30-day trial. Enter your email address and click on Continue. Enter your name and password while signing up and click on Create Account to get some promotional discounts. Does Wamart Have A Free Trail? How To Cancel A Walmart Plus Free Trial? Image Source: i.dansdeals.com If you are in your trial phase in Walmart plus here are the steps that will help you achieve yours. 1. Navigate to the Walmart website. 2. From the top right corner, click on Hi, [your name] Account. 3. Click on Account from the drop-down menu. 4. From the left pane, click on Walmart+. 5. Select Manage membership. 6. Over the bottom you will have a Cancel Free Trial. Can You Cancel Walmart Plus Subscription Anytime You Want? A lot of us like to try out a few things but then want to cancel these subscriptions. The Walmart Plus subscription is no less different than that. Your Plus subscription can be canceled at any time. Depending on your preference, you can cancel it right away or wait until the end of your pay cycle. You will not receive a refund for the remaining days if you cancel during the middle of a billing cycle. Consequently, you must plan your cancellation accordingly. Benefits of A Walmart Plus Subscription Walmart Plus is close to the top of the list when it comes to perks for subscription services offered by retailers. Customers benefit greatly from it, especially if Walmart is your primary retailer. Six months of Spotify Premium for free are one of the first benefits you receive. That amounts to a value of $59, which is more than half the annual cost of a Walmart Plus subscription. Video streaming is also included through the Essential plan of Paramount Plus. That is a great deal of diversion stacked on top of the typical advantages. Another advantage is free conveyance from your nearby Walmart store, gave your request is somewhere around $35. You must reserve a time in advance due to some restrictions. With the exception of oversized and Marketplace items, you can also get free shipping. This also includes delivery the same day or the next; ideal for customers who primarily use Walmart for grocery delivery. Wrapping It Up! In case you were searching for the answer to how to cancel Walmart Plus, I hope that this article has been of help to you. If there are any other queries related to the same, feel free to let me know. All that you need to do is scroll down till you reach the bottom of the page. Then leave your suggestions and doubts in the comment box below how to cancel walmart plus? - Step by step guide. Read Also: Walmart 101: What Is Walmart Neighborhood Market? Operating Hours: What Time Does Walmart Customer Service Close And Open? Walmart Pharmacy Hours: What Time Does Walmart Pharmacy Close And Open?

READ MOREDetails
MySQL

Top 10 MySQL GUI MacOS

Databases are the primary data storage location for all software applications. For instance, when someone conducts a web search, logs into an account, or completes a transaction, a database system maintains the information so users can retrieve it whenever they choose. A relational database, on the other hand, organizes data into tables, rows, and columns. Furthermore, it combines tables and creates a link between the data, making it simple to acquire insights into the relationship between multiple data points. Among the different relational databases, MySQL is the most popular. It supports different OS like Linux, Windows, and even macOS (Apple). In addition, it powers several popular web applications, including Twitter, Netflix, Uber, and Facebook. There are several MySQL GUI for macOS. However, this blog article will discuss the top 10 MySQL GUI Clients for MacOS. 10 Most Popular MySQL IDE for MacOS 1. dbForge Studio for MySQL dbForge Studio for MySQL is a MySQL GUI for macOS. It is used to create, maintain, and design databases. dbForge Studio for MySQL allows you to build and execute queries, develop and debug stored procedures, and manage database objects. Furthermore, it has a user-friendly UI and consists of intelligent coding features like code completion, enabling you to write SQL queries easily and effectively. PROS Code completion Automatic run-time query Visual Query Builder, which helps you create queries using drag-n-drop Simple to debug Simple backup and restoration CONS The free edition has limited functions It is compatible with only MySQL and MariaDB dbForge Studio for MySQL cannot be used offline. Price: 30-day free trial, $179.95 for a perpetual license of the premium edition. 2. TablePlus TablePlus is a native MySQL GUI application with an easy-to-use interface. Its native architecture enables speedier processing of SQL queries. As a result, you can quickly build, query, edit, and save databases. Furthermore, TablePlus has an appealing user interface that enables you to manage numerous relational databases at the same time, such as MySQL, PostgreSQL, SQLite, Microsoft SQL Server, Redshift, MariaDB, and others. PROS It executes queries in split seconds It consists of a simple UI It only consumes a little space - about 180MB to install no code query features you can connect to multiple databases simultaneously code formatting features CONS The free version limits you to 2 opened tabs and 2 opened windows No rollback button Price: $79, $99, and $49 for basic, standard, and custom license, respectively. 3. DBeaver DBeaver is a graphical database administration tool for database developers and administrators. It is a free and open-source tool that supports popular DBMSs like MySQL, PostgreSQL, MariaDB, SQLite, and Oracle. Aside from MacOS, it also works on Windows, Solaris, and Linux. DBeaver is highly functional and user-friendly. It consists of the typical features one should expect from a GUI database management tool. Features like code completion, code formatting, data editing, database analysis, SQL editor, and so on PROS Can connect and work on different databases simultaneously It has easy navigation through the Schema object tree It saves coding time through code completion CONS The free edition has limited functions It consumes a lot of RAM space You cannot install it without Java Price: The community edition is free, and the Enterprise edition is $10/month. 4. Sequel Ace Sequel Ace is a popular Mac database management tool for MySQL and MariaDB databases. It serves as a replacement for the longtime MacOS tool - Sequel Pro. Sequel Ace allows easy writing of custom queries, easy accessibility to all your databases, and a filtering system to find what you need quickly. PROS It rarely crashes It is fast and easy to install It has flexible connectivity CONS It does not support multiple result tabs for multiple queries The query editor window is slow 5. SQLPro Studio SQLPro Studio is a high-end database management software for Postgres, MySQL, Oracle databases, and Microsoft Management Studio. It is well-known for its smart features, such as syntax highlighting, the ability to execute several queries simultaneously, autocomplete, keyword inclusion, and exporting files as CSV, among others. PROS The table filters are easy to use It can install plugins You can easily connect it to local Docker containers CONS It is a little bit slow It does not have NoSQL DB management It crashes randomly. Price: $99.99 per year. 6. DataGrip DataGrip is a multi-engine database management tool. It is compatible with MySQL, PostgreSQL, Microsoft SQL Server, Oracle, Sybase, SQLite, and so on. DataGrip is characterized by many amazing features, such as code auto-completion, bug detection, and version control integration, among others. In addition, it provides a query console for performing and profiling queries. PROS The interface is user-friendly and very easy to understand. The support is substantial, and the tool deployment is highly authentic You can manage multiple databases simultaneously. CONS It consumes too many computer resources, which slows down its performance. If you plan using of MySQL DB only, its functionality is poorly Price: $199 per year 7. Beekeeper Studio Beekeeper Studio is an open-source SQL editor and database management tool for MacOS, Linux, and Windows. It has a friendly user interface and is very easy to understand. Also, Beekeeper studio is GPL licensed, which makes it free to use. The tool is characterized by various smart features, such as a tabbed interface for multitasking, keyboard shortcuts, query history, code auto-completion, and syntax highlighting, among other features. PROS It has keyboard shortcuts It enables users to multi-task You can use the tool without the internet You can save your queries to visit them later CONS It takes a while to load multiple tables in a database The UI could be better Price: $99 8. Adminer Adminer is a PHP-based database data editing tool that is both simple and user-friendly. It is appropriate for general users because it allows for high-level data manipulation. Adminer was previously known as phpMyAdmin. It does, however, have a simpler and more user-friendly layout. PROS The security features are top-notch It is fast in executing queries It restricts the number of connection attempts to prevent cyberattacks CONS The user interface could be more user-friendly It is not easy to move database schemas across the workspace Price: it is free 9. Navicat Navicat is a graphical front-end database administration tool that allows you to connect to several databases simultaneously, including MySQL, MariaDB, SQL Server, Oracle, PostgreSQL, and SQLite. Navicat allows you to create and manage database objects, move data between databases, synchronize, and deploy updates. Furthermore, its efficient functionality allows you to quickly complete complex jobs, such as importing a large number of file data into a database table without interruption. PROS It is beginner friendly It runs SQL queries very fast You can easily move data across different tables and databases. CONS The subscription is very costly It has a short free trial period (14-day free trial) Price: $69.99 monthly subscription, $1399 for a permanent license. 10. Querious Querious is a new MySQL database management software for MacOS. It is precise and simple to use, giving you complete control of your work. Furthermore, Querious is beginner-friendly and comes with smart features that enable users to view, edit, search and structure their data how they deem fit. PROS A simple user interface It executes queries quickly Complete control over user privileges It rarely crashes CONS Autosuggestion can only suggest table names It only supports MySQL It is available only on MacOS Price: $25. Read Also: Quality Of E-Commerce Data Entry Services- Whether You Should Invest In Them? Is Computer Software Prepackaged Software A Good Career Path? Best Practices For Replicating Data

READ MOREDetails