9 Home DIY Decorating Tips

Published on: 24 June 2021 Last Updated on: 16 January 2024
Home DIY Decorating Tips

For new homeowners, there is nothing more exciting than the prospect of owning your first home. This is a place that you can share with your family and make memories in. Of course, for your home to truly feel special you need to do the work to make it look as stunning as it possibly can, so not only do you get to impress your neighbors, but you will be able to give your family a feeling of warmth and belonging by manipulating the aesthetics to suit their tastes.

If you don’t want to spend money by hiring a professional interior designer at the moment, here are some quick ways for you to decorate your home!

1.  It All Starts At the Facade

The facade is the first thing that your guests see when they enter your home. It is fair to say that the facade will create a more lasting first impression compared to the other parts of your home.

One thing that you can do to make your home feel inviting is by giving your front door a nice playful hue, perhaps one of the primary colors of red, blue, or yellow. This gives your house a very impressive aesthetic, which many of your guests will surely appreciate.

In fact, it is actually a very popular tradition to paint the front door red as a sign of welcome, which is something that started in the early days of the United States but is something that is still practiced today.

2.  Keep Everything Light and Subtle

Home DIY Decorating Tips

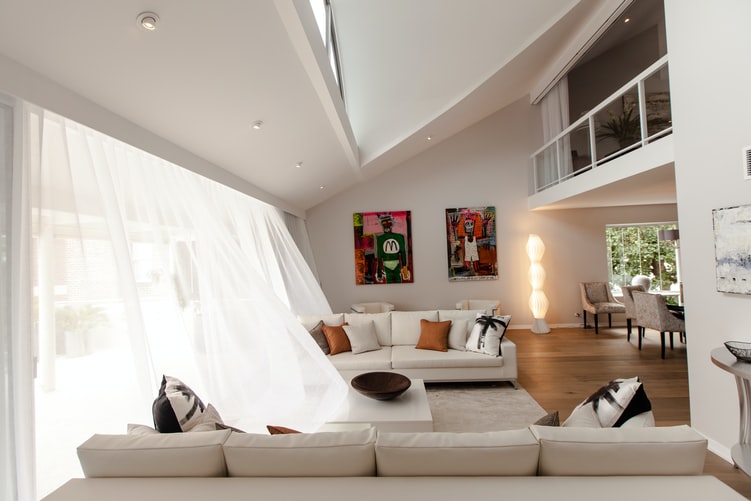
So this approach is a little different from your front door, but you should keep the colors of the interior of your home very light and very subtle. Remember, you want to tickle the senses with the color of your front door, but you want to calm them down with the color of your walls and furniture.

The reason why is simple: the colors of the interior surround you and your guests, from all sides. That is why having a very profound color indoors has the potential of absolutely overwhelming your guests. Light-colored walls of white or gray particularly go well with natural light.

3.  You Can’t Get Enough Natural Light

3.  You Can’t Get Enough Natural Light

Speaking of natural light, you should make sure that you maximize it within your home by removing any obstructions from the outside or from within that could obstruct it. Natural light is beautiful and it can easily improve the aesthetic of your home.

4.  Mirrors, A Must Have For Every Room

4.  Mirrors, A Must Have For Every Room

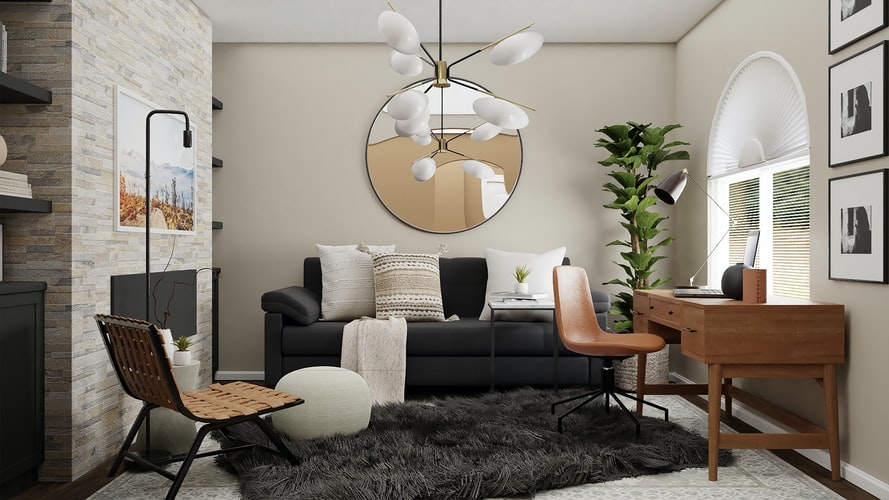
Of course, if your home is not situated in an area that permits too much natural light, there is a little secret that you can so that you can recreate the effect of having tons of natural light in your home. That is, of course, with the careful and creative use of mirrors. You should have a mirror hung in every room because it can bounce light around to give your home better brightness and artificially create the feeling of having tons of light from coming from the outside.

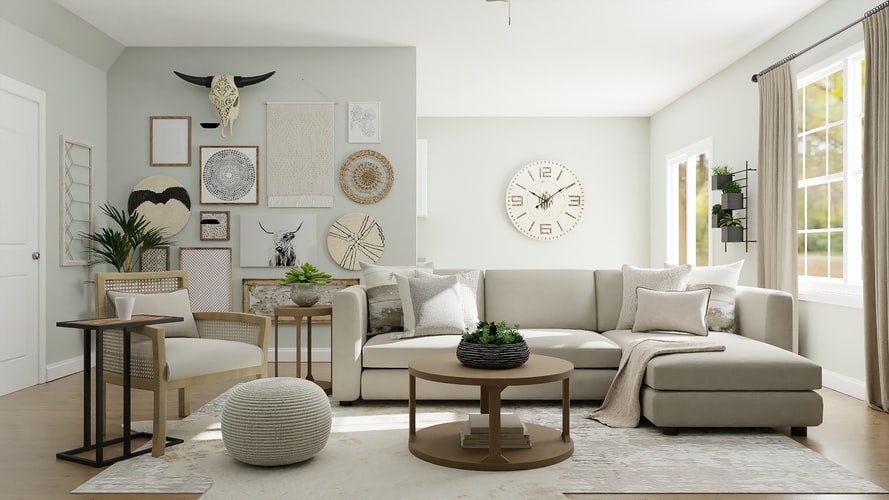
5.  Make Good Use Of Art

The oldest trick in the book when it comes to making your home look fancier and more luxurious is to buy art and carefully choose the right areas of your home to feature them in. You have to remember that art is very subjective, so you shouldn’t feel the need to buy pieces that are too expensive to enhance the aura of your living room.

It is purely visual, there are tons of paintings out there that you can buy for under $50 that would look great on your wall. To the untrained eye, which accounts for most eyes, the difference between those pieces of art and the most expensive ones will be completely negligible. If it looks good and fits the color scheme of your home, buys it!

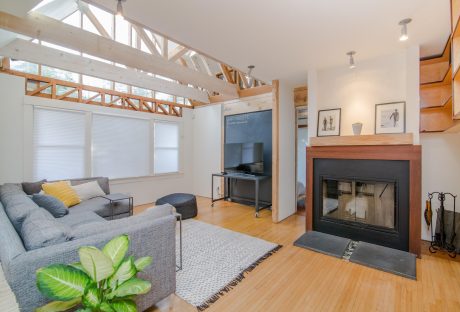
6.  Add An Electric Fireplace

Earlier we talked about the home being the perfect place to make your loved ones feel nice, loved, and warm. There is no better way to recreate this warmth in your home than to feature an electric fireplace with mantle. Not only are electric fireplaces very practical for people who live in colder states, but they are very symbolic and traditional as well; an ideal setting for having deep conversations and telling fun stories in the presence of the people you care about.

Not only are electric fireplaces very practical for people who live in colder states, but they are very symbolic and traditional as well; an ideal setting for having deep conversations and telling fun stories in the presence of the people you care about. You can also consider in using bio ethanol burners, powered by clean and renewable bioethanol fuel, offer an eco-friendly and versatile solution for adding warmth and ambiance to any space without the need for a chimney or vent.

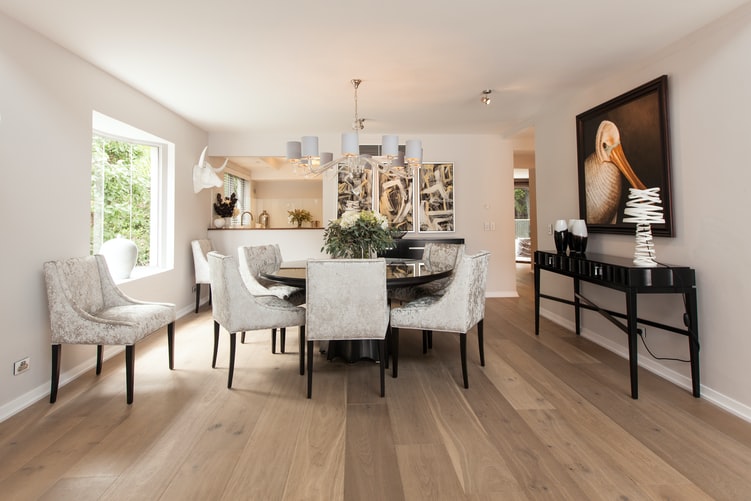
7.  Lighting that Matches the Room

This tip is a little bit more technical but it can be very powerful if you use it correctly. You should have different types of lighting in your home and you should match with the room it is in. There is ambient lighting that exists purely for the purpose of illumination, which would work great in the living room.

There is also such a thing as accent lighting, which provides very decorative and very pleasing highlights. These types of lights are perfect for places where you entertain like the dining room.

8.  Don’t Forget to Declutter

This is probably something that you hear time and time again from people that are interested in home decorating, less is definitely more. Having that said, you have to constantly look at the parts of your home that you feel may look a little overwhelming and find ways to declutter. Maybe your bookshelf has too many books, or maybe your furniture is too closely packed together.

9. Low Ceiling? No Problem

One of the first things that realtors talk about when they are trying to sell an expensive home is high ceilings, they are just magnificent to behold and they can give the home a very grandiose appearance.

Of course, if these types of homes are not exactly within your budget, there are some visual tricks that you can try to artificially reproduce this look. Using custom drapes, using large mirrors, and using design elements that feature vertical stripes will all make your ceiling look higher.

Styling a Stunning Home

So those are some of the simple ways you can make your home look great in a way that does not break the bank. Always remember, however, that design may give you a beautiful looking house, but it is the people in it that truly turn it into a home.

Read Also:

Content Rally wrapped around an online publication where you can publish your own intellectuals. It is a publishing platform designed to make great stories by content creators. This is your era, your place to be online. So come forward share your views, thoughts and ideas via Content Rally.

View all posts

Leave a Reply

Your email address will not be published. Required fields are marked *

Related

Iron Clothes

How to Use Iron Clothes With Steam

Believe it or not, the amount of people that don’t know how to iron clothes is amazing. There’s no shame on it since most of us were thrown into society without really practicing skills that would definitely help us fight back as we become independent. These skills include things like cooking a proper meal before going to work, knowing what groceries to buy without spending all our money on unnecessary things, being able to pay bills accordingly without becoming a mess, cleaning the house every now and then, and of course, knowing how to use steam irons and what to do to properly iron our clothes to not look like folded toilet paper. Don’t worry though! In this guide, I’m going to teach you the essentials of how to iron, and how to deal with different types of fabric. To be honest, ironing is not something as complicated as many think. It’s all about knowing what to do, which is what most people lack. The process may require a little preparation and patience, though, so be prepared to practice with different pieces of clothing to get the main idea. One thing is sure, though. You have to be careful when using an iron because they can be harmful if dealt with without precautions! How to Prepare for It The first thing you’ll need is a flat surface where you can prepare your clothes to be ironed. Try to have everything neatly organized to avoid possible accidents, and if you can, try to do it on an ironing board. Some clothing is too delicate for the heat produced by the heated metal of the device, so have a piece of fabric to protect these. Read more: A Complete Guide on Using IRON on Transfer Paper Connect the Iron Irons can take some time before they are ready to be used. They usually show a sign that they are ready, so be sure to be attentive about them while you take care of the next step. Never try to do it before its ready, since it’ll lead to a slower and far less efficient process. Know the Differences Between Materials, and Sort Them Beforehand Depending on the type of fabric you are dealing with, you might want to change your approach while ironing. You can’t deal with a silk piece the same way you would deal with a cotton one, for example. Some pieces of clothing will require you to use the lowest setting of heat possible, while others may require even more heat. Separate silk, wool, rayon, and acetate to be dealt with the lowest settings. Wool clothes may require the protection of another piece of fabric that was previously dampened, so take that in mind! For polyester, go with the medium heat setting, and for cotton, you can go either medium and high heat setting. Both of them should be dampened to be protected from the heat. Before the iron is ready to go, you should have them sorted out. How to Iron Clothes When you deal with shirts with a collar, you should start with it. You can start with a pattern that follows the inside part of the collar, starting from the center of it, until you reach the edges. Then, fall back to the center, and keep moving between both sides. Once you’ve finished with it, you can work the outside. Lay down the shirt in a way that you can flatten it with the iron with simple movements. After that, you have to work your way down, slowly moving the shirt. Then, work the sleeves then the cuffs. Pants are much easier than shirts with a collar. You just have yo lay them down in a way that you can work both legs at the same time. Start with the waist, gently work with the pockets, and go your way down. Repeat the process until you are satisfied with the results, but make sure to be gentle and careful with the heat and the ironing. Considering that there are way too many types of clothing to teach all of the proper methods and techniques to iron them accordingly, you should check this guide on how to do it without fail. Safety Recommendations Ironing can be a pretty dangerous process if you are not attentive while you do it. If you don’t take safety measures, you might harm yourself or others, so make sure to pay attention to this part of the guide. The very first thing you should always make sure is that the iron is unreachable for children. Children can be curious and do things without knowing, so you will be the one to blame if you allow them to get closer while they are heated up. This is important even after you’ve finished ironing. These devices tend to remain heated up even after disconnecting them, so you should still be attentive to any possible situation. I recommend you to wait at least 10 minutes before taking your guard off. Remember to check just in case. While it rests, don’t leave it face down. You might burn something or damage the iron if you do. If an accident happens and you burn yourself or someone else gets burned, treat the burn with cool water for as much time as you can. 20 minutes should be more than enough. Don’t use things like butter or oil, since it might infect the injury. if the burn is too big, you should check yourself with a doctor. Read Also: How To Choose A Washing Machine? How to Pack Clothing Properly for Shipping Choose The Latest Collection Of Women Clothing For a Stylish Look 6 Benefits Of Buying Clothes Online – Why People trust online shopping

READ MOREDetails
Protecting Keepsakes During Storm Surges

How To Prepare Your Home For Protecting Keepsakes During Storm Surges

When you live in a storm surge-prone area like New Orleans, the safety of your home and cherished belongings is always a concern. The city’s proximity to water makes it particularly vulnerable to extreme weather, including hurricanes and the accompanying storm surges. However, protecting keepsakes during storm surges is a major issue. In this article, you will learn why how to protect your keepsakes during storm surges. Here, you will get five useful tips that are easy to follow. However, before that, you will learn a few details about storm surges and what to do in such situations. Hence, to learn more, read on to the end of the article. Staying Prepared Before Storm Surges Generally, storm surges affect your building’s foundations. This happens due to high water piling because of tropical cyclones, which results in constant agitation in the building. With time, it can result in complete demolition of homes and commercial buildings. Moreover, if the storm is bad enough, you need to evacuate and move inland for safety. In such cases, you have to plan ahead for such possibilities. However, to save your valuables, you can keep large rubber storage containers. In those containers, you have to place your photos and mementos. This will help you take them while you evacuate the place. Apart from that, you must have extra plastic storage containers to gather jewelry, mementos, and other photos. Also, try to place those containers in the attic if you get the news of an upcoming flood. Additionally, you can also keep your necessary documents in a fire-proof safe. Moreover, check them to ensure that they are water-proof as well. This will prevent water from entering the safe it the building submerges in a flood. On the other hand, you must also shut off your electricity at the circuit brakes. This will help your appliances from short circuits.  5 Tips For Protecting Keepsakes During Storm Surges While securing your property is essential, safeguarding your irreplaceable keepsakes—like family photos, heirlooms, and old home movies—requires proactive steps.  The following are some essential tips for protecting keepsakes during storm surges: 1. Identify Valuable Keepsakes The first step in protecting keepsakes during storm surges is to identify which items hold the most sentimental or practical value. For instance, family photos, handwritten letters, heirlooms, home videos, and important documents often top the list.  Generally, in New Orleans, homes may face repeated flooding risks. Hence, creating an inventory of these items ensures you know what to prioritize. Therefore, you must take time to review albums, VHS tapes, film reels, and other family treasures. Moreover, once you identify your most valuable keepsakes, it becomes easier to plan their protection. 2. Store Keepsakes In Waterproof Containers Generally, storm surges bring a high risk of water damage. Hence, you must always store your keepsakes in waterproof containers. Use sealed plastic bins, waterproof bags, or specialized storage boxes for delicate items like photographs and letters.  However, if you need extra protection, consider fireproof and waterproof safes to shield irreplaceable items from both water and heat. For instance, in a flood-prone city like New Orleans, it’s important to seal containers properly. Also, store them away from low-lying areas. 3. Elevate Keepsakes Above Flood-Prone Areas Elevation is one of the simplest and most effective ways to protect your keepsakes. In a city with a history of flooding, storing items in basements or on ground floors is risky. Instead, place keepsakes on higher shelves, upper floors, or in attics well above expected flood levels. In fact, for long-term storage, elevated cabinets or specially designed storage units can provide peace of mind. Basically, they will prevent water damage during high-water events. 4. Digitize Important Items One of the most effective ways to protect family memories is by digitizing them. For instance, you can scan photos and documents. Then, you must covert old VHS tapes or film reels. Thereby, you can create digital backups that can’t be harmed by water or storms. I live in New Orleans, and using local digitization companies was a smart choice for me. Actually, these professionals understand the importance of preserving family memories in a city with a high risk of natural disasters.  Whether you need high-quality scanning for photos or video conversion services, these companies can help digitize your most treasured items while handling them with care. In fact, once you digitize your files, you can store them securely in cloud storage. As a result, you can ensure they are accessible. Apart from that, you can protect them even if you lose the originals. 5. Create An Emergency Evacuation Plan In the event of a major storm, you must have a clear evacuation plan. Moreover, you must include your most important keepsakes in your plan, both physical and digital.  Also, prepare a “go bag” with waterproof containers for physical items. Make sure to have a USB drive or external hard drive containing your new digital files. Actually, if you prepare in advance, you can quickly grab what’s most important. Thereby, you can ensure your irreplaceable memories are safe. Additionally, cloud-stored backups of digitized items allow you to access them from anywhere. This helps even if you are displaced for an extended period. Conclusion If you follow these tips, protecting keepsakes during storm surges in New Orleans will not be a big problem. Basically, New Orleans has a unique geography and vulnerability to storm surges. Hence, protecting keepsakes is a critical part of disaster preparation.  Hence, start by identifying your valuable items. Then, store them securely in waterproof and elevated locations. After that, digitize them for long-term preservation. This way, by planning for emergencies, you can safeguard your cherished memories. Don’t wait until a storm is approaching to take action. Start digitizing your family photos, videos, and documents today to ensure your memories are preserved and protected for generations to come. Preparing now means peace of mind later, no matter what the weather brings. Do you have more suggestions for protecting keepsakes during storm surges? Please share your ideas and opinions in the comments section below. Read Also: Best Carpet Maintenance Practices 6 Expert Tips for Finding The Right Home to Buy How To Approach Home Maintenance With A Focus On Well-Being

READ MOREDetails
Vanity Size On Bathroom Design

The Impact Of Vanity Size On Bathroom Design And Functionality

Today, clothing sizes often lead people to believe they are smaller than their actual size. This is called “vanity sizing”. For instance, "a size 8 dress today is nearly the equivalent of a size 16 dress in 1958," according to a report.  Because clothing can create the illusion of a slimmer appearance, many people now desire larger bathrooms as well. The trend of vanity sizing is influencing the design and functionality of bathrooms. From wider toilet stalls to more spacious showers, bathrooms are being changed to match people's distorted self-image. What is Vanity Sizing For Bathrooms? Vanity sizing is when something is made bigger than normal to make people feel better about themselves. Just like size 6 jeans that actually fit someone who usually wears size 8 jeans. In bathrooms, vanity sizing means making the room and fixtures bigger than what works for real bodies. Such as extra-wide shower stalls, two-person bathtubs, or oversized sinks. They make us feel skinnier, but take up a lot of space! Factors To Consider When Choosing Vanity Size The main thing you should consider when choosing your vanity is the size of your bathroom which is a major factor in changing the look and feel of your bathroom. So, carefully review common bathroom vanity sizes and measurements before selecting. Look at the data below that shows the common vanity width that fits the bathroom sizes:  Data Source: Forbes 1. Consider Floor Space Will counters, cabinets, and toilets still squeeze in if you supersize your bathroom? Make sure giant fixtures don't crowd out other necessary stuff! 2. Watch Door Openings Too That cool two-person tub won't do you any good if it gets stuck trying to fit through the bathroom doorway! Double-check entrances. 3. Check Plumbing Locations Expanding your bathroom means dealing with pipes inside walls too. Make sure water lines still reach sinks or toilets when they move. 4. Price For Extreme Upgrades Going big in bathrooms means spending big bucks too! Make sure your wallet can handle all that bonus tile, lighting, high-tech toilets, and other swanky stuff before pulling the trigger.   5. Future Homeowners Too What seems huge and perfect for your family now may scare off buyers down the road. Keep future practicality for the next folks in mind. 6. Consider Resale Value Even if you adore your 47 jet massaging tub, will someone else want to pay big money for your over-the-top bathroom later when you sell? 7. Extra Cleaning Responsibilities The bigger the bathroom, the longer the cleaning day takes! Make sure you want to put in elbow grease for giant showers and his ‘and her everything.   8. Watch Wet Floor Safety Oversized sinks and tubs mean leaks or splashes cover larger areas. Pay attention to slip-proof surfaces so no one goes crashing down.   9. Visiting Guest Comfort Even if space permits, older relatives may feel uneasy navigating a huge bathroom with their walkers or canes. Consider all who will use it. 10. Separate Private Toilet Room Rather than one giant open space, smaller vanity bathrooms with a separate water closet for the toilet allow privacy. Choosing The Right Vanity Size For Your Bathroom’s Look The dimensions of your bathroom vanity change how open, crowded, or balanced your space appears. An overgrown vanity makes small rooms feel stuffed. But one too tiny turns your bathroom into a messy pile-up of products without enough organizer drawers or counter area. Here’s how to get vanity sizing just right for your ideal bathroom design style:   In Itsy Bitsy Bathrooms When dealing with snug powder rooms or half baths, keep your vanity narrow in the 24 to 30-inch range so it doesn’t hog up the entire floor. Any wider starts making moving around impossible! Select wall-mounted styles instead of boxy cabinets to save precious inches. Or opt for floating vanities that have air rather than chunky boxes below to give the illusion you have more breathing room.  Another decorating trick for a petite bathroom is going big with mirrors or using reflective tiles and chrome finishes. When tiny rooms sparkle and shine, they seem to double in size instantly! Just avoid dark paint shades, clutter, and heavy fabrics that make small salons feel even more closed in.   For Middle-of-the-Road Bathroom Sizes   If your washroom dimensions fall somewhere in that just-right not-too-big, not-too-small middle zone, standard vanity widths from 30 to 48 inches tend to fit nicely without limiting movement. This gives your average family plenty of surface space to spread out self-care must-haves each morning and store all those lotions and potions in handy drawers below.   When organizing your cabinet and counter goods, be sure to keep at least 9 to 12 inches of space around the vanity perimeter. You’ll still need elbow room to get in there for clean-ups without bonking walls, doorway frames, or light switches! Beyond functional inches, defining your vanity area with cool lighting designs or eye-catching tile shapes helps contain the space in a neat square for a balanced, soothing aesthetic.   When You’ve Got Room to Spare Lucky enough to be working with a big old bathroom complete with soaring ceilings and a giant footprint? Then you’ve got options to install his and her double-wide vanities ranging from 60 to a whopping 72 inches. This creates the dramatic appearance of dual stations without the need for significant construction to physically divide your spacious room into two separate spaces. FAQs:- Q1. What is the standard width of a bathroom vanity? Ans: The standard width for a single-sink bathroom vanity is 24 to 48 inches. For a double sink vanity, it’s 60 to 72 inches. Q2. How do I choose the right vanity size for my bathroom?  Ans: Consider your existing bathroom size, number of users, and required storage space when selecting the ideal vanity. Allow proper clearance between the vanity and walls.  3. What are some common mistakes to avoid when choosing a bathroom vanity size? Ans: Avoid sizing too small and creating limited functionality or choosing an oversized vanity that makes the bathroom feel confined. Failing to measure properly and allowing adequate wall clearance are also common mistakes. Conclusion Vanity dimensions significantly influence the visual enhancement and practical use of any bathroom. By factoring in room size, user needs, and required storage, you can achieve an optimally designed and functional space that suits your lifestyle beautifully. By paying attention to critical measurements and clearances, you can avoid common mistakes. With some planning and foresight, you’ll love your new bathroom for years to come. Additional Reading: 3 Best Indoor Plants For The Dining Room Stunning Bathroom Vanities For An Instant Makeover Storage Units Your Ultimate Guide To Organized Living

READ MOREDetails