Home Maintenance Plans And Cleaning Tips During Covid-19

Published on: 17 April 2020 Last Updated on: 29 June 2020
Cleaning Tips

The COVID-19 pandemic outbreak rages on as many fall victim to the deadly virus. Everyone started with the assumption that it is something benign that will soon be over, but no one speculated that the virus could evolve into something so catastrophic. Entire countries beat down by the virus are now practicing strict precautionary measures and complying with the imposition of a house quarantine. The damage can’t be reverted, but everyone is playing their part to minimize it and save as many lives as possible. As unfortunate as the condition is, it is onto us to play an active role and do the needful to ensure our safety.

Local authorities and governments have published and requested people to observe a set of rules to minimize spreading the virus when out of the house. Exercising these measures have helped people take a step towards securing themself from a host of the COVID-19. However, it isn’t sufficient as we can do a lot more to raise the bar and tighten the grip to avoid catching this virus. Staying indoor at all times doesn’t mean that we are not susceptible to this virus as it can survive on surfaces, especially metals, from where others can get it. What we should be doing to guarantee our safety is to go to extensive lengths and adopt extraordinary hygiene practices. Not just of ourselves, but the surroundings where we are living should also be in exemplary states. If you feel that you have ever been half-hearted in cleaning up your house, now might be a good time to make up for it and show some diligence.

Practicing personal hygiene includes all the necessary steps like bathing regularly, washing hands after short intervals, and maintaining distances. People can do this even if they don’t have a quarantine handbook to follow, but exterminating the traces of this virus from your house can be a challenge. There are many ways that you can do this, but there are certain subtleties that you need to practice while at it to do it right. It may sound easy, but it heightens the risk of contracting the virus. That is why you need to be extra careful and make sure that you are prioritizing your health and safety while doing this. With that noted, here are some maintenance and cleaning tips that you should follow to build your defenses against this virus.

Here are home maintenance plans and cleaning tips during COVID-19

1. Secure The Entrance

In a normal situation, this would mean placing a security guard on your front door to keep anyone from intruding. However, under these circumstances, the objective remains the same, but you need to use inanimate objects to secure the parameter. Like many other counties, people in Australia have started covering up windows with solid window shutters to avoid anything floating in from there. You can find some high-quality window shutters in Sydney to help you do this.

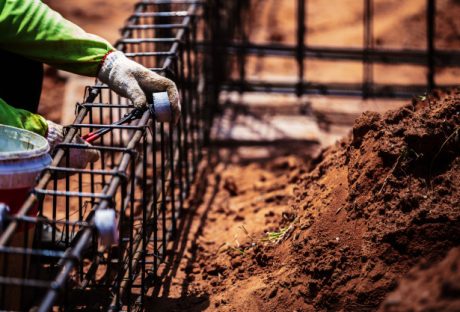
The next step would be to cover the basement, since it is an area likely to have an opening from outside, like a water inlet. If you find anything like that, keep it sealed unless you have no other option but to use it. Besides this, look for openings and cracks in your flooring or ceilings, and try to patch them up, even if it is temporary. Follow these to ensure that whatever is outside, stay outside.

2. Cleaning Layers

Cleaning Layers

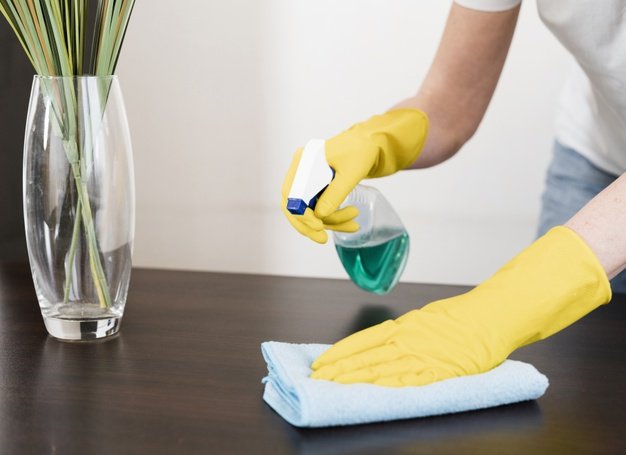
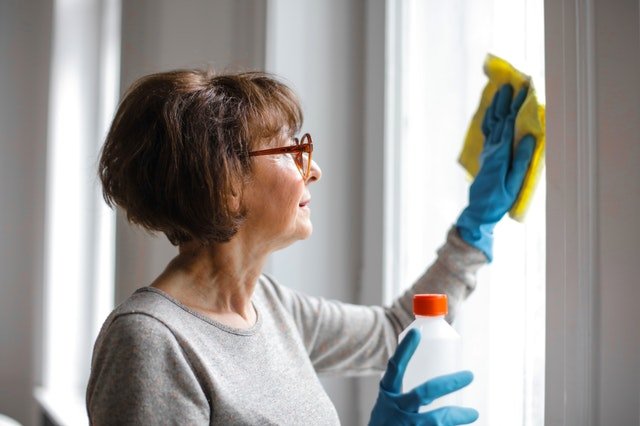
Don’t panic and start applying the disinfectant everywhere. It is neither the best effective nor the right way to go about the situation. If you see dirt on a surface, use some water and soap to clean it first, and then use the disinfectant. Don’t forget to target the areas that are most frequently touched by everyone. These include doorknobs, staircase railings, switches, remote controls, desks, toys, electronic devices, and similar other stuff. Be thorough. One thing that the quarantine has granted us is time, so don’t rush with your cleaning.

3. Cleaning The Cleaners

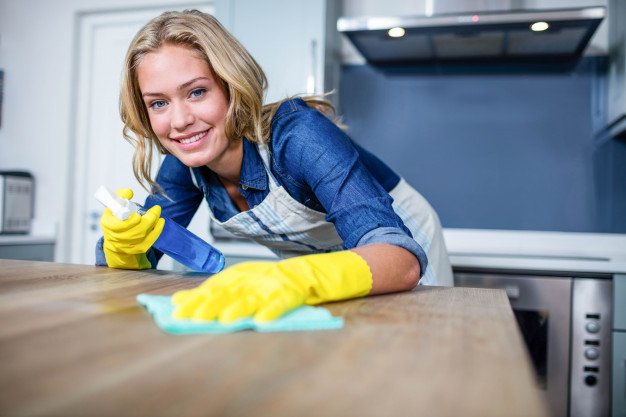
What’s dirtier than the surface that you are cleaning are the tools that you are using to do it. Wash sponges and wiping clothes after using them to clean a surface so that you don’t pass on the germs of one place to another. Don’t miss out on the internal surface of your vacuum cleaner. After removing the dirtbag, apply a disinfectant and wait for it to dry off before placing the dirtbag back in. Don’t use your bare hands to pull out the dirtbag. Try putting on some gloves to avoid catching anything from it. And between all this, don’t forget to clean your gloves when moving on to another task. Take them off, wash them, and don’t forget to wash your hands at the end of it all. That should suffice.

4. Get It Off From Your Clothes

If the virus can survive on surfaces, then it can survive on your clothes as well. Wash things that are used regularly, like undergarments, towels, and linens between 40 and 60 degrees Celsius. Try and use a bleach-based detergent or a bioproduct to ensure that the clothes get rid of anything that can spread. Handle the dirty laundry with care and maintain minimal contact with it. Don’t touch them unless you have to. Once done, let your washing machine run empty for a while to get everything out of the system. And in case if you don’t have a washing machine, then don’t think of doing your laundry inside the house. You will risk spreading the virus. It’s better to take it outside and bring it back in once done.

Summary

These were some primary maintenance and cleaning tips that you should follow to disinfect your house. Try to start early and do it daily to minimize the risks. In case you feel unwell, don’t act tough, and distance yourself from all these tasks. Try to stay isolated until whatever you were experiencing subsides. If your condition doesn’t improve, reach out to the relevant health care services immediately to get yourself checked. Practice strict personal hygiene and don’t neglect minor symptoms if they aren’t going away. The best way to survive this is by exercising caution, so don’t slack off on it.

Read Also:

Content Rally wrapped around an online publication where you can publish your own intellectuals. It is a publishing platform designed to make great stories by content creators. This is your era, your place to be online. So come forward share your views, thoughts and ideas via Content Rally.

View all posts

Leave a Reply

Your email address will not be published. Required fields are marked *

Related

House Move

Motivational Tips to Kick Start Your Packing Process for the House Move

Moving is a time taking process which usually stars right after the move is confirmed and often ends with the moving date flashing on the calendar. The job demands a lot of efforts and doing the same tasks over and over again. The monotonous and complicated nature of packing often intimidates homeowners, who, in return, feel demotivated to take up the job of packing efficiently for a successful move. Considering the repetitive nature of the process and also the extended time frame, it isn’t easy to keep up your motivational spirit. But, timely pacing is important as you have your complete household belongings to be packed and move on a specific date. If you do start pacing early, you will end up messing you’re your time table and at last, leaving a lot of mess behind. If you too are feeling the lack of motivation and want to pump up your spirits to start packing, here are some amazing ways: Make a packing list first: Often the lack of knowledge as to where to start and what to do first makes the homeowners rather demotivated. There are a lot of things that homeowners must know in order to feel motivated to kick start the packing process. This includes what to pack when to pack, how to pack and more. If you too are dealing with these such complications, you must make a packing list first. Make a list of all the items that you want to move with you to the new house before you end up doing nothing and lose a good amount of days. Many homeowners miss a number of days due to inactivity and end up with nothing but a lot of panics. So, the first thing that you must do is make a packing list, have a timeline for all the items and get started. Enjoy organized packing: If you want to enjoy maximum efficiency in your packing process, you must know that it can only be achieved with logical progression.  Organized packing is the secret of the best local moving companies and by following it, you too can attain the desired success. The first thing that you must focus on is to start the packing process as soon as possible. This will offer you enough time to follow your packing schedule and timeline. Also, start from the toughest rooms to pack to make sure you have enough challenges to make the job interesting. Pack only what should be packed: You must not exceed your limits by trying to pack everything on your own. Limit your packing efforts to the thing that you consider easy and possible to pack. Items like appliances, furniture, piano, and others are tricky to pack and should be packed with the help of the professionals only. However, you can always try to pack items that can be fit in the cardboard boxes as packing boxes are easier. Ask for help: You must always ask your friends to help you with the packing process. Your friends may have experience of packing various household items. Moreover, you can also enjoy spending some time with your friends and family in your last few days together. If you do not have friends or families to ask for help, contact the best local moving companies and enjoy their expertise. Downsize before you pack: Packing everything present in your home can make you bored and tired. It is always good to pack only those items that you want. This will not only reduce your packing efforts but also help you save money with reduced moving size. Downsizing is critical to a house move and by honest efforts you can reduce your moving size to more than half. The items that you sort out as unwanted can be sold or donated for a cause. So, this is how you can make your packing interesting and get started with your moving process. Read Also: The Five Most Important Things To Know Before Moving Moving Home Checklist: What You Need To Know Moving House? Here’s The Ultimate Checklist Our Guide To Finding The Cheapest New York City Movers

READ MOREDetails
Vanity Size On Bathroom Design

The Impact Of Vanity Size On Bathroom Design And Functionality

Today, clothing sizes often lead people to believe they are smaller than their actual size. This is called “vanity sizing”. For instance, "a size 8 dress today is nearly the equivalent of a size 16 dress in 1958," according to a report.  Because clothing can create the illusion of a slimmer appearance, many people now desire larger bathrooms as well. The trend of vanity sizing is influencing the design and functionality of bathrooms. From wider toilet stalls to more spacious showers, bathrooms are being changed to match people's distorted self-image. What is Vanity Sizing For Bathrooms? Vanity sizing is when something is made bigger than normal to make people feel better about themselves. Just like size 6 jeans that actually fit someone who usually wears size 8 jeans. In bathrooms, vanity sizing means making the room and fixtures bigger than what works for real bodies. Such as extra-wide shower stalls, two-person bathtubs, or oversized sinks. They make us feel skinnier, but take up a lot of space! Factors To Consider When Choosing Vanity Size The main thing you should consider when choosing your vanity is the size of your bathroom which is a major factor in changing the look and feel of your bathroom. So, carefully review common bathroom vanity sizes and measurements before selecting. Look at the data below that shows the common vanity width that fits the bathroom sizes:  Data Source: Forbes 1. Consider Floor Space Will counters, cabinets, and toilets still squeeze in if you supersize your bathroom? Make sure giant fixtures don't crowd out other necessary stuff! 2. Watch Door Openings Too That cool two-person tub won't do you any good if it gets stuck trying to fit through the bathroom doorway! Double-check entrances. 3. Check Plumbing Locations Expanding your bathroom means dealing with pipes inside walls too. Make sure water lines still reach sinks or toilets when they move. 4. Price For Extreme Upgrades Going big in bathrooms means spending big bucks too! Make sure your wallet can handle all that bonus tile, lighting, high-tech toilets, and other swanky stuff before pulling the trigger.   5. Future Homeowners Too What seems huge and perfect for your family now may scare off buyers down the road. Keep future practicality for the next folks in mind. 6. Consider Resale Value Even if you adore your 47 jet massaging tub, will someone else want to pay big money for your over-the-top bathroom later when you sell? 7. Extra Cleaning Responsibilities The bigger the bathroom, the longer the cleaning day takes! Make sure you want to put in elbow grease for giant showers and his ‘and her everything.   8. Watch Wet Floor Safety Oversized sinks and tubs mean leaks or splashes cover larger areas. Pay attention to slip-proof surfaces so no one goes crashing down.   9. Visiting Guest Comfort Even if space permits, older relatives may feel uneasy navigating a huge bathroom with their walkers or canes. Consider all who will use it. 10. Separate Private Toilet Room Rather than one giant open space, smaller vanity bathrooms with a separate water closet for the toilet allow privacy. Choosing The Right Vanity Size For Your Bathroom’s Look The dimensions of your bathroom vanity change how open, crowded, or balanced your space appears. An overgrown vanity makes small rooms feel stuffed. But one too tiny turns your bathroom into a messy pile-up of products without enough organizer drawers or counter area. Here’s how to get vanity sizing just right for your ideal bathroom design style:   In Itsy Bitsy Bathrooms When dealing with snug powder rooms or half baths, keep your vanity narrow in the 24 to 30-inch range so it doesn’t hog up the entire floor. Any wider starts making moving around impossible! Select wall-mounted styles instead of boxy cabinets to save precious inches. Or opt for floating vanities that have air rather than chunky boxes below to give the illusion you have more breathing room.  Another decorating trick for a petite bathroom is going big with mirrors or using reflective tiles and chrome finishes. When tiny rooms sparkle and shine, they seem to double in size instantly! Just avoid dark paint shades, clutter, and heavy fabrics that make small salons feel even more closed in.   For Middle-of-the-Road Bathroom Sizes   If your washroom dimensions fall somewhere in that just-right not-too-big, not-too-small middle zone, standard vanity widths from 30 to 48 inches tend to fit nicely without limiting movement. This gives your average family plenty of surface space to spread out self-care must-haves each morning and store all those lotions and potions in handy drawers below.   When organizing your cabinet and counter goods, be sure to keep at least 9 to 12 inches of space around the vanity perimeter. You’ll still need elbow room to get in there for clean-ups without bonking walls, doorway frames, or light switches! Beyond functional inches, defining your vanity area with cool lighting designs or eye-catching tile shapes helps contain the space in a neat square for a balanced, soothing aesthetic.   When You’ve Got Room to Spare Lucky enough to be working with a big old bathroom complete with soaring ceilings and a giant footprint? Then you’ve got options to install his and her double-wide vanities ranging from 60 to a whopping 72 inches. This creates the dramatic appearance of dual stations without the need for significant construction to physically divide your spacious room into two separate spaces. FAQs:- Q1. What is the standard width of a bathroom vanity? Ans: The standard width for a single-sink bathroom vanity is 24 to 48 inches. For a double sink vanity, it’s 60 to 72 inches. Q2. How do I choose the right vanity size for my bathroom?  Ans: Consider your existing bathroom size, number of users, and required storage space when selecting the ideal vanity. Allow proper clearance between the vanity and walls.  3. What are some common mistakes to avoid when choosing a bathroom vanity size? Ans: Avoid sizing too small and creating limited functionality or choosing an oversized vanity that makes the bathroom feel confined. Failing to measure properly and allowing adequate wall clearance are also common mistakes. Conclusion Vanity dimensions significantly influence the visual enhancement and practical use of any bathroom. By factoring in room size, user needs, and required storage, you can achieve an optimally designed and functional space that suits your lifestyle beautifully. By paying attention to critical measurements and clearances, you can avoid common mistakes. With some planning and foresight, you’ll love your new bathroom for years to come. Additional Reading: 3 Best Indoor Plants For The Dining Room Stunning Bathroom Vanities For An Instant Makeover Storage Units Your Ultimate Guide To Organized Living

READ MOREDetails
Plumbing Pipe

5 Best Type of Plumbing Pipe

Because all plumbing jobs have different risks and requirements, pipe manufacturers make a variety of products for specific maintenance and repair situations. If you select a proper pipe, you'll less likely experience leaks, flooding, and other plumbing problems after all of your fixtures are operational. Make use of the best plumbing pipe that can work well in your favor. At local hardware stores, you'll find many plumbing pipes that can distribute water and process waste. However, if you're looking for the best option for a bathroom or kitchen, there are five pipes that are worth considering. PEX Pipes: PEX piping is one of the most popular options for traditional jobs. They can supply water to various fixtures around a home or building. The housing is very rigid and strong, so these pipes can handle intense pressure from a water supply. It is one of the best plumbing pipe to make things easier for you. It is one of the best plumbing pipe that you can look for. Pros: Thanks to the color-coded designs, you can easily identify pipes for hot and cold water. The cold pipes are blue, and the hot water pipes are red. Every PEX pipe is easy to cut during installation jobs. If a pipe doesn't fit, you can make adjustments by taking advantage of its 90-degree curves. Cons: You can't use PEX pipes with push-fit fittings because leaking may occur. When a pipe breaks and leaks, you can't recycle it. PVC Pipes: PVC pipes are built for drainage and venting jobs. Many plumbers work with these pipes because they're light and simple to use. The big advantage is that PVC piping is easy to cut. You can slice through the product quickly with a hacksaw. Whenever you need to secure PVC pipes together to extend the lines, you can connect them using solvents. Pros: All PVC pipes are inexpensive, and they're great cost-efficient options for irrigation projects. If you ever need to bend a pipe, you can arch its flexible housing. Cons: PVC pipes are only great for simple jobs because they have fragile housing. You can't apply glue on PVC pipes since water may leak through the seal. Ridged Copper Pipes: Ridged copper pipes are also made for water supply in a home, and you can also cut them using a hacksaw. In order to connect a riged copper pipe, you'll need to use a soldering device. Many home builders and commercial building contractors rely on these particular pipes when they design plumbing systems because copper distributes drinking water without contaminating it. Pros: A ridged copper pipe can handle high heat well. It can also withstand intense water pressure. When you no longer need a riged copper pipe, you can easily recycle it. Cons: If you don't have great plumbing skills, the process of connecting ridged pipes with soldering equipment may be challenging. Also, you'll need to set aside plenty of cash to buy ridged pipes since they're expensive. ABS Pipes: ABS pipes are commonly used during jobs that involve drains and vents. These pipes and PVC pipes have similar characteristics. However, the big difference is that ABS pipes have a black housing that's somewhat softer. Pros: If you need great pipes for underground plumbing systems, ABS pipes are ideal options since they're durable and strong. When the temperature drops outdoors, ABS pipes won't break because their housing is engineered for cold weather. Cons: You'll need to use ABS pipes in some locations wisely according to the building code. Also, you must pick the installation zones strategically since high temperatures can cause warping. Flexible Copper Pipes: These pipes are built for sinks, fridges, and water heaters. You can bend them to establish a secure connection during installation jobs, and you can cut them very easily with a sharp hacksaw. Pros: Flexible copper pipes will fit snugly in tight spaces. They can also handle high heat that builds up in confined areas. It is one of the best plumbing pipe that you can look for at your end. Cons: You must handle flexible copper pipes with care to avoid breaking them. Another disadvantage is that the pipes are expensive. Winter Protection Strategies for the Best Plumbing Pipe: After you have proper pipes for a job, you'll need to implement procedures to protect them. Winter is a time when most pipes are damaged. As water freezes in a line, pressure builds up, and the intensity of the expanding ice can crack or break a pipe that isn't properly protected. By following a few simple steps, you'll maintain and protect your pipes whenever the temperature dramatically drops in your neighborhood. Insulation can create a barrier that blocks icy air around your pipes. When applying insulation onto thick or thin pipes, ensure that there are no gaps because air can seep through any opening. Plastic pipes are more vulnerable than copper pipes, so they will need extra protection before a harsh winter storm. Indoor pipes will also need protection against cold weather. You can keep arctic air away from vulnerable pipes underneath kitchen and bathroom fixtures by sealing cracks around your home. Caulking and spray foam is the best sealants for large cracks around doors and windows. Heaters, furnaces, and other heat sources can protect vulnerable indoor pipes as well. To achieve the best results, use indoor heat sources throughout the night because the coldest temperatures occur long after the sun sets. These five piping materials are great options for general residential and commercial projects, and you can protect each product using insulation, sealants, and heat sources throughout the winter. However, along the way, you may need professional help with an installation or maintenance routine. When this happens, always work with a professional plumbing company, such as Conrad Martens Plumbing. Read Also: 8 Plumbing Myths Busted Asphalt Pavement Maintenance Tips 5 Important Tools For Pipe Recovery Operations

READ MOREDetails