How to Handle the Move-Out Cleaning

Move Out Cleaning

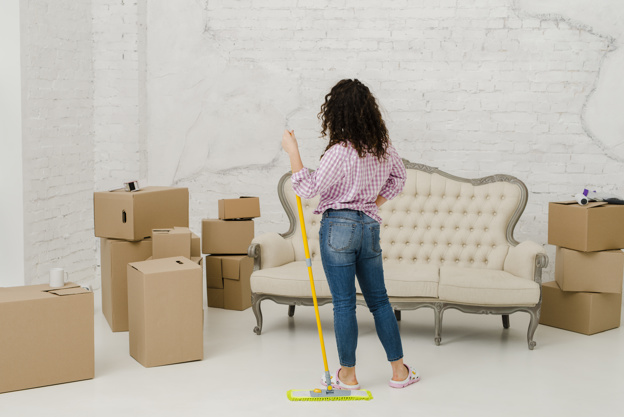
Changing home is a stressful and demanding endeavor itself, you have to think about so many things – packing, organizing transport, and of course, cleaning. You need to clean your new place unless someone was kind enough to do it for you, but still, a second-round might come useful.

And of course, you need to clean your old home and leave it in decent condition for the new tenants.  Otherwise, you may not get your deposit back. In case you are selling your own place, it is also an important criterion which will make your former home much more attractive to the potential buyers.

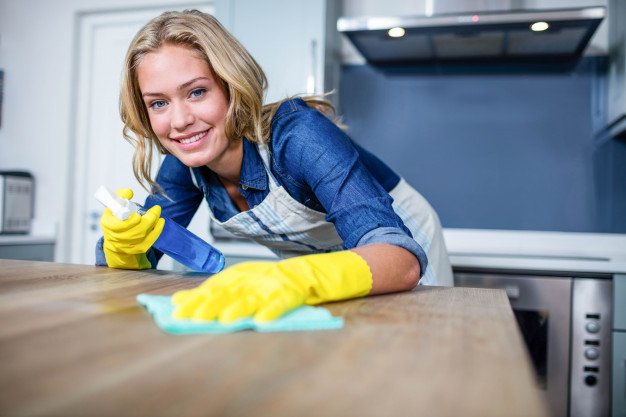
Unless you hire professional help, cleaning your old place is definitely not going to be easy, but there are a few things that can make the experience a bit less stressful and burdensome as recommended by move out cleaning professionals.

Start from the Top

A common mistake many of us make while cleaning is to start from the floors, as they usually do represent the biggest item on the list. However, if you start from the floors, and then move up to walls, corners, and surfaces, guess what – you will have to clean the floors all over again.

So, be wiser than that and start this excruciating business from the top. This will save you a lot of time and energy. Also, when talking about directions, always start the cleaning from the back, that is from a wall towards the door, so you don’t end up stuck in one small uncleaned place, like on an island, having to cross all the wiped space to go back, and potentially soil it all over. It sounds funny, but this has certainly already happened to some of you, and you will definitely want to avoid it this time.

Change the Approach

When cleaning, everyone mostly likes to do the job room by room. However, this usually takes way more time than actually cleaning segment by segment, which is task by task. For instance, if you are wiping floors, it is better to do it in the whole house while you are at it, instead of moving to a different segment in the same room. This approach is much more efficient so take it into consideration once you start you moving out clean up.

Have Everything at Hand

In situations where time is really precious and you don’t have the liberty to take too long because a lot of other things are waiting, good organization is everything. You will definitely need different cleaning chemicals such as glass cleaners, disinfectants, baking soda, vinegar, and others, as well as cleaning equipment like cloths, vacuum cleaners, brooms, dustpans, brushes, and others.

The first important step is not to pack any of these along with the rest of your stuff. The second is to actually know where they are and to organize them as much as possible so you don’t have to lose too much time searching for them. As professional home cleaners at Maid Easy say that good organizational skills can shorten the time it takes to clean the whole house significantly.

“Dry” Cleaning First

Make sure you first do the “dry” cleaning such as swiping, dusting, and vacuuming to remove all the dust and other dirt in that way. If you apply wet cloth or a brush, you will just make bog, rather than clean something. The best option is to dust all the corners and surfaces first, swipe any bigger mess, and then finally vacuum to give it the final touch. After this, you may proceed with “wet” cleaning activities.

Once you are done with the old place, you can apply all these tips to your new home. Even if the previous tenants or owners have cleaned it, you will probably want to make sure it is spotless. Of course, if repeating the same process all over again is just too much for you, you can always ask the professionals for help, at least for one of these cleaning actions.

Read Also:

Content Rally wrapped around an online publication where you can publish your own intellectuals. It is a publishing platform designed to make great stories by content creators. This is your era, your place to be online. So come forward share your views, thoughts and ideas via Content Rally.

View all posts

Leave a Reply

Your email address will not be published. Required fields are marked *

Related

Bathroom

How To Keep A Bathroom Timelessly Elegant

When it comes to bathroom design, new trends emerge year after year. If these are always followed, however, this can become quite expensive in the long run. Those who don't want to invest a lot of money in redesigning their bathroom after just a short time are therefore much better off with a timeless style in the bathroom. But what interior design tips should actually be considered for this and what options are basically available? The following article shows. Timeless bathroom design - the basics With regard to a timeless bathroom design, some principles can be identified. These include the fact that the focus should be on basic colors. In addition, the functionality of the interior should be given the highest possible priority. Another valuable tip is to follow the well-known motto "less is more" when designing the bathroom. Despite a high level of functionality, however, aesthetics should not be neglected - after all, you should be able to feel good all around in the bathroom. Use basic colors In timeless bathrooms, people hardly ever go for shades like a bright turquoise or a gaudy red. Such splashes of color are only suitable for accessories and bathroom accessories, such as towels - after all, if necessary, these can be replaced in no time at all. Much more suitable are basic colors, such as black, gray, cream, sand, or white. Such muted colors will still be considered modern and contemporary in 20 years. In addition, brown tones also provide a high feel-good factor and a cozy ambiance, whether in the area of furniture or tiles. You can discover marble look tiles on this website. The tiles, by the way, play an extremely important role when it comes to the timeless design of the bathroom. Accordingly, basic colors should be used here as well. In addition, modern tiles have meanwhile been showing themselves as large-format for several years. Less is more A timeless bathroom is hardly characterized by the fact that the design always immediately catches the eye as soon as the room is entered. Current trends can be completely out again in just a few months. To prevent the design of the bathroom from soon being judged as a tasteful misstep, it is therefore much more advisable to prefer more inconspicuous and restrained designs. If the essentials are placed in the focus of the interior, the chances are good to be satisfied with the bathroom design for many years. Choose tried and tested classics There can be a very fine line between modern and antiquated - this is true not only in the world of fashion but also in bathroom design. When it comes to putting together new bathroom furnishings, it is therefore essential to proceed with caution. Many furnishings can be identified that have already proven themselves over many years. The chosen products should still give pleasure when entering the bathroom in ten years. Functionality in focus A timeless interior means, above all, that it will be enjoyed for a long time. However, if the functionality in the bathroom is neglected, this is quickly tarnished - a beautiful appearance is hardly enough in this room. Thus, awkward-to-use faucets, a too-small sink, or slippery floor tiles are taboo. A bathroom can only be truly timeless if its usability is guaranteed for many years. It also makes sense to address the issue of accessibility in the bathroom at an early stage. Additional: Bathroom Remodeling Tips and Ideas How to Keep Your Bathroom Clean All the Time Considerations When Choosing the Ceramic Bathroom Tile 5 Hotel Housekeeping Tricks You Need To Clean Your Bathroom

READ MOREDetails
Metal Studs

Why Metal Studs are More Suitable for Your Construction Works

When it comes to building structures, it is preferable to consider using metal studs in place of wooden studs for non-load bearing walls. Research shows that more than 50% of structures are built with metal studs made from cold-formed sheets. However, metal studs conduct cold, but builders prefer using metal studs in place of woods for the following reasons. 1. Metal studs are lighter than wooden studs and convenient to work: Metal studs are lighter in weight than wooden studs because of their hollow shape. This makes them less bulky than wooden studs in terms of transportation and storage. When cutting metal studs using aviation snips, there are no sawdusts, unlike cutting through wooden studs. But it is advisable to protect your hands from sharp ends using gloves, especially during galvanized steel frame building construction. 2. Metal studs are easier to handle: In terms of installation, metal studs weigh far less than wooden studs and are held in place with screws. Therefore, it easy to correct installation blunders with metal studs. 3. Metal studs are less prone to attacks from atmospheric elements: Metal studs are not inclined to stresses and uneven shrinkage. Unlike wooden studs, which are susceptible to such factors with time. Also, metal studs are more resistant to mold and rot, which are common wooden infections. Although metal studs rust with time, this is preventable by installing a vapor barrier on the concrete floor. This explains the durability and sturdiness commonly enjoyed with galvanized steel frame building. 4. Metal studs have a higher tensile strength than wooden studs: Metal studs have a higher tensile strength and flexibility than wooden studs. Therefore, they are preferred for construction in wind prone areas and seismic zones like the Gulf Coast states of the USA. 5. Metal studs are resistant to fire and insect attacks: Metal studs are not prone to insect attacks like carpenter ants and termites, which can cause grave damages to wooden studs. Also, in terms of fire outbreaks, metal studs are fire resistant and do not burn in the case of a fire outbreak, unlike wooden studs. 6. Metal studs have a higher cost advantage: Wooden studs cost 15% lesser than metal studs, but metal studs offer cost advantages in other areas. These advantages cut across warranty call-backs in the sales of metal studs are much reduced because metal studs are not susceptible to shrinkage, and additional stress-related factors. Buildings built with metal studs do not have cracks or nail pops to fix after completion. Therefore, scraps are significantly reduced. Up to 20% wastage is recorded when wooden studs are used in construction. Hence the cost of disposing of discarded materials is decreased considerably. 7. Higher insurance discounts: Owners of buildings built with metal studs enjoy a higher insurance discount due to lower risk factors. Unlike buildings built with wooden studs, which attracts a higher insurance premium because of their higher susceptibility to fire and other environmental factors. Conclusion: Metal studs are preferable for buildings because they are environmentally friendly compared with wooden studs. They can be recycled and are readily available in similar wooden dimensions. Read Also: How To Protect Your Wood Flooring In A Busy Household Hardwood Timber Flooring: Gives A Classic Look To Your Home

READ MOREDetails
Clothes Dryer Maintenance

9 Clothes Dryer Maintenance Tips

Taking care of your appliances is the key to saving money, time, and effort. The clothes dryer maintenance is among essential major assistants in your household. While it works, you don’t notice it. When it breaks down, you face a disaster. The life expectancy of an average dryer is about 13 years. However, the majority of these appliances last much less. The reason is the lack of proper operation and maintenance. It’s not enough to plug the unit in and forget about it. If the only thing you do for your dryer is clean the lint filter, your appliance is likely to demand repair in just a few years. In this article, we’ll share top clothes dryer maintenance tips to keep your dryer working for as long as possible. Here are the 9 Clothes Dryer Maintenance Tips: 1. Run Full Loads Only The more you run your dryer the faster it will give out. It’s as easy as that. Since you are unlikely to limit the number of times you do laundry, you can at least add some efficiency to the process. By ensuring you only run full loads, you don’t just extend the lifespan of your clothes dryer, you save energy as well. Don’t rush to do laundry when you have free time. Wait until a full load is available. On the other hand, don’t overload the dryer. In the rush to finish laundry quicker, many homeowners overload washers and dryers. As a result, the motor strains, dryer becomes misbalanced and eventually stops functioning. 2. Opt for Professional Installation With numerous DIY videos overwhelming the Internet, homeowners often opt for DIY appliance installation to save money. Even though installing a dryer may appear straightforward, it’s not as easy as it sounds. You may not notice the mistakes you make during the process. They’ll become obvious after several uses. By that time, your dryer could already be damaged. Proper venting is highly important for a clothes dryer. You would need to select the right material and size for the venting tube and install it properly. Meanwhile, you should make sure the appliance is perfectly balanced. It’s especially important if you are placing it on top of the washer. 3. Clean the Dryer Vent The dryer vent is the most important part of your appliance. It needs regular maintenance. Ideally, you should hire professional technicians to check and clean the vent at least once a year. However, some owners do it on their own. Cleaning the vent involves disconnecting it from the dryer. After that, you would need to use a long-handled attachment to ensure penetrability. Special dryer vent cleaning brushes exist to remove clogs. Be careful about reinstalling the duct properly after the cleaning is done. If you fail to do it, the dryer won’t function. Consider hiring professional dryer vent cleaners to avoid mistakes. According to experts from Jacksonville appliance repair services, if ducts aren’t cleaned regularly, the dryer’s motor can burn out leading to costly repairs. 4. Limit the Number of Dryer Sheets While dryer sheets are an excellent way to keep your clothes static-free and soft, they aren’t harmless. These products have a wax layer that melts when the dryer heats up. If you use too many of them, the wax settles on the appliance’s interior walls and clogs the venting system and the lint trap. Removing this layer may be tough. No matter how many dryer sheets you use, it’s important to clean your dryer once a week even if you don’t see any dirt inside. Failure to clean the dryer regularly is the top cause of dryer-related fires in households. 5. Clear the Lint Trap Lint trap is one of the most important parts of your clothes dryer maintenance tips. Cleaning it regularly is the key to the appliance’s longevity. Wipe the lint filter clean after EACH load. Even if you are planning to do two loads in a row, clean the trap between them. At least once a week, remove the lint screen and vacuum the trap. You can use a brush to loosen the residue. Every one or two months, remove the lint filter and soak it in warm soapy water for about an hour or so. This can help remove wax, which appears after using dryer sheets and residue that settles after using a fabric softener. 6. Inspect the Appliance Weekly A visual inspection of the dryer can help prevent damages. Make sure no moisture is trapped around the door seal. If there is any, wipe it off gently. In fact, you can wipe the door after each load is done to prevent mold formation and bacteria growth. When checking the appliance, pay special attention to the doors seals. If they are cracked, ripped or damaged, the dryer is struggling to maintain the right temperatures. It may be straining the motor and overusing electricity. Replacing door seals is much easier and cheaper than repairing the motor. 7. Listen to it Work One of the first signs of dryer problems is the change in its operating noise. If you hear that something seems off, turn the appliance off immediately and check what’s happening inside. The reason for the change of sound could be overstuffing dryer with clothing or a sleeve caught up in an improperly installed lint trap. If everything seems to be in order, but the dryer continues to make strange noises, call professional technicians. 8. Check Exterior Vents Every month or so inspect the exterior vent of your dryer. While the appliance is working, go outside and check if the air is flowing freely through the vent. If something seems wrong, the pipe may be clogged. If you have a plastic vent, consider replacing it with a metal one. A plastic vent is a fire hazard. 9. Find a Professional Repair Service Some clothes dryer maintenance tasks require an expert’s assistance. Spend some time looking for a reliable repair service before anything breaks down. Knowing whom to call in case of an emergency could prevent further damage to your dryer. Start following the above clothes dryer maintenance tips today, and your dryer will serve you for at least a decade. Read Also: How to cut down your home decor costs? Read here Knowing Your Vehicle: 5 Maintenance Tips for Porsche Owners Tips on How to Avoid Hoarding and Get Rid of Clutter

READ MOREDetails