Incognito Mode: How To Post Anonymously On Facebook?

Published on: 09 January 2024 Last Updated on: 11 February 2026
Incognito Mode: How To Post Anonymously On Facebook?

Facebook is a great way to connect with people. Your list will have people who you know as well as new acquaintances. But things get icky when you are in a Facebook group. Your profile becomes subject to many different other user's scrutiny. Your post also stands a risk of being attacked.

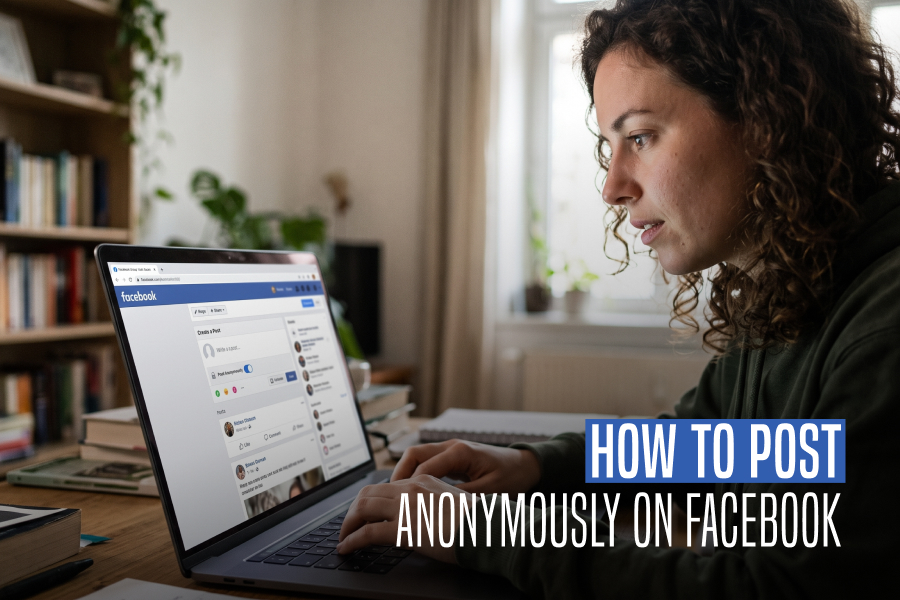
If you want to be able to share your thoughts in a group as well as not have hundreds of people visiting your profile, consider knowing how to post anonymously on Facebook.

How To Post Anonymously On Facebook?

How To Post Anonymously On Facebook

Once this feature is enabled, group members can make an anonymous post. The procedure for posting anonymously in a group on a desktop is simple. All you have to do now is follow the steps outlined below.

  • Go to your Facebook account and log in.
  • Go to the group where you want to post.
  • Click Anonymous Post, next to the place where you make a post.
  • A prompt will explain how anonymous posts work. Make an anonymous post by selecting Create Anonymous Post.

Remember that any anonymous posts made in the Group in the past or present will vanish if you toggle it off. After the feature is reactivated, the posts will be recovered. The community will become stronger as well as more valuable to members due to anonymous posting, which paves the way for its success.

Things To Know Before Posting  Anonymously

Users can publish posts anonymously in Facebook groups, hiding their identities from prying eyes. Members of the group are not aware of their identities, and when they participate in the discussion on that thread, they maintain their anonymity in comments.

To enforce Facebook's Community Standards, group admins, moderators, and other users can still see and access the identity of an anonymous post; to all other group members, however, the post will appear as either a "Group participant" or an "Anonymous member," as illustrated in the screenshot below.

How To Post Anonymously On A Facebook Group From A Desktop?

Members of the group will be able to post anonymously after the feature is activated. On a desktop, the process for making an anonymous post in a Facebook group is simple. Now, all you need to do is take the actions listed below.

  • Proceed to your Facebook profile and sign in.
  • Enter the group in which you wish to publish.
  • Select Anonymous Post by tapping the icon next to the post editor.
  • A prompt outlining the process for anonymous posts will show up. Click Create Anonymous Post to start a new anonymous post.
  • After creating your post, hit "Submit."

This group will see the post without a name on it. Facebook's systems and the Group administrators, as well as moderators, will still be able to see the name.

Users can write anything anonymously after accepting this warning, including ideas or actions, just like they would in a regular post. Anonymous posters on Facebook groups, events, and prompts can create polls. Additionally, users can produce more imaginative as well as captivating designs by using a free poster maker.

If a group member wants to post anonymously, the admin will know. You can accept or reject their post in the Admin Tools panel's Pending Posts section.

How To Post Anonymously On Facebook On A Mobile?

If a Facebook group permits anonymous posts, you can also post anonymously on the group from a mobile device.

To use your account on your device to post anonymously, do the following:

  • Go to the Facebook group where you wish to post anonymously.  
  • Select "I want to Post Anonymously" from the menu.
  • Write your post now, then hit POST.

 Pros Of Anonymous Posting On Facebook

You may consider anonymous posting an effective way to be heard without having to be noticeable. Here are a few benefits:

  • Posting in a Facebook group anonymously helps express yourself and share knowledge without giving away who you are to other users.
  • Posts made under pseudonyms can shield you from abuse in cases where you discuss private or delicate topics that might not sit well with other community members.

Cons Of Anonymous Posts On Facebook

You are not limited in how many times you can enable or disable this feature. Nevertheless, all of your earlier anonymous posts will be removed if you disable it.

Facebook should fix this, as it does not provide any notice or indication that this will happen when you turn it off. As a result, you have to realize this after it has already happened.

Thankfully, all of your previous anonymous posts will reappear and remain accessible within the Group if you decide to activate it again in the future. But if you choose to disable them permanently, you won't be able to keep them. An anonymous post stays anonymous and is only accessible in Facebook groups.  

How Does Anonymous Posting Work?
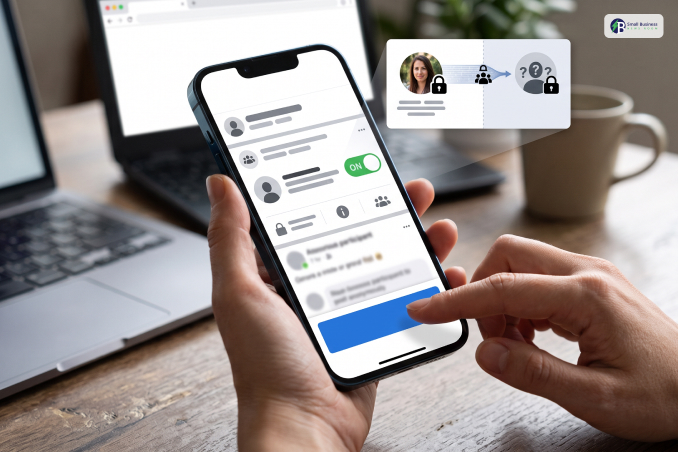
In 2017, Facebook launched the anonymous posting feature, which lets users share content inside groups while hiding their identities. This means it's pretty long before you asked Google "how to post anonymously on Facebook." This feature syncs with all of your devices and is accessible on all platforms that Facebook is available on. Facebook groups allow you to share your thoughts anonymously, regardless of whether you use an iPhone, Android, or one of the best Chromebooks.

To use this feature, you have to be a part of a group that has enabled anonymous posting. The administrators, moderators, and Facebook have access to your name as well as your profile picture, even though your posts stay anonymous within the group. Facebook community standards and group safety are upheld by implementing this measure.

Your anonymous post comments stay anonymous, so you can maintain a low profile on the group forums. It's a clever way to participate as well as maintain some privacy.

Reasons Why It May Not Work

You may be wondering why posting content on Facebook requires revealing your identity. There could be a few things preventing you. Perhaps you are currently without the option. Certain users are unable to post anonymously due to their location or Facebook settings.

You might not be able to post anonymously in the Facebook group you're a part of. The group administrators may have disabled anonymous posting as an additional factor. If you wish to remain anonymous, take a look at these and see what goes on.

Reasons Why You Can't Participate In A Group

You may find that you are unable to engage in group activities at times. Two things could lead to this. A group administrator may put you on hold, restricting the frequency of your posts or slowing down the comments on a particular post.

The other thing is that Facebook restricted what you could do in groups. This could indicate that you violated some Facebook policies or that group administrators must approve your posts.

Wrapping Up

You can use the anonymous posting feature to post anonymously. For group members to be able to post anonymously, this feature needs to be enabled by the group administrator. Members of Facebook groups that have enabled anonymous posting have the option to post content without revealing their identity.

But remember that Facebook teams, moderators, as well as group admins will be able to see your name in anonymous posts. Once approved by a group administrator or moderator, anonymous posts will be visible within the group. If you have thoughts to share or questions to ask about how to post anonymously on Facebook, please leave a comment below. We would love to hear from you!

Additional Reading:

Content Rally wrapped around an online publication where you can publish your own intellectuals. It is a publishing platform designed to make great stories by content creators. This is your era, your place to be online. So come forward share your views, thoughts and ideas via Content Rally.

View all posts

Leave a Reply

Your email address will not be published. Required fields are marked *

Related

facebook message sent but not delivered

How To Fix “Facebook Message Sent But Not Delivered” Error?: A Complete Guide

Billions of people use social media on a daily basis. Among all the social media platforms that are used by people on the internet, Facebook is the most popular one. However, despite being highly popular and efficient, Facebook still has many issues. One of the most common messages that people face in Facebook Messenger is the error of Facebook message sent but not delivered. In this article, we will discuss what it means when a Facebook message is sent but not delivered, as well as the best ways to fix this error through the Facebook website and the Facebook Messenger app. Furthermore, we will also discuss why the error is happening as well as different ways of fixing the error so that you can deal with the problem quickly. Facebook Messenger Message Sent But Not Delivered – A Few Reasons Since millions of people use the Facebook social media platform, as well as the Messenger app of Facebook, it is bound to get some glitches. Hence, it happens that many messages do not get delivered. This can get annoying sometimes when you are in a hurry and want to send an urgent message to a friend or a family member through Messenger. Facebook Messenger Message Status When you hit the send button on Messenger, the app shows different symbols at the end of your message to indicate its status at the moment. Make sure that you are aware of the message status on Messenger: As you are now aware of the different statuses of your message, it is time now for you to get an idea of the reasons why you are facing the problem of a Facebook message sent but not delivered: 1. The Recipient Might Be Ignoring You It might be that the person to whom you are sending the message is not in the mood to chat with you. The recipient might have seen the message in the phone notification and decided not to open Messenger. However, your message status will show delivered. 2. The Recipient Deleted Your Message The recipient also has the option to delete the message without opening it through Messenger. After looking at the message through notification, the recipient might have opted to delete it so as to ignore chatting with you. 3. Your Message Got Marked As Spam Image Source: wikihow.com Your friend might have accidentally marked your message as spam. Hence, the message got stored in the Spam folder of Messenger. Your message got deleted from the inbox of the recipient as a result. 4. The Recipient Is Logged Out Of Facebook Messenger If the recipient is not logged in to the Messenger app or might have uninstalled the app from his/her phone, your message will not get delivered as a result. Once the person logs in to the Facebook account, your message will indeed get delivered. 5. The Message Is Stored In The Message Request Folder If the person to whom you are trying to send your message is not on your Facebook friends list, your message will not get delivered. This will, in turn, get stored in the person’s Message Request folder. Facebook Message Sent But Not Delivered – The Best Solutions Image Source: cdn.windowsreport.com One of the most common reasons for the case of a Facebook message being sent but not delivered is that a glitch is happening due to many people using the app at the same time. There might also be some delay in the network, as the message is not getting sent at the right time. Apart from that, there might be a problem with the Messenger server at the moment. 1. Try Messaging Using The Facebook Website Image Source: icebergwebdesign.com If your message is not getting sent through the Messenger app, you will need to log in to your Facebook account using your web browser, either through your phone or a computer. Check whether you can send a message through Facebook chat or not. 2. Your Phone Needs A Restart Image Source: gotechtor.com Smartphones also experience glitches sometimes. If you restart or reboot your device, all the network issues get solved. See whether the problem is still there or not. 3. Try Messaging Others Image Source: resources.stuff.co.nz You can check your Messenger app by messaging other friends on your friend list. If you can send messages to other friends, and your message shows delivered, then you are probably blocked by that friend. If other friends do not receive your message, there might be other problems. 4. Facebook Message Sent But Not Delivered – Restart Your Messenger You can switch off the Messenger app by going to app management on your phone settings and restarting the app. This way, the data flow through the app becomes better, and it will probably fix the problem. 5. Try Reinstalling The App If restarting the app is not working for you, try uninstalling the Messenger app. Go to the App Store or Play Store and install Messenger again to see whether the problem is solved or not. 6. Reach Out To Facebook Support If none of the solutions mentioned above worked for you, try going to the "Help & Support" section on your Facebook app and clicking the "Report a problem" option. There, you must select the option named "Something went wrong.” In this way, you can share your problem with Facebook’s support. Troubleshooting Tips From Facebook   Facebook has three possible reasons to account for why your messages are not getting delivered: "You sent a lot of messages recently. Your messages went against our Community Standards. This may cause your account to be temporarily restricted and prevent you from replying. There may be problems with your app, device or internet." Facebook's own website has apt solutions in cases where your message does not get delivered. Here is what it says: "Update your Messenger app to the latest version. Connect to a reliable Wi-Fi network. Make sure your device has enough storage. Close your Messenger app and restart your device. Make sure the person you’re replying to hasn’t deactivated or deleted their account. Make sure you haven’t blocked the person you’re replying to and they haven’t blocked you. If you’re replying to a group chat, make sure the other members haven’t left the conversation." In cases where you may be blocked by Facebook from sending messages, here is what Facebook says: "This block is temporary. You can still connect with your confirmed friends through the Facebook app or www.facebook.com while you're in this block by leaving comments on posts, posting on your profile, or using other Facebook features. If you can't send messages, you may also be temporarily blocked from sending friend requests. If one of your messages was removed and you think it follows our Community Standards, tap on the notification about the message removal. You may be able to let us know that you disagree with the decision. Learn more about requesting a review." To be able to send messages in the future, Facebook has the following tips: Use the name you go by in everyday life to help the people you're messaging recognize you. "Once your block is over, please send messages and friend requests only to people you know. Learn more about our policies from our Community Standards." Summing Up These aforementioned solutions are enough to get your problem solved in a few minutes. However, if you still face the problem, just wait for a few days, and try these solutions again. The reasons for these problems can be anything. All you need here is to find out what problems you have and use these solutions to solve the problems you have in your Messenger app. In addition, you can also resend the message to the recipient again to see if this time the message is received by the person or not. Thereby, you can find out whether the problem is still there or not. Read Also: Why A Business Should Use Facebook Remarketing? Bored So Much: Learn How To Play Games On Messenger How To Recover Deleted Facebook Messages Using Com.Facebook.orca?

READ MOREDetails
slider-img

Guard Your Space: A Step-by-Step Guide to Locking Your Facebook Profile 

Are you looking for ways on how to lock Facebook profile to increase the privacy of your account? Those who are not on your Facebook friends list will only be able to view a restricted portion of your profile if it is locked. Only friends on the friend list will be able to see the images and posts on the timeline, cover photos, stories, and new posts on a locked profile. Additionally, only your friends will be able to see the "Public" posts you previously made. It should be noted that there is a workaround available for the desktop version of Facebook if you would like to lock your profile. You can lock a Facebook profile using the mobile app or your browser. Moreover, this functionality is exclusive to the Android app. Continue reading to learn how to lock your Facebook profile.  What Is Profile Lock  Users will notice a Lock sign on your profile after you add a profile lock. This will limit the amount of photos and posts on their profile, cover image, and other areas to just their friends. Upon locking their profile, users prevent others who aren't on their friends list from viewing the profile. They won't be able to download cover photos and profile photos either. They are also unable to view the Stories that a user has added to his profile. Previously shared posts are now marked as friends instead of public when using the Lock Profile feature. The timeline review and tag review are activated. This implies that you must grant others permission to tag you in their posts. Additionally, the About section of their profile will only be partially visible to the public. Now that you are aware of how Facebook's lock your profile feature operates, let's examine how to do it on various platforms.  How To Lock Facebook Profile Locking your profile has quite a few advantages. It has some drawbacks, too. If you have a security concern, you must lock your profile immediately from treats such as identity theft, data manipulation, and so on. Here are the different methods you can use to lock your profile on desktop, android, and iOS devices.  How To Lock My Facebook Profile On Desktop Although there isn't a direct method to lock your app from the browser, if you can't access the mobile app, you can use the following workaround: Open the Facebook website and click the icon for your profile. To make the URL read "m.facebook.com/yourprofilename," change "www" to "m" in the URL. This will open Facebook in a mobile format on your desktop computer. The Edit Profile option should have a three-dot menu next to it. Click the Lock Profile option that appears in the three-dot menu. The following screen, which has the option to Lock Your Profile at the bottom, will walk you through the locking process, just like the Android version does. This will lock your profile for enhanced safety. iOS users can either borrow an Android device and follow the previously mentioned instructions, or they can use the desktop method to lock their facebook profiles. The procedures to unlock your Facebook profile are the same for desktop and mobile apps. There will be an Unlock Profile option in place of the Lock Profile option. Tap on it and select Unlock on the resulting screen. A description of how to unlock your profile will appear, and when you click the Unlock Your Profile option at the bottom, your profile will be unlocked.  How To Lock Fb Profile on Android If you want to lock your profile using an Android device, here is what you have to do: On your Android device, open the Facebook app. Tap your profile picture on the main page. Click the Menu with three dots. From the options on the page, choose Lock Profile. On the Lock Profile Page, select the "Lock Your Profile" option located at the bottom of the page. After that, a pop-up notification stating, "You locked your profile," will show up on the screen. The posts and images on your timeline are only visible to your friends. To finish the procedure, tap OK.  How To Lock Facebook Profile In iPhone  Here are the steps to lock your profile for iPhone users: Navigate to Facebook and select your name from the three-line menu located in the lower right corner. Put three fingers on a dot for your name. Use the Lock Profile button to secure your profile. Press Lock Your Profile again just to be sure. You can simply exit that page to confirm that your profile has been locked. Next, sign in to your profile once more. The notification that your profile has been locked will appear there. You can manually change the Facebook privacy settings to enable lock profile mode if your page does not have profile locking. However, it is important to note that not all locations have access to this feature yet. Only a few countries allow you to lock your profile at this time.  Why Is It Important To Lock Your Profile  Facebook claims that hackers from Vietnam and Bangladesh compromised the company's entire privacy system in December 2020. Furthermore, they have taken Facebook users' personal information. These groups won't be able to misuse Facebook and harvest data from users' accounts all over the world thanks to this lock profile feature. To support Facebook's privacy system, users should refrain from accepting friend requests from unreliable sources and clicking on dubious links. Vanish mode was also introduced by Facebook to address privacy concerns. This model's unique feature is that once activated, it erases all chats and media files after a predetermined amount of time. It also has one more important safety feature. Facebook will instantly notify you if someone takes a screenshot of your profile. The steps to activate vanish mode are as follows. Visit the Play Store or App Store to download the most recent version of Facebook. Launch the particular chat. From the chat's bottom, swipe up. Vanish mode will be activated as a result. This causes the chat's background color to change to black, denoting that the mode is now active.  Wrapping Up  Facebook is a great social media platform for communication on a global scale. But now that data privacy is a global concern, it's imperative to secure your Facebook accounts permanently. Your data is protected from hackers and stalkers when you lock your profile. You will need to reenter your password on each device after locking. Facebook will add an indication to your profile once you have locked it. But keep in mind that you won't be able to publish to the public after you activate this feature. Rather, friends are limited to viewing and sharing the posts. Read Also: Here Is How To Delete A Facebook Page Easily? How To Stop Scammers On Facebook Marketplace? Facebook Settlement: What Went Down And What Was The Final Result?

READ MOREDetails
facebook katana

What Is Facebook Katana And How Can You Fix It In 2024

Many Android users are becoming puzzled while seeing the Facebook Katana files, and many of them want to know how to delete these files permanently. Some of the users are not aware of the function of the Facebook katana files. They have a misconception about the working process of the Facebook katana files. Katana files are like the orca. This file is not harmful, and this is not a virus or URL. But if you do not clear your Facebook application cache memory, then Facebook katana files can give you a big headache. What Is Facebook Katana? When you want to know about Facebook katana, you must first know about Com. Facebook. This is the file name of the Facebook katana. Then what is com facebook katana? Com.facebook.katana is the code name for the Facebook apps on android devices. Just like the Facebook orca. Orca is the code name of the messenger in android devices. Katana is the name of the Facebook apps, and you can not delete the file without uninstalling the Facebook apps. Katana files are not malware, but when you start receiving popups about slowing down the other applications' processes, uninstalling Facebook Messenger and deleting the Katana files solves the popup issues. The Katana files issue is causing a certain amount of battery running problems, and other apps are starting to run slowly. Fixing the Katana files solves almost all the issues that are related to battery drainage and slow app processing. But if you do not receive these types of messages, then do not delete the Katana files as they are not malware or any harmful URLs. Related: How to remove pname com Facebook orca How To Fix Facebook Katana In 2024? If you are repeatedly receiving messages about the slow performance of your devices. Katana files are responsible for slowing down your device performance, so fixing the Facebook Katana files is the only way to get rid of the problem. A. First Process To Fix The Facebook Katana Issues You can fix the issue from your Android device and your Facebook profile; both of the processes are fast and effective. Then, start making some changes to the Facebook account settings. Here is the step-by-step process to fix the Facebook Katana problem by using your Facebook account. Step 1: Start by opening up the Facebook application from your device. Step 2: After opening the Facebook application, you have to choose the “see more” option.  Step 3: Then open the setting options. Step 4: Then click on the account setting options. Step 5: Select the option of account setup, privacy, and security. Step 6: Then open the browser and clear all the browsing history, data, and cookies. Step 7: Now clear all the data and the cookies by clicking the clear data option Step 8: When you are clearing the data files, you delete all cookies and cache files that are generated during the FB usage. B. Second Way To Fix The Facebook Katana Issue Another way to fix this problem is by uninstalling the Facebook applications. When you uninstall the Facebook application, then your katana problems are automatically fixed. Step 1: Go to your device settings. Step 2: Then click on the Facebook application option. Step 3: And then uninstall the app from the "app details in-store". Step 4: Then click the uninstall options. Step 5: You can reinstall the Facebook application from the google play store. Related: 9apps – An Alternative Other Than Google Playstore. C. Third way To Fix The Facebook Katana Issue Facebook katana is showing the popups mainly at the time of new updates. If you want to fix the Facebook katana files, then you should try a way by stopping all the Facebook updates. To apply this method, you have to follow the simple steps below. Step 1: First, start with opening the Facebook application. Step 2: Then go to the Facebook settings option. Step 3: Click on the rough corner of the page where you can notice three dots. Step 4: Then click on the option to stop all the running updates. Step 5: Or you can simply force stop the Facebook application to solve the Facebook katana file issues. D. Fourth way To Fix The Problem The fourth way is the ultimate step. If you are not getting success with these three steps, then you can apply the fourth method. The fourth method is nothing but to apply the factory reset mechanism.  But factory reset is resulting in a huge data loss. All the records are detected when you are applying the factory reset method. But if you are facing continuous trouble due to the facebook katana files, then factory reset is the ultimate step to solve the issue. Access Geo-Restricted Apps With  VPN With the help of a virtual private network, or VPN, known as Private Internet Access, you can remain totally anonymous online and stop your ISP, the government, and other parties from tracking you. The program offers dedicated servers for streaming and torrenting, guaranteeing top speed and preventing lag. Additionally, you can view popular streaming services like Netflix, BBC, Disney+, and others without any restrictions no matter where you are by avoiding geo-restrictions. Do Not Pay Ransomware Authors The biggest threat to your photos, videos, work, or school files is definitely malware attacks, especially ransomware. Data that has been locked by cybercriminals using a strong encryption algorithm is unusable until a Bitcoin ransom is paid. Try using alternate recovery techniques first, as they may be able to help you recover at least some of the lost data, before paying hackers. If not, you risk losing your money in addition to the files.  Bottom Line Now you know what Facebook Katana is. And you are also aware of the fact that this is not a URL or malware. This is a file where Facebook is storing all the cache data. If you are not receiving any alarming messages about the Facebook katana files, then avoid deleting the file or the Facebook application. These four are the most effective ways to solve the issue. If our article helps you solve your katana issues, do not forget to comment back to us. More Resources: 10 of the Best Facebook Pages to Follow Now How to Download Facebook Videos on Android? All That You Need To Keep In Mind Before Selling On Facebook.

READ MOREDetails