How to Remove Acne Scars Naturally

Published on: 05 April 2016 Last Updated on: 04 September 2024
inner-img

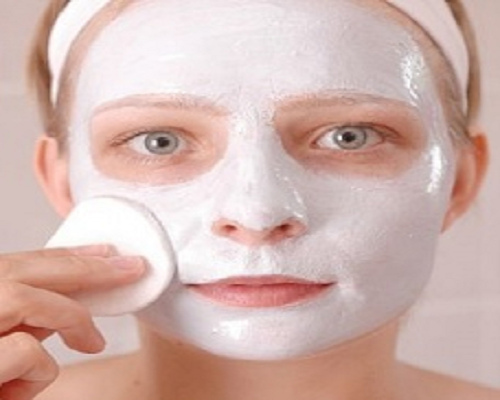
These days, more and more people become interested in natural acne scar treatment. It has become a clear fact that acne scars especially the big one can create unpleasing experiences because they can ruin someone’s physical appearance.

Greasy skin that is often found in people with acne scars also creates a problem. People with acne scars usually must conceal the scars with a certain cosmetic product so that their face will look flawless. This effort actually does not solve the problem.

If the cosmetic is removed, the scars can be easily seen. To have acne scars free skin, you need to know how to remove acne scars effectively. In this case, natural treatment can become your consideration.

What is the natural treatment? Referring to its name, natural acne scar treatment that is also known as the home remedy is an acne scar treatment that is made or uses natural ingredients. In this case, natural ingredients include fruits, leaves, and seeds. Because these natural ingredients can be found easily in almost all households, they can become a perfect emergency solution for acne, pimples, and acne scars.

Why to Choose Natural Treatment

There are 3 reasons why many people choose natural treatment. The first reason is availability. Ingredients for natural treatments can be found easily in almost all households. You do not need to leave your home to get an acne scars treatment because the ingredients are available in your kitchen. The second reason is a comfort.

If you can find the treatment in your kitchen, you can surely apply the treatment at your most convenient time. Anytime you want to remove acne scars, you can take the ingredients in your kitchen and then apply them on your scars.

Then, the third reason is economical. The cost to buy it is lower than the cost to buy over the counter medication because you usually buy them for cooking purpose in a bulk amount. Further, the last reason is to avoid harmful side effects.

Products made of chemicals are reported to have side effects. Their side effects can promote health risks. Because natural treatment has no side effect, it is surely a perfect solution.

Is Natural Acne Scar Treatment is Right for You?

Before you apply the natural treatment on your puberty Scars, it is better for you to know whether natural acne scar treatment is right for you. Visit sites like www.skinhelpers.com to get reviews on products to help you on your journey to find a natural acne treatment that works. This is important to consider because the knowledge will avoid you from wasting your money, energy, and time.

Basically, removing acne scars naturally will only work on light, superficial, and new scars. Home remedies work on the superficial skin; they are not able to go deep down the skin. Even, they usually work slowly.

This means that if you want to remove your acne scars fast, you should not use home remedies. Patience is the key to success when taking home remedies. Actually, if your acne scars are old and deeper, you will need a more complicated treatment.

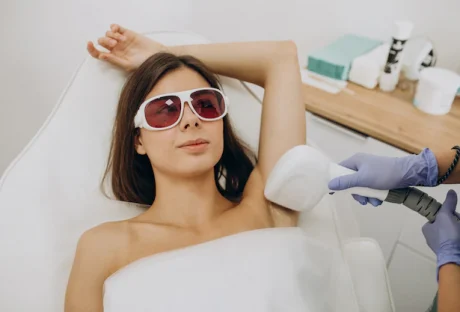
In this case, chemical peel and laser treatment can become a solution. Because it works by naturally exfoliating and renewing your skin, it is certainly a solution for superficial acne scars problems. Also, it can help to remove blackhead and whitehead.

Ingredients to Remove Acne Scars Naturally

The followings are natural ingredients that are powerful in removing acne scars naturally

1. Lemon

To use lemon as natural medicine, you should mix a teaspoon of lemon juice with 2 teaspoons of Vitamin E well. In this case, to get vitamin E, you can pop a capsule. After the mixture is made, apply it on your acne scars. Next, massage your face gently for about 30 seconds. Then, apply your normal moisturizer.

Basically, lemon works in two powerful ways. It can bleach skin, resulting in lighter skin. It can help to rebuild collagen because it is high in vitamin C. Vitamin E has a ton of antioxidants that are able to protect your delicate skin.

The combination of lemon and vitamin E will result in lighter yet delicate skin. 30 seconds massage is intended to break down damaged scar tissues and stimulate the growth of new skin. To get the best result, you should avoid sun rays while wearing this natural acne scar treatment. You should also use this treatment once a day.

2. Papaya

To use papaya as a homemade treatment, you should take 1 ripe papaya. Remove a bit of the flesh and mash it. Apply it to the scar (You should have previously wash the face cleanly) and let it sit for 15 minutes. Then, remove it with warm water.

Papaya is an effective natural skin exfoliator because it contains natural enzyme papain. This natural enzyme is often used as a meat tenderizer. However, because papaya is powerful, you should not leave it too long. You can use this treatment once a day.

3. Egg whites

To use egg whites as a natural acne scar treatment, you should take 3 egg whites and a small bowl. Whip the 3 egg whites in the bowl until they become fluffy and white. You had better use your fingers to spread the mixture onto your skin gently.

You need to apply a double layer on the affected area to give it a stronger effect. Let the egg whites dry on your skin. Rinse away the dried egg whites with warm water. For the best result, you need to use this treatment 2 to 3 times a week.

4. Aloe Vera

To use Aloe Vera as your homemade treatment, you had better use fresh Aloe Vera. Even though there are many over the counter products containing Aloe Vera, those products are not as effective as fresh Aloe Vera. There are incredible health benefits of Aloe Vera juice to our health, body, and skin.

In this case, you need to take fresh Aloe Vera leaf that usually can be bought at your local grocery. Then, peel of the green part and take the gel-like part. Apply it on your car gently and rub it several times. Leave it for 20 minutes and wash it with warm water. Aloe Vera can soothe inflamed skin, boost the immune system and regenerate damaged tissues.

Read Also:

Content Rally wrapped around an online publication where you can publish your own intellectuals. It is a publishing platform designed to make great stories by content creators. This is your era, your place to be online. So come forward share your views, thoughts and ideas via Content Rally.

View all posts

Leave a Reply

Your email address will not be published. Required fields are marked *

Related

Hairstyles

Hairstyles for Wedding Party and Braid for Wedding

You have found the dress; you now have to decide which hairstyle to adapt to accompany it. With these 5 ideas, you will inevitably find a hairstyle to your foot. We now allow you to use most up to dated fashion wears and clothing + accessories as well, but also at the same time, we help you, people, to know what’s all around the world in terms of styles and beauty. 1. The gold accessory Because your hair is too short or you do not control the braids, bet on a refined accessory, such as a golden comb. No need to make a complicated hairstyle: twist one of the locks near the face to the side and plant the accessory. You can secure with some hidden pins and a haze of lacquer. 2. The stylish ponytail If you have thick and long hair, this hairstyle will be perfect. Crease your lengths with a texturizing spray and make a shell. Tie the hair in a low tail leaving a wick. Braid it, pull the strands to give it some thickness and wrap it around the elastic before attaching it with a pin. 3. The half-wreath of flowers Are you invited to a country wedding? Bet on a hairstyle with fresh flowers or a wreath of flowers (which will not be fooled). Separate your hair into two parts, as if you wanted to make a half-tail, but attach the lower part. Position the crown on the head and wrap the wicks of the top one by one. Once they are all in place, detach the rest of the hair and slightly curl the lengths. 4. The double bun Separate your hair into two parts just like the previous hairstyle. With the upper part, make a braid on each side of the head, and then tie the two wicks in a first bun at half height. With the lower part, make a second bun pulling well on the locks to give it volume and secure with pins. To keep it until the end of the night, do not skimp on the lacquer! 5. The wavy mane The best way to leave with the wedding is all bet on a sexy hairstyle. Make a messy half-bun and make wide loops on the lengths. Above all, do not forget to throw your mane over your shoulder while staring directly at your target. Braids for Wedding Hairstyles - You Must to Know Braids are popular and especially when it comes to wedding hairstyles, so for both brides and guests, we show 5 wedding braid inspirations. This braid really makes your hairstyle more beautiful and attractive. These braids works on every kind of hairs, your hairs are curly black hair, you have golden hair or you have a golden white hair, this braid will make them more beautiful. Here those ladies, who have curly hair, make it sure to use hair straighteners before choosing any braid style. This will make your hairstyle more beautiful and charming. Don’t forget to see the best hair straightener reviews before buying any one of them for your curly hairs.  Anyhow, let’s move forward towards the best braid hairstyle that must be in your mind. 1. The braided half-tail Wedding hairstyles based on braids, yes, no need to make tons of them. This is why we can adopt the braided half-tail that will give a romantic touch to the hairstyle. To play the game thoroughly, we do not hesitate to wrap the wicks braided in a wreath. 2. The crown of braids The crown of braids will also be quite appropriate for a braid wedding hairstyle. We leave a few stranded locks delicately framing the face for a bohemian side. The flower note is optional but clearly makes its effect and will be indispensable in case of a country wedding. 3. The double braid In this case, it is simply a matter of sliding two simple braids into a loose hair and a wedding hairstyle, which is suitable for medium-length hairs. We attach these two braids with a flower bar or other original accessory to complete this hairstyle in beauty. 4. Braids and bun blurred Proof that flowers are not always appropriate, we opt for a wedding hairstyle that mixes two braids glued to the front of the hair and ends with a bun blur. A braided wedding hairstyle terribly chic and sober to accompany his white dress 5. Braid on the side If the braid on the side may seem very simple for a wedding, it is done from the front of the hair until it casually falls on the shoulder. A braid spike will be the best effect for an elegant and original hairstyle. For the detail, we put on a rhinestone bar associated with his earrings. Read Also: 5 Gorgeous Hairstyles For A Perfect Date Night 6 Stunning Long Hairstyles For Oval Faces Why Hairdressers Love Rose Gold Colour

READ MOREDetails
Classy Makeup

Simple But Classy Look Make-up

If you're looking for a simple but classy makeup look, there are a few steps to follow that will help you achieve just that. Whether you want to adopt a basic and elegant look for a special occasion, such as an engagement, wedding, reunion, or another occasion, there are certain guidelines that will help you achieve a sophisticated look for almost any event. Here are some basics to get you started. In the following section, we speak to leading experts at the Paris Lash Academy and ask them about the best simple and classy make-up looks that you can opt for. Paris Lash Academy offers various eyelash extensions that can complement your looks. Simple But Classy Makeup Look: Makeup Brushes: Before you get started on your simple but classy makeup routine, be sure and gather a set of quality makeup brushes to speed up the process. You'll likely need foundation, blush, eyelid, powder, and contouring brushes. You might also want to think about including a few beauty blenders, particularly for foundation, blush, and contour application. You want a smooth application and the right brushes and blenders can provide that. Prepping Skin: In order for makeup to blend as it should, cleanse your skin to create a slight exfoliating effect before any makeup is applied. Once cleansed, moisturize the face and apply a face and eyelid primer. Primer applications should smooth and preserve any makeup that is applied to those areas. Evening out Skin Tone: If the skin is blotchy or uneven, the application of a sheer tinted moisturizer will help to smooth and even out skin tone. Tinted moisturizers can also add warmth to the complexion. You don't have to go for an exact skin match with a sheer tint as you can still bring an added intensity or glow to the skin. If your skin is extremely oily, you'll probably want to skip the tinted moisturizer step to avoid oil buildup. Concealing Under-Eye Circles and Blemishes: Evening out skin tone also means including and using a good concealer that is rich in pigment and staying power. You want to cover dark under-eye circles and other blemishes. Using too much will accentuate problems, so simply use a short swiping motion under the eye. When dispensing the concealer, place it in a triangular shape under the eye. Blend the area with your finger or a beauty blender. For blemishes, dab the actual spot and blend. Continue to do the same action if added coverage is necessary. You want the concealer to be at least one to two shades lighter than your skin tone. Other spots to highlight include going up the bridge of the nose and on up to the forehead. Foundation: The right foundation is the piece de resistance of any makeup routine. You want to find a shade that is closest to your actual skin tone and decide whether a liquid or cream is suitable for your skin type. For a more flawless look, use a beauty blender to apply the foundation. It will definitely deliver a smoother and more complete coverage. Blend the foundation on the face and continue down onto the neck area. If necessary, use your concealer again to cover any blemishes or dark areas, or to add further accents. Contouring/Highlighting: Once the foundation phase is complete, use a contour brush to apply contour powder or cream under the apple areas of the cheeks. Also, apply that same contour to the forehead area and both sides of the jaw. In order to add more warmth, apply a bronzer to those same areas. Blush Color and Highlighter: For added color, choose a blush color for a simple but classy makeup look. You want to think about using cream blushes in warm peaches and pinks so that skin is given a natural and subtle look. Forego cool pinks as they add too much drama. Natural cheek colors can convey a blushing bride kind of appearance that can enhance just about any luvbridal wedding ensemble as well as any other special occasion or event. Use a blender or brush to apply blush to the apples of the cheeks. For more cheek and face enhancement, add a non-sparkly highlighter to the tip of the nose and cheek areas and anywhere else where the sun would normally hit. Again, use a beauty blender to smooth out both the blush and highlighter to create a more subtle and simple effect. Eye Shadow, Liner, Mascara, and Eye Pencils: Soft browns are the best eyeshadow colors to use to enhance the eye area and its shape. Select a shade that is a bit darker than your skin. Brush and blend the shadow into the creases of the eye as well as on the lower lashes. Keep it soft with no hard lines. Add a neutral creamy color shadow at the inner corners of the eyes as well as at the center of the lids, and on the brow bones. At the outer corners of the eyes, use a darker shade to bring a further dimension to the eyes. Liner - Apply a dark brown or black liner to the eyelids. Liquid and gel liners give a longer, starker and lasting effect while pencils usually bring a softer and smoother look. Mascara - provides a finishing touch to the eye area. Apply several coats to the top lashes. For lighter lashes uses brown mascara and if you have darker lashes, use brown or black. Avoid mascara products that produce spidery lengths to lashes, as they can detract from a more natural look. Mascara can also be used on your bottom lashes by applying a bit of mascara from the wand and placing it right at the roots of the bottom lashes using a small eye brush to dot in the mascara. Eyebrow pencil/gel - color choices should be one or two shades on the darker side for blonde or light brown hair, while one or two shades lighter for dark or black hair. You want your brows to be natural but you also want them to be defined. Use an eyebrow template if you are not sure of how to color in your brows or simply need a guideline for correct color placement. Think soft and subtle, yet defined. Lips: You want to enhance your lips with a pretty lasting tint rather than an outlandish and garish color. Choose a shade that actually matches your true lip color and pat or press the color into the lips. Go to the center of the lips first and blend the color in an outward motion. Darker berry colors and reds are flattering in a matte tint as they do bring emphasis to the lips without exaggerating them. Powder: Maybe you don't require powder to finish your look but if your skin has a tendency to get oily and produces shiny spots, you might want to think about an oil-absorbing powder. Powders that are pressed, silk, airbrushed, translucent, and hydrating are great for completing any look, whether your skin is oily or otherwise. These powders are easy to use as you can just sweep a powder brush across them and buff the skin to create a perfect look, which includes powdering the under-eye area as well. Pores and blemishes are also reduced with the use of this kind of powder, and touch-ups are easy as the buildup is almost nonexistent. Setting or Fixing Spray: Once your makeup is completely done, use a setting or fixing spray to hold your work of art in place. Whether you choose it in spray, powder, or mist form, it is designed to maintain your makeup for a number of hours to all day. It helps you avoid those frequent powder room touch-ups that are annoying and a hassle. There are specific types to use for both oily and dry skin. Creating a simple but classy makeup look can be fun and enhancing and if you have a few steps to follow, the process isn't then difficult. Take a look at the steps here and give yourself a simple but classy makeup makeover. Just remember not to overdo it. A Simple Professional Makeup Routine for Everyday   Sometimes all we need is simple classy makeup to put yourself together before your office.  Creating a polished look for the office doesn’t have to be time-consuming. With a few straightforward steps, you can achieve a clean and classy makeup look that’s ideal for work.  Start with a Clean Slate  Your face is the canvas, and a clean slate is the beginning step of a well-set makeup.  Therefore, begin by thoroughly cleansing your face to remove any impurities.   Apply a lightweight moisturizer to hydrate your skin, followed by a primer to ensure your makeup lasts throughout the day.  Achieve an Even Complexion  The second step is getting an even complexion. This will be the base of your minimal makeup. Half of the time, getting an even tone can already make you feel put together.  Select a light foundation or BB cream (if you do not want something heavy like foundation) that closely matches your skin tone.   Blend it evenly across your face using a beauty blender or brush, focusing on areas that need extra coverage. For blemishes or dark circles, gently apply concealer and blend it in seamlessly.  Enhance Your Natural Glow  Too much bold makeup can make you stand out in all the wrong ways when you are in the office.  So, if you are in love with the heavy sun-kissed look, it is time to keep that overwhelming rouge down.  Rather, choose a soft pink or peach blush to add a subtle pop of color to your cheeks.   Lightly contour under your cheekbones and along your hairline with a matte bronzer. Finish by applying a touch of highlighter to the high points of your face, such as the tops of your cheeks and the bridge of your nose.  Subtly Define Your Eyes  Again, do not go for a bold eye look. Reserve them for the evenings. But here is how you can define them with the help of counting.  Go for neutral eyeshadow shades like soft browns or taupe. Apply a lighter shade across your lids and blend a slightly darker shade into the crease for depth. Use brown or black eyeliner to line your upper lash line and finish with a coat of mascara.  Perfect Your Brows  Sometimes, all you need is a well-set brow, and your makeup and your face have an automatic symmetry.  Fill in any sparse areas of your brows with a brow pencil or powder, maintaining a natural look. Follow the natural shape of your brows without making them too bold.  Finish with a Soft Lip Shade  Finally, it is time to seal the makeup with lips.  For a natural and professional look, you can opt for a simple lip gloss or balm. Try not to go overboard with the clear gloss, as it can cheapen your look at times.  Select a lip color that enhances your natural lip tone, such as a nude, pink, or soft berry shade.   Apply it evenly, and if you like, add a layer of gloss for a polished finish.  Read Also: 7 Tips For People With Hypersensitive Skin Expert Doctor’s Treatments For Cystic Acne 7 Anti-Aging Tricks And Tips To Get Youthful Skin Like A Teen Get Part Ready In No Time With These Hair And Makeup Hacks!

READ MOREDetails
Achieving Radiant Skin In Rainy Vancouver: The Role Of Medi Spas

Achieving Radiant Skin In Rainy Vancouver: The Role Of Medi Spas  

When it comes to beauty and skincare, Vancouver residents know the challenges of maintaining radiant skin in the city's rainy climate. With its frequent drizzles and overcast skies, Vancouver's weather affects your skin. However, thanks to the growing popularity of medi spas in Vancouver, achieving and maintaining radiant skin has become more accessible than ever. This article discusses how a Vancouver medi spa plays a crucial role in meeting the unique skin care needs of Vancouverites. Understanding Vancouver's Unique Climate The city of Vancouver is known for its mild, wet winters and cool, temperate summers. While this climate is comfortable for its residents, it also means dealing with higher humidity levels and increased moisture in the air. This combination can lead to a range of skincare challenges, including: Increased Moisture Levels: Vancouver's high humidity can make your skin feel oily and prone to breakouts. Dry Spells: Paradoxically, despite the moisture in the air, some individuals may experience dry and dehydrated skin due to temperature fluctuations. Sun Exposure: Vancouver's overcast skies can be deceptive, leading many to underestimate the sun's harmful effects on their skin. How Medi Spas Address Unique Skin Care Challenges Tailored Skincare Solutions Medi spas in Vancouver specialize in providing customized skincare solutions that take into account the city's distinct climate and the individual needs of their clients. Here's how they do it: Personalized Assessments: When you visit a medical spa in Vancouver, skin care professionals will conduct a thorough assessment of your skin type, taking into consideration your lifestyle and the city's climate. This assessment ensures that the treatments you receive are tailored to your specific needs. Hydration Treatments: To combat the increased moisture levels in Vancouver, medi spas offer a range of hydration treatments, including moisturizing facials and advanced skincare products. These treatments help balance your skin's moisture levels, keeping it healthy and clear. Anti-Aging Solutions: Vancouver's overcast skies can be deceiving when it comes to sun exposure. Medi spas offer anti-aging treatments such as chemical peels and laser therapies to address sun damage and maintain youthful skin. Acne Management: For those struggling with oily or acne-prone skin due to the humidity, medi spas provide effective acne management solutions, including facials and medical-grade skincare products. Innovative Technologies One of the reasons media spas are so effective is their use of cutting-edge technologies. These technologies are designed to address specific skincare concerns and adapt to Vancouver's climate conditions. Some notable treatments include: Laser Therapies: Laser treatments are used for a variety of purposes, from skin resurfacing to hair removal. They can effectively treat sun damage, wrinkles, and other skin imperfections caused by Vancouver's unique climate. Cryotherapy: Cryotherapy treatments can help reduce inflammation and redness, making them ideal for individuals dealing with skin sensitivities exacerbated by the weather. Microdermabrasion: This non-invasive procedure exfoliates the skin, leaving it smoother and more radiant. It's a popular choice for those seeking to rejuvenate their skin in Vancouver. In Conclusion A Vancouver Medspa is a valuable resource for residents seeking to achieve and maintain radiant skin in the city's unique climate. With personalized skincare solutions and innovative technologies, these establishments play a vital role in helping individuals look and feel their best year-round. Read Also: What You Need to Know About Caring for Your Skin as You Get Older: Your Guide 7 Anti-Aging Tricks and Tips to Get Youthful Skin Like A Teen 11 Foods You Must Incorporate Into Your Diet for Great Skin

READ MOREDetails