









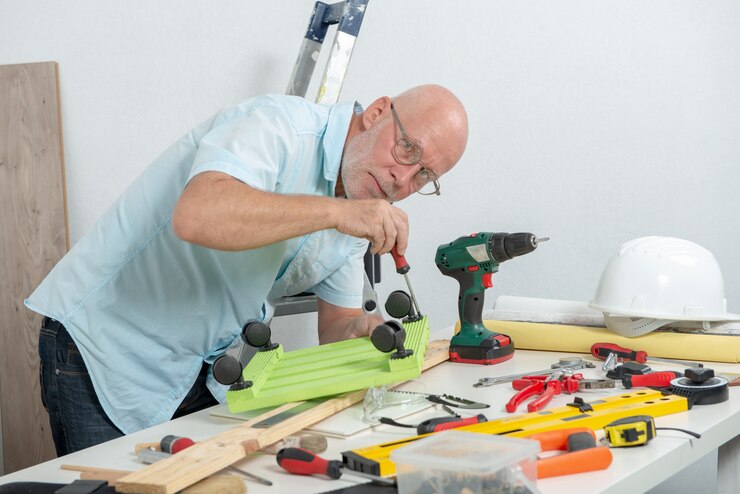
Mastering Troubleshooting For Power Tools: Your Comprehensive Guide

Published on: 26 October 2023 Last Updated on: 07 February 2026
Mastering Troubleshooting For Power Tools
Power tools have become indispensable for professionals and DIY enthusiasts, making tasks more accessible and efficient. RYOBI stands out as a reliable choice among the numerous brands in the market. However, like all power tools, RYOBI devices can occasionally encounter issues. In this guide, we'll explore techniques for troubleshooting for RYOBI power tools and power tools in general, focusing on the common problems and solutions that can apply to various brands and models.

Power Issues

Begin by examining the power source. Ensure that the cord is securely connected for corded tools and that the battery is adequately charged for cordless ones. For persistent issues, inspect the tool's switch for damage or debris. Also, check for loose or frayed wires and replace them as needed. If you're dealing with a cordless tool and it's not turning on, the battery might be the culprit. Before assuming the worst, try charging the battery fully and then attempt to use the tool. Sometimes, a drained battery can give the appearance of a malfunctioning tool. Consider using a different, fully charged battery if this doesn't work. If the device still doesn't work, the issue may be with the tool itself or the charger.

Loss Of Power In Power Tools

Power loss may result from a worn-out or damaged motor or brushes. Inspect the brushes for signs of wear and tear and replace them if necessary. Clean the air vents and cooling fans to prevent overheating, which can lead to power loss. If your tool still experiences power loss after checking the brushes and vents, it may be due to an issue with the motor. Motors can wear out over time, mainly if the tool is used heavily. In this case, it might be necessary to replace the engine, which is a job best left to professionals unless you're experienced with power tool repair.

Overheating

Overheating can damage your tool and pose safety risks. Proper maintenance is crucial in such cases. Ensure air vents are clean and unobstructed. If overheating persists, consider shorter usage intervals and allow the tool to cool down between sessions. Regularly check for proper lubrication in moving parts and replace worn-out components. Excessive heat buildup in a power tool often indicates it's being pushed too hard or used beyond its recommended capacity. Pay attention to the tool's specifications and try to match it with the right type of work. If you frequently overheat a device, consider upgrading to a more robust model that can handle the demands of your projects.

Vibrations And Noise

Vibrations and noise can indicate loose or damaged components. Tighten all screws, bolts, and nuts. Inspect the blade or bit for damage and replace it if necessary. Lubricate moving parts following the manufacturer's recommendations to reduce friction and noise. Excessive vibrations and noise are annoying and can indicate potential safety hazards. Loose parts in power tools can lead to accidents or damage to the tool. Regularly inspect your tool for loose fasteners and tighten them as needed. If you notice unusual vibrations or noise persisting after this, it's advisable to have the device checked by a professional technician.

Battery Troubles

Battery issues can stem from a lack of use, overcharging, or a faulty battery. Always follow proper charging and storage guidelines from the user manual. If battery performance remains subpar, consider investing in a replacement battery. Batteries, especially rechargeable ones, have a finite lifespan. Over time, they can lose their ability to hold a charge effectively. If your cordless tool's battery life has significantly decreased, it may be time to invest in a new battery pack. Make sure to recycle old batteries properly, as they can be hazardous to the environment.

Blade/Bit Issues In Power Tools

Dull or damaged blades/bits can hamper performance. Sharpen or replace them as needed. Ensure you're using the appropriate type of blade/bit for the material at hand, as using the right one can lead to efficiency and damage. The blade or bit's quality and sharpness directly impact your power tool's performance. When you notice a decrease in cutting or drilling efficiency, it's time to inspect and maintain these essential components. Regularly sharpen blades or replace them if they're excessively worn or damaged. Also, be mindful of the material you're working with, as using the wrong type of blade or bit can result in subpar performance and even safety hazards.

Trigger Sticking

Disassemble the tool's handle and clean the trigger mechanism. Lubricate moving parts with a manufacturer-recommended lubricant. If the problem persists, consult your user manual or contact the manufacturer's customer support. A sticking trigger can be a frustrating issue, and it can also be a safety concern. Before attempting any repair, ensure the tool is disconnected from its power source. Disassemble the handle carefully and clean the trigger mechanism. Lubricate any moving parts as recommended in the user manual. If the issue persists, consult the manufacturer's customer support or take the tool to a professional repair service.

Conclusion

These tips are not limited to RYOBI tools; they apply to various power tool brands and models. Always refer to your user manual for specific guidance and safety precautions. Safety should be your top priority when troubleshooting and repairing power tools.

Read Also:

Nabamita Sinha loves to write about lifestyle and pop-culture. In her free time she loves to watch movies and TV series and experiment with food. Her favourite niche topics are fashion, lifestyle, travel and gossip content. Her style of writing is creative and quirky.

View all posts

Leave a Reply

Your email address will not be published. Required fields are marked *

Related

how to turn off chromecast

Fix: How To Turn Off Chromecast? – Latest Update 2021

Are you the regular users of the Chromecast devices? Then you already notice sometimes the Chromecast turning off is becoming very troubling. Turning off the Chromecast helps you to hide the connected device’s presence when people start searching in your network. In that respect, the most important question which comes to your mind is how to turn off Chromecast? As Chromecast sometimes gives you more sweat than the usually hot summer weather can. As every one of the users is aware of these facts, the Chromecast does not come up with an on and off switch.  Many users are preferring the Chromecast device showing in their home network while it is not being used. But many of the regular users do not prefer the Chromecast device showing in the home network. How To Turn Off Chromecast In Television? The easiest method of turning it off is just to unplug the device. Or the easiest answer is just to disconnect the wifi connections of the Chromecast. But both of these ways are not the fully authentic and technical way to stop working. Before asking how to turn off Chromecast, you have to learn about the Chromecast turning off technical functions. How to turn off Chromecast on tv is a very common question when you are accessing multiple television connections with the Chromecast. For your better understanding and knowledge, here is the step-by-step guide on how to turn off the Chromecast device from your home network, android phone, and Television. Turning Off The Chromecast By Switching Off The Plug As we told you, switching the power off is the easiest method to turn off the Chromecast devices. Chromecast is coming with a separate power port, which was connected with the main switch. You have to plug in the wall charger to get the connection. If you can unplug the charger from the port, the device is automatically getting disconnected from the network. If the Chromecast device is connected with your television, you can switch off the television. But that move does not turn off the Chromecast device. If you face a problem turning off the main power switch, you can use the aromatic switch to get the operation done automatically. But still, then the Chromecast device is connected with your home wifi networks. And the Chromecast device is still showing in the available connected devices like the android phones. How To Turn Off Chromecast On Android? In many Chromecast devices are getting used in the single house, then most of the time the android phone users are facing more trouble turning off the devices. If you are using the Chromecast devices, then turning off the Chromecast on android is the common question arising in your mind when you are facing the interruption in the middle of your streaming videos.  Most of the users want to turn off the Chromecast to preserve the phone’s safety-related concerning issues. And most of the users are facing problems during the streaming of the video because, in the middle of your streaming video, some content can pop up. You can simply stop the casting by simply enabling the Chromecast device from your android phones. And this is the simple process of how to turn off Chromecast. Step 1: Just click on the image of the Chromecast device from your android phone. Step 2: Open the file of the Chromecast devices. Step 3: Click on the settings of the Chromecast devices options and open the setting options. Step 4: After entering the setting of the disable Chromecast option, let others control your cast media. Step 5: And you can turn off the Chromecast from the android devices. How To Stop Casting To Chromecast? If you want to stop the casting of the Chromecast, as you already know, there are many apps that are getting compatible with the Chromecast. Still, if you are using these apps to operate the Chromecast, then you lose control over the Chromecast. And if the remote control over the Chromecast is disabled, then your manual controls are also limited. How to turn off Chromecast is a common feature of turning off the multiple connectivities of the television. But if you lose control over the Chromecast, the volume bar to pause button everything is in a non-functional state. For these purposes, you can use google chrome. Here is the step-by-step process to stop the casting of the Chromecast. To stop the interference from popping up, casting closer is an essential task. Step 1: Go to the google chrome browser settings. Step 2: Then go to the cast options after opening the browser setting options. Step 3: If you see the Chromecast options in the blue color mode, which means the Chromecast is now in the functional state. Step 4: You have to make it white by disabling the options. Step 5: After disabling the options, then cross the chrome and restart your device. Step 6: After restarting your device, recheck the casting option after opening the browser. Step 7: You can also shut down the Chromecast casting from your google homepage. Bottom Line If you are using the Chromecast in multiple ways and the different devices, switching off the devices and turning off Chromecast is necessary. How to turn off Chromecast is a common question that has multiple ways of solving.  If you ask us why you need to turn off the Chromecast devices, here are the answers. If you want to preserve your device security and are eager to close the outside’s external interference, then turning off the Chromecast is the easiest solution.  When you are connected with the Chromecast devices, you automatically see how many other devices are connected with the network, and this causes interference and trouble in the network. More Resources: Headphones vs Earbuds: How to Choose for the Best Music Experience. Your Guide In Buying Kid-Friendly Gadgets. Alexa Voice Assistant: Why It Succeeds Where Others Fall

READ MOREDetails
E-Waste Recycling

5 Eye-Opening Reasons to Choose Certified E-Waste Recycling Agencies

Let’s see if this situation sounds familiar. You just bought the latest phone on the market. And, like any responsible citizen, you took the old gadget to an e-waste recycling center and deposited it. You walked out of the center confident that the old phone would be taken care of safely. You then forgot about the gadget altogether. Well! The story doesn’t quite end there. And, if you are an environmentally conscious person, you may want to take a closer look behind the scenes to identify what happens to the redundant and used devices once they leave your ownership. Did You Check for the Certification of the E-Waste Recycling Center? Should you check this feature on MoneyCrashers, you will come across an interesting observation. Delivering your e-waste to a recycling agency does not guarantee safe disposal. That’s because many such centers use unscrupulous methods to get rid of the gadgets. While the measures they use may comply with U.S. e-waste management regulations, they could cause severe damage to the environment in other offshore locations. The only way you can get complete assurance that the old electronics will be taken care of the right way is if you deposit them at certified recycling centers. Alternatively, you can exchange them at the original manufacturer. It might interest you to know that in the year 2015, Apple accepted and recycled 90 million pounds of electronic gadgets to extract usable materials. These materials included plastic, 6612 pounds of silver, 2.9 million pounds of copper, and 2204 pounds of gold. Choosing a certified e-waste recycling agency when getting rid of old and used electronics ensures that your gadgets will not end up in landfills and pollute the environment around your hometown. But, that’s just one good reason. Here are 4 more. 1. Recycling Agencies Choose Supposedly Economical Methods for IT Asset Disposal: You might think that you’re doing your bit to help the environment by recycling cell phones and other devices. But, keep in mind that although the recovered materials are valuable, the recycling process is not exactly economical for regular agencies. Extracting metals for reuse involves a careful process using the right kind of equipment and trained personnel. To save on the expense of dismantling old gadgets and separating the useful materials, most agencies simply ship them off to third-world countries. Would you like to know how the process works? Containers reaching the shores of the U.S. from Hong Kong and other vendor companies across the world are typically sent back empty after the goods are unloaded from them. In an attempt to cash in on the reverse transportation, the giant cargo boxes are now filled with used electronics and sent to Far East destinations under the guise of donations for philanthropic purposes. 2. Environmental Damage is Transferred to Third World Countries: When the gadgets make their way to countries like China, Ghana, and India, unskilled laborers including young children burn them in giant pits. Once the process is complete, all that remains is the precious metals that are sorted out without any regard for the toxic materials in the ashes. These poisons like arsenic, bromates, lead, and cadmium not only leach into the soil and underground water, but also cause various illnesses among the people who handle them or live around the processing plants. To know more about the extent of the damage, read this article in the Smithsonian magazine. If you’re looking for e-waste recycling procedures that protect the environment not just in your country, but also in any other location around the world, deliver your devices to certified agencies. 3. Irresponsible E-Waste Recycling is the Largest Cause of Data Breaches: Should you work with a licensed recycling company, the expert professionals will make sure to dispose of the hard drives in them securely. They may use DoD-approved multiple overwriting or shredding protocols to erase the data and make it impossible to decipher. Why is this important? According to PBS, The U.S. State Department has identified Ghana as the top sources of data leaks in the world. Hard drives from discarded electronics are easily available to hackers here at $35 apiece. Even novice cybercriminals can retrieve records of online transactions, credit cards, personal financial data, and various other kinds of sensitive information. Enoch Kwesi Messiah is a computer scientist at the Regent University in Accra. He reveals, “I can get your bank numbers and I retrieve all your money from your accounts. If ever somebody gets your hard drive, he can get every information about you from the drive, no matter where it is hidden.” A shocking incident reported in recent times involves the details of a government contract worth $22 million that were extracted from an old hard drive. When attempts were made to locate the source, it was traced back to Northrop Grumman, one of the military contractors of the country. The drive also held highly classified information about contracts with Homeland Security, NASA, and the U.S. defense intelligence agency. Think about it! If government agencies can become the targets of millions of dollars worth of data breaches, your information is a much easier target. 4. Recycling Lowers Wastage of the Earth’s Resources: Reusing gadgets and recovering reusable materials from them will help reverse some of the wastage of the earth’s resources. Should you check some of the statistics revealed by ThoughtCo., you will learn that the power saved by recycling a cell phone can run a laptop for 44 hours. If all of the 130 million phones annually discarded in the U.S. were recycled, the energy saved could power 24,000 homes for a whole year. Other than gold, silver, and copper, cell phones also contain palladium, platinum, tin, and zinc, all of which are metals that can be used and reused several times over simply by adopting the proper e-waste recycling methods. Responsible e-waste recycling is now more about protecting the environment in your country. The problem has become so huge that you need to take a step back and carefully view the big picture. Saving the earth begins with every citizen who upgrades to a new gadget. Have you REALLY done your bit? Read Also: Layman’s Guide For Improving Your Phone’s Signal Strength Best IPhone Spy Apps Without Jail Breaking

READ MOREDetails
Night Vision Weapon Sight

What To Look For In A Night Vision Weapon Sight?

Most operations performed by the tactical members of Military & Law Enforcement are done in a low, failing, or altered light. Night vision weapons sight offer the high ability to set up the target, motivate & shoot with a pinpoint at an accurate point across the long distance during the night. As we have noticed from the pointers we are going to mention below, Several considerations are there to bear in mind when choosing the right type of night vision sights, and it relies on certain requirements or the kind of operations they may deploy. Here is the list of some parameters and a proper guide to consider while deciding or picking up a weapon sight as given below: Things To Look For In A Night Vision Weapon Sight When choosing a night vision weapon sight, a set of features need to be looked upon. Some of those features include – Resolution The soldiers or the tactical teams need to confirm that they are sighting the right target. That’s why it’s important to check the resolution of the night vision sight weapon they are getting. The resolution stands for the amount of detail someone can get through the 12-weapon sight. The measurement unit for resolution here is lp/mm (line pairs per millimeter) When considering the resolution, it’s important to note what works best for the tactical team. Here are a few resolutions and the levels of their capacity – 640 x 480: Here’s a good resolution to help the team identify the target and ready a shot. 1280:  this resolution is the best for providing exceptional image quality and target. 384 x 288: If you are going for this resolution instead, this will only provide basic thermal imaging. It’s good enough to understand if there’s a target in the place or not. Optics Quality And Electronics: The optics quality plays a huge role no matter whether it is a thermal sight or weapon sight as it hampers the performance at the top. 0 The weapon sight is a perfect combination of top-notch quality, fast optics, latest generation, and infra-red sensitivity that offer high resolution, a wider FoV, and clear vision to the operator that allows improving the device’s capability. Probably, the size, specs, and resolution of the device are the important ones and judge the quality of the device perfectly. Zoom & Magnification: The idea of choosing the maximum magnification when it comes to choosing a weapon sight, but the better one is the low magnification usually. Higher magnification results in a smaller view, and a weapon device with 4x magnification have-it-all. Thus, weapon sight is recommended. Image intensifier tubes: I2 tubes are accountable for the light amplification rather than anI2 sight. Across all years, I2 tubes are advanced and better than Generation 1 or 2 to all the newest Gen 2+ as well as three tubes. These tubes are produced by a handful of companies across the globe and the labels are different in each one. The most advanced versions of I2tubes are Gen 2+ and Gen3 responsible for a clear vision in low light, which will be measured as SNR and Ip/mm for resolution of the modern weapon sight as available on www.defendandcary.com. Weapon sight range: For tactical use, weapon sights are mounted on snipers, rifles, carbines, and LMGs with a primary motive to set up, aim, obtain, and shoot at a target during the conditions of low visibility or types of special missions. Generally, they ought to be chosen to complement an effective variety of weapons that will be used in the future. If the weapon sights have the longest ranges, then it results in larger, more expensive, heavier, and not optimal at all. Ergonomics control and easy to use: Weapon sights are too easy to use anytime and ought to be exposed to all controls while adjusting for magnification, windage, and elevation. Here’s an important point of consideration if you are getting a night vision weapon sight. Typically, it shouldn’t be a problem if you are using a tripod to aim and shoot on a still target. But, if you have to do a lot of moving around with the night vision weapon, you need something lightweight. But, it’s also important to consider that the night vision sight that is lightweight will have lesser magnification. Also, since we are talking about ergonomics, the lens size is also something we must talk about. If you have a large-sized lens, the FOV ( field of view) will become narrow. With a shorter lens, you have a wider FOV but a shorter distance. So, it’s important to first note what you need in the night vision weapon sight. Additional Factors To Consider While all the different parameters explained above are important, there are other parameters as well. You can go much deeper with your points of consideration when choosing the perfect night vision weapon sight. Mounting: one of the things to consider is whether you can mount the night visitation weapon sight on the weapon or not. Spectral Range: the range of light this weapon sight can detect is also another important area you need to consider. Display Resolution: if the display resolution isn’t up to the mark, the users won't get the right output. Field of View: It’s important to consider the field of view of the weapon's sight vision. Start-Up Time: The sight should also get ready quickly. When considering a night vision weapon sight, the start and off time are also important to consider. Wrapping Up: In the end, you need to make sure that all weapons work in a better way, and also, these pointers are covered under the same. These are the main things to take into account. First, it’s best to understand the type of operation you need the night vision weapon sight for. When it comes to imaging sights, the weapon-mounted night vision sights are the best. They are also the most waterproof ones to use. However, there are different other types of weapons sights, each serving a unique purpose. Hopefully, you found this article useful. Do share your feedback about the type of weapon sight that you think is the best. Read Also: What is an Airsoft Gun? Everything You Need To Know About Concealed Carry Holsters Not Sure How to Keep Gun Safe at Home? These Tips Work! 5 Must need Accessories for a Firearm Owner    

READ MOREDetails