Mint is a wonderful plant that practically cultivates itself. So fast is its growth that it can threaten to spread across and take over your entire yard or garden. One way to battle this is to confine its growth by planting it in a pot or a separate bed. However, once you have this plant, you will be glad, because it has properties that make it fruity and a great addition to tea and foods.
As can be seen here, it is also quite useful in health remedies that can aid digestion and relieve headaches. We know you already feel enthralled by this herb and would like to know more. So, why don’t you read on and discover more amazing things about mint…
What Mint is All About
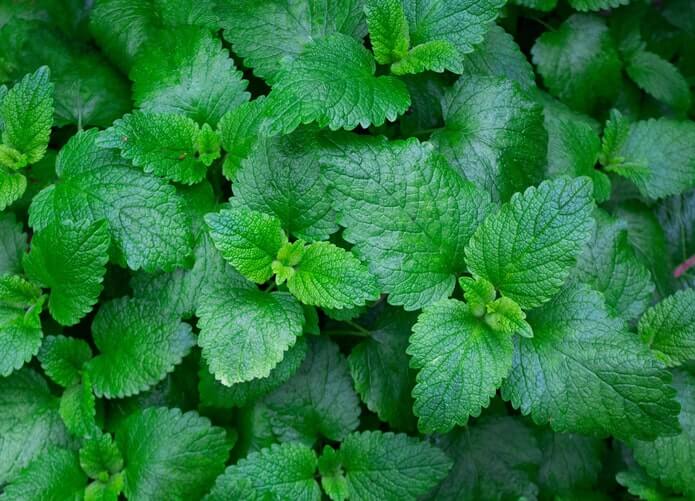
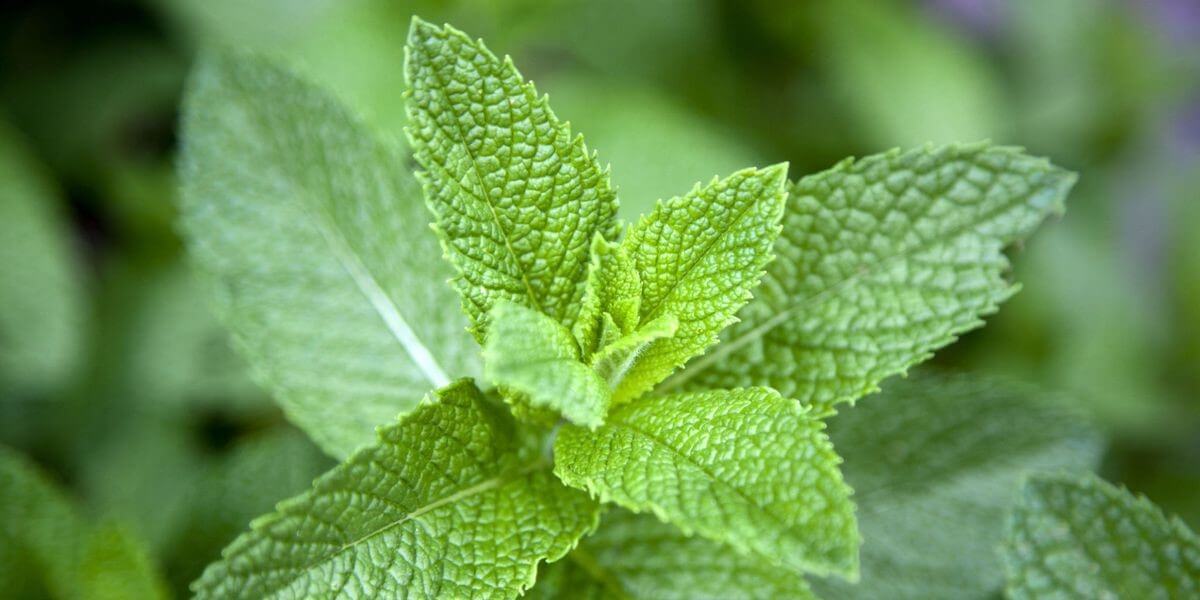
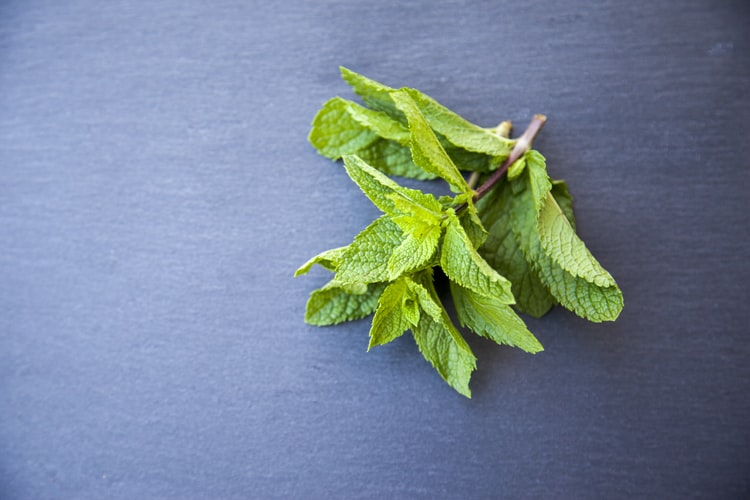
Mint is an herb that is perennial and has a very wonderful fragrance. Its leaves are toothed and may have tiny pink, white, or purple flowers. Mint has so many variants from crinkled or smooth, to fuzzy or shiny. However, one thing is constant despite what kind of variant it is; all mints have that wonderful fragrance.
Hence, whenever you pick up any variant of this great herb and roll it in your fingers, you would get the same smell that will make you either think of sweet teas, candy, or mint juleps.
Aside from being a wonderful kitchen companion, this herb is also used as ground covers, garden accents, herbal medicines, and air fresheners. Mints are functional as well as beautiful and can grow either in shades or under the sun. However, as we already said, this plant is a vigorous spreader; therefore, unless you want to have too much than you need, you have to be very deliberate about planting it.
Uses
We have already stated several things that mints can be used for, but there are still so many more benefits of this wonderful herb. Below are some of these benefits:
Can be used to make mint tea. To do this, simply put the leaves in a cup of hot water and then leave it to sit for some minutes.
Make tasty ice cubes with it by freezing the leaves with raspberries and cranberries.
Add it to a salad dressing, marinades, or fruit salad.
Use it to relieve headaches by applying It’s oil to the temples.
It can also be used to relieve anxiety and stress.
Yes, mints have many other health benefits, but though not a practical use, it is also used as a virtue symbol.
Planting Mints
If you decide to plant mints in your garden or yard, then below are some important things that you have to know:
They flourish in light earth which has good drainage.
Their original habitats are stream banks, so, the site you plant them should imitate stream bank soils. That is to say, ensure the soil you plant your mints is moist but also well-drained.
Variegated mints should not be planted in direct sun as they require a bit of shade.
Mints typically grow to become one to two feet tall.
If you plant them in a container or pot, then you would need to topdress them with organic or compost fertilizer once in a few months.
If you plant mints in your garden, ensure to plant them next to tomatoes or cabbages, this will help contain their spread and prevent them from stealing your crops’ nutrients.
Care
Mints do not require that much care; however, you should consider the following points when caring for them:
If planted outdoor, use light mulch. You can visit https://www.thespruce.com/what-is-mulch-1402413 to read up more on mulch. The light mulch will ensure the soil remains moist and also help the leaves to stay clean.
If planted indoors, then ensure you water them often to help the soil stay evenly moist.
Mints should be picked and pruned regularly. Like we have stated many times already, these guys are fast spreaders, therefore, you would need a lot of pruning to stop them from taking over everything. This should not worry you since their roots are shallow making it quite easy to drag them out of the soil.
The Propagating
You do not need to do a lot to propagate mint. The perfect way to go about this is to find the plant which you like and then cut out of it. Ensure the cutting is at least 6 inches and has ample roots attached. Then plant them in the soil horizontally.
You can always get a cutting from a gardening friend, so this is nothing to worry about.
Harvesting and Storing
To learn how to harvest mint is quite easy, it typically does not involve any special skill. You may either pick the leaves individually, or you may use shears to prune the plant and then take off the leaves from the stem you had cut off.
Despite the harvesting process being relatively easy, you need to remember a few things when you harvest your mints:
Frequent harvesting will keep the plant at its best.
The younger leaves have a better flavor than the old ones.
You can pluck the leaves whenever you need mints.
If you need dry mints, then pluck the leaves before flowering and then save them in an airtight container.
You can also store fresh mints that you do not immediately have use for. To do this, put water in a glass and then put the stems inside the water. The mint will stay fresh for 3 to 7 days this way. You may equally put the mints inside a rubber bag and then store them in your refrigerator. This should keep it fresh for at least a week.
Conclusion
Mint is an herb that would make a very great addition to your garden or yard. But, without proper knowledge about the plant, everything may spiral out of control. Therefore, you must have basic knowledge about planting, caring for, and harvesting this plant before you farm it.
I enjoy writing and I write quality guest posts on topics of my interest and passion. I have been doing this since my college days. My special interests are in health, fitness, food and following the latest trends in these areas. I am an editor at Content Rally.
Bored of seeing the old patio and cringe every time your friends come home for a barbecue backyard? Not anymore! Give your boring living space a beautiful makeover.Whether you have small outdoor or a big yard, you don’t need to juggle a lot to make a big statement to your outdoors. Just some tips and bang on!From the most beautiful designs to the personalized touch, get the most out of your outdoors with these ten practical tips:
Seating:
A perfect seating as per the ambiance is the one everybody wants to relax on. While the right seating can enhance the look, inappropriate arrangements can ruin the whole look. For big spaces, add farmhouse table or a custom-built bench, or perhaps an artistic sofa. However, for small spaces, try bold colors or make use of wicker chairs.
Lighting:One of the essential elements in outdoors is the lighting. Perfect lighting can uplift the mood as well as can change the ambiance of the place to dress up your place, use chandeliers or small lamps. String lights can also work for small patios to make a significant impact.Read More: Create A Stunning Outdoor Space With These Residential Landscape Lighting Tips
Bar/ Kitchen:
A bar at the outdoors is a must! Turn your patio into an outdoor kitchen space or a customized bar with all the liquor to make your weekend party a bang!
Rug area:
Dress-up your outdoors with the beautiful rugs of different patterns and shapes. Try primary colors, or a plane stencil pattern would work in that green lushes.
Storage seats:Storage is another essential thing for outdoors. Use a multifunctional box or perhaps a functional couch to place drinks, cushions or eatables in it. Adorn the storage box by painting on it or make them look like extra seating for your guest or friends.
DIY planters:Plants at outdoor are no exception, but plants in quirky things can be. Don’t settle for pots or hanging pots, instead make use of every other waste thing lying around to bring greenery to your outdoors. Grab a tin or maybe an old bottle or perhaps tire, spray paint on it and done!
Flower boxes:
Flower boxes are also a beautiful way to enhance the look of outdoors. Use shutters or wall hangings of a different color to get the most out of your living space. Give it a curb appeal by planting colorful flowers in it.
Fire Pits:If your outdoors has a fireplace, you know it’s the place to cuddle on beautiful nights. The source of fire at outdoor draw people, so if you have one makes the seating around it and get set party!But if you don’t have any fireplace, DIY one by making small pits.
Fire pit cover:
Put your fire pit to double duty by popping a lid on it making it a unique tabletop. For daylight gathering or day parties, coving a fire pit will add more space to the outdoor to place things.
Add a sporty look:
Fashion and sport can go hand-in-hand. And with greenery, it looks the best. Use some of your favorite outdoor games to decorate the space. Make use of walls, install shelves on the railings or look for the places where you can hang on things.So those were some of the most favorite home builder tips that you can use to remodel your outdoors. Want to go a step ahead? Build a swimming pool in the space and enjoy outdoor bathing or how about a pool party! Insert these ideas and make outdoor living beautiful.Read More:3 Amazing Flower Street Garden – How To Design
Does Organic Gardening Improve Soil Quality?
How To Choose The Right Containers For Your Container Garden
Grow These Flowering Plants In Your Home Garden To Remove Vastu Related Problems
Animals might be cute, furry, and very pleasing to look at but they can seriously be destructive to your field, some of us may enjoy their company, others might want to kill them instantly! Either way, if you do not take care of who enters your garden, your plants may not thank you. Check out the rest of the article to understand what kind of animals can spoil your garden and how to restrict their movement.
Who are these animals?Some of the most common garden animals include chipmunks, squirrels, skunks, mice, moles, rats, and opossums. To learn more about possums, click get rid of possum. These animals dig holes into the ground, eat your fruits and vegetables, multiply or lay eggs in your garden, and generally wreak havoc. Other larger animals include dogs, deer, birds, snakes, etc. Just having them run around the garden can cause large-scale destruction.
Ways to get rid of animals in your garden
There are several ways to control the entry of animals in your garden. Some are more effective than others. To learn more about these methods, read on.
1. Identify the creature :The best way to control animals is to identify them first. This way you would know exactly how to deal with them by understanding their behavior and ways of living or multiplying. You can then target the animal with exactly the right technique that is needed to get rid of them. It is necessary to identify the animal to learn about its habitat, control them, and devise an effective solution.
2. Make your garden animal proof :By making your garden attractive to animals, you will invite more pests into it. Therefore, certain methods need to be adopted to make sure that the animals stay away. One such method is to cut down on places that can house such animals, like tall grass, bushes, or a pile of leaves. Some animals can even crawl under your deck or porch.Minimize any food sources, like birdbaths and seed booths, where animals like squirrels may come to feed. Moreover, you should cover your compost pile that attracts raccoons and fruit and vegetable patches with nets to avoid dogs, cats, deer, etc.
3. Fences, nets, and traps :Fences are a great option to help minimize the entry of animals. For smaller animals, like rats, squirrels, rabbits, and more, small fences around your garden are enough. But for larger animals, like dogs and deer, larger and taller fences are required. Putting up taller fences can go a little heavy on your pocket, so securing plants is probably a better option.Nets are a great way to prevent animals from actually feeding on your produce, like fruits and vegetables. Just adding a mesh or net around your patches can make a huge difference. Traps can be placed throughout the garden to catch animals with the help of baits. Use some food, like cheese, crackers, or biscuits, to lure animals into the trap, which then slams shut. Animals are also not harmed this way. It’s easy to catch possums, rats, squirrels, etc. with the help of traps.
4. Repellents :Some animals can be repelled using auditory techniques, like certain sounds, and repellents that smell a certain way, thus driving or scaring away the animal out of your garden. Some examples of repellents are - predatory urine, garlic clips, and castor oil. But these repellants need to be applied and monitored on a regular basis to make sure they are effective. Some of these repellents, however, can be toxic to humans, so be careful, which repellents you choose.Auditory repellents include motion-sensitive water sprayers, ultrasonic repellers, and visual scare devices, such as reflective tape. The only problem with these repellents is that pests may become immune to these methods, and therefore they may decrease in effectiveness over time. Make sure you read all the directions given on any repellants or products before using them.
5. Do on the spot management :
For example, when moles create boroughs in your garden, you can place mothballs in the holes to repel them. Moles don’t eat your garden produce but their tunnels can cause your plants to die since plants may not find space to grow underneath the ground with enough nutrients.If certain animals have entered your garden, immediately introduce the predator species into your gardens, such as cats and dogs, to scare away the pests. Cats and dogs prey on animals, like mice and rats. In some cases, you can hand aluminum foils with strings in your garden. The shiny material can scare away the animals. Again, the effectiveness of this method may die with time.Pests are destructive to your garden and should definitely be identified and eradicated. However, there’s no need to kill these animals in order to get rid of them. You can also use humane ways to get animals out of your garden. Use the methods given above in order to get rid of animals, including possums, from your garden. This will help you get a more secure and flourishing garden in no time!Read Also :5 Summer Garden Maintenance Tips And Tactics You Have To Know
Grow These Flowering Plants In Your Home Garden To Remove Vastu Related Problems
If you are a gardener like me, you must have thought about harvesting greens that you eat at restaurants at your house. One of these days, I was with my friends from my university, and we were discussing the importance of eating veggies for staying healthy. And they could not figure out the best ways to effectively do so. Reading my previous blog about cilantro, Laila asked me, “how to grow and harvest asparagus?”Well, surely asparagus is one of the most delicious and nutritious vegetables you can grow in your garden. But what a lot of people do not know is that it's also one of the easiest once you know how to harvest asparagus properly.In this article, I will cover everything you need to know about harvesting asparagus, from when to start, how to cut, and how often to do it. Additionally, I will also share some tips on how to store and freeze asparagus, as well as the benefits of eating this green wonder.So, keep on reading till the end to learn more... How Does Asparagus Grow?Before I dive into the seemingly difficult process of how to harvest asparagus, let me help you grow it. Asparagus is a perennial plant that grows from a crown of roots that can live for up to 20 years. The crown produces spears, which are the edible part of the plant, every spring.The spears grow rapidly, sometimes up to an inch per day, and can reach a height of 6 to 10 inches. The spears are harvested before they open into fern-like leaves, which are edible and tough.Asparagus grows best in well-drained, sandy soil with a pH of 6.5 to 7.5. It prefers full sun and moderate temperatures and needs regular watering and fertilizing.Asparagus can be grown from seeds or crowns, but crowns are easier and faster to establish. Crowns are planted in trenches about 12 to 18 inches apart and covered with 2 to 3 inches of soil. As the spears emerge, more soil is added until the trench is filledBenefits of Asparagus https://giphy.com/gifs/food-asparagus-taylor-lee-nicholson-pejh5q5BBXxi2m4PgFAsparagus is not only tasty, but also healthy. It's low in calories and high in fiber, vitamins, minerals, and antioxidants just like spinach. It can help lower blood pressure, regulate blood sugar, support digestion, and prevent urinary tract infections.Asparagus also contains a compound called asparagine, which is a natural diuretic that helps flush out excess fluids and salts from the body. Asparagus is also a good source of folate, which is essential for pregnant women and fetal developmentWhen to Harvest Asparagus?The first year after planting, you should not harvest any asparagus spears, as they need to grow and strengthen the root system.The second year, you can harvest a few spears for a short period, about two to three weeks.The third year and beyond, you can harvest asparagus for a longer period, up to eight weeks, depending on the climate and the health of the plants.The best time to harvest asparagus is in the early morning when the spears are crisp and tender. You should harvest asparagus when the spears are about 6 to 10 inches tall, and before the tips start to open up. If you wait too long, the spears will become woody and bitter.How to Plant and Care for Asparagus?Asparagus is a long-term investment that can reward you with years of delicious harvests. However, it requires some planning and preparation before planting. Here are some steps to follow to plant and care for asparagus: Choose the Day Choose a sunny and well-drained spot in your garden, preferably with sandy or loamy soil. Avoid areas where water tends to pool or where weeds are hard to control. Asparagus also needs plenty of space, so make sure you have at least 4 to 5 feet between rows and 12 to 18 inches between plants.Prepare the Soil Prepare the soil by adding organic matter, such as compost or manure, and adjusting the pH to 6.5 to 7.5. You can use a soil test kit to check the pH and nutrient levels of your soil. You may also need to add some fertilizer, such as 10-10-10 or 10-20-10, to boost the phosphorus and potassium content.Dig it DeepDig a trench about 8 to 12 inches deep and 12 to 18 inches wide. You can make the trench longer or shorter depending on how many asparagus crowns you have. Asparagus crowns are the dormant roots of the plant that you can buy from nurseries or online. They usually have one-year-old or two-year-old crowns, which are more reliable and productive than seeds.FertilizeSpread some fertilizer along the bottom of the trench, about 2 pounds per 100 square feet. Then, cover the fertilizer with 2 to 3 inches of soil, forming a ridge in the center of the trench.Placing the PlantPlace the asparagus crowns on top of the ridge, about 12 to 18 inches apart, with the buds facing up. The crowns should be slightly below the soil surface, about 1 to 2 inches deep. Do not bury them too deep, as this will delay the emergence of the spears.Focus on the CrownCover the crowns with another 2 to 3 inches of soil, and water well. As the spears grow, gradually fill in the trench with more soil, until it is level with the ground. This will help protect the crowns from frost and weeds.Add Mulch Mulch the bed with straw, leaves, or wood chips, to conserve moisture and prevent weeds. You can also add some organic fertilizer, such as fish emulsion or seaweed extract, every few weeks during the growing season, to encourage healthy growth.Keep in MindDo not harvest any asparagus spears in the first year, as they need to establish a strong root system. In the second year, you can harvest a few spears for a short period, about two to three weeks. In the third year and beyond, you can harvest asparagus for a longer period, up to eight weeks, depending on the climate and the health of the plants.How to Harvest Asparagus?Now, coming to the most important part that you wanted to know about. Let us talk about the ways to harvest asparagus!To harvest asparagus, you need a sharp knife or a pair of scissors. You should cut the spears at the base, about an inch below the soil surface.Be careful not to damage the crown or the emerging spears. You should also avoid cutting too many spears from one plant, as this will weaken the plant and reduce the yield. A good rule of thumb is to leave at least one-third of the spears on each plant.You should harvest asparagus every day or every other day, depending on how fast the spears grow. You should stop harvesting asparagus when the spears become thinner than a pencil, as this indicates that the plant is running out of energy.You should then let the spears grow into ferns, which will replenish the crown and prepare it for the next season.How to Store and Freeze Asparagus?Unlike lettuce, which you can store for more than a week, asparagus is best eaten fresh, as it loses its flavor and texture quickly. If you can't eat it right away, you should store it in the refrigerator for up to a week.To keep it fresh, you should trim the ends of the spears and stand them upright in a glass of water or wrap them in a damp paper towel and put them in a plastic bag.If you want to preserve asparagus for longer, you can freeze it. To freeze asparagus, you should first wash and trim the spears, and then blanch them in boiling water for two to three minutes, depending on the thickness. Blanching is a process of briefly cooking and cooling the vegetables to stop the enzyme activity that causes them to spoil. After blanching, you should drain and cool the spears, and then pack them in freezer bags or containers, leaving some space for expansion. You can freeze asparagus for up to a year, and use it in soups, casseroles, or stir-fries.How to Prevent and Treat Asparagus Pests and Diseases? Asparagus is generally a hardy and resilient plant, but it can still suffer from some pests and diseases that can affect its growth and quality.Here are some of the most common problems that affect asparagus plants, and how to prevent or treat them:Asparagus beetlesThese are small, black or red beetles that feed on the spears and the ferns, causing them to wilt and turn brown. They can also lay eggs on the spears, which hatch into larvae that chew on the stems and leaves.To prevent asparagus beetles, you should keep the area around the plants clean and weed-free, and remove any old or damaged spears. To treat asparagus beetles, you can hand-pick them and their eggs, or spray them with insecticidal soap or neem oil.Fusarium wiltThis is a fungal disease that infects the roots and the crowns of the plants, causing them to rot and die. It can also cause the spears to become yellow, twisted, and stunted. Fusarium wilt is more likely to occur in poorly drained, acidic, or infested soil. To prevent fusarium wilt, you should plant disease-resistant varieties, rotate crops, and avoid overwatering or injuring the plants. To treat fusarium wilt, you should remove and destroy any infected plants, and apply fungicides to the soil.RustThis is another fungal disease that affects the ferns, causing them to develop orange or brown spots and pustules. Rust can reduce the vigor and yield of the plants, and make them more susceptible to other diseases. Rust is more likely to occur in humid, wet, or shady conditions. To prevent rust, you should plant resistant varieties, space the plants well, and prune any excess or infected ferns. To treat rust, you should apply fungicides to the ferns, and avoid watering them from above.Crown rotThis is a bacterial disease that causes the crowns and the bases of the spears to become soft, mushy, and foul-smelling. Crown rot can spread quickly and kill the plants. Crown rot is more likely to occur in wet, compacted, or poorly drained soil.To prevent crown rot, you should plant healthy crowns, improve the drainage and aeration of the soil, and avoid overwatering or injuring the plants. To treat crown rot, you should remove and destroy any infected plants, and disinfect the tools and the soil.Bonus: How to Cook and Enjoy Asparagus? There are many ways to cook and enjoy asparagus, from steaming, boiling, roasting, grilling, to sautéing. The key is not to overcook it, as it will become mushy and lose its flavor.You should cook asparagus until it is bright green and crisp-tender, which usually takes about 5 to 10 minutes, depending on the method and the thickness of the spears.You can season asparagus with salt, pepper, butter, lemon juice, garlic, herbs, cheese, or any other condiments you like. You can also pair asparagus with eggs, bacon, ham, chicken, fish, pasta, rice, or salad. Asparagus is a versatile and delicious vegetable that can complement any meal.Wrapping It Up!Asparagus is a wonderful vegetable that you can grow and harvest in your own garden. It's easy to care for, once you know how to harvest asparagus properly.You should harvest asparagus when the spears are about 6 to 10 inches tall and before the tips start to open up. You should cut the spears at the base and leave some on the plant to grow into ferns. It would be best to store asparagus in the refrigerator for later use.And yes, you should also enjoy the many benefits and flavors of asparagus, by cooking it in various ways and pairing it with different dishes. Asparagus is a springtime delight that you don't want to miss.Learn More About:Planting & Harvesting Mint7 Health Benefits of Black Seed OilSpirulina: The Complete Plant Based Protein Source | Health Benefits