Published on: 16 August 2023
Last Updated on: 25 May 2026
Fostering a connection between children and the great outdoors has become more important.
Playful landscapes offer a unique solution to this modern challenge by seamlessly integrating play areas into your lawn, creating a harmonious environment that encourages physical activity, creativity, and family bonding.
Choosing the right type of grass
When considering grass types for your playful landscape, opt for those that are hardy and resilient, able to withstand the wear and tear of active play. Bermuda grass and Kentucky bluegrass are excellent choices due to their durability and lush appearance.
These grasses recover well from foot traffic and require moderate maintenance, balancing playability and aesthetics. These grasses are available for purchase via the convenience of the Internet.
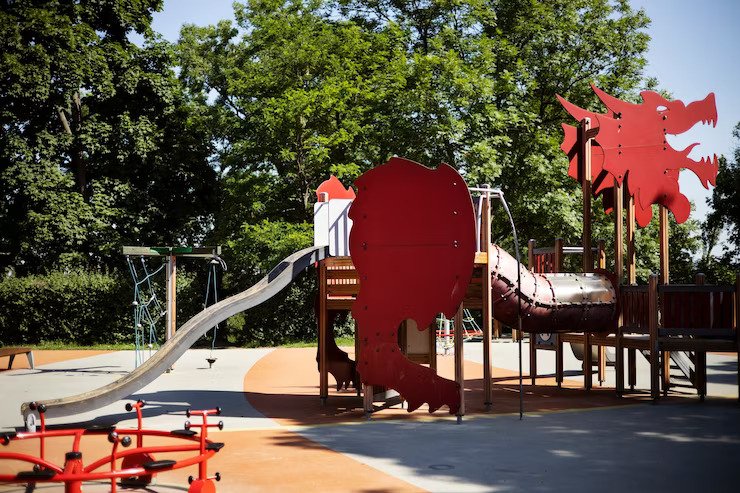
Designing play zones with natural elements
How often do we see playgrounds today? The answer is very rarely. Kids are nowadays trapped in technology and gadgets- they have almost forgotten the importance of playground. But as adults, we are responsible for keeping this feeling mortal in them. And what helps in doing so? Making the playgrounds more attractive with organic elements.
Integrate play areas with their natural environment using gentle slopes, mounds, and pathways. These additions improve the aesthetic value, pique kids' interest, and inspire creativity. Adding native trees and plants to playgrounds has multiple benefits, including aesthetics, environmental education, and biodiversity.
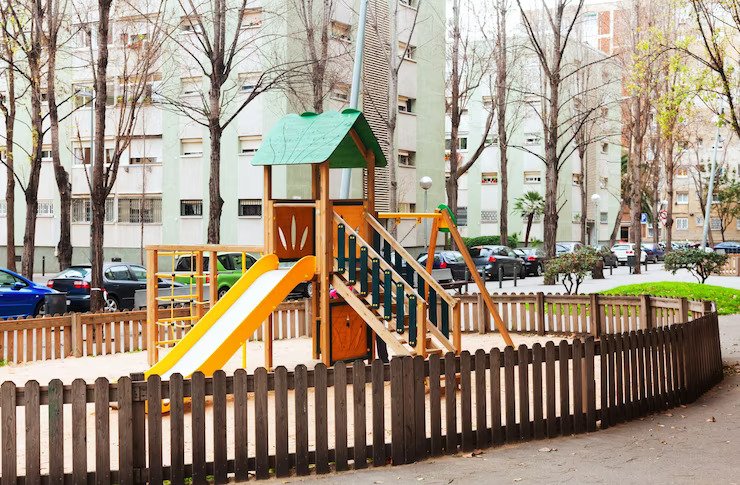
Incorporating safe play equipment
Playful landscapes must prioritize the installation of secure play equipment. You may put in swings, slides, and climbing structures suitable for different ages that still fit in with the architecture. Ensure everything is in working order and up to code before using it. A well-designed playground incorporating natural elements will encourage youngsters to play and learn.
Blending play areas with aesthetic appeal
Aesthetics shouldn't take a back seat to functionality while designing an entertaining and engaging environment. Use landscaping components like rocks, grasses, and flowers to help blend the playsets in with the rest of the yard. This method results in a space that is appealing to the eyes of both young and old.
Maintenance tips for a lively lawn
Your landscaping should be maintained regularly to keep it looking fresh and appealing. Maintain a proper mowing height, water the grass well, and immediately fix bald spots. You should consider aerating and overseeding the grass to keep it lush and healthy, so your kids will have a great place to play.
Environmental considerations
Make your landscaping more environmentally responsible without sacrificing fun. A greener and more sustainable playground is possible through rainwater collection systems, native plant varieties, and organic fertilizers. Instilling lifelong lessons of environmental responsibility in children through their play space is worthwhile.
Enhancing family bonding through play
An environment with play opportunities improves bonding among family members. Have a picnic, do some gardening, and compete against each other in fun contests. Children will remember these times fondly far into adulthood, and the relationships between family members will grow stronger as a result.
Boosting children's creativity and imagination
Playful landscapes inspire creativity and imagination by providing a constantly shifting canvas for play. Encourage children to make forts, nature-inspired artwork, and imaginative activities. The flexibility to experiment and explore promotes cognitive growth and problem-solving abilities.
Final words
Adding playsets to your yard may completely alter the vibe of your outdoor space, making it a more inviting place for kids to spend time and develop their interests. You may make a landscape that entertains, teaches, and enhances through careful planning and a balance between natural and artificial features.
Shahnawaz is a passionate and professional Content writer. He loves to read, write, draw and share his knowledge in different niches like Technology, Cryptocurrency, Travel,Social Media, Social Media Marketing, and Healthcare.
Rug layering, a trend that has gained popularity in interior design, can be perceived as both artsy and deliberate or, alternatively, as a bit sloppy, depending on the execution and context. When done with care and a discerning eye, rug layering can add depth, texture, and visual interest to a space, elevating it to a more eclectic and personalized level.
The key to artful layers
Artful layering involves combining rugs of varying patterns, textures, or sizes in a way that complements the overall design scheme, creating a harmonious and intentional aesthetic. Starting with a Large selection of stylish rugs is the best way to move forward in a stylish and purposeful way by allowing for a dynamic interplay of colors and materials, contributing to a space that feels curated and thoughtfully designed.
While a good rug collection is the best way to nail this trend, some thought and artistic design is still required in the process. If not executed thoughtfully, rug layering runs the risk of appearing haphazard or messy. The key to avoiding a sloppy look lies in keeping a sense of cohesion and balance. It's essential to consider the color palette, scale, and patterns of the layered rugs, making sure they work together rather than clash.
Proper placement is also crucial; overlapping rugs in a purposeful manner can create zones within a room, defining different functional areas and enhancing the overall design. Without this intentional approach, however, rug layering may come across as disorganized and lacking in visual harmony.
If you would like to add additional warmth to your home, and perhaps find a way to tie your rooms and decor together, then blankets are a great way to do that. They blend in easily and provide both aesthetic and practical value.
Why add warmth with rugs and blankets?
Rugs and blankets play crucial roles in enhancing the comfort, aesthetics, and functionality of a home. Rugs, with their diverse textures and patterns, serve as versatile decor elements that can tie together various design elements within a room. They not only add warmth to hard flooring surfaces but also define and delineate living spaces. Whether it's a luxurious Persian rug in the living room or a cozy sheepskin rug in the bedroom, these floor coverings contribute to the overall ambiance of a home.
Similarly, blankets are multifunctional essentials that go beyond providing warmth. They introduce layers to interior design, allowing homeowners to infuse colors and textures that complement their style. Blankets draped over sofas or neatly folded beds serve as both decorative and functional accessories. In addition to their aesthetic value, blankets offer a sense of coziness, inviting individuals to snuggle up during chilly evenings. Together, rugs and blankets contribute to a home's atmosphere, creating a welcoming and personalized space where style meets comfort.
Ultimately, the method of rug layering chosen is really dependent on individual taste. For those who appreciate a more eclectic and bohemian look, carefully layered rugs may be considered artsy and avant-garde. The key here is to strike a balance that aligns with the overall design vision and the desired atmosphere of the space.
Read Also:
Home Decoration At Its Best: 7 Key Ideas To Recreate Your Home
Top Home Remedies To Make A Floor Non-Slip
Ideas for Modern Flooring Designs for Home Improvement Plans
Weddings, the celebration of love and unity, are occasions where every detail matters. And they are certainly incomplete without incorporating centerpiece-inspired decor trends. The magic of the event is found not only in the bride’s gown or the perfect ceremony but also in the decor that sets the mood and theme of the wedding.
Wedding decor trends have evolved over the years, with creativity and personalization taking the forefront. Couples are now leaning towards decor that reflects their personalities, love story, and even their favorite hobbies.
However, with so many options available, it can be overwhelming to decide which trend to follow. From rustic to modern, vintage to boho, the choices are endless. With the right guidance, you can decode the vast world of wedding decor trends and choose the ones that suit you best.
In the realm of wedding decor, one aspect that holds significant importance is the centerpiece. Let's delve into its significance and how it can transform your wedding.
Importance of a Centerpiece in Wedding Decor
The centerpiece is not just a mere decoration, it is the heart of the table setting that brings everything else together. It sets the tone for the table decor and, ultimately, the entire room. A well-chosen centerpiece can create a cohesive look, reflect the wedding theme, and even serve as a conversation starter among guests.
Centerpieces can be simple or elaborate, minimalistic or extravagant, depending on your personal style and wedding theme. Regardless of its design, a centerpiece should be engaging, drawing your guests' attention and leaving an impression.
However, the power of a centerpiece extends beyond aesthetics. It can also evoke emotions, create a mood, and tell a story. A well-thought-out centerpiece can speak volumes about your personality, taste, and the love story that brought you to this day.
Top 10 Centerpiece-Inspired Decor Trends
As with any other aspect of wedding decor, centerpiece trends are also ever-evolving, reflecting the changing tastes and preferences of couples. Below are the top 10 centerpiece-inspired decor trends that can add a touch of elegance and personality to your wedding.
Botanical Bliss: This trend involves using a variety of plants, from succulents to ferns, to create a natural, eco-friendly vibe.
Floral Fantasia: Floral arrangements will forever be a classic choice, but the trend now is to go for unconventional flower types, colors, and arrangements.
Vintage Charm: Antiques, heirlooms, and vintage items can be used to create a nostalgic and timeless atmosphere.
Rustic Allure: Using elements like burlap, wood, and mason jars can create a cozy, rustic charm.
Glamour and Glitz: For those who love sparkle and shine, incorporating crystals, sequins, and metallic accents can add a glamorous touch.
Boho Chic: This trend involves using eclectic elements like macrame, dream catchers, and vibrant colors to create a bohemian, free-spirited vibe.
Modern Minimalism: For a clean, sophisticated look, go for minimalistic centerpieces with geometric designs and neutral colors.
Exotic Elegance: Incorporate elements from different cultures to create a unique, worldly vibe.
Nautical Nuance: If you love the sea, use elements like shells, sand, and sea glass to bring a coastal charm to your wedding.
Playful Pop Art: For a fun, vibrant atmosphere, use bold colors and pop art-inspired designs.
Now, let's see how some of the most popular centerpiece-inspired trends can transform your wedding.
Transforming your Wedding with Welcome Sign-Inspired Centerpieces
Welcome sign-inspired centerpieces are a trend that's gaining popularity. Instead of a traditional guest book, the centerpiece can be a beautifully decorated welcome sign where guests can leave their well wishes. It's a creative and interactive way to engage your guests and create a keepsake that you can cherish forever. Couples might even prefer exploring different styles of a wedding welcome sign to match their decor, from elegant acrylic boards and floral framed canvases to rustic wooden displays that can blend smoothly with the overall wedding theme.
A welcome sign centerpiece can also give your guests a warm welcome and set the tone for the rest of the wedding. It can reflect the wedding theme, your personality, or even your love story. You can personalize it with your favorite quotes, images, or even a timeline of your relationship.
The possibilities are endless. You can go for a rustic wooden sign for a barn wedding, a sleek acrylic sign for a modern wedding, or a vintage chalkboard sign for a retro wedding. Whatever your preference, a welcome sign centerpiece can definitely add a unique touch to your wedding.
Enhancing Ambience with Candle-Inspired Centerpieces
Candles have always been a favorite when it comes to centerpiece-inspired decor trends. They add a warm, romantic glow to the setting and can transform the ambiance of your wedding. However, the trend now is to think beyond traditional candle arrangements and to get creative with your candle-inspired centerpieces.
You can place candles in lanterns for a rustic charm, float them in water-filled glass bowls for a magical effect, or arrange them among flowers for a classic look. You can also experiment with different candle shapes, sizes, and colors to create a unique centerpiece.
But apart from their aesthetic appeal, candles also create a warm, intimate atmosphere. The soft, flickering light can make your guests feel relaxed and comfortable, setting the perfect mood for a celebration of love.
Delighting Guests with Gift-Inspired Centerpieces
Another trend that's making waves is the gift-inspired centerpiece. Instead of traditional decor, the centerpiece can be a beautifully wrapped gift that adds a festive touch to the table. This can double as a thank-you gift for your guests, making them feel special and appreciated.
You can personalize the gifts based on your wedding theme, your personality, or even your guests' preferences. It could be a small plant for a green wedding, a custom-made candle for a romantic wedding, or a jar of homemade jam for a rustic wedding.
Gift-inspired centerpieces not only add a unique touch to your decor but also create a memorable experience for your guests. It's a small gesture that can leave a big impact, making your wedding unforgettable.
How to Choose the Best Centerpiece for Your Wedding
Choosing the perfect centerpiece for your wedding can be a daunting task, but with a few tips and considerations, you can find the one that best suits your style and theme.
Firstly, consider the size and shape of your tables. The centerpiece should complement the table and not overpower it. Also, it should not obstruct the view or conversation among guests.
Secondly, take into account the overall theme and color scheme of your wedding. The centerpiece should blend in seamlessly and enhance the aesthetic of your decor.
Lastly, think about your personal style and preferences. Your wedding is a reflection of you and your partner, so choose a centerpiece that speaks to your personality and tells your story.
DIY Tips for Creating Your Own Centerpiece
If you're a crafty couple who loves DIY projects, creating your own centerpiece can be a fun and fulfilling experience. Here are a few tips to help you out.
Start by gathering inspiration. Look at wedding magazines, decor blogs, and Pinterest to get ideas. Once you have a clear vision, start sourcing materials. You can find a wide range of supplies at craft stores, thrift shops, or even online.
When it comes to design, simplicity is key. Choose one or two main elements and build around them. You can use flowers, candles, vases, or any other items that fit your theme.
Lastly, don't be afraid to experiment and get creative. Your centerpiece is a reflection of your personal style, so make it unique and memorable.
Where to Buy Wedding Centerpiece-Inspired Decor Trends?
If DIY is not your thing, there are plenty of places where you can buy trendy wedding centerpieces. From online marketplaces like Etsy and Amazon to local florists and decor rental companies, you have a myriad of options to choose from.
When shopping for centerpieces, keep in mind your wedding theme, color scheme, and budget. Look for reputable sellers with good reviews, and make sure to order well in advance to avoid any last-minute stress.
Conclusion: Making Your Wedding Unforgettable with Centerpiece-Inspired Decor
In conclusion, the centerpiece is an integral part of your wedding decor that can set the tone, create a mood, and tell a story. Whether you opt for a welcome sign-inspired centerpiece, a candle-inspired centerpiece, or a gift-inspired centerpiece, you can transform your wedding and create a memorable experience for your guests.
So, embrace the latest trends, get creative, and let your personality shine through your centerpiece. After all, your wedding is a celebration of your unique love story, and every detail should reflect that.
Read Also:
Why Trusting Professionals For Your Wedding Photography And Videography Is A Must
Why Sending An E-Invite For Your Wedding Is A Smart Option?
How to Choose Hotels for Your Wedding in Pigeon Forge TN
In today's fast-paced world, household appliances have become an integral part of our lives. From refrigerators to washing machines, these appliances simplify our daily chores, making our lives more convenient. However, like any other machine, appliances are prone to wear and tear over time.
When your trusty appliance breaks down, it can disrupt your routine and be a source of frustration. But fear not! In this article, we'll walk you through the appliance repair process, helping you understand what to expect when seeking professional appliance repair services.
Appliances can malfunction for various reasons, such as wear and tear, electrical issues, or mechanical failures. When your appliance starts acting up, the first step is to identify the problem accurately. This is where professional appliance repair toronto downtown services come into play.
Basic Aspects Of The Repair Process
Repair of electronic appliances is quite a comprehensive process. It will be an expansive discussion. This is the reason people try to ensure that they give the work to experts. However, let's try to understand them here in brief to gather a clear idea on the subject.
1. Saving Money
Electronic appliances, especially quality ones, usually serve customers with satisfaction. However, after theft, they face some issues, and consumers generally make the decision to replace it with a new one. But if you are investing to get a new machine, you have to spend a lot of money. It can entirely derail your budget. Why not get them repaired? Repairing these malfunctioning gadgets saves you extra dollars.
2. Convenience
One of the great benefits of repairing the old appliance is the convenience. Be it the Television, washing machine, or some other gadget, you definitely have your convenience. You are used to this very quality. But sometimes the new gadgets or appliances fail to satisfy the consumers. Notwithstanding the expenditure, you may not be happy. Repairing an old appliance can make your life quite convenient.
3. Safety
When an electronic appliance stops functioning, it may be unsafe for people, especially kids. These malfunctioning appliances can disrupt the electronic connection within the house. So to stop further damage to the appliance and maintain the safety of the people, you have to be mindful of the repair of your appliances. So, get these applications to the best of your understanding and ensure that you have them.
4. Assessment And Diagnosis
The first process in this system is the assessment and diagnosis. First, you have to look at the types of issues that you are facing with your appliance. The problem requires the replacement of certain components. The problem may also have a link with repairs.
A. Identifying The Issue
The initial phase of the appliance repair process involves identifying the root cause of the problem. Skilled technicians use their expertise to pinpoint the issue: a faulty motor, a broken thermostat, or a malfunctioning control board.
B. Diagnostic Tools And Techniques
Technicians utilize advanced diagnostic tools and techniques to ensure accurate problem identification. These tools help assess the appliance's functionality and determine the necessary repairs.
5. Choosing the Right Appliance Repair Service
Appliances’ care is under your hand. If you take adequate care of your appliance right from the beginning, then it will help you increase the shelf life of your appliance. But when the appliance goes out of order, then, its better that you take the assistance of the right repair services. They are professionals and they will provide you with the best suggestion on wha exactly you have to do it fix the issue.
A. Research And Reviews
Selecting a reputable appliance repair service is crucial. Conduct thorough research and read reviews to gauge the reliability and customer satisfaction of different service providers in your area.
B. Credentials And Experience
Ensure that the repair service you choose has certified technicians with ample experience in repairing appliances of various brands and models.
C. Getting A Quote
Before proceeding with the repair, request a detailed quote from the service provider. This should include the cost of parts, labor, and any additional charges.
Related: How To Repair Home Appliances and Use Humidifiers
6. Repairing Your Appliance
When you are repairing an appliance, you may have to replace one of many components. At the same time, you may do some repairing of that component and fix the problem. It will depend on not one but a group of elements.
Parts Replacement
If your appliance requires replacement parts, the technician will use genuine components to ensure optimal performance and longevity.
Repair Techniques
Technicians employ effective repair techniques, ensuring that the appliance functions as good as new. These may include soldering, rewiring, or recalibrating components.
Quality Assurance
The longevity of the electric appliance depends primarily on not one but many elements. The electric appliance, whether it is a refrigerator or, say, a washing machine, branded goods generally offer better products. Quality repair standards and their maintenance depend on some other elements and including;
Testing And Inspection
After repairing your appliance, thorough testing and inspection are carried out to verify that it's working correctly. This step ensures that the issue is fully resolved. The repair service with a good enough name and fame would always love to ensure zero tolerance towards any negligence.
Warranty And Guarantees
Reputable repair services provide warranties and guarantees on their work. It also offers you peace that your appliance is in good hands.
Warranty on the repair provides confidence to the people that their investment will not go to waste under any circumstances.
Preventive Maintenance
To avoid future breakdowns, performing preventive maintenance on your appliances is essential. Here are some tips:
Clean filters and vents regularly.
Check for loose or damaged wires.
Schedule routine check-ups with a professional technician.
Conclusion
The appliance repair process may seem daunting when your valuable appliances malfunction, but with the right knowledge and a trusted repair service, you can have them back in top shape in no time. Remember to prioritize regular maintenance to prolong the lifespan of your appliances and minimize the need for repairs. Finally, take the assistance of an experienced repair services to save yourself from loss of further damage.
Read Also:
Vampire Appliances And Electronic Costs
Best Practices That Extend The Life Of Your Appliances
How Can Appliance Repair Services Help You