What Do Ad-in And Ad-out Mean In Tennis?

Published on: 30 August 2021 Last Updated on: 10 January 2025
Ad-in And Ad-out

Tennis might be one of the most loved sports out there, but for beginners, it is also considered one of the most confusing outdoor activities because of its unique scoring system. Terms such as Deuce, Ad-in, and Ad-out are used differently in this sport and may appear too complicated for players who just recently found their love for tennis.

To help you understand how the tennis scoring system operates, you must know each term’s definition and a clear awareness of how they work. For starters, you have to learn what an ad in tennis means, what an ad-in and ad-out is, when it happens, and how you gain a point when it occurs.

For all tennis novices out there, we have listed down some key points you have to note for your future matches.

What does “Ad” mean in tennis?

What does "Ad" mean in tennis?

The term “Ad” is an abbreviated version of the word “advantage.” It is used in tennis to identify the winning player when a deuce happens. A deuce occurs when both players acquire a score of 40 simultaneously or if each player scored three times in a row.

In simpler terms, an “Ad” in tennis can be rather called a “tiebreaker.” It is the means of deciding a winner from players who are currently having a neck-and-neck tie score.

Winning a deuce in tennis can be simple yet nerve-wracking. To win the match, a player only needs to score two consecutive points. The player who breaks the tie has the edge since they just need one more point to control the match and will be positioned on the ad court, which is advantageous for every player.

However, when he fails to do so, and his opponent scores the same one point as him, making it a tie again, the two-point requirement will be back – resulting in a rally. So, if you want to win, these two points will determine your fate.

What is an Ad-in?

The term Ad-in is somewhat like a colloquial word used outside of a professional game. Players and even umpires use it, but this term, along with its contrast word “ad-out,” is not considered an official signal in tennis.

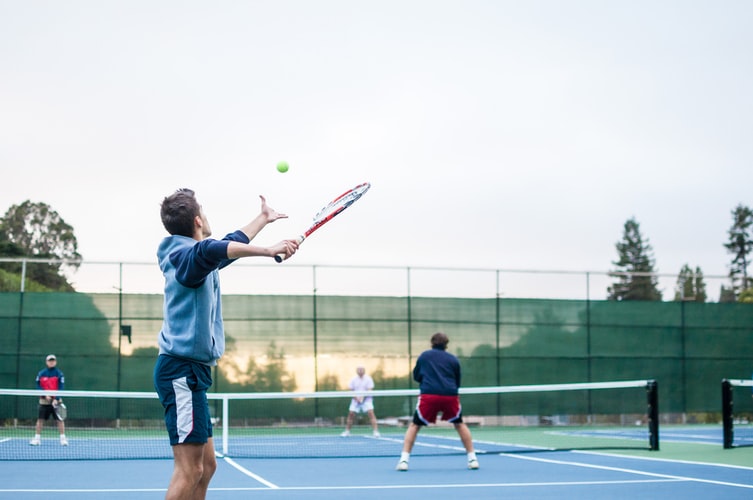
A player says the word “ad-in” when he is the one serving the ball when he has the advantage for scoring a point on a deuce. So, if you happen to advance a single point, you should notify the umpire by saying “ad-in,” or for others, they say “my ad.” This will make you stand on the ad court and increase your chance of winning.

What is an Ad-out?

What is an Ad-out?

An “ad-out,” opposite to the definition of “ad-in,” is said if your opponent has the advantage point when you’re the one serving. You will be the one serving the ball, but your opponent is the one who has the privilege of being in the “Ad Court” or the left side of where the center mark is.

This scenario might be a little difficult for some or doesn’t affect game performance much on others. Of course, having the advantage is always better.

Getting accustomed to all the scoring terms and systems might be a little burdensome for the new players, but once you play more and devote more of yourself to playing, you will realize just how fascinating and fun tennis is. It only requires time, practice, and patience. Have fun, stay safe, and play well!

Bonus throw for you: Check out an exclusive journal on buying ping pong paddle

Read Also:

Content Rally wrapped around an online publication where you can publish your own intellectuals. It is a publishing platform designed to make great stories by content creators. This is your era, your place to be online. So come forward share your views, thoughts and ideas via Content Rally.

View all posts

Leave a Reply

Your email address will not be published. Required fields are marked *

Related

Boxing Tips

Top 4 Effective Boxing Tips for Beginners

If it’s your first time in the boxing gym, then you probably won’t really know what to do unless you have a program. Even if you do have a trainer, it pays to have some boxing knowledge beforehand so you won’t have a hard time. Here are top 4 effective boxing tips for beginners. 1. Perfect Your Stance : As a beginner, the first thing you’ll probably think about is getting the best boxing gear you can find. However, it’s better to think about your stance first. A sloppy stance will make you either lose your balance or decrease the power of your punch. So you have to make sure your stance is your foundation. To attain a good stance, make sure your front foot is a few inches away from your back foot. Stand in a way that you’re most comfortable. Just make sure your feet are shoulder-width apart. After that, angle your front foot around 15 degrees and your back foot 45 degrees. Put your chin down but your eyes facing forward. Bring your arms up with your left hand guarding your chin and your right hand in front of your left. Make sure your elbows are tucked in tight. Lastly, keep your knees bent so that you’re in a comfortable position. From this stance, practice moving around to see if you’re comfortable. 2. Breathe Properly : If you watch all those old kung-fu movies like the old Jackie Chan or Jet Li ones, you’ll notice that the old grandmaster will tell the protagonist to always focus on breathing. That’s actually a real fighting technique that will help you conserve energy and power your punches. In boxing, the proper breathing involves slowly breathing in when you prepare and breathing out sharply while you punch. So as a beginner, practice breathing in when you’re about to punch and breathe out through your mouth with an “ssh” sound as you punch. 3. Keep Elbows In : Whenever you guard or you punch, it’s always important to keep your elbows tucked in close to your body. This positioning of the elbows allows you to throw quick and sharp punches. If the elbows are close to the body, the posture allows you to piston your punch forward, making it sting more. Aside from that, keeping your elbows in also allows you to quickly defend your body just in case you’re about to be hit by a body shot. This will also prevent your funny bone from getting hit by a punch. 4. Perfect the One-Two : The very first combo you’ll ever learn is the one-two punch which involves a jab and a cross. Sure, it may be a very basic punch combo, but if you perfect it, you’ll be able to throw it naturally, helping you create knockouts. To throw a good one-two, throw a jab and slightly step forward. After that, pull back your jab and move slightly again and throw your backhand while twisting your hips. This twist will power up your punch and deal a lot of damage. Conclusion : If you happen to be a beginner without any knowledge about boxing, then here are a few tips to help you out. Sure, most coaches will teach you those techniques as a beginner, but it’s better if you know about them early on so that you’ll be able to get to the boxing training right away. So for those who are starting, always remember these top 4 effective boxing tips for beginners. Knowing them and maybe even practicing early on can really help supplement your training and make you better. Raed Also : Resistance Bands: The Best Tool For Your Home Gym Top 10 Muscle And Strength Building Exercise At Home 8 Home Gym Systems You’ll Want To Try Out Easy Diet Tips To Summer Six Pack Abs

READ MOREDetails
puck

Play the Puck at Home the Way You Do at the Rink

The NHL season has begun, and that means only one thing: your ice hockey season is about to begin too! Did you work on keeping your skills sharp all summer? If so, your hard work is about to pay off, and if you didn’t, you have some catching up to do! Let’s check out how the best hockey training equipment lets you practice from home as if you were at the rink. Skating on Tiles There’s nothing like that moment when the Zamboni is done flooding, and you have a fresh sheet of ice to skate on. Now you can enjoy this moment whenever you want. Leaders in training equipment like HockeyShot Canada, offer synthetic ice surfaces you can easily build in your basement, backyard, garage, or anywhere else. These interlocking tiles form skating surfaces of any size, indoors or out. The best tiles can withstand the weight of cars, so you can put them right on the driveway. They also have UV-protection and weather-resistant treatment to endure the hot and cold months. You won’t need to worry about renting the ice to get a skating session in. Just lace them up whenever you want and skate at home with friends and teammates. Related Reads: Health Benefits of Figure Skating Pick Top Corners Like a Pro When you get the chance to bury the puck, you can’t miss it. You need to develop the instinct and reaction to go bar-down, and that takes a lot of practice. If you’re scared of the damage a misfired puck might cause your walls or garage door, your practicing will be restrained and timid. Shooters need to fire the puck, so you need to condition yourself to automatically shoot hard in a game by practicing just as hard. Shooting tarps protect your property and have holes in the corners and between the goalie’s legs you need to aim for. Work on the Sauce The “saucer pass” is a handy tool for getting the puck past a defender and onto your teammate’s stick. If you can control the puck so it hovers just over the outstretched stick of a defender and onto your teammate’s tape, your teammates will fight to be on your line. The best producers of hockey training equipment created sauce kits, a type of Corn hole game you can play by yourself or with friends to improve how you pass. Pass the puck into the miniature net by clearing the obstructing ramp. A sauce launchpad is included that makes the puck feel like it’s on ice. Work on your saucer passes anywhere, even the beach! The highest-grade equipment is designed to withstand years of abuse from sticks and pucks so that you can have years of fun. Ice hockey should always be fun, but what’s more fun than scoring sick goals, dangling opponents, and winning games? Ice hockey training from home is the most enjoyable way to keep your skills sharp, but you need modern gear that makes practice away from the rink feel just like it does on the ice. Read Also: What Do Ad-in And Ad-out Mean In Tennis? Guide to Over-the-Top Sports Streaming Services What Golf Equipment to Pick When You Start Out

READ MOREDetails
Snowboarding

5 Snowboarding Tips For Beginners

Snowboarding is the sport of adventurers! The icy cold, the rushing wind, and the epic views are what draw in this rough and tumble crowd. Beginners often become overwhelmed by all the equipment and safety talks, so to keep you from getting deterred, we are going to give you 5 simple tips! 1.  Picking The Right Board When you go board shopping for the first time, you might be taken back by how many boards are on display. A board is a board, right? Wrong! There are so many different ones for you to choose from, so picking the right one is super important. Beginners should be using boards with rocker cambers. A rocker camber places a rock between your feet and has camber under each foot. These are safety features, like training wheels on a bike. The rocker will stop your board from catching the edges as you turn, and the camber will help you create edge digs to help you turn. Only when you are feeling confident in your turning skills should you pick a board without these features. At that point, you can pick mountain boards. When you are feeling super confident, then you can move to freestyle boards. Similar Reads: Ways to Play the Puck at Home 2.  Be Sure To Have Appropriate Gear Which Fits The right gear is essential for making you safe, but all the gloves and bindings in the world won’t protect you if they don’t fit. If your boots are too small, you will find it hard to turn and maneuver, and at the end of the sloop, you may end up with a sprained ankle. In fact, our boot gear is one of the most essential pieces of equipment to get right. Your toes should be able to feel the end of your boot, but not so much that they curl or have pressure against them. Your bindings should have the same feeling. You want them to keep you attached to the board while allowing you to turn as appropriate. If you are not sure what size of blinding or shoes you should be buying, then click here for more information. Similar Reads: American Football Rules 3.  Start Snowboarding Lessons It might be tempting to rush straight to the snow, but without proper training, you won't make it far, and you will risk developing an injury. The lessons you learn in snowboarding classes will teach you how to fall correctly without damaging yourself, it will give you the confidence to make dramatic movements for cooler tricks, and it will teach you how to move the board for speed and control. You don’t need a lot of training to get started, and if you don’t mind staying at a beginner level, you can just go to one starter class. But if you want to learn to take on bigger mountains and cooler trickers, you should advance through the programs. Related Reads: Ad-in And Ad-out Meaning In Tennis 4.  Look Towards Your Path A common mistake that most newbies make is looking at their feet. They want to make sure their feet are going through the motions correctly, and it is a natural response, but focusing on your feet will stop you from preparing for the bumps ahead. This response is called object fixation. You know that your calves, feet, and core are controlling your movements, so you want to watch them make sure their form is correct. Instead, you need to be confident in your body's ability to react. Your feet need your eyes to tell them what to do. Try to relax and let the movement happen without your glaring surveillance. You should look forward to the path you are taking so you can avoid trees, get out of the way of other snowboarders, and keep yourself upright. 5.  Bend Your Knees Looking straight is the first rule, bending your knees is the second. You will encounter bumps, dips, and quick reactions while you’re snowboarding. To make sure your body doesn’t buckle under the impact, you need to bend your knees. This way, your legs act as a suspension, and you can absorb this rough terrain and react quickly to the area around you. This doesn’t mean you should be sitting on a fake chair to create a 90-degree angle. Instead, you should be making your knees a little loose and bouncy, creating a spring. Adjusting your knees like this is the best way to control your speed too. Having this bouncy connection to the ground will allow you to keep your low aerodynamic shape even if the ground beneath you isn’t smooth. Read Also: Top 3 Pieces of Women’s PWC Gear {for Summer} Guide to Over-the-Top Sports Streaming Services How to Become a Better Golfer this Year What Golf Equipment to Pick When You Start Out Guide to Understanding Training, Strenght Cycles and Alternatives

READ MOREDetails