Trending Vape Juice Flavors That You Can Try With Your Family

Published on: 24 August 2023 Last Updated on: 06 November 2023
Vape Juice Flavors

Vaping is a popular hobby among many people, but keeping up with the latest trends and flavors can be tricky. Whether you’re an experienced vaper or just starting, plenty of unique and delicious vape juice flavors can please any palate. Lately, people are also searching for “salt vape juice flavors sold here”.

In this article, we’ll outline six trending vape juice flavors that you won’t want to miss – so gather your family around for a taste test so they can see what all of the fuss is about!

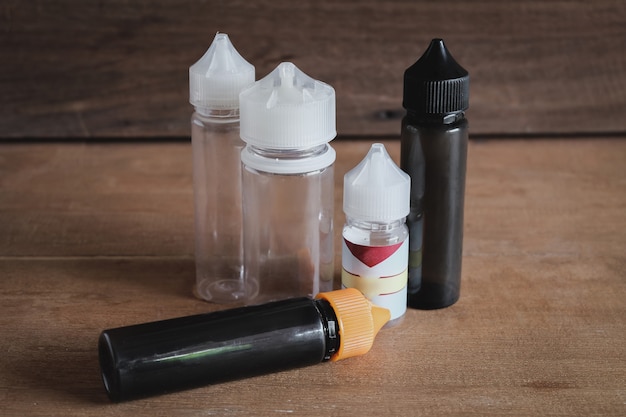
Here Are The Trending Vape Juice Flavors That You Can Try With Your Family

1. Blue raspberry blast

If you’re a fan of vaping and are looking for a refreshing flavor to try, you may want to check out the Blue Raspberry Blast. This popular flavor trend is gaining popularity amongst vapers, especially those who love fruity and sweet tastes.

The Blue Raspberry Blast is a flavor that is both tangy and sweet, making it a pleasant experience for your taste buds. It is perfect for enjoying with your family and friends, as it is a flavor most people will likely enjoy. Whether you’re new to vaping or a seasoned pro, the Blue Raspberry Blast is worth trying out if you want something enticing and enjoyable. You can find great blue raspberry taste with Breeze Smoke Pro. Or you can suggest a similar sentence with the same anchor.

2. Vanilla bean dream

Vanilla Bean Dream is a top choice for those seeking a sweet, creamy vape juice flavor. This trending flavor combines the classic taste of vanilla with a dreamy creaminess to create a vaping experience that is both smooth and satisfying.

Vanilla Bean Dream is a great choice for those who don’t want a strong or overpowering taste, and it is perfect for sharing with family and friends. With its buttery smoothness, this vape juice is a real crowd-pleaser. Whether new to vaping or a seasoned pro, Vanilla Bean Dream is a must-try flavor that will surely delight you.

3. Juicy watermelon burst

Juicy watermelon burst

Looking for a new vape juice flavor that you and your family can enjoy? Look no further than Juicy Watermelon Burst! This trending flavor is bursting with sweet and juicy watermelon notes that are perfect for summertime.

Whether relaxing by the pool or enjoying a BBQ with loved ones, Juicy Watermelon Burst will surely be a hit. Its crisp and refreshing taste makes this flavor perfect for those looking for something delicious and easy to vape. Give it a try and see what all the fuss is about – you won’t be disappointed!

4. Caramel swirl delight

If you’re on the hunt for a vape juice flavor that is both sweet and irresistible, the Caramel Swirl Delight is worth a try. This trending flavor has been gaining popularity for its unique blend of rich caramel and smooth cream that explodes with flavor in every puff.

Whether you’re new to vaping or a seasoned pro, this flavor is a must-try that will leave you wanting more. Plus, the Caramel Swirl Delight is a great option to share with your family and friends, as it is sure to impress even the pickiest of taste buds. So go ahead and indulge in this delicious vape juice flavor today!

5. Sweet and sour cherry bomb

If you’re looking for a new e-juice flavor with your family, the Sweet and Sour Cherry Bomb is a trending option worth a taste test. This flavor features the perfect blend of sweetness and tartness, making it a deliciously unique experience that will tantalize your taste buds.

Every puff will deliver a burst of cherry flavor complemented by a tangy aftertaste, creating a complex and satisfying vaping experience. Whether you’re a vape enthusiast looking to switch things up or just starting with vaping, the Sweet and Sour Cherry Bomb is a must-try flavor that’s sure to impress.

6. Tangy lemon twist

If you’re a fan of tangy flavors, then the Tangy Lemon Twist vape juice is worth a try! Perfect for those who aren’t fans of overly sweet flavors, this juice offers a refreshing blend of tartness and sweetness that will tantalize your taste buds.

Additionally, this flavor isn’t heavy or overpowering, making it an ideal choice for those who prefer a lighter vape experience. Whether you’re looking to switch up your usual vape flavor routine or want to try something new with your family, the Tangy Lemon Twist vape juice is a great option to consider.

How To Choose The Perfect Vape Juice Flavor To Enjoy With Your Family?

Choosing the perfect vape juice flavor to enjoy with your family can be an exciting adventure.

First and foremost, it’s essential to consider the preferences of each member of your household. Tasting different flavors together can also be a fun activity to help you find the perfect vape mood. When selecting vape juice flavors, consider a variety of flavor categories such as fruity, candy, dessert, and menthol.

Take your time to try different combinations and find a favorite that everyone in your family can enjoy. Importantly, ensure the vape juice flavors you pick are high quality and produced by a reputable company.

With a vast selection of vape juice flavors available, choosing the perfect one may take time and patience, but it’ll ultimately be worthwhile.

Factors To Ensure While Trying Different Vape Juice Flavors With Your Family
When trying different vape juice flavors with your family, there are a few critical factors to keep in mind for a satisfying and safe experience:

  1. Consider the nicotine level and opt for lower concentrations if possible. This is particularly important if anyone in your family is new to vaping or sensitive to nicotine.
  2. Be mindful of any flavor allergies or preferences and choose accordingly. Be open to trying different flavor profiles and experimenting with combinations, but always prioritize safety and comfort for everyone involved.
  3. Always store your vape juice properly and keep it out of reach of children and pets.

Following these simple guidelines, you can enjoy trying different vape juice flavors with your family while ensuring a safe and enjoyable experience.

Bottom Line

Vaping has become a popular pastime for adults across all age groups. With increasingly diverse flavors, settling on the perfect mix can be hard. From Twisted Tobacco to Caramel Mint, there is something for everyone’s palate! In addition, this can be a great way for families to spend quality time together, whether inside or out. All you need is an e-cigarette starter kit, and you’re ready to go! Whatever flavor tickles your fancy, always remember to vape responsibly and take safety precautions when testing different flavors.

Read Also:

Arnab is a professional blogger, having an enormous interest in writing blogs and other jones of calligraphies. In terms of his professional commitments, He carries out sharing sentient blogs.

View all posts

Leave a Reply

Your email address will not be published. Required fields are marked *

Related

proper way to cut an onion

The Importance Of Proper Cutting When Preparing Meals

When you're preparing meals, there's a lot to get done. You might not think too much about how you're cutting up the foods that you use, but it can make a difference in how your dinner looks and tastes. Some of the reasons why it's important to make sure you're using proper cutting techniques when you're prepping foods include the following. If you are planning to cook something, you probably will need to chop onions! onions play an important role with regards to bringing flavor and crunch to the dish. You can cut the vegetables into nice little cubes along with vertically chopping the food. Read about the different ways in which you will learn to cut the onions along with keeping yourself safe! See that you don’t cut yourself. Keep Yourself Safe When Cutting Of course, safety should be a top priority when you're preparing meals. Knowing how you should cut an onion can help keep you safe. When you are cutting any vegetables, using the right techniques keeps your fingers out of the way, so you can cut every piece of the vegetable without getting your fingers. This could save you from a trip to the hospital or being out of commission for a while as you let your hand heal.  Make Sure Pieces Are Uniform In Size It is important to make sure the pieces you cut are uniform in size, as this can help make sure the food all cooks evenly. There are many different methods for cutting carrots, but with any of them, if you cut some pieces large and some small, the small ones will be done cooking long before the large ones are finished. This can lead to the food not tasting as good as well as to the meal being served with some pieces that are overdone and some that might not be cooked all the way through.  Food Cut Properly Looks More Attractive Cutting the food properly and making sure they're the right size can make the food more attractive. When you use safe cutting methods, you can do unique shapes or cut them in ways that are a little more fun or add to the presentation. Since food that looks better tends to taste better, making sure you're cutting the foods properly can mean everyone enjoys your meals more.  Make Sure Portions Are Precise When the cut foods are plated, if there are some that are much bigger than others, it can mean that it's more difficult to get the proportions right. The plate might look more full with bigger pieces on there, but you might not be getting as much because you're only having a few of the big pieces instead of lots of the small ones. If you're portioning your plate for weight loss, this can be even more important, as you'll want to make sure you are eating enough healthy foods.  Ensure The Meal Tastes Right Along with being more attractive and tasting better, if the pieces aren't cut properly, it can impact the overall taste of your meal. When you cut pieces that are too large for the recipe or too small, they will cook differently, even if they're all the same size. Smaller pieces when cooked may impart more flavor to the meal, so your soup could end up tasting a little too much like onions and you won't be able to taste the other flavors as much. What Are The Types Of Cutting Techniques That Every Chef Must Know?  In the previous sections, we have discussed the important aspects to consider with the proper cutting technique. If you are a chef taking intensive training, you have to consider some of the most important aspects linked with proper technique techniques. Therefore, you have to consider some of the important aspects linked with cutting techniques. However, here are some of the top cutting techniques that you  need to master as an evolving chef So let discuss them here in this very section to get a better understanding of the entire subject.  Dice  Cut Are you looking for a proper way to cut an onion? Then you may master this very technique effective;y to get it done. This is a classic cutting technique. It involves making the fruit or vegetable small squares. In this process, you need to integrate the onion by slicing it horizontally along with keeping the roots intact! Significance Of Cutting Onions In Different Ways! One of the most important vegetables, onions is used in about every dish for breakfast, lunch and dinner! We also use onions in a lot of snacks, hence, you should learn how to chop onions. The flavour of onions plays an important role in chopping the pieces along with cutting them into strips. Mincing is the first way of chopping which you can use to cook soups, raita, Manchurian balls and marinades. If you do not want to learn how to mince onions, you can use a food processor to finely mince the onions. Chopping is another process where the size of the onions is medium. This is mostly used in dal, stir-fried veggies as it gives a delicious and nice flavour to the overall food intake. Dicing is another process where the onions are used in cutlets, dosa stuffings, paratha stuffings and omelettes. When onions are diced, there is prominence in the dish along with the flavorful deliciousness of food. we often use half-moon cutting which is of the layer from thin or thick based on your requirements. This is mostly used in sandwiches, burgers and salads. Furthermore, the onions can be used to add a crunchiness to the food item! Onion rings are one of the most popular food items as a lot of people eat it as a snack! You can peel the onion trim the edges and then cover it in a flour batter with salt, spices and pepper, thus creating rings of onions. When it is fried, the deliciousness is great because it can go with any sauce. Conclusion To sum it up, it is an important part of cooking especially when knowing the right way of chopping vegetables. If you are a cook, you will know the significance of chopping vegetables along with adding them in the form of strips. Onions are an important part of most food items, be it a sandwich, be it any protein, starting from chicken to meat, to dressing of other food items, onions are a must! After you read the article, there are six ways to know the proper way to cut an onion and accordingly, they will help you cook different recipes. You can cook soups with onion chopping hence, after reading the article, get to learn about these different ways. If you'd like to improve your meal prep, start by learning how to cut vegetables and other foods properly. Knowing how to cut them and the different methods you can use can help keep you safe, help ensure the food is uniform in size, and help ensure your meals always taste amazing.  Additional Reading: 8 Campfire Cooking Essentials For a Camp Kitchen That Crackles 10 Unique Kitchen Hacks to Save your Time in Kitchen and Cooking Lift Your Home Cooking: Mysteries From HMD Bar And Grill’s Kitchen

READ MOREDetails
how to thicken chili

How to Thicken Chili – Tried and Tested

A cold winter night with a delicious dish of chili is all you need to enjoy your moment. But wait, Are you left with too much liquid in your chili? Ah! No need to worry at all. There are numerous ways on "how to thicken chili". Honestly, you don’t want a thin chili because there is nothing better than a cheerful bowl of thick chili as your winter dish. Many times, just to thicken the chili, people cook it more than it is necessary. Later, other ingredients in it fall apart and turn to mush.  Don’t panic. There are effective and easy ways to thicken chili at your home, and all of these methods are tried and tested. Just be sure to use at least some of these methods to thicken chili before your precious moment turns into sour. How To Thicken Chili - Tried and Tested You may be wondering that cooking your dish for a little longer will make your chili thick. But do you know that you are mushing other ingredients in it? So, you must know other effective ways about how to thicken chili. Below listed are the perfect ways to thicken chili for the perfect night. 1. Flour - Standard Thickening Method: Wheat flour is composed of proteins, sugars, lipids, starch, and enzymes. It is used for making different types of foods. Flour is widely used for thickening chili in most of the kitchens. It really works great. Now its time to try for yourself as well. Ingredients:  30ml or two tablespoons of flour and 60ml or ¼ cup of cold water. How to Use? Take a separate bowl. Mix flour and water thoroughly in it.  Make sure that the resulting mixture has no lumps and is smooth. Then add the flour mixture in your thin chili while cooking it in medium-high heat. Stir constantly. Let the mixture boil and thicken well. It will hardly take few minutes. Make sure to continue stirring an additional few seconds to see if you are able to detect flour in your chili flavor.  So, here is your hearty chili dish! Now, it is much thicker and tastier than before. You can even serve this to your guests. 2. Arrowroot- Best Thickening Agent: Arrowroot contains Vitamin B, Iron, Potassium, low-protein, starch, etc. It is widely used as a thickening agent in all household kitchens. It is a starch that is extracted from the arrowroot plant. When you will use arrowroot in your dish, then it will give an amazing surface gloss to your liquid chili.  Ingredients: 5ml or 1 tablespoon of Arrowroot and 5ml or 1 tablespoon of cold water. How to Use? Take a separate bowl. Mix thoroughly water and arrowroot to turn it into a smooth paste. Make sure that you add only a small amount of arrowroot as it is potent and flavorless. Then add slurry into your thin chili cooking it in medium heat. Stir constantly below the boiling point. Then after 1 to 2 minutes, your thin chili will thicken instantly. Arrowroot adds gloss like appearance to your chili dish making your dish thicker and delicious. I have used this method and got the result, so now it’s your time! 3. Cornstarch- Anti-sticking Agent: Cornstarch is also known as Maize starch which is extracted from the maize grain. It is a food ingredient that is used in thickening soups and sauces. Cornstarch gives a moderate glossy appearance and when mixed with liquid, it rearranges itself.  Ingredients: 15ml or 1 tablespoon of cornstarch and 15ml or 1 tablespoon of cold water. How to Use? Take a separate bowl. Mix thoroughly cornstarch and water before mixing it to chili. After adding cornstarch paste to chili, heat it in a medium to high flame. Stir it well until the bubbles start appearing. Wait for few minutes to see the results. If you still feel that your chili should be thicker then you can add more cornstarch and water on it.  Then let it cook for an additional few minutes. You can use cornstarch to thicken your chili because it will not alter the taste of your dish of chili as cornstarch is flavorless. Other Simple Ways to Thicken Your Thin Chili: 4. Mix it in Tomato Paste Now, no need to worry about how to thicken chili. If you want your chili only a little thick then you can use this method. Tomato is one of the main elements in chili. So adding it to your mixture won’t alter its taste and makes your chili thicker. Ingredients: 170 grams of tomato paste. How to Use? I am suggesting that you should use fresh handmade tomato paste. Since tomato paste is recognized as bitter in taste, so you can add a pinch of sugar in it. Sugar will add a mild sweetness to your dish by removing tomato’s bitterness. During the final thirty minutes of cooking add 170 grams of tomato paste into your thin chili. Slowly add tomato paste to your thin chili. You can also add it after every ten minutes if you wish (⅓ of the tomato paste). Stir constantly to combine it well. You can use tomato paste to thicken your thin chili dish. But keep all the instructions in mind so as not to make any mistakes while preparing it. 5. Use More Beans to Thicken Your Thin Chili: A bean is a seed of numerous genera of the flowering plant. They have the ability to curl up on any medium. Beans can be use to thicken your thin chili. Do you know that India is the largest producer of dry beans in the world? Yes, it is.  Ingredients: 125ml or a half-cup beans. How to Use? If your chili contains beans then strain half cup of beans. Then refry and blend it. Then again mix this mixture to your chili and cook for a few minutes. Stir occasionally to warm it well. You can use canned or home-cooked beans as per your wish.  If you still feel that your chili is thin, you can add extra beans in it but make sure you blend it well. Here you go! Your thick chili dish is ready now to serve your family. If you don’t like beans then no need to worry. You can add meats to make your chili thicker. Wrapping it Up "How to thicken chili" is one of the major problems for all the cook masters. Even I have used many methods to thicken my thin chili but all went in vain! Therefore, all the above methods are tried and tested about how to thicken chili. So, you can use it to thicken your thin chili. I know nobody likes to serve thin chili to their family or guests. Even I don’t like it. Do you?  Image source: wikihow Read Also: 3 Variants of Thin Crust Pizzas How You Can Increase the Value of Your Home with Stone Veneers

READ MOREDetails
Hummingbird Food Recipe

Hummingbird Food Recipe: How To Make Hummingbird Nectar?

It always feels good to see a hummingbird in your garden. To see more of them in your garden, you can keep hummingbird nectar/food in a jar in your garden. In fact, with a simple hummingbird food recipe, you can make their lives easier. All you need is a few simple ingredients. In this article, you will learn how to make hummingbird food with simple ingredients. Apart from that, this article also discusses hummingbird nutrition and the steps you can take to set up your bird feeder. Finally, you will learn how to attract more hummingbirds to your garden. Hence, to learn more, read on to the end of the article. Understanding Hummingbird Nutrition There are a variety of food options a hummingbird needs to meet its nutrition. Although they are one of the smallest birds in the world, they burn a lot of their calories by fluttering their tiny wings. Generally, a hummingbird flutters its wings 90 beats per second to maintain its momentum. Hence, you can see that hummingbirds need to eat a lot. In fact, to satisfy their daily calorie requirements, these birds even consume half of their body weight. Basically, they feed on bugs and nectar every 10-15 minutes. Also, they visit 1000-2000 flowers per day. The following are the things that hummingbirds feed on: 1. Nectar: This is the primary food source of hummingbirds. Basically, it consists of 20% sugar and 80% water. Generally, hummingbirds get their nectar from cardinal flowers, bee balm, salvia, and petunias. 2. Insects: For their protein needs, hummingbirds feed on insects. This is also a source of fat and salt for hummingbirds. In fact, nectar does not provide those nutrients. Basically, hummingbirds hunt insects by finding them from flowers, leaves, or tree bark. Sometimes, they also attack insects midair or pluck them from sticky saps. 3. Spiders: Generally, hummingbirds also feed on spiders for protein. However, they are generally small spiders. 4. Tree Sap: When the amount of nectar is low, hummingbirds drink tree sap from tree bark. Generally, woodpeckers drill wells on tree barks to get tree saps. Hummingbird Food Recipe Basically, by offering hummingbird nectar, you can help them with their post-workout meal. Hence, follow the below hummingbird food recipe to make nectar: Ingredients The following are the ingredients you need to make hummingbird nectar: Filtered Water: 4 Cups Regular White Sugar: 1 Cup (If possible, use organic sugar for the recipe) Procedure Here are the steps you must follow to make hummingbird nectar: 1. Get four cups of water in a saucepan and bring it to a boil. 2. Once the water reaches the boiling point, take the water off the heat. Add sugar to the boiling water. 3. Stir the mixture until the sugar completely dissolves in the water. 4. The nectar is ready. Now, you must let the nectar cool completely. 5. Get a hummingbird feeder and place the mixture inside the feeder. Make sure to hang the hummingbird feeder outside (in your garden) to attract hummingbirds. Essential Factors To Consider The following are some of the major factors you must consider before you start making nectar with the hummingbird food recipe: Make sure to change the nectar every four days with a new nectar. This will ensure that the nectar is fresh. Also, remember not to use food coloring in the nectar. Let it be as natural as you can. Regularly check the bird feeder every time you change the nectar inside it. Look whether there is a gray mold inside the feeder base or not. Also, check whether any ant has crawled inside the feeder to consume sugar water. If you check any dirt or ants inside the hummingbird feeder, throw the bird food away. Basically, it is not good for the birds to drink dirty nectar. In fact, there is a high chance that the birds will not feed on the nectar anyway. To clean the feeder, rinse it with warm water. Then, put some bleach into the water inside. This will allow you to clean the feeder with a brush easily. Once you clean the feeder, rinse it thoroughly with fresh water. Moreover, allow the water to dry. After that, please fill up the feeder with food and place it outside. Enhancing The Hummingbird Experience Enhancing the hummingbird experience, you can attract more hummingbirds to your garden/balcony/porch. The following are some of the steps you must follow if you want to enhance the hummingbird experience: 1. Change The Food Regularly Make sure to change the food every 3-4 days. This is because nectar spoils quite fast, especially when the weather is hot. In fact, if the weather is above 30 degrees Celsius, make sure to change the nectar regularly. Also, make sure to keep the feeder in the shade. This will prevent the sugar from fermenting. 2. Use The Right Amount Of Ingredient You can make hummingbird nectar with just water and sugar. However, you must ensure the water-to-sugar ratio is 4:1. Then, boil the water and add the sugar. After that, mix them until the mixture is perfect. After that, you must let the mixture cool before you add it to the feeder. 3. Avoid Honey Generally, honey can ferment fast and becomes a great place for mold to grow quickly. Moreover, they can be sticky and get on the feathers of hummingbirds. Hence, it is better to avoid honey. 4. Add Another Feeder Although hummingbirds are small and cute, they can be incredibly aggressive and territorial when confronting other hummingbirds. Hence, to avoid conflict among hummingbirds, it is better to add a second feeder if you want to ensure every hummingbird gets the opportunity to have the nectar. 5. Clean The Feeders Make sure to clean the feeders every week. Moreover, if you have hot weather around, clean the feeders twice every week. While you clean, ensure the vinegar-to-water ratio is 1:4. Also, rinse the feeders well before you refill. Furthermore, while rinsing, do not use dish soap. This is because they can leave harmful residue on the feeders. Setting Up Your Hummingbird Feeder The following are the steps you must take to set up your hummingbird feeder: Make the nectar by checking the hummingbird food recipe in the previous section. Hang the feeder in your garden at the start of spring. Generally, hummingbirds migrate through your area in the spring. Also, leave the feeder up after the hummingbirds migrate in the fall. Hang the feeder in a place where it is visible for hummingbirds to see. Also, make sure to place the feeder in an area where you can have a good look. Clean the nectar every 3-4 days and clean the feeder thoroughly each time you change the nectar. This way, you can prevent dust and mold from getting into the feeder. Sugar water is safe and helpful for hummingbirds. Basically, it is quite similar to the natural nectar that hummingbirds find in flowers. If you want to make your own feeder, use an old spice container, bottle, mason jar, or wine bottle. Attracting More Hummingbirds Here are some of the major ways you can attract hummingbirds to your garden: 1. Offer Hummingbird Food/Nectar: If you make sugar water and keep it in a feeder in your garden, you can attract many hummingbirds in your area. To make this item, you can see the hummingbird food recipe above. 2. Keep Water: Generally, hummingbirds also like to bathe. Hence, you can keep some water in a pot/jar to allow hummingbirds to access water for bathing and drinking. 3. Perch Area: You can leave small branches and sticks on your trees and plants. This will allow hummingbirds to perch on. 4. Plant Flowers: There is no alternative to pure nectar that flowers have. Hence, this attracts hummingbirds a lot. For instance, you can use hummingbird sage, honeysuckle, bee balm, and more. Also, you can add other types of flowers to your garden. 5. Keep Other Animals Out: If you have a pet cat/dog in your home, keep them inside. This is because they can bother hummingbirds or even end up killing them. 6. Avoid Pesticides: Pesticides are repellants for hummingbirds as well as insects. Hence, make sure not to use them or use them minimally. Make Your Hummingbird Food Now Now, you can make hummingbird nectar with the help of the hummingbird food recipe in the article. However, make sure to change the food every 3-4 days. Also, ensure to clean the jar every time you change the food. This way, you can ensure clean food for hummingbirds. Do you have more suggestions on how to make hummingbird food? Please share your ideas and opinions in the comments section below. Additional Resources: Is Indian Food Healthy? – Major Nutritional Benefits of Indian Cuisine 15 Healthy Mexican Food Items With Immense Health Benefits The Importance Of Proper Cutting When Preparing Meals

READ MOREDetails