To start your Pilates workout, all you need is a wall. With wall Pilates free workout, you can blend traditional Pilates with home exercise. This workout can be helpful for you whether you are a beginner in Pilates or have been practicing Pilates for a few years. Consider starting out with wall Pilates if you want to transform your fitness journey.
In this article, you will get a Wall Pilates workout plan. Apart from that, you will also get a general overview of what a wall Pilates exercise is as well as its benefits. Moreover, this article will also set a Wall Pilates free workout plan. Finally, you will also get essential tips to perform this exercise. Hence, to learn more, read on to the end of the article.
What is Wall Pilates?
Wall Pilates is a form of Pilates training. It is a low-impact exercise where you have to use a wall for support and resistance. Basically, the wall provides support for your back, shoulder, and hips. Hence, you can use it as a resistance to perform exercise.
Generally, when you perform traditional Pilates, you have to exercise on a mat or a reformer machine. Here, you use your body weight or the machine for resistance. However, with wall Pilates, you press your body and its parts against a wall. You make movements by exerting force on the wall and by using it as a support.
Actually, in this exercise, you have to do the same repetitive movements that you practice during a mat. Some examples of wall Pilates are single-leg stretch, criss-cross, the hundred, etc.
Benefits of Wall Pilates Free Hand Exercises
The following are some of the major benefits of Wall Pilates that you must:
- By performing wall Pilates daily, you can strengthen your core muscles. As a result, this will help you prevent injuries and maintain a good posture.
- With time, you will improve your flexibility with wall Pilates. Additionally, it also helps you to improve your coordination and balance.
- As you are using a wall for your support, the stable surface can help you maintain the right form. Thereby, with time, you will get a better spinal alignment, which will ensure a lower risk of injury.
- With wall Pilates, you engage your full body for the exercise. This way, you can target all muscle areas of the body.
- Moreover, Wall Pilates free hand exercises are also effective in reducing blood pressure. Hence, if you do it regularly, you lower your risk of heart attacks and strokes.
- Wall Pilates also involves mindful movement, which can help you work on your mental health.
- People of all ages and fitness levels can perform wall pilates. This is because it is a low-impact exercise.
Apart from all these benefits, one of the biggest factors to consider Wall Pilates is that it is a budget-friendly exercise. All you require here is a wall.
Who is Wall Pilates Good for?
Since Wall Pilates is a low-impact exercise, it will not be physically demanding and exhausting. Hence, this form of exercise is good for people of all ages and fitness levels. Moreover, this exercise is also good for pregnant and injured people. Furthermore, if you are someone who finds it difficult to lie on your back, you can even do Wall Pilates.
Generally, traditional Pilates, like mat or reformer Pilates, are difficult to perform. This is especially true for people who have physiological issues or injuries. Hence, if you want to perform a light exercise to stay fit, Wall Pilates is one of the best options to consider.
15-Minute Wall Pilates Free Hand Workout
To start a Wall Pilates workout, you need an open wall and a yoga mat. Here are the steps you must follow to perform your Wall Pilates workout:
- Start your warmup with a Cat-Cow pose and Thread-the-Needle stretch. Warm up for 2-3 minutes.
- Once you complete your warmup, start your wall Pilates exercise. Here, make sure to have consistency with the reps for each move. Once you complete the five Pilates exercises, repeat the circuit twice more.
The next section consists of 5 back-to-back exercises that you must perform in each circuit.
5 Wall Pilates Free Hand Exercises
Here are the Wall Pilates exercises you must perform to complete each circuit:
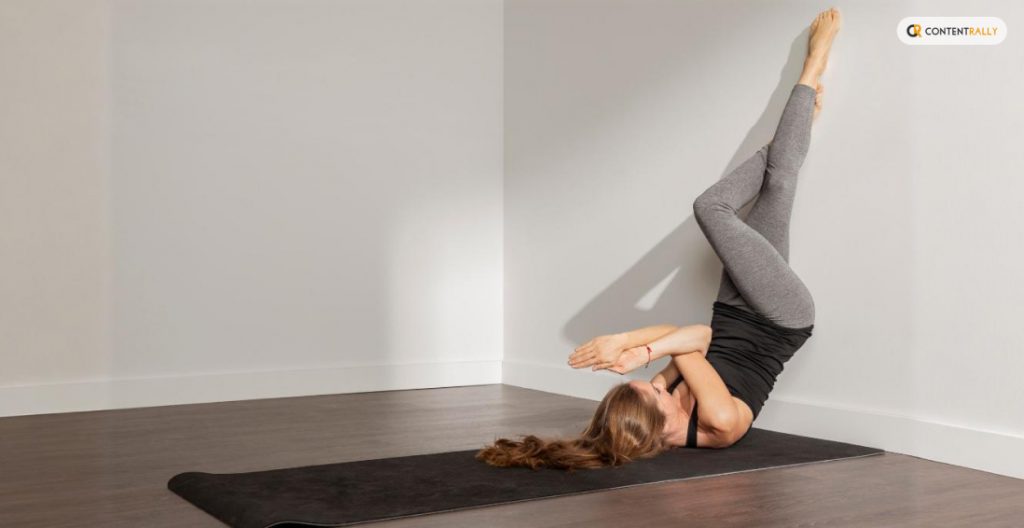
1. Single-Leg Knee Crunch
The following are the steps to follow if you want to perform a single-leg knee crunch:
- Sit one foot away from the wall. Then, lie down on your back. After that, place your feet on the wall so that your legs look like a tabletop, horizontally.
- Stretch your left leg diagonally so that your toes are just touching the wall. Then, extend your arms over your head. Meanwhile, be sure to press your lower back into the floor. This way, you can engage your core.
- Pull your left knee toward your chest and curl your shoulders, hands, and your head towards your core. Then, slowly, go back to the initial position.
- Repeat these fifteen times to complete one set.
2. Wall Bridge and Calf Raise
The following are the steps to follow if you want to perform the wall bridge and calf raise exercise:
- Sit one foot away from the wall. Then, lie down on your back. After that, place your feet on the wall so that your legs look like a tabletop, horizontally.
- Press your feet on the wall. This way, you can engage your glutes and your hamstring. Then, lift your hips off the floor. However, do not arch your back in the process.
- Moreover, when your body makes a straight line from the knees to the shoulder, lift your heels for a calf raise. This will balance out the movement. Then, return to the starting position to complete one rep.
- Repeat these fifteen times to complete one set.
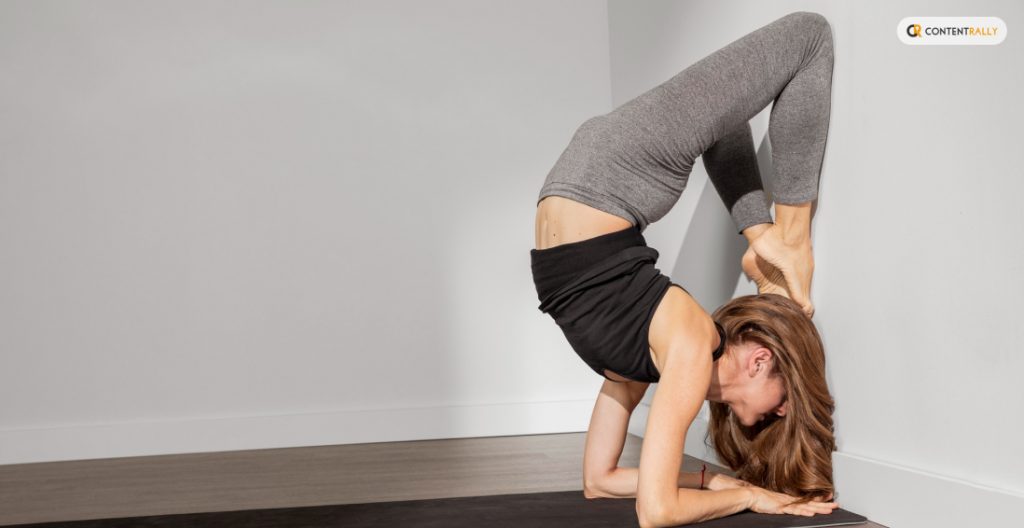
3. Reach Backs
The following are the steps to follow if you want to perform reach-backs:
- Start with a high plank by pressing your feet on the edge of the wall. Here, ensure to keep your feet apart by shoulder-width. Also, be sure to place your shoulders directly over your wrists. Moreover, your body must be in a straight line from your heels to your shoulder. Use it as your starting position.
- Then, lift your hips up. When you are lifting up, touch your left foot with your right hand. Then, come back to the starting position. Do the same with your left hand by touching your right foot. Again, come back to the starting position.
- Make sure to repeat this 10 times for one set.
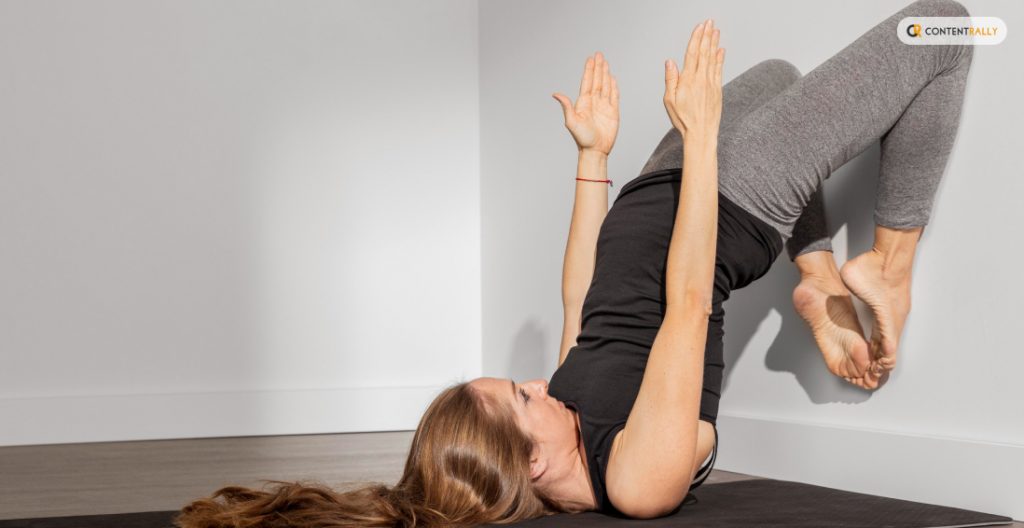
4. Marching Bridge
The following are the steps to follow if you want to perform a marching bridge:
- Sit one foot away from the wall. Then, lie down on your back. After that, place your feet on the wall so that your legs look like a tabletop, horizontally.
- Then, press your feet to lift your hips off the floor. Here, make sure to form a straight line from your knees to your shoulder. However, make sure not to arch your back. Consider this as your starting position.
- Then, lift your left foot and bring your knee toward your chest. Meanwhile, make sure to keep your hips still. Here, maintain the same bend in your knee and stop when your thigh is at a right angle to your torso.
- Then, come back to your starting position by reversing the movement. This is one rep.
- By performing 10 reps, you complete one set of the marching bridge.
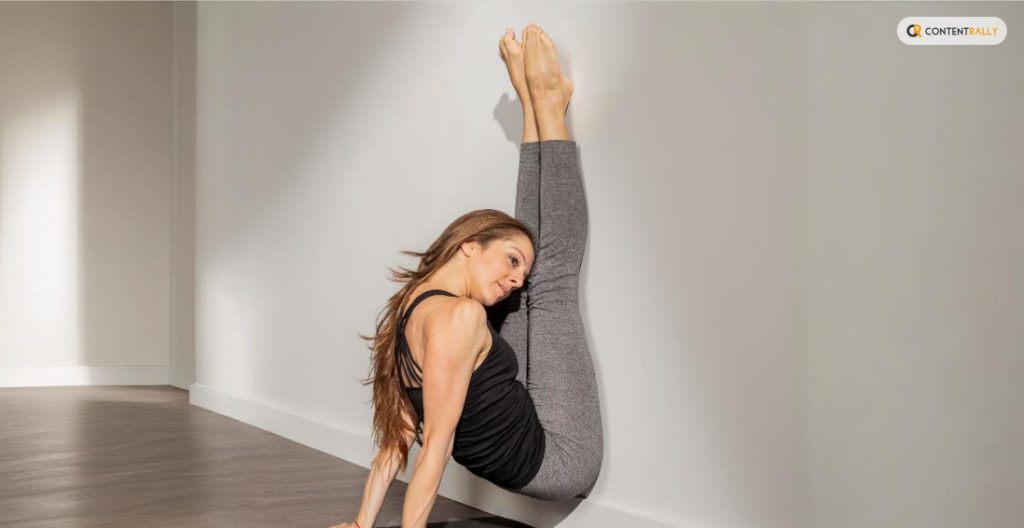
5. Wall Sit and Calf Raise
The following are the steps to follow if you want to perform the wall sit and calf raise exercise:
- Become a human chair: Stand with your back against a wall and take your feet about a foot forward. Then, lower your hips down to a position such that your knees are perpendicular to your hips. Also, make sure your ankle is perpendicular to your knees.
- Then, extend your arms horizontally so that it is perpendicular to your torso. This is your starting position.
- Hold the squat position to raise your arms, and reverse the movement to the starting position. Simultaneously, raise your heels to do a calf raise and reverse the movement. This is one rep.
- Perform 12 reps to complete one set of Wall Sit and Calf Raise.
Tips for Effective Wall Pilates Practice
Here are some useful tips if you want to perform Wall Pilates free hand exercises effectively:
- Don’t over-exert yourself with your exercises. Basically, start with simple exercises and gradually increase your intensity.
- Make sure to breathe steadily and have control of your breathing.
- Use good-quality mats to support your back and hips.
- There is no substitute for a professional instructor. Hence, consult with an instructor to perform your exercises correctly.
Do you have more suggestions on how to perform Wall Pilates free hand exercises? Please share your experiences and opinions in the comments section below.