Published on: 01 July 2019
Last Updated on: 30 October 2024
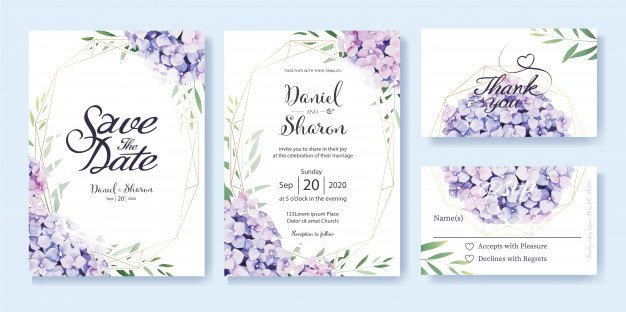
From wedding invitations to seating charts and wedding programs, wedding printable seek to add style and sophistication to a wedding. However, you must ensure they’re of high quality to add to the success of your event.
For this reason, you should consult experts such as Budget Savvy Bride who’ll guide you on how to create quality printable that will leave a lasting memory on your guests’ minds. With a professional service, you don’t have to worry about compromised quality on your special day.
Moreover, you can be confident that your guests will equally be happy when they receive the different forms of printed materials you issue at the event. At Budget Savvy Bride, you have the chance to access free wedding planning printables. Here’s what you should know about the different kinds of wedding printable.
Forms of Wedding Printable:
Wedding Invitations:
These are some of the most significant aspects of planning a wedding since they set the tone of what guests are to anticipate on a special day while helping them prepare for the event.
Wedding Programs:
These are an overall means of keeping the guests informed while making them feel like they’re a part of the ceremony. If you’re having a difficult time coming up with the ideal design, you can access free wedding planning printables from Budget Savvy Bride. They’ll undoubtedly give you a clue on how to move forward.
Factors to Consider when it comes to DIY Printable:
Timing:
In the event that you decide to take the DIY route due to the cost, bear in mind that this option won’t necessarily be faster. You must give yourself sufficient time and exercise patience because the process can at times be complex.
You need to count back from the wedding date to establish when you’ll have to begin assembling and printing. You should mail invitations eight weeks before the wedding date and you’ll require at least one month to assemble and print every invite.
This implies that you’ll require all the pieces at least three months at hand before the wedding. Ensure you have at least 10% more supplies than you really need, for instance, ink, envelopes, and paper in case of errors or in the event that you have to reprint something.
Style:
While you can print virtually any design from the comfort of your home, some are better suited to home printers compared to others. In fact, designs with lighter color backgrounds and more white space will appear better on home printers while saving you on the cost associated with the printer ink. If you desire some pop of color, you should consider colored paper.
Why You Should Hire Professionals for Your Printable:
Extensive Services:
A professional printer provides a wide array of options from which to choose that if you were working from your home. Whether you require digital printing for your invitations or program, an expert certifies that everything occurs to your distinct specifications.
Efficient work:
Experts offer a faster turnaround for services because they have years of experience in addition to advanced equipment at their disposal. Moreover, they have the necessary paper to complete the task at their location, so there’ll be no downtime for the appropriate photo paper or card stock to arrive.
Wedding printable add to the value of your special occasion. However, you must get it done right. For this reason, consider the assistance of professionals.
Content Rally wrapped around an online publication where you can publish your own intellectuals. It is a publishing platform designed to make great stories by content creators. This is your era, your place to be online. So come forward share your views, thoughts and ideas via Content Rally.
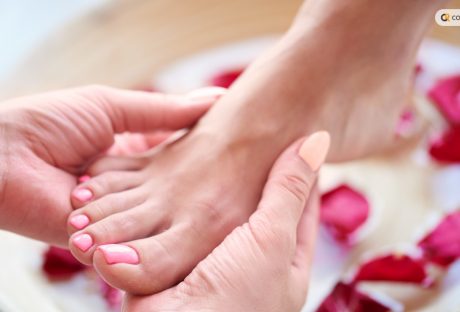
Among all cosmetic treatments, pedicure is one cool thing. All of you know what is pedicure. So, I won’t go into the basic nitty gritty. However, we have to focus on all four segments of it equally. Certainly, nail and cuticle care are the most important.
The term pedicure is coined from the Latin “pedis,” meaning “of the foot,” and cura. Generally, when you speak of pedicure, it implies cosmetic pedicure. However, pedicures can be used for therapy and medical purposes, too.
In this article, we will discuss the perks of pedicure and the outcomes you expect of it. We will also suggest some tips for DIY pedicures at home. But first, let’s start with what is pedicure.
It is one of the beauty enhancers and, of course, maintaining better nail and foot hygiene. After all, the function of beauty is marinating better outer health.
How often do you get a pedicure?
A pedicure is a process of skin exfoliation. However, you may think of it as a skin treatment, too. It is a complete package of nail care, skin care, cuticle care, and dead skin removal.
Now, the question is, how often do you need this set of treatments?
The ideal gap is a month. In between these 30 days, the skin can regrow and regenerate. However, you must not overdo it. Firstly, the skin may feel irritated if pedicures become frequent.
But pedicure isn’t one straightforward process. You may frequently repeat switching your Polish grade. But don’t barge into the exfoliation process every time.
Types of Pedicures
I already mentioned- a pedicure is not a simple process. So, it’s crucial to discuss the types of pedicures and their importance for your skin health and hygiene.
Basic Pedicure
It is the most common form of pedicure. It includes cuticle refining, shaping, and polishing. This package costs $35 and takes around 30 minutes.
Spa Pedicure
Next in line is a spa pedicure. It is a smooth process. People generally visit salons to get it done. First, it involves a deep cleansing and massage of the feet. The average cost of your spa pedicure could be $50 to $60.
But experts say getting it done from a good spa for better effect is better.
Paraffin Pedicure
If you want a hydrating nail and cuticle treatment, go for the paraffin pedicure. Most of you may know what is pedicure. But do you know about paraffin and gel pedicures? Most nail designs 2024 updates include gel treatment.
Firstly, a paraffin pedicure is a process where salon specialists use paraffin wax to reduce cracks and barriers. After that, they moisturize the feet. If you have cracked or frizzy skin, you must get a paraffin treatment once or twice a year.
Gel Pedicure
Here, nail treatment is the prime focus. Most importantly, experts curate your nails with UV or LED light after applying builder gel. But what is builder gel? It is a natural viscose gel base that increases nail strength, thickness, and length. It adds a gloss glass look to the nails. However, the look would last two weeks at best.
Stone Pedicure
One of the seldom-used types of pedicures is the stone pedicure. It is no prosthetic treatment. However, the spa specialists only use stones to massage the feet.
The prime benefit of the same is better blood circulation in your feet. Hence, the skin remains naturally well.
Benefits of Pedicures
Pedicure sessions have specific benefits for sure. Some of these are apparent, and others are long-term gains. Here are the prime benefits you expect out of a pedicure:
Your Skin Health
Pedicures help to improve skin health. Hence your skin will immediately look fresher and youthful. It is the most significant outcome of the exfoliation process.
Better blood circulation
If you want better massage and foot care during pedicures, go for a classic and a stone treatment. What is pedicure? It is the mere exfoliation of the skin so that it respires better.
Meanwhile, blood circulation through and around the cutaneous players also improves. It keeps the skin fresh and youthful as well.
Exfoliation
A pedicure is the best way to remove dead cells from the two upper layers of the skin. Hence, it prevents skin infection since all toxins are given away.
Stress relief
The pedicure process releases endorphins. Hence, you feel calm and breezy. Meanwhile, your feet feel relaxed as the blood circulation improves.
Other Benefits
There are other benefits of pedicure, too. Most importantly, it can resolve foot odor issues. At the same time, it can release muscle tension and cure back pain to some extent.
What to Expect During a Pedicure
Let's see what makes up a classic pedicure session. What is a pedicure? It is the treatment of your skin. There are 6 to 7 basic steps of this treatment. It starts with soaking your feet in warm, lather-rich water. Consequently, your nails and the skin of your feet will become mushy.
After that, it is time for exfoliation. The process involves using a foot tile to remove the upper dead skins. Thirdly, pedicure involves nail care, too. Most importantly, the trimming, filing, buffing, etc. Moreover, there is cuticle work to be done.
The last three steps are:
Moisturizing
Massaging, and
Polishing
The process lasts between 30 to 90 minutes. However, there are two types of pedicure treatment. These are basic and luxurious. Other than small detailing like nail shaping, gel polishing, and cuticle work, the rest is the same for luxury treatment.
How much does a pedicure cost?
In the US, the cost of pedicure might vary. It may range from $20 to $75. However, the average price of a basic pedicure from a standard salon would be $45.
It is also apparent that the salon brand and location would be reasons for variation in the prices of the same pedicure services.
DIY Pedicure at Home
A DIY pedicure is easy. However, you need to prepare the ingredients from scratch using natural elements when you do it first. After that, you can reuse the same products and save time and resources.
To do the same, you need a natural scrub first. A pumice stone can be one. It can substitute cosmetic foot scrubs. But the treatment should start the same way it does in any salon.
Firstly, soak your feet in a bucket or tumbler. Combining lukewarm water, Epsom salts, and a few drops of essential oils. Remember, what is pedicure? It treats the external skin and blood vessels on the inner lining. So, a home pedicure can be as effective as a salon treatment.
Just use the proper steps and a set of the right organic ingredients.
Done with soaking? Apply Pumice stone for natural foot scrubbing. Once done, just trim your toenails and push back the cuticles. Finally, apply a base coat to the nails. Any nail color would do. At the end, apply the topcoat. While applying it, you should check out the best ombre nail designs 2024 ideas.
Flaunt your best nails before Christmas!
Massage the feet with moisturizer, lotion, or oil to finish the process.
Choosing the Right Salon
Finding the right salon for a pedicure can give you a heck of a time. So, keep this basics in mind when selecting one:
1. Ask friends and family members for recommendations. Meanwhile, check the ratings, reviews, and recommendations for that salon on local community groups.
2. Read customer reviews and expert opinions of the listed salons.
3. Most importantly, know your budget. The services that cost $30 at your local salon might cost you $150 at Bastian Gonzalez. So, choose wisely.
4. Book an experienced nail technician. Novices may often do it wrong, causing nail infections and plumps.
5. Hygiene is the first thing you should check when you visit any nail salon. Meanwhile, check the cleanliness as well.
Common Myths About Pedicures
Go, get your pedicure done in a sweep. Many people don’t know what is pedicure. They often create or spread false rumors about the process. I’ve heard people say paraffin pedicure is for people with dry feet and heavy skin barriers. However, it is a process that benefits anybody.
Secondly, knowing that a stone pedicure is for relaxation only gives me a good laugh. However, the truth is that it can relax your whole body. It can also relieve you from muscle and bone-related diseases.
Don’t Go for a Professional Pedicure! I won’t say that ever. However, it is one of the most outstanding rumors about pedicure. Just ignore such small talk! Meanwhile, enjoy your pedicure session. Also, let me know your experience at your local salon.
We will survey who has the best salons in their area. Share the article and ask people to comment on the same too.
Read Also:
Fashion Style Every Modern Woman Must Know
Types of Fashion Designing Courses You Should Know
Is your sex life suffering and you would like to improve it? Congratulations are in order. Many women do not take measures in this sense and allow their low sex drive to undermine their relationship. They also miss out on the numerous health benefits of sex.
Don’t worry! There are many things we can do to boost your libido and improve your sex life naturally. We will review the most effective of them in the following lines. But, before we get to it, there is one thing you should consider: getting a medical exam and make sure your problem does not stem from some medical condition.
It could be a hormonal imbalance. You may suffer from hypoactive sexual desire disorder, approaching menopause, or be pregnant. The causes could also be psychological, like stress, anxiety, depression, poor self-esteem, or relationship-related, like communication issues with your partner, different sexual needs and preferences, etc.
The best way to eliminate a problem is to identify and eliminate its causes. Until you get a chance to do that, we will review a few remedies that should provide immediate, even though short term results.
9 Quick Ways to Boost Your Libido and Improve Your Sex Life
1. Get into the Mindset
If you are not willing to have sex, arousal is less likely to occur. Whether for your partner’s sake, the numerous health benefits, your own pleasure, or all of these combined, you should decide to have sex. Once you start thinking about it and fantasizing, your libido will receive a natural boost.
2. Watch Your Meals
If you overeat right before going to bed, or you eat unhealthy foods that cause bloating and gas or are difficult to digest, getting in the mood for sex will be difficult. Therefore, try eating less and focus on healthy, unprocessed foods.
3. Include Aphrodisiac Foods in Your Diet
A small bar of dark chocolate, fenugreek seeds, warm spices like cinnamon, hers like Shatavari, and exotic foods like dates can work miracles on your libido. You just have to give them a chance. Consume them regularly or with a couple of hours before your date, to give them time to act.
4. Relax
Stress gets to all of us and affects us more than we realize. Try to relieve it through physical exercise, meditation, yoga, listening to music, etc. Just before your sexual encounter, get a hot bubble bath. Add a few drops of essential oils to it, like lavender, sandalwood, clary sage, etc.
5. Have a Glass of Red Wine
No, the goal is not to get you drunk. Research has shown that a moderate intake of red wine will improve blood flow to your erogenous zones and increase lubrication. Being rich in polyphenols, and histamines, red wine could also improve your partner’s erectile function and increase sex drive in both of you. It will surely help you get rid of some inhibitions and act more freely, more confident, more determined.
6. Take Supplements
It’s common knowledge by now that our modern diet and chaotic lifestyle are depriving us of essential vitamins and minerals. Among others, such deficiencies can contribute to low sex drive and vaginal dryness.
You can fight them with supplements based on natural ingredients, like Queen V Livin’ Libido Loca. Taken regularly, they will improve blood flow to your erogenous zones and increase your libido without any side effects for you to worry about.
7. Make Sure You’ll Enjoy Prelude
Especially if you’re in a years-old relationship, chances are you and your partner have gotten comfortable with one another. You could be skipping prelude or investing too little time and effort into it. Change that.
The ideal would be to talk to your partner and get him to work with you. If you do not feel up to it, discreet suggestions like a massage, a shower together, or a slow dance could help. Changing the location or the position could have a powerful impact as well. A blindfold could help stir your excitement as well.
8. Use Lubricants
Vaginal dryness can really hinder pleasure during sex. Until you eliminate its cause, you can find temporary relief in lubricants. Some have a pleasant smell and contain ingredients that help to enhance pleasure.
9. Try Something New
Routine and boredom should not find room in your sex life. If they have, it is time to kick them away. There are several ways to do that. You and your partner can try new positions, pleasure one another before the actual intercourse, or use sex toys. Do not be afraid to share your fantasies with your loved one and to experiment. As long as you both enjoy it or consent to it, everything is allowed when it comes to sex and pleasure.
All of the above methods are safe and effective. Why deprive yourself and your loved one of the pleasure and benefits of sex when enjoying them is so easy and risk-free?
Read Also:
8 Healthy Ways To Improve Your Sex Life Overnight
Just Not Feeling It? Tips For Getting Your Sex Drive Back
Virectin Reviews – Intense Male Enhancement For Increased Sex Drive
It is time for the Millennials to move over. There is a new generation, which is making all the right waves right now. Generation Z is a generation, which has been born in the late 1990s. They have grown up in the age of social media, eCommerce shopping, and cryptocurrencies.
Gen Z, as they are fondly called, is different in many ways to the earlier generations. In terms of their approaches towards life, finances, health, politics, and society, Gen Z is much more aware, conscious, and willing to take action.
In this article, we are going to discuss who or what is Generation Z. In addition, we are going to look at five top trends; Gen Z is leading, following, or heralding in 2020.
Generation Z: Meaning and Introduction
According to the global consulting firm, McKinsey, members of Gen Z are born between the years 1995- early 2000s. They use the term ‘digital natives’ to accurately describe them and also differentiate them from earlier generations, like the Millennials and the Alpha.
Being digital natives, Gen Z was born into information technology. One of the major fallouts of being born into the age of information technology is that their habits, patterns, interest areas, worldviews, culture, and relationships are entirely different.
Some of the immediate aspects, which can be tangible, presented are- social media, eCommerce, online learning, online gaming, cryptocurrencies, etc. One other aspect, which needs to be considered when understanding Gen Z is the time period of their birth.
Gen Z has seen the Financial Crash of 2007-2008 at close quarters. They saw their parents losing jobs, defaulting on mortgages, social service benefits, and so on. This has impacted them in a severe fashion.
Top 5 Trends being ushered in 2020 by Gen Z: The List
1. Vaping-
If there is one generation, which can be credited for not only introducing but also making vaping mainstream, it is Gen Z. Being careful about their health, and not taking tobacco, is a statement for the generation. This is why vaping has become not only a cultural phenomenon but also a new and hot trend in 2020 in different parts of the world.
Tobacco companies and cigarette manufacturers are lobbying hard so that favorable components like e-liquid and vaping cannot replace them. However, it is very difficult to offset vaping in 2020. This trend is not only cool but also much healthier.
2. Electric Vehicles (EVs)-
There is no doubt that Gen Z feels passionate about the environment. They have seen and experienced what the previous generations have done to the environment. Climate Change and Global Warming have made them abandon fuel vehicles in exchange for EVs.
In essence, Gen Z has even forced mainstream automobile manufacturers to create good products, which are- economical, affordable, feature-rich, and reliable. The year 2020 is going to be a major year for electric vehicles as they look to attract members of Gen Z.
3. Financial Investments-
When it comes to finances and investments, Gen Z is more conscious than the earlier generations. As they had seen their parents go through the hardships of the financial crash, they are also very distrustful of governments and traditional financial institutions.
This makes them invest in new areas of investment like cryptocurrencies, vintage cars, wine, and other non-traditional areas. As they are innovative in their options, they are also earning high profits in the process.
4. Ecommerce Shopping-
One of the starkest effects of Gen Z’s digital behavior is E-commerce. We are not only talking about buying things from eCommerce platforms. We are also talking about getting services, food, booking tickets, consuming entertainment, all from the internet.
This has led to the creation of a new trillion-dollar industry, which caters to different populations all over the world. You can practically get anything home delivered from any part of the world. Gen Z is the major driver of initiating changes in consumption patterns.
5. A Young Entrepreneurial Culture-
If someone had told you fifteen or twenty years back that, a 20-year-old created his own multimillion-dollar empire (self-made), would you have believed them? The answer is no. Gen Z has redefined the rules of entrepreneurship. They are setting up businesses when they are as young as 15 or 16 years of age.
They are also getting support from their families are using the internet and digital platforms in order to boost their businesses. This is why many members of Gen Z never want to work for anyone else. They prefer setting up their own businesses and running them.
Conclusion
In recent years, Gen Z’s influence on the state of world affairs is palpable. They are using technology and other resources at their disposal to create new needs, consumption patterns, and demands in the world economy. Many brands are strongly catering to the specific nature of demands made by this generation.
Read also:
5 Different Things You Can Try During Quarantine
Make a Mark: The Vape Brand for Your Lifestyle
Do Vape Mods Affect the Quality of Vape?