5 Eye-Opening Reasons to Choose Certified E-Waste Recycling Agencies

Published on: 23 November 2020 Last Updated on: 15 June 2021
E-Waste Recycling

Let’s see if this situation sounds familiar.

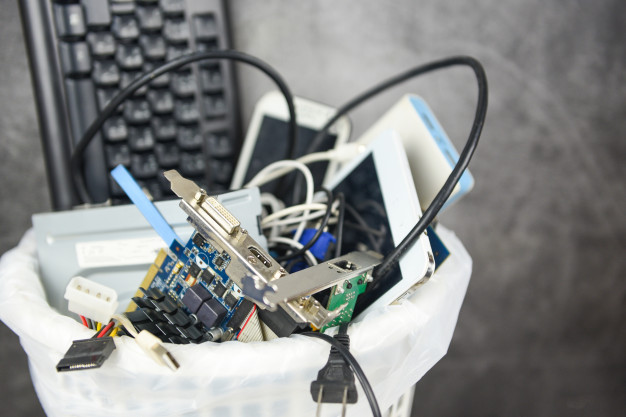
You just bought the latest phone on the market. And, like any responsible citizen, you took the old gadget to an e-waste recycling center and deposited it. You walked out of the center confident that the old phone would be taken care of safely. You then forgot about the gadget altogether.

Well! The story doesn’t quite end there. And, if you are an environmentally conscious person, you may want to take a closer look behind the scenes to identify what happens to the redundant and used devices once they leave your ownership.

Did You Check for the Certification of the E-Waste Recycling Center?

Should you check this feature on MoneyCrashers, you will come across an interesting observation. Delivering your e-waste to a recycling agency does not guarantee safe disposal. That’s because many such centers use unscrupulous methods to get rid of the gadgets. While the measures they use may comply with U.S. e-waste management regulations, they could cause severe damage to the environment in other offshore locations. The only way you can get complete assurance that the old electronics will be taken care of the right way is if you deposit them at certified recycling centers.

Alternatively, you can exchange them at the original manufacturer. It might interest you to know that in the year 2015, Apple accepted and recycled 90 million pounds of electronic gadgets to extract usable materials. These materials included plastic, 6612 pounds of silver, 2.9 million pounds of copper, and 2204 pounds of gold.

Choosing a certified e-waste recycling agency when getting rid of old and used electronics ensures that your gadgets will not end up in landfills and pollute the environment around your hometown. But, that’s just one good reason. Here are 4 more.

1. Recycling Agencies Choose Supposedly Economical Methods for IT Asset Disposal:

Recycling Agencies Choose Supposedly Economical Methods for IT Asset Disposal

You might think that you’re doing your bit to help the environment by recycling cell phones and other devices. But, keep in mind that although the recovered materials are valuable, the recycling process is not exactly economical for regular agencies. Extracting metals for reuse involves a careful process using the right kind of equipment and trained personnel. To save on the expense of dismantling old gadgets and separating the useful materials, most agencies simply ship them off to third-world countries.

Would you like to know how the process works? Containers reaching the shores of the U.S. from Hong Kong and other vendor companies across the world are typically sent back empty after the goods are unloaded from them. In an attempt to cash in on the reverse transportation, the giant cargo boxes are now filled with used electronics and sent to Far East destinations under the guise of donations for philanthropic purposes.

2. Environmental Damage is Transferred to Third World Countries:

When the gadgets make their way to countries like China, Ghana, and India, unskilled laborers including young children burn them in giant pits. Once the process is complete, all that remains is the precious metals that are sorted out without any regard for the toxic materials in the ashes. These poisons like arsenic, bromates, lead, and cadmium not only leach into the soil and underground water, but also cause various illnesses among the people who handle them or live around the processing plants. To know more about the extent of the damage, read this article in the Smithsonian magazine.

If you’re looking for e-waste recycling procedures that protect the environment not just in your country, but also in any other location around the world, deliver your devices to certified agencies.

3. Irresponsible E-Waste Recycling is the Largest Cause of Data Breaches:

Should you work with a licensed recycling company, the expert professionals will make sure to dispose of the hard drives in them securely. They may use DoD-approved multiple overwriting or shredding protocols to erase the data and make it impossible to decipher.

Why is this important? According to PBS, The U.S. State Department has identified Ghana as the top sources of data leaks in the world. Hard drives from discarded electronics are easily available to hackers here at $35 apiece. Even novice cybercriminals can retrieve records of online transactions, credit cards, personal financial data, and various other kinds of sensitive information.

Enoch Kwesi Messiah is a computer scientist at the Regent University in Accra. He reveals, “I can get your bank numbers and I retrieve all your money from your accounts. If ever somebody gets your hard drive, he can get every information about you from the drive, no matter where it is hidden.”

A shocking incident reported in recent times involves the details of a government contract worth $22 million that were extracted from an old hard drive. When attempts were made to locate the source, it was traced back to Northrop Grumman, one of the military contractors of the country. The drive also held highly classified information about contracts with Homeland Security, NASA, and the U.S. defense intelligence agency.

Think about it! If government agencies can become the targets of millions of dollars worth of data breaches, your information is a much easier target.

4. Recycling Lowers Wastage of the Earth’s Resources:

Reusing gadgets and recovering reusable materials from them will help reverse some of the wastage of the earth’s resources. Should you check some of the statistics revealed by ThoughtCo., you will learn that the power saved by recycling a cell phone can run a laptop for 44 hours. If all of the 130 million phones annually discarded in the U.S. were recycled, the energy saved could power 24,000 homes for a whole year. Other than gold, silver, and copper, cell phones also contain palladium, platinum, tin, and zinc, all of which are metals that can be used and reused several times over simply by adopting the proper e-waste recycling methods.

Responsible e-waste recycling is now more about protecting the environment in your country. The problem has become so huge that you need to take a step back and carefully view the big picture. Saving the earth begins with every citizen who upgrades to a new gadget. Have you REALLY done your bit?

Read Also:

Content Rally wrapped around an online publication where you can publish your own intellectuals. It is a publishing platform designed to make great stories by content creators. This is your era, your place to be online. So come forward share your views, thoughts and ideas via Content Rally.

View all posts

Leave a Reply

Your email address will not be published. Required fields are marked *

Related

aeropress machine

How to Make Coffee with Aeropress Machine

 The Aero press is one of the most straightforward gadgets that you can use to make your morning coffee faster. Invented in 2009 by Engineer Allan Adler, the Aeropress machine has gained popularity due to its small size, high portability and efficient speed in brewing coffee. Due to its portability, you can carry the device to your camping escapade, fishing, or any sporting coffee. With the Aeropress machine, you can have your coffee anywhere at any time. How to assemble an Aeropress machine Remember, you can buy your Aeropress coffee maker from a trustworthy place. Some of the accessories that come with the coffee machine include: The Aeropress device which is a plastic plunger Cap that should get placed at the end of the AeroPress device The fillers which should be used alongside the cap A scoop that should be used to measure the coffee A funnel to put the beans and neatly organize them in the chamber Paddle to be used in stirring the coffee Once you have acquired all the accessories of the AeroPress machine, here is how to assemble the machine: Step 1: Push the plunger of the machine out of the chamber Step2: Remove the filter and put it in the filter cap Step3: By twisting the filter cap, put it into the chamber Step4:  Put the chamber on top of a stand. Put the chamber on a sturdy mug and ensure it stands firmly. Put the ground coffee in the chamber. Step5: Share properly to ensure the coffee is leveled correctly. Step 6:  Add water to the chamber. Ensure the water fill up to level 1. At this point, you are ready to brew the coffee. If you want hot coffee, use hot water, but if you need cold coffee, use cold water. Remember, with the AeroPress machine, the coffee taste is determined purely by the water's temperature. If you use boiling water, it will make your coffee bitter. The manufacturer's recommendation is to use water at 175 degrees. Though it is not practical to achieve the exact temperature, you can boil the water and allow it to cool down before using it. Also, ensure that you use high-quality coffee bean; preferably, coffee beans that have been ground recently. The coffee bean should be finely ground. How to brew coffee If you have everything in place, the process of brewing coffee should take less than two minutes. There are two ways to make coffee using the AeroPress machine; the inverted way, and the usual way. Both methods make delicious coffee, but one is faster. Equipment required Electric stove and kettle The AeroPress machine; stirrer, funnel, and scoop A coffee grinder Small pitcher, or a mug Timer Original method Start by boiling the water. Remember, boil the water and let it cool for a minute since the coffee maker works best at a temperature of 175 degrees. Grind your beans. Depending on the amount of coffee that you want to make, grind the beans accordingly. For the two cups, grind at least two spoonfuls of coffee. Remember, you must grind the coffee until its fine. Ensure the filter is wet. After assembling the Aeropress machine, put paper filler inside the cap. Place the device on top of a mug and dab the filter with warm water. Place the warm funnel on top of a mug and dispense the coffee. After pouring the coffee, remove the funnel. Add warm water. Ensure you add the water until it gets to the marked line in the machine. Remember, the water should be recently boiled and cooled. Using a spoon or a paddle stirrer, stir the coffee until it dissolves. Insert the plunger by pressing it down till a hiss is heard. If you fill any resistance, pause briefly. Push the plunger gently until it reaches the ground. 8. Remove filler cap while pushing the plunger. This should eject the used coffee while rinsing the seal. Dilute and taste your coffee. Depending on how you want your coffee to taste, add more water. The Aeropress machine makes concentrated coffee. Thus you can split the concentrated coffee and make more cups. Reverse method Reverse method is similar to the standard process but with few adjustments. Here is the method: Start by assembling the Aeropress machine. Remember, in this method, and the machine must get assembled in an upside-down manner. Put the plunger in the chamber, flip the device upside-down, and don't put the cap and the filter. Put the funnel and pour the ground coffee. Use fine coffee grits enough for the amount of coffee needed. Next, add boiled water until you fill the filter. Remember, you should boil the water and let it cool for a few minutes. using a spoon or a paddle, stir the coffee gently. Steep the coffee for at least one minute. Place the paper cap and tightly screw it into the chamber Carefully, flip over the machine. Remember, this should get done accurately and quickly. After flipping, place the device on a mug Taste the coffee and dilute as desired. Remember, both ways make concentrated coffee, thus add water until you get the desired coffee. The Aeropress machine features as the most resourceful and most efficient coffee maker. It is less fussy and makes minimum noise; hence, you can use in places that require minimum noise. The machine is also highly affordable, with some brand costing less than twenty dollars on amazon. It is light and highly durable; thus, it can last long and give you value for money. It is easy to assemble and clean, even if you don't have any technical knowledge. The only downside of this machine is that you can only make two cups of coffee. Thus, if you are hosting a party, or your household has more than two people, then you will be forced to make the coffee several times. How to make coffee: [embed]https://www.youtube.com/watch?v=jlCUYNe9pes&t=100s[/embed] Read Also: 10 Best Coffee Places In The US How You Can Create A Coffee House Experience In Your Own Home 7 Fantastically Unusual Uses Of Old Coffee Beans Monthly Best Coffee Subscription

READ MOREDetails
Best Gadgets for Teachers

7 Best Gadgets for Teachers in 2020

Gone are the days when the teacher only needed a board and chalk to hold lectures. Sure; you could try doing that. But don’t expect today’s generations of students to be engaged with such an approach. You must know the best gadgets for teachers in 2020. As a student in a modern classroom, you have to use contemporary methods of teaching. That involves using the specific best gadgets for teachers that help you show the things you want to explain. 7 Best Gadgets for Teachers: Let’s see: what are the best gadgets for teachers should use in classrooms? 1. Acer Pico C120 Projector: You don’t have a lot to invest? The most advanced best gadgets for teachers cost a lot of money, but this simple projector comes for less than $200. It’s small and portable so you can bring it to the classroom(as classroom gadgets) whenever you need it. The school can invest in a few of these projectors, and all teachers can use them. Projectors are cool because they show things on a big platform. The computer screen is not big enough for everyone to see. If, for example, you’re chatting with the writer from a term paper writing service trying to get essay writing tips, you may display the instructions through the projector in real-time. 2. NumonicsIntelliboard Interactive Whiteboard: The blackboard no longer works. When there’s a solution so advanced as this Intelliboard, there’s no going back. It’s an expensive gadget (it costs over $1300 on a discount), so it’s probably something the school or a donor should provide for the classroom. The NumonicsIntelliboard acts as a computer and a board at the same time. And so much more! You can write and draw on it, and you can save the designs as notes on your computer. It holds advanced educational content software that lets you develop lesson plans. You’ll get free online instructions on how to use it, and it doesn’t have a huge learning curve. 3. Catchbox: This is a microphone that you can throw and catch. It’s perfect for interactive and collaborative activities in the classroom. Let’s say your students should complete an academic assignment together. They will pass around the Catchbox, each giving ideas and arguments. Then, they will compose sentences together. 4. Mophie Powerstation: A modern teacher needs their laptop, tablet, and smartphone. They need to stay connected, but they also use these devices in the classroom. So it’s important to have a backup charger all the time. The MophiePowerstation is a portable battery with two USB ports, which allow you to charge different devices. 5. Rocketbook Everlast: Throughout a single day at work, you write more custom notes than you probably should. You’ve written several notebooks over the years and you have no idea what information you have in them. It would be too hard to find the detail you need. The Everlast notebook changes that. It’s just like a notebook, but it’s a digital device. It changes the concept of note-taking. It’s more comfortable than your smartphone or tablet since you’re writing instead of typing. And let’s be honest, if you are a pregnant teacher, BABY BRAIN is the last thing you want your students to catch onto, so having a nifty notebook like this will do wonders. You can also use it as a tool to teach as teachers gadgets academic writing. You already know that almost every student uses an affordable custom writing service when they get stuck with a project. To prevent that from happening, you should make them fall in love with writing. This device shows them that being a writer is actually cool. 6. Wear OS by Google: Still, resisting the smartwatch? It may be because Apple’s watch looks hideous. It’s not classy at all. Google fixed that! Wear OS looks more like a traditional watch, but it’s packed with features that make you a more effective teacher. It will give you reminders synchronized with your Google calendar. You can check the digital wallet or even pay through your watch. If the phone rings in the middle of a lecture, you’ll be able to control it through the watch, so you’ll avoid frantically searching for it. You can choose between many different models, so you can be mindful of your style and retain the status of the coolest teacher at school. 7. AmScope MD35 Microscope Imager Digital USB Camera: Do you remember the days when your chemistry and biology teachers made you go to the microscope, one by one? You couldn’t wait for your turn and then you saw it… nothing. You couldn’t see anything because the microscope wasn’t focused well on your eyes. Today, you have a better microscope in the classroom. But the process of getting one student after another to see something is still a waste of time. With this digital USB camera, you’ll show what’s going on on a big screen. These are the cool gadgets for teachers in 2020. Do You Want to Be the Best Teacher You Could Be? The perfect gadgets make you look cool. When you have the “cool” appeal for students, they are more willing to pay attention to what you’re saying. But the devices also help you to deliver more effective instructions. Students love technology, and you have access to such tech gadgets for teachers that makes the teaching process effortless. It’s an offer you can’t refuse, and if you need help financing this kind of equipment, a title loan could help you. Read Also: 5 Awesome Gadgets For Your Office Your Guide In Buying Kid-Friendly Gadgets Top 5 Electronics Gadgets To Buy From Amazon US

READ MOREDetails
Soldering Iron

How to Use a Soldering Iron

Of all techniques and methods used to join surfaces, metal sheets, Iron, and other objects together, soldering is highly preferred because it does not cause any type of damage to the items being joined together. This is because the solder used to stick them together has a lower melting point than most metals and it offers durable yet reversible bonds between the items. In addition to that, although there are a few key differences between the two types of soldering gear used, they share a similar trait and they’re both easily operable, which we will discover more in this article What Is Soldering? There are several types of soldering using different filler metals called solder, but, they all use the same concept which is heating a filler metal between two items so that it melts and fills the seam between the two items. Soldering is done using either individually bought soldering gear, which allows you to choose the type of tool that is most suitable for the project you are planning to work on, or a soldering station which usually is a standard combination of a soldering iron and a power supply. Soldering Iron  In order to learn how to use a soldering iron, one must first know its basic parts and the science behind its mode of operation. It is simply a tool that connects to a power supply, it consists of a handle that doesn’t conduct heat and a tip that heats up very quickly to high temperatures so it can melt the solder, it also cools down fast. To Be More Specific, The Main Parts Of Soldering Iron Are: Soldering tip: All soldering irons contain iron tips which are the only part that heats up; it doesn’t ooze out the solder as most people think, it simply heats the metals being joined so that when the solder is applied, it melts, but more often than not, the solder would stick on the tip. Luckily, most tips are interchangeable so, you can replace your tip in case of damage or in case you need a specialized tip to suit your uses; bear in mind that tips vary in size and shape, thus, they vary in their uses as well. Wand: The wand is the handheld part of the iron that the tip is attached to. It can be made from a large number of materials that poorly conduct heat or isolate it completely so as to prevent heat from the tip from transferring to the part where the wand makes contact with the skin. Inside the wand, there are wires and metal contacts that conduct and convert the electricity from the power outlet to heat. The contradicting functions of a wand are the reason why most people prefer to buy high-quality wands from renowned brands. Of course, there are other extras and accessories like brass sponges, cradles, and tip tinner which can be purchased individually or found in soldering stations which is actually one of the advantages of soldering stations; but, the two main parts will always remain the tip and the wand. Step 1: Safety First of all, before using a soldering iron, you must be familiar with standard safety precautions since the iron tends to get really hot; not to mention the fact that solder is literally molten metal. So, it would be smart of you to wear protective gear such as; safety goggles and protective gloves, because your fingers are most likely to come into contact with the tip during the first few times. You also should keep in mind to tie your hair and avoid wearing loose-fitting clothes. Moreover, it is preferable to work in a well-ventilated area since some types of solder contain lead which produces toxic fumes, it is also important to thoroughly clean your hands after handling lead-based material. Step 2: Preparing The Tip The tip should be regularly cleaned of any old solder because when old solder solidifies, it turns into a heat isolator due to oxidization resulting in a totally inefficient and highly wasteful soldering process. Not only that but also, slow heating means that you will have to hold the iron to the items being joined for a longer time; it would be highly inconvenient for you and very damaging for sensitive objects like PCBs. So, when the iron is fully heated, softly drag the tip against a sponge to remove old solder. You want to aim for a shiny tip. After cleaning the tip, you should “tin” the tip; to make it last longer and conduct heat better through newfound layers of solder. Same as above, on a fully heated iron, apply a little piece of solder and lightly coat the tip with tinner; then, immediately start soldering while cleaning and tinning the tip between every couple of joints for maximum conductivity and efficiency. Step 3: Actual soldering With your dominant hand holding the iron and the other holding a piece of solder, touch the area where the object comes into contact with the solder and hold it there for about a second then slide the solder underneath the tip while pushing the solder rod further according to how much solder you need. Then, make sure to pull back the solder first while holding the tip in position until all the solder melts; it usually takes about five seconds or less. Solder cools down fast so, you will not need to blow on the joint since it will only lead to a weak joint which can be identified by its oxidized, unclear, and grainy appearance. What you want to get is a smooth connection, not a lump. Finishing touches : After you’ve had enough soldering for the day, clean and in the tip again before you put it into storage, it helps increase its lifespan. As you may have noticed, soldering is not that hard of a task, it only requires soldering gear, steady hands, and concentration. So, go ahead, start soldering, and don’t be afraid to get creative. Read Also: Is Polyester Stretchy? – Its Materials & Properties [Detailed Explanation] Top 6 Different Types Of Scarves Names And Its Benefits How to Thicken Chili – Tried and Tested

READ MOREDetails