How to Bring Summer into Your Space

Published on: 26 June 2016 Last Updated on: 10 September 2024
Content Rally

With the winter far behind us and the cheating half-rainy half-sunny spring about to leave, it’s finally time to welcome the most beloved season of all – the summer. Although this is the period when we spend most of our time outside, it would only be fair to show our house some sweet summer love and refresh it with joyful and bright elements. For too long your home has been burdened with heavy fabrics, shut windows, heating systems, and all the other remnants of the harsh winter. It’s the time to bring spring cleaning to shame, by giving your house a complete summer facelift. Here are a couple of tips that should help you to do that.

De-Cluttering

Summer does not stand layers and clutter, not in clothes and surely not in the house. So, just like your summer outfits are lightweight and minimalistic, your home décor should also be. One way of de-cluttering is to get all the stuff out, and then put back in just the things you need. If your home is not that burdened with clutter, you can just remove the items you don’t need, or store them into boxes, bins, etc.

Deep Cleaning

If deep cleaning was not a part of your spring endeavor, then you should consider doing it now, so that your home would be fresh and breezy. Some of the things/places that should be deep cleaned are under the sink, oven racks, the oven, the freezer, the curtains, the carpets, the windows, and the furniture. When cleaning the windows, do not forget to clean the blinds too. Don’t use harsh chemicals. Most of the cleaning can be done with DIY cleansers (baking soda, vinegar, lemon, etc.). The carpets and furniture can be cleansed with steam vacuums, so you don’t spread dirt and allergens throughout the air.

Getting Rid of the Wintery Fabrics

The last things you want to look at in your home are layers of heavy and dark fabrics and textures. Replace them with lightweight materials (e.g. heavy drapes with sheer curtains). Get rid of blankets and knitted items. If you have to cover your furniture, use slip-covers in light summery colors.

Letting the Air and the Light In

This is easy – just open your windows and let some air in. Remove curtains for a day or two, just to allow clear passage to sunlight. Afterward, you can use the sheer curtain so that you always have sufficient light.

Seasonal Products as Decorative Elements

If someone were to ask us what is the most beautiful thing about summer, we would instantly reply strawberries (well, right after the beach). So use them and other fruits and vegetables as home décor. Arrange some colorful fruits and vegetables in baskets and bowls and use them as centerpieces. Fresh flowers are a great alternative.

Grow Fresh Herbs

There is nothing more delicious than fresh basil in a salad or on a homemade pizza. So, get creative and make yourself a wall-mounted container garden, where you will be able to plant and plunk herbs. Not only will you add a touch of greenery into your space, but you will always have fresh herbs within your reach.

Outdoor to Indoor

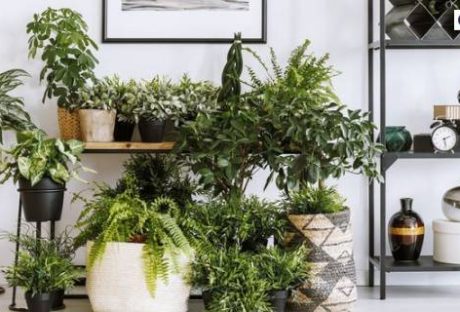
Create a connection between outdoor and indoor by adding some elements you would normally use on your terrace or in the backyard, such as a jute area rug, plants (palms, bamboo, etc.), and some cane and wicker furniture.

Pops of Color

Summer home décor is not as hard to pull off as you might think, basically everything is the same as in fashion. Think about styling your outfit with a colorful accessory, and translate that into your home by adding pops of color in each room. Those can be vases, bed coverings, curtains, rugs, etc. You can start small by adding subtle summer shades like an orange rug in the living room or a teal table runner in the dining room to add a summery pop of color to your home.

Pantry and Refrigerator Do-Over

Here, you really need to give it your best shot. First, get everything outside the fridge and pantry, check the labels for expired items and throw them away. Also, if some products have been opened and not used for an extended period, you should throw them away, even if the expiration date isn’t due yet.  Once you are done, put everything back, but arrange the products into groups and types (e.g. dairy goes in the door, cheeses on the upper shelf, meat products on the lower, etc.). Turn all labels facing out, so that you could always see which product you are taking and is it expired.

Summery Scents All-Around

Start with your skincare and hygiene products. Replace the wintery aromas of chocolate, milk, honey, etc. with refreshing scents of fruits and flowers. Move on to air fresheners throughout the house. Go fully natural with homemade fresheners. Some of the common ingredients are lemon, rosemary, orange peel, essential oils, lavender, basil, etc.

As you can see, summer is not reserved exclusively for the outdoors. If you try, you can bring it inside your home. Spring cleaning is so last season.

Read More:

  1. How To Choose The Right Containers For Your Container Garden
  2. Grow These Flowering Plants In Your Home Garden To Remove Vastu Related Problems
  3. 3 Amazing Flower Street Garden – How To Design

Abdul Aziz Mondol is a professional blogger who is having a colossal interest in writing blogs and other jones of calligraphies. In terms of his professional commitments, he loves to share content related to business, finance, technology, and the gaming niche.

View all posts

Leave a Reply

Your email address will not be published. Required fields are marked *

Related

Amazing Flower Street Garden

3 Amazing Flower Street Garden – How to Design?

When it comes to planting your garden, perhaps you love nothing but the joy of rooting, tilling, and otherwise nourishing your plants and flowers to grow to be amazing and beautiful. Really, you are passionate about gardening, and would not trade the experience for anything. That said, perhaps you have experimented with tons of different types of gardening, from hydroponics to indoor planting. This time around, you are probably curious to take on planting flowers…on the street. While you might find it to be a piece of cake, there is a certain art to it, and we are here to help you out! Read on to learn more in this article on how to design an amazing flower street garden. Pretty soon, you will be well on your way to an excellent garden that you can show off to your family and neighbors. Without further ado, let’s get started! How to Design an Amazing Flower Street Garden First things first, it is necessary to take some time to research just how you are going to start your flower street garden. It is not just a matter of rushing into doing so, but rather taking the time to yield great results. Trust us: in the end, it will all be worth it. Here are three, simple steps to follow: 1. Select your plants and flowers Aside from choosing plants and flowers that look aesthetically-pleasing and color-coded with each other, it is also a matter of choosing some which can co-habit together peacefully. In other words, you need to select plants and flowers that can grow well without having to fight for the same nutrients in the soil, let alone fertilizer. Really, competition can be fierce for some of them, which can end up leading not only to inadequate nutrients being distributed unevenly but also inadequate growth on both parts of the plants and flowers. For instance, zinnias and geraniums go well together, both in terms of being planted together and color-scheming. Another good one to refer to is that of Melampodium and shrub rose, which add that extra pop to your home curb appeal. 2. Keep them orderly Paradoxically speaking, this point is both about keeping your street garden limited just to a few plants and flowers, but also diversifying them for an aesthetically pleasing sight. What do we mean by this? In other words, it is advisable not to go crazy with too many different species of plants and flowers within a given plot of land, considering that, again, they will have to compete for nutrients (which can affect how they grow), as well as create a hodgepodge of all sorts of species which can make it look a bit too disorganized and detract from its attractiveness. That said, a rule of thumb is to plant just a few varieties: we recommend planting no more than ten sorts of perennials, five kinds of shrubs, and two types of trees. Again, strike a balance between color scheme and practicality, and doing so will make all the difference when it comes to the beautiful results of your street garden. 3. Maintain them regularly Finally, it is a matter of just getting around to planting and nourishing your plants and flowers along the side of your street. Besides just the basics of watering and giving them enough sunlight to flourish, you will also have to maintain it regularly with appropriate fertilization and pruning from time to time, especially if you are growing plants and flowers that tend to get quite thick and heavy with foliage and so forth. Hence, for the latter, it is a good idea to have at least a prune tool around to make it easier (and safer) to efficiently keep the plants and flowers under good maintenance. From shears to pole saws to lawnmowers, pruning tools come in all sorts of shapes and sizes, so it is essential to know which ones are the best for the type of pruning you need to do. *bonus* Give them love and care. While this point sounds corny, it is important nevertheless to care for your plants and flowers like they are your own children. Doing the basics such as watering, fertilizing, and pruning is a good start, but to take it above and beyond to keep them safe from harsh weather and investing in safety fences to keep out pests and other sources that might otherwise damage, will make the street garden even more lovely and happier. For an idea of what to expect for street gardens, check out this video here: https://youtu.be/qh0ckoAiCek Read also: 5 Essential Tips To Designing A Beautiful Front Yard Garden Overall, street gardening is an interesting concept that is not a bad idea to consider, should you be passionate about planting flowers, in general. With the right amount of tools and planning, you should be able to create an amazing and attractive street garden to call your own.

READ MOREDetails
how to harvest dill

How to Harvest and Preserve Dill for Year-Round Use?

The tender, fern-like leaves of dill almost beg to be touched. If you want to cook them, trim the fresh dill foliage and gather the seeds for pickling. Or you can chop the feathery leaves and yellow umbels for attractive bouquets of homegrown flowers. In addition, black swallowtail caterpillars love to feed on it. Its tiny yellow blooms are great at drawing in a wide range of pollinators. Dill grows as an annual for summer harvests in USDA Hardiness Zones 2–8. In other parts, it may self-seed and is hardy in the winter in Zones 9–11. Here is everything you need to know about how to harvest dill. Keep reading for a comprehensive guide. How to Harvest Dill? Fresh dill clips easily, but it soon starts to droop. Sounds familiar to Cilantro, right? Its flower umbels may look lovely in a mixed bouquet, but after a few hours, don't be shocked if they start to wilt. When harvesting dill for recipes, use it as soon as possible because its flavor starts to fade after a few days. Cut off the flower stalks of dill after the yellow blooms have faded but before the seeds start to ripen and come away from the umbel. Cover the entire flower head with a small paper bag that has a few tiny holes for ventilation. Hang the plant upside down in a cool, dry place. Watch for the seeds to fall and collect them in the bag's bottom. The seeds should be kept in a cool, dry, and dark area in an airtight glass container. When and How to Plant Dill? Dill grows best outside and is simple to start from seed. Plant the seeds directly into the ground, 1/4 inch deep and spaced 1 to 2 inches apart, in the springtime following the last frost. If you want the dill plants to be able to self-sow, plant the seeds in tufts so the seeds can fall and sprout the following year. Or you can plant them in rows spaced about 6 inches apart. You might want to think about succession planting if you want a reliable supply of dill. During the growing season, start by planting a small number of seeds from the packet at a time and then a few more every week. Typically, seeds take 7 to 14 days to germinate. Also, dill can be grown from transplants grown in nurseries planted in the ground or in containers in spring. You can plant dill outside a few weeks before the last predicted spring frost because it can withstand light frost. To achieve lush growth and stop crowded seedlings from producing seed heads, which stops the production of foliage, thinning is essential. Every 12 to 24 inches, reduce the number of seedlings to just the strongest one once they reach 3 or 4 inches in height. As they get bigger, some start to flop. Plants can be kept upright by placing a stake or a sturdy twig in the ground close to the plant's base. To loosely secure the plant to the stake, use garden twine. You can start the dill seeds indoors four to six weeks prior to the last frost. And you can move the seedlings to the ground once the risk of frost has passed. Transplanting mature dill does not work well, so plant your seedlings where they will be able to grow and thrive. Where To Plant Dill? Dill should be planted in a spot with well-drained soil and at least 6 to 8 hours of daily full, direct sunlight. Particularly for cottage gardens, the delicate foliage gives garden beds and borders textural interest. Choose a location for your dill that will shield it from the wind if possible. Just like spinach, high winds can easily damage its stalks if you do not stake the dill. You can plant dill's fragrant foliage in perennial garden container plantings. Or you can plant them alongside other herbs or vegetables in a traditional kitchen garden. In an edible garden, cruciferous vegetables such as Brussels sprouts, collard greens, broccoli, and cabbage are good companion plants for dill. Dill draws beneficial insects like ladybugs and bees and drives away common brassica pests like loopers and cabbage worms. But avoid planting dill close to carrots. Carrots can be stunted by dill, and because they are closely related, dill can cross-pollinate with carrots to produce inferior hybrid plants. Planting dill close to tomatoes is also not recommended. Mature dill will probably stunt your tomatoes' growth, even though some studies have indicated that tomatoes and dill can be beneficial companions when they are young. How to Propagate Dill? Seed is the most effective method of dill propagation. Cuttings can also propagate Dill, though this isn't as dependable. Seed: Direct sow the dill seeds in early spring at a depth of 1/4 inch in a prepared garden bed. Dill does not tolerate transplanting well. Thin the seedlings so they are 12–24 inches apart when they are 3–4 inches tall. Cuttings: Using shears or scissors, cut off the stem with at least 3 to 4 inches of new growth to take a dill cutting. Place the cutting in a water-filled container, making sure to remove any leaves below the water's surface, and allow the roots to grow for two to three weeks. Fertilizer and rooting hormones are not required. Plant the dill in a container or on the ground once the roots are 2 to 3 inches long. Is Dill a Type of Weed? No, I am not talking about WEED weed (read: marijuana). Although dill isn't technically a weed, some individuals and spice companies call the plant dill weed, possibly due to its feathery leaves. Dill weed is a dried or fresh foliage plant. Flower umbels are yellow and used to make dill seeds. How Should Dill Be Stored for Optimal Quality? You can keep fresh dill in the fridge by wrapping its leaves in a moist paper towel. Or you can tuck its stems into a container of water. Fresh dill can be frozen by submerging it in water in ice cube trays. Place the cubes in cooked dishes that have enough moisture to withstand them. Dill seeds and leaves can also be easily dried for later use, though the flavor is a lot more muted. Water and Soil Sow dill in soil that is moist but well-drained. If there is a lot of clay in your soil, add organic matter to the top few inches to aid in drainage. If you have trouble with poor soil drainage, plant this herb in raised beds or containers. Growing dill requires proper irrigation. As the seeds germinate, keep the soil evenly moist. Dill plants require one to two inches of rain or extra water each week once they begin to grow. Humidity and Temperature Dill tolerates temperatures as low as 25ºF, but 70ºF is the ideal temperature for it. Dill often bolts, sending up flower stalks to set seeds when temperatures rise. This annual herb dies after it flowers and produces seeds. Get rid of the flowers to prolong the plant's growing season. Apply Fertilizer While most herbs, including dill, don't require extra fertilizer, you can give them once or twice during the growing season by applying a balanced 10-10-10 fertilizer. When planting, either mix a liquid fertilizer with water or etch a time-release fertilizer into the soil. Refer to the product label for instructions on how much to use. Trimming Dill should be pruned early in the growing season to prevent limb bending. Cut off the top leaves of the plant to promote more growth of the lower leaves. Food preparation and cooking can be done with anything that has been pruned. Repotting and Potting You can grow dill in pots on a sunny balcony or deck, even if you don't have an outdoor garden. Due to the deep taproot that dill plants have, choose a container that is at least 12 inches deep. Because clay and terracotta pots don't retain as much moisture as plastic or glazed ceramic pots. They are ideal for growing dill. Make sure the container you select has good drainage and is big enough to allow you to space your plants 12 to 24 inches apart. It is best to start over in a new, larger container. Especially if your dill plant outgrows its current one because it does not take well to transplant. If the temperature where you are planting is not too high, you can keep planting seeds into the summer. Types of Dill Dills can be of many types with each of their distinct looks and flavors. Here are the three different types of dill you can grow in your kitchen or backyard. Long Island Mammoth Also known as Long Island Mammoth this one is an old-time favorite. Its fern-like leaves can be dried and stored for a long time, or they can be harvested fresh. It produces big clusters of yellow flowers with flat tops. They turn into brown seed heads, and they can reach a height of five feet. Fernleaf Grown to a height of only 18 inches, Anethum graveolens, or Fernleaf, is a highly productive dwarf variety. It works well in container gardens or small in-ground beds. Its feathery, delicate foliage has a great flavor of dill. From midsummer into fall, it blossoms. Bouquet The 'Bouquet' cultivar produces plants up to thirty inches tall with fine bluish-green foliage. The enormous, six-inch-diameter yellow flower heads are ideal for drying, creating an enduring arrangement. Or you could chop them for fresh floral arrangements. How to Keep New Dill Fresh? Dill weed quickly wilts after harvesting and gradually loses its distinctive flavor and aroma. If you know how to store your freshly harvested dill, this shouldn't be a problem. Here are two straightforward techniques that you can use: Put It in the Crisper Drawer of the Refrigerator Loosely wrap the recently cut and cleaned leaves in damp kitchen towels before putting them in a container or sealed bag. Put the container in the crisper drawer of the refrigerator, which has a lower humidity than the other sections of the appliance. Utilize the herbs before they begin to wilt and dry out, which should happen in a few days. Put It in Water To make this method function, when harvesting the herb, you must cut off the entire stem. After gathering the stems, put them in a glass of water and seal the opening with a plastic bag. Every day, change the water. Unlike potatoes, dill leaves can remain fresh for up to a week when stored in this manner. How to Freeze Fresh Dill? Freezing is the best way to preserve extra dill for later use if you've harvested more than you can use at once or in a few days. Dill freezes most effectively when chopped into smaller pieces and added to ice cube trays with just enough water to cover the freshly minced dill. This allows the herbs to be kept for four months or longer. This will ensure you always have dill on hand for when a recipe calls for it. How to Dry Fresh Dill? Dried fresh dill is a popular method if you're searching for another way to store dill for a long time. The herb has many uses, even though it won't have as much flavor as when it's fresh or frozen. All year long, you can use it as a herb in cooked dishes or to make tea. Stick to hang-drying if you don't want much of the flavor to be lost. This is a very easy method to use. All you must do is gather a few dill leaves and then bind them with a string. Later, place them in an area with adequate ventilation upside down.  Place them in an airtight container once they're crumbling and dry. Even though fresh dill is always preferable, make sure to save some for later use. Particularly if you don't have a year-round indoor herb and spice garden. Wrapping Up Growing dill is a great way to add flavor to fish and seafood dishes. A little goes a long way because fresh dill leaves have a strong licorice flavor. It is best that you add dill toward the end of cooking, in salads, or as a garnish for soups. Because once cooked, it tends to lose its flavor. If you have thoughts to share or questions to ask about how to harvest dill, please leave a comment below. We would love to hear from you! Read Also: Asparagus 101: When, How, And How Often To Harvest? How To Harvest Sunflower Seeds: A Fun And Easy Activity For The Whole Family How TO Harvest Lemongrass: Tips AND Tricks FOR Growing AND Using This Versatile Herb

READ MOREDetails
attic room

Turn your attic into a living space

When purchasing a home, people have some projection of the future. However, it is hard to predict everything. This is why we like getting a place with the room for improvement and expansion. The attic is probably one of the first choices for home expansion of growing families. It often seems miraculous the way an empty, or a storage room turns into a comfortable living space. The purpose : The purpose of your loft-conversion is an important element of project planning. Some of the most convenient and usual purposes are a playroom, an office, an entertainment room, or a bedroom. Decide the most convenient purpose depending on what you lack space for. Perhaps this can give your children enough space to play when they are indoors, or finally give you the master bedroom you’ve always wanted. The purpose will determine the layout, the amenities, and the type of access. The access : Perhaps you are used to using the attic ladder, however, when this becomes a room you use every day, the ladder is no longer acceptable. First of all, consider the space you have. Is there anything on the floor below which will make fitting a staircase difficult? Perhaps in certain scenarios, it could block one of the doors into one of the rooms. Hire a professional to make a plan for the stairs, unless you are a professional, or truly experienced. Safety should be your priority. Also if your loft is meant to be a playroom, you should definitely get a banister and safety get at the top and the bottom. The style : Does your attic currently have enough space for your purpose? Is the ceiling high enough? Do you have enough windows? Check your local regulations, get the required licenses and choose the style of the conversion. There are three common styles of the loft conversion, mansard, dormer, and roof light. The roof light is probably the most convenient one as it does not require major alterations to your roof. This is the reason why there is usually no need for planning permits.  The other two styles, however, involve creating more space and offer a better choice of windows. You can get more daylight and a possibility of installing shutters and other window treatments greater energy-efficiency. Electricity/Plumbing/HVAC : Hire a licensed electrician to establish whether your current system can handle the increase in the electrical load required for the new room. Let them do the wiring. Look for the main stack and plan your bathroom in that area. A professional plumber should have no trouble setting it up. Finally, the last contractor you will need for this type of project is an HVAC specialist. They will tell you if the current system can support another room and set it up. Insulation : Insulation is another essential part of the conversion. Perhaps even the most important one. Without it, the room would be impossible to live in due to extreme temperatures. It protects a room from the weather elements and increasing energy efficiency. Hang drywall once you are done insulating. Flooring : The floor insulation is not so much for the sake of warmth, but for the sake of noise. Installing floorboards requires an excellent subfloor to reduce the squeakiness. Also, a carpet may be a good choice as it absorbs a lot of noise. While you are at it, carpet tiles are excellent for a playroom. They are not slippery, they absorb sound and they are easily removed and replaced. The room now fulfills all standards to be lived in. All you are now left with are the finishing touches. You need to select the colors, the furniture, and decor.  Do so according to the purpose of the room and your taste. Bio: David Koller is a freelance blogger passionately interested in minor house fixes and home décor. Read More : Natural Ways To Get Rid Of Flea In Your Lawn Leather Furniture Is An Essential Improvement For Any Home Or Office Ten Tips To Make Most Out Of Your Outdoor Space

READ MOREDetails