What Makes a Good Mobile Website

by

19 September 2019

Dev & Design

mobile website

People are tethered to their phones even when they are not using it. When they are not doing anything, they remain close to their phones to hear any notification ringtone.

More importantly, they use their phones to access websites, shop, watch YouTube, log on to Facebook or Instagram, or search on Google. By the end of 2019, the number of mobile Internet users would have grown to 4.68 billion.

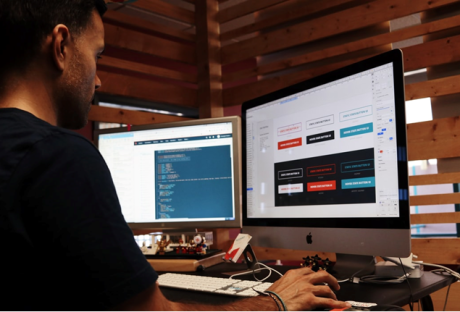
A mobile UX designer optimizes your website making use of the best practices for mobile users. If your website is not yet optimized, you need to do it right away.

It’s projected that by 2021, 73% of all eCommerce activities will come from mobile users. Right now, China alone has 98% penetration rate in terms of mobile Internet.

What Can a Mobile UX Designer Do for You?

To answer that, you must first know what makes a good website. Google has attempted to answer this question by listing the following elements:

  1. Make the navigation easy for the user. Call to actions should take a prominent position
  2. The users can call customer service directly from the website
  3. Menus should be clear and concise
  4. Visitors tap the logo when they go back to the home page
  5. The local search box should be visible at first glance
  6. Add filters to narrow down the search, particularly for eCommerce sites
  7. In the same vein, the site should yield relevant results in response to site query
  8. Avoid site registration before users can explore your website
  9. Users can make a purchase even without registering to your site
  10. Quick sharing to social networks
  11. Quick links so they can email themselves and finish the task on other devices
  12. The website should be optimized for mobile, which means fonts are larger and the images are expandable

What Can You Expect from a Mobile UX Designer?

A mobile UX designer will make sure that people will have a positive user experience when they access your website through mobile devices.

A good designer will:

  1. Conduct UX research to understand users’ needs and behaviors
  2. Cut out the clutter for easier navigation. The navigation should be intuitive
  3. Properly use colors, graphics, font, and negative space to highlight key content and promote activity
  4. Test your mobile website for optimum experience and functionality
  5. Make sure your website is stable for mobile use
  6. Insist on the consistency of themes and design across devices
  7. Ensure that important elements measure 18mm so they can be easy to tap

Finally, the mobile UX designer should ensure that your website loads fast. According to Google, most mobile websites load at an average of 15 seconds.

That won’t do. The same Google research warned that customers almost always leave when it takes more than 10 seconds for the mobile landing page to load. Even if the website loads for 1-3 seconds, the bounce rate will increase to 32%.

The mobile app services of Sunlight Media include a dedicated mobile UX designer who will check and test the architecture and workflow of your app. They will work with you to achieve your goals and ensure the app will adhere to your style guide. Head to their website now or contact them at 323-868-3581.

Read Also:

I enjoy writing and I write quality guest posts on topics of my interest and passion. I have been doing this since my college days. My special interests are in health, fitness, food and following the latest trends in these areas. I am an editor at Content Rally.

View all posts

Leave a Reply

Your email address will not be published. Required fields are marked *

Related

Would Your Ecommerce Website Pass the Cybersecurity Test? Here are 3 Things You Could be Doing Wrong

There is no doubt that cybersecurity is a considerable concern in the modern age, both for business owners and consumers. This is particularly relevant in the case of newer technologies, with an estimated 98% of all tested web apps thought to be vulnerable to a cyber attack. So, we face up with problems of qualification of IT security workers, the importance of Certified Information Systems Security Professional Certification, upgrading of computer systems and mainframes, etc. This is an entirely staggering statistic and one that should worry about every website and e-commerce business-owner in the UK. It also highlights the fact that your website may not be as secure as you think, so here are three things that you may well be doing wrong: 1. Focusing Too Much on Prevention Rather Than Detection : Team of Primetimeesay.com has checked a lot of papers and asked heads of IT security departments about the problems they face in their work first of all. According to the interviews, there is often a chasm between the length of cyber attacks and the subsequent time taken to discover and respond to them. An initial strike may be over in a matter of minutes, for example, while it reportedly takes an average of 256 days for it to be identified. This issue can be at least partially resolved by placing a greater emphasis on detecting cyber threats and attacks rather than striving to prevent them merely. After all, sophisticated hackers and malware programs may be able to breach even the best defenses, so your organization must have a viable strategy to detect and respond to attacks after they have been launched. 2. Relying Solely on Compliance : While complying with industry guidelines and mandatory regulations is an important consideration, it is by no means guaranteed to protect all types of cyber-threat. In fact, it may be argued that they provide little more than minimum requirements to adhere to, and the fact remains that you must strive harder to keep your eCommerce site safe. This is particularly true when it comes to handling consumer and corporate data of a sensitive nature, as in this case the majority of compliance law has been created from a legal perspective. So, always try to go above and beyond when securing your website and the details of your customers, while ensuring that you have 128 or 256-bit encryption to safeguard all financial transactions. 3. Failing to Appreciate the Differences Between Penetration Testing and Vulnerability Scanning : Make no mistake; penetration testing and vulnerability scanning are two very different concepts, and confusing them can cause significant security issues for your website. While vulnerability scanning is a formulaic and best security test performed by systems, for example, penetration testing provides a far more in-depth examination of your website and its level of resistance to cyber-attacks. This is especially true when the tests are carried out by a reputable service provider like Nettitude, as this type of company uses humans to emulate the relentless and aggressive actions of genuine cyber-thieves and hackers. This intuitive and in-depth testing offers a genuine insight into your website's level of security, while it can help you to take proactive steps towards safeguarding your business. Read More : How To Get Product Ideas For Your E-commerce Business Are Debt Consolidation Loans Recommended For Credit Card Consolidation What Can I Do To Make My Company Website More Profitable And Powerful?

READ MOREDetails
bootstrap templates

Bootstrap Templates and Allied Tools to Make Your Web Presence Easy and Instant

It is no secret among online business marketers and website builders that the Bootstrap templates and themes could be their first option in terms of building a web presence. There are many reasons why people tend to use handy Bootstrap templates as: Primarily, most of the designers tend to use this as boilerplate. Bootstrap is out there with us for long, and people are so familiar with it. Many find it much riskier to switch to other options unknown to them. Bootstrap is time-tested, and it also found to be valid. It is a tool, which is time-tested and can also pave a strong foundation for websites. An endless collection of classic Bootstrap templates now helps you construct any type of website you want. It also has high flexibility and rich features, so irrespective of a regular blog or portfolio site, you can get it all here. The community around Bootstrap is so immense and extensive. This constantly expanding expert community will give you plenty of choices and unrelenting support for any issues. Most importantly, Bootstrap is a freemium product and also boasts of its high quality. You will come across countless free templates of Bootstrap, which won’t disappoint you at all. All these could act as a quick fix to your web development problems from time to time. In addition, they will also give you the apt solutions on which you can build safely. Some important things you need to know about Bootstrap 4 themes As we have already seen, Bootstrap is a very powerful but freemium CSS framework with an impressive selection of jQuery plugins, components, layouts, and UI/UX elements. The primary thing about Bootstrap is that it can be availed for free by the users. Now, the extreme popularity of Bootstrap has also urged web developers and designers from across the globe to land on this platform and uses it as a top choice in their projects. If you are also planning to use framework or workflow tools in your web projects, one should always make a note about the updated version of Bootstrap. The latest update is Bootstrap 4, which comes with a custom set of tools and features for the users to benefit from. The new version Bootstrap will certainly help the developers to create business websites flawlessly with ease. A few key things to remember while using Bootstrap You should know that there are different types of Bootstrap 4 themes and templates available out there, both official and third party. So, if you consider using one, always make sure that you do a thorough baseline analysis to identify the best theme for your purpose. In fact, with an abundance of choices, it will always be difficult for a customer to feel overwhelmed about the choice and get confused. This will be more so in case of the beginners who don't have an idea about how to make use of the best Bootstrap 4 template for their purpose. If you are among one of those amateurs who are confused about Bootstrap 4 templates, here we will discuss a few handy things which will help you out in making the right choice. When to consider using a Bootstrap template? The ones who are into website design or the developers who are applying the CSS, as well as a markup of Bootstrap, would have some basic default designs handy. Many don't want to customize Bootstrap, which also isn't ideal as it will make your site look similar to many others out there. So, the best move is to take any of the Bootstrap templates which are useful for you and then customize it to match your needs as well as to look unique. When it comes to choosing a default template, the design may not seem to be very appealing because the providers tend to make those pretty simple with some basic features embedded. So, to bring a professional look to the website, you should try to work further on it and customize it. For this, designers need to pay attention to the CSS framework to make the end product more stylish. There are many tools to help you customize the Bootstrap templates. Tools to customize Bootstrap themes It is so easy to create Bootstrap templates and themes, but it may be confusing if you don't use the right tools. In the case of beginners, it could be somewhat difficult until they get a good grip on it through practice. Adding to it, they also need to pay close attention to the fine details to set things right, which is time-consuming. Fortunately, many tools are there to help these novice Bootstrap web builders to create customized Bootstrap templates quickly and easily. Let's explore some such tools. Sublime Text This tool has a fair number of features to help web development. On using this tool, you can get quick access to many quick windows for the project code. Adding to it, you can also see the codes which you have written on the panel. Anvil The same group of developers had developed both Anil and Hammer, and you use both these tools independently. Anvil could work the best for the localhost servers, which could further let you preview the themes and choose the best for your purpose. Hammer As we said above, Hammer could be used in combination with Anvil or independently. It is a Mac-based development tool that comes with a handful of features to develop Bootstrap themes and static sites. With this tool, you can ensure that you make use of various HTML in the standard templates for further customization. Hammer could also be used to compile the languages like CoffeeScript, SASS, JavaScript, Markdown into CSS, and HTML, etc. SASS If you are planning to create a template of design a full-fledged website, then you may know that the Bootstrap 4 framework is built primarily on the SASS (Syntactically Awesome Style Sheets). In simpler terms, SASS is a wonderful scripting language that could be interpreted to CSS. You should also note that SASS is a scripting language used in almost every case. There are many other tools too to be used for customization of Bootstrap as Grunt, Harp, Bootply, Brix.io, Bootstrap Starter Kit, etc. which could be handy for the developers and designers. All this help to pay attention to the crucial elements of Bootstrap customization and help you build the most relevant and user-friendly websites. Read Also: Adrian Rubin Tells How To Bootstrap Business In The Photography Niche Major Financial Problems That Can Affect A New Business

READ MOREDetails

How To Design Your Custom Banner That Works

Whether you want to attract new customers or promote an event, a custom banner can be a powerful way to drive your message. But how do you design one that works? The first step is to consider your marketing goal. Once you know what you're trying to achieve, all of your other decisions will fall into place. Here Are Four Prime Steps To Design Your Custom Banner: 1. Colors When designing a custom banner, you want to be sure to choose colors that will help grab your audience's attention. The wrong colors can make your banner look dull, while too many can take away from your message. When it comes to choosing the right colors for your banner, the best approach is to use bright hues that stand out against a neutral background. These can be anything from radiant yellow to fiery red. A contrasting color like this makes your sign more eye-catching and helps potential customers identify it from a distance. It also helps create a visual hierarchy to help your audience better understand what you're advertising. For example, a fast food chain might use a combination of yellow and red for advertising its products because it's easy for people to recognize and remember. It's also a great contrast to the black background of their logo. You should also consider the type of font you'll be using for your custom banner printing. If your banner is intended for a small business, for example, it might be best to stick with plain text that's easy to read from a distance. If your banner is intended for an event, a more detailed font might be a good choice. However, if you're designing a one-time-use banner, it's best to avoid putting too much information on it. This is because people don't have time to read a lot of information at once, so it's important to keep it brief. Generally, you'll want to have a big font for your primary message and smaller text for any additional information, such as a description of an event or a contact number. The next thing you should keep in mind when choosing colors for your custom banner is how far the colors will be from each other. The farther the colors are from each other, the more likely they'll be to confuse people or distract from your main message. For this reason, it's important to choose a background color that compliments your business theme and a font that's easy to read. A quality online banner printing company can provide you with advice and recommendations for the perfect colors and designs for your business. 2. Typefaces Custom banners are one of the most effective advertising mediums for reaching new customers. But it’s important to design them right. This means choosing the best typefaces and keeping them simple enough to be read quickly by people driving by or walking by your store. The most important thing to remember when designing your custom banner is to choose a font that’s easy to read. There are many different font types to choose from, and selecting the right one can make or break your design. There are five main types of typefaces: Serif, Sans-Serif, Script, Condensed, and Italic. Each has a unique personality and can be used for different purposes. Serif typefaces typically feature slight decorative strokes at the ends of letters, which give them a traditional appearance. They’re popular for brands and products that want to create a sophisticated, classy, and trustworthy image. Another important consideration is the typeface’s weight. Font weights range from thin (also called hairline or light) to black, with a lot of different options in between. Using too thick or too thin fonts can make it difficult for people to read your message, and can even confuse them. Using too light or too dark can also have the same effect, so it’s crucial to know which option is most suitable for your needs. The best fonts for a custom banner are those that are easily readable in all sizes. For example, Verdana is a widely used typeface that’s easy to read on smaller devices. Sans-Serif typefaces are generally preferred for large banner signs that will be seen outdoors. These fonts are usually bold, but they can also come in regular and italic styles. They’re often used for titles and call-to-actions, but they can be a bit on the thin side when it comes to body text. If you’re planning on adding a lot of copy to your custom banner, it may be best to use a font like Quattrocento Sans. If you’re looking for a banner that mimics the look of typewriter letters, Veteran Typewriter is a good choice. This font is easy to read and emulates the typewriter letters that are commonly found in magazines. 3. Backgrounds If you want to make sure your banner is eye-catching, the background is a key component. You can choose from a range of options, including illustrations, color overlays, and custom backgrounds. When choosing a background, keep in mind that the size of the image will affect how it looks when printed on your banner. The best type to use is a vector file since these files can be scaled without losing image quality. It's also a good idea to save your design as a flattened file in Photoshop or Illustrator before sending it to a printing company. Another important consideration is glare. If the background of your banner is too bright or dark, it can cause your logos to appear distorted. You can avoid this by using an off-white color for your background, which will absorb light and minimize glare. It's also a good idea to choose a background that complements the main text and logos on your banner. This will ensure that your brand's colors stand out from the rest of the background, and your logos will pop. A background can also help convey a specific message, such as a call to action. For instance, if your business is based at an unremarkable location, a colorful banner could help you draw attention to your building and services. The right banner will communicate your message quickly and clearly. Whether you're promoting a new event or announcing a product launch, it's important to make your banner easy to read from a distance. This means avoiding fonts that are too chunky and contrasting colors and sizes. To design your custom banner, start by selecting a template from Canva's collection. Once you've done this, you can add images and other elements to your design. Before you start adding your elements, take some time to think about your message and what action you want people to take after they see your banner. This will guide the rest of your design and ensure that your message is clear and impactful. You can use Canva's free templates to get started on your design, or you can create a more professional look with a paid account. The site has thousands of images, so you'll be able to find the perfect one for your banner. You can even search for specific graphics if you'd like to incorporate a specific piece of artwork into your design. 4. Images If you're designing a custom banner for your business, it's important to use images that will grab the attention of viewers. The right images will help your message get across, entice people to visit your site and encourage them to take action. When designing a banner, you can either use a pre-made template or create your own from scratch. There are several factors that go into designing a banner, including color, text size and placement, and image quality. One of the best ways to make your banner stand out is to use contrasting colors. For example, a white background with red or yellow text will draw the eye. This will also make your message pop out in a crowd of competitors' ads. You can also add photos to your banner from the Web by using an online image editor. Kapwing, for example, is a collaborative image and video editing platform that allows you to use copyright-free content from huge image libraries like Unsplash and Pexels. Once you've selected the photo you want to use for your custom banner, resize it to fit your dimensions. You can do this by using the "Resize" button on the toolbar or by manually inputting the appropriate picture sizes. After you've resized the image, it's time to decide on a background color. You can choose a color that fits your brand's colors or another neutral shade that complements your design. You can change the color of your background in several places, including the Banner Styling menu and in your template's guide. When deciding on a background color, be sure to consider the opacity of your banner's text and graphics. A light background will make your text and graphics harder to read and will be less noticeable, while a dark background can help the elements of your banner stand out from the rest of the page. Once you've finished selecting your background color, it's time to add text to your banner. You can add text with the Text tool (the big letter "T" in the toolbar), or by clicking on the banner to access its text editing bar. This way, you can add any text to your custom banner and modify its size, fonts, and colors. Read Also: How To Make Sure You Get The Best Service From Your IT Supplier 5 Content Ideas to Use with Instagram Influencers 5 Benefits of Digitalization in Marketing

READ MOREDetails