Published on: 12 November 2021
Last Updated on: 18 January 2025
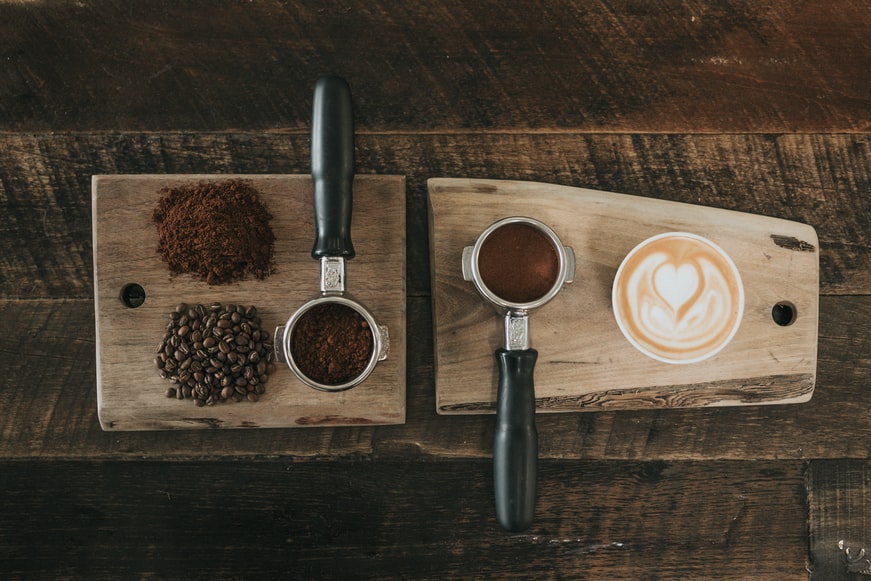
Have you ever heard about black coffee for weight loss? Well, it helps in weight loss because it contains natural antioxidants that help in the reduction of excess fat cells. This means you don’t have to invest in fat-burning supplements.
Besides, it has many other health benefits, especially for those who are suffering from osteoporosis. So, here are some benefits of consuming black coffee.
May prevent cancer & enhance liver function
The major health benefits of coffee include the prevention of cancer, helping in preventing heart disease, slowing down the aging process, and preventing dementia. However, the most outstanding side effect of Black coffee is its ability to increase the normal functioning of the liver.
In simple words, if your liver functions properly, it will help in burning fats and calories which results in a decrease in weight loss. So, drinking two cups of Black coffee a day can help in enhancing liver functions which significantly helps in weight loss.
Improves digestive health
Another great benefit of black coffee is that it aids in digestion. When making black coffee, the caffeine content increases the speed of the metabolism in our body which consequently enables our body to burn more fats faster. If you prefer drinking a cup of black coffee with some hot milk, you can add a dash of natural sugar to taste and enjoy the healthy benefits of caffeine.
Good source of antioxidants
Black coffee is loaded with antioxidants. The antioxidant content of black coffee is 20 times higher than that of green or decaffeinated coffee. Including a cup of hot black coffee in your diet can do wonders for your health. It also works as a detoxifier and speeds up the metabolism which aids in losing weight.
Burns excess calories
When you are dieting, you should reduce the number of calories you take in a day. The main benefit of drinking coffee is it burns off excess calories quickly. Thus, the consumption of black coffee can help you in reducing your calorie intake while you are following a diet regimen.
However, you should ensure that you do not increase the number of calories you take in when you switch over to black coffee. This will result in increasing the number of calories you consume later in the day resulting in gaining weight.
Detoxifies digestive system
In addition, black coffee helps in detoxifying the digestive system. As a result of its healthy and natural ingredients, it helps in cleansing the digestive tract. It cleanses the stomach of toxins which eventually results in improving your digestion and decreasing the risk of digestive diseases.
Constipation and indigestion are common problems that affect millions of people across the globe. Black coffee provides an effective solution to both of these problems by helping you to relieve the symptoms and prevent future indigestion.
May elevate mood
Apart from the healthy properties, drinking black coffee may also be good for your mental health. The caffeine content in this beverage acts as a mood elevator and provides a pleasant state of relaxation. However, excessive use of this beverage may lead to insomnia and may adversely affect your mental health.
Conclusion
Black coffee beans without adding any sugar help in retaining the flavor of the original blend. You will get a delicious and rich taste by drinking black coffee. However, it should be noted that too much use of black coffee may result in a sour taste in your mouth.
It has been seen that excessive use of caffeine leads to the weakening of the teeth’ enamel. Therefore, people with weak teeth should avoid drinking this beverage or consult their dentist before they start using this product. So, make sure to have coffee at the recommended dosage.
How do you prefer to have your black coffee? Feel free to share with us in the comments section below.
Content Rally wrapped around an online publication where you can publish your own intellectuals. It is a publishing platform designed to make great stories by content creators. This is your era, your place to be online. So come forward share your views, thoughts and ideas via Content Rally.
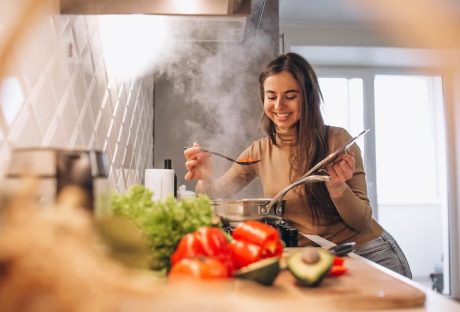
Have you ever wondered how restaurants are able to churn out amazing dish after dish that tastes like it was prepared by a culinary master? The secret is out – professional chefs have tricks up their sleeves that take cooking to the next level. At HMD Bar & Grill, the team works hard behind the scenes using expert techniques and methods to create memorable meals for customers.
Take a look at the kitchen masters who shared their cooking secrets with us: hmdbarandgrill.com.
In this series, you’ll get an exclusive backstage pass into the kitchen to unlock mysteries behind popular ingredients, explore useful cooking hacks, and pick up skills that will inspire you to become a home cooking hero. Your friends and family won’t believe the dishes you’re able to whip up after learning the pro tips and secrets in these articles. Get ready to lift your home cooking game to new heights!
Secrets from the Professional Kitchen
Marinate meats for maximum flavor
Chefs marinate proteins like steak, chicken, and fish for at least 24 hours to infuse them with complex flavors. Try a tangy citrus marinade, an herbaceous chimichurri, or an Asian-inspired mixture of soy sauce, rice wine, and spices.
Sear, then finish in the oven
For extra tender and juicy meats with a crisp exterior, our chefs first sear cuts of meat on the stovetop in a hot pan with oil. Then they finish cooking the meat in a moderate oven. This works great for thick pork chops, beef roasts, and whole chickens.
Add umami boosters
Ingredients like soy sauce, miso, Parmesan cheese, sun-dried tomatoes, and mushrooms enhance the savory umami flavor of dishes. Chefs incorporate umami boosters into sauces, rubs, and marinades to create bold, crave-worthy flavor.
Finish with fresh herbs
A sprinkle of just-chopped parsley, cilantro, basil or mint adds a burst of freshness and vibrant color. HMD chefs garnish many of their dishes with fresh chopped herbs right before serving. This simple step makes a big impact on flavor and presentation.
A touch of sweetness
Chefs know that a bit of sugar or fruit can enhance savory and spicy flavors. They’ll add a spoonful of molasses or honey to barbeque sauces, a diced mango to salsa, or a bit of maple syrup to a mustard glaze. Just a touch of sweetness is all you need.
Cooking and Presentation Secrets
To make your home cooking shine like the pros at HMD Bar & Grill, it's all about technique and presentation.
First, master the art of seasoning. Taste as you go and season gradually until flavors pop. For extra flavor boosts, use fresh herbs, citrus zest, or chili peppers. Balancing sweet and savory, spicy and tangy is key.
With proteins like steak, chicken, or fish, brush on flavorful sauces or crusts before cooking and garnish artfully after. For example, brush grilled shrimp with garlic herb butter and garnish with lemon wedges and fresh parsley.
Elevate side dishes with special touches too. Toss roasted or steamed veggies in browned butter, toasted nuts or breadcrumbs. Or top mashed potatoes with crispy shallots, chives, and cheese.
For desserts, focus on height, color, and texture. Layer cakes, stack cookies, or get creative with toppings like crushed candies, chocolate shavings, or whipped cream.
With professional techniques and artful presentation, your home cooking will become a masterpiece. Dive into the mysteries of flavor balancing and garnishing to make every bite as stunning as the food at HMD Bar & Grill. Your guests will think you have a secret culinary double life!
Insights into HMD Bar & Grill's Kitchen
1. Ingredient selection
The quality of ingredients is key. HMD chefs handpick the freshest produce, sustainably sourced meats and seafood, and artisanal cheeses from local providers. At home, choose organic and in-season whenever possible. Premium ingredients make a world of difference in flavor and texture.
2. Balancing flavors
A dish should have a balance of flavors - sweet, salty, bitter, sour, and umami (savory). HMD chefs carefully calibrate flavors in each dish. For example, a sweet glaze might balance a bitter vegetable, or a tangy citrus pair nicely with a rich cut of meat. Think about how you can achieve flavor balance and contrast in your own cooking. A squeeze of lemon or lime juice is an easy way to brighten up and balance the flavor of many savory dishes.
3. Presentation
How a dish looks is just as important as how it tastes. Here chefs artfully arrange each component on the plate to make an attractive presentation. At home, pay attention to color, texture, and negative space on the plate. A sprinkle of chopped herbs, a swipe of sauce, or an edible garnish can elevate your dish from homestyle to restaurant quality. Presentation is the first impression, so make it count!
Following the techniques and tips from the pros in Bar & Grill’s kitchen is sure to make you a better home cook. Experiment with premium ingredients, practice balancing flavors, focus on attractive presentation, and your cooking skills will reach new heights. Your dinner guests will surely be impressed!
Elevate Your Culinary Game
To elevate your home cooking, start by investing in high-quality ingredients. Fresh, seasonal produce and artisanal ingredients will make a world of difference in flavor and texture. Shop at local farmers' markets or specialty stores for the best options.
Learn proper cooking techniques
Things like properly searing meat, making pan sauces, and using herbs to garnish can take a dish from good to restaurant quality. Study cooking shows or take a class to master techniques.
Get the right tools
A good chef’s knife, kitchen shears, immersion blender, and other gadgets designed for home cooks will make cooking more enjoyable and help you achieve professional results.
Experiment with different flavors and cuisines
Try making dishes from various culinary traditions to expand your repertoire. Combining flavors from different cultures in one dish, known as fusion cooking, is a great way to be creative in the kitchen.
Pay attention to the presentation
How a dish looks is just as important as how it tastes. Use garnishes, interesting plateware, and thoughtful plating to make your home cooking look polished and appealing.
Practice
The only way to really improve your cooking skills is to do it often. Try cooking the same dish over and over again. Check out the cooking and serving tips. Over time, the more you work at it, the better your skills will be.
High-quality products, cooking methods, proper equipment, attention to detail, and consistency are the keys to professionalism. Your friends and family will be amazed at your power!
Conclusion
That’s all, friends. The secret behind the delicious food at HMD Bar and Grill is no longer a secret. With expert advice, you can take your home cooking to new heights. Be creative, try new flavors, and don’t be afraid to venture out into the kitchen. Invite your friends to try it. You might make a good home cook! Practice, explore, and enjoy your culinary skills.
Read Also:
How To Cook Sausage That Tastes Like Heaven
8 Baking Essentials For The Home Cook
How To Cook And Eat Frozen Squid
A Rudraksha means-‘tears of Rudra’ in Sanskrit. It is a sacred bead, which is fashioned into rosary in Hinduism. Hindus regard the Rudraksha with great reverence and believe that it bodes good health and prosperity. It can be worn as a bracelet or as a chain.
The 3 Mukhi (face) Rudraksha consists of three natural lines on the surface. It is a symbol for Agni- the fire, which consumes everything. It helps the wearer handle and overcome any situation.
The ruling planet is Mars and days of wearing are Monday and Thursday. It is recommended for:
Children suffering from chronic fever
Gallbladder and liver disease
Stress and depression
Control of blood pressure
Influence on body organ is throat
Other Benefits of 3 Mukhi:
Just as fire destroys everything, this Rudraksha destroys one’s Karma.
It is believed that all past sins of the wearer are forgiven. It is a way of attaining Moksha.
It removes obstacles faced by a person due to past Karma.
It provides remission from the sin of committing an abortion.
It helps attain purity of soul and to live a life, free of guilt.
Protects from all sorts of diseases, accidents and blood poisoning.
Mantras:
Shiva Purana: Om Kleem Namaha
Padma Purana: Om, Om, Namaha
Skanda Purana: Om Dhum Dhum Namah
Om Namah Shivaya
Mode of Wearing:
Take the beads. Wash them with sacred Ganga water or unboiled milk.
Wear in the neck, chanting Mantra.
Who Should Wear?
Those who want to avoid the malefic effects of Mars.
Those suffering from the disease.
Those who are weak, lazy and have an inferiority complex
Those suffering from stomach disorders, skin diseases, eye defects.
Those who are depressed and need a boost of self-esteem.
Rules to Wear:
Wearers and devotees of Rudraksha enjoy peace, good health, and prosperity. But one must take some precautions:
The Rudraksha must be worn only after Siddhi (purification rites and chanting of Mantras).
Rudraksha mantra is to be chanted 9 times daily, after removing at night and wearing in the morning.
It must be kept in the Puja room at night and worn after the bath in the morning.
The wearer should not consume alcohol or non-vegetarian food.
He must speak only truth and visit Shiva temple.
Rudraksha must not be taken while visiting a baby or to the cremation ground.
Women must remove it during menstruation.
Keep Rudraksha clean and tidy. Pores of the beads can attract dirt and dust. Clean this with any soft material with fine bristles. Change the thread if it becomes dirty. After it has been cleaned, wash Rudraksha with holy water. This is to maintain its sanctity.
Keep Rudraksha constantly oiled. After the beads and chord have been cleaned, periodically apply oil and treat with incense. This is crucial when you have kept the Rudraksha in storage for a long time and want to use it again.
These are some safeguards for wearing and maintaining Rudraksh chains and bracelets. Since it is a sacred ornament, most Hindus are not affected by 3 Mukhi Rudraksha price. Don’t be confused by the shape and size of the beads. One has to buy the beads according to one’s gut instinct.
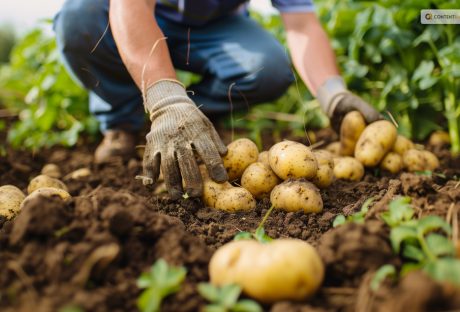
If there is something that I have learned in life, it is about gardening. Well, almost everything if not all. And if there is one thing that took me some time to master, it was knowing how to harvest potatoes at home!
Potatoes are one of the most versatile and popular vegetables in the world. They can be cooked in many different ways, such as boiled, baked, fried, mashed, or roasted. Moreover, they are also rich in carbohydrates, fiber, vitamin C, potassium, and antioxidants.
But how do you grow and harvest your own potatoes at home? You see, potatoes are not like cilantro or other plants. These are tubers.
In this article, I will show you everything you need to know about how to harvest potatoes, from planting to storage.
So, if that is something that you are interested in knowing, then I have you covered! Keep on reading this blog till the end to learn more...
How to Plant Potato Seeds or Tubers?
The first step in how to harvest potatoes is to plant them. You can start with either potato seeds or tubers. Potato seeds are small, round, and black, and they are usually sold in packets.
Potato tubers are the actual potatoes that you eat, and they have eyes or buds that can sprout new plants.
You can buy certified seed potatoes from a nursery or garden center, or use organic potatoes from the grocery store.
Here are some if the steps that you must take to plant them:
Planting Potato Seeds
To plant potato seeds, you need to sow them indoors in pots or trays filled with moist potting soil.
Place them in a sunny spot and keep the soil moist but not soggy.
The seeds will germinate in about two weeks and produce small green shoots.
When the shoots are about 3 inches tall, you can transplant them outdoors in your garden or in containers.
Planting Potato Tubers
To plant potato tubers, you need to cut them into pieces, each with at least one eye.
You can do this a few days before planting to let the cut surfaces heal and prevent rotting. Alternatively, you can plant whole small potatoes with several eyes.
To prepare the soil, you need to loosen it and add some organic matter, such as compost or manure.
You also need to make sure the soil is well-drained and slightly acidic, with a pH of 5.0 to 6.0.
You can use a soil test kit to check the pH level and adjust it with lime or sulfur if needed.
Planting Potato Pieces
To plant the potato pieces, you need to dig a trench about 4 inches deep and 12 inches wide.
Place the pieces about 12 inches apart, with the eyes facing up.
Cover them with 3 inches of soil and water well.
As the plants grow, you need to hill up the soil around them to cover the lower stems and prevent the tubers from being exposed to sunlight, which can turn them green and bitter.
You can also mulch the soil with straw, leaves, or grass clippings to retain moisture and suppress weeds.
How to Care for Your Potato Plants?
The second step in how to harvest potatoes is to care for your potato plants. You need to water them regularly, especially during dry spells, to keep the soil moist but not waterlogged. You also need to fertilize them every two weeks with a balanced organic fertilizer, such as fish emulsion or seaweed extract. Also, you can add some wood ash or bone meal to provide extra potassium and phosphorus, which are essential for tuber formation.
You also need to protect your potato plants from pests and diseases, which can reduce your yield and quality. Some of the common potato pests are:
Colorado potato beetles, which are yellow and black striped insects that feed on the leaves and can defoliate the plants. You can handpick them and drop them in a bucket of soapy water, or use an organic insecticide, such as neem oil or pyrethrin.
Potato leafhoppers, which are small, green, winged insects that suck the sap from the leaves and cause them to curl and yellow. You can spray them with a strong jet of water, or use an organic insecticide, such as garlic or hot pepper spray.
Wireworms, which are thin, brown, worm-like larvae that bore into the tubers and cause holes and tunnels. You can trap them with pieces of carrot or potato buried in the soil, or use beneficial nematodes, which are microscopic worms that parasitize and kill the wireworms.
Common Potato Diseases
One of the most common reasons why a potato cannot grow or survive is the diseases. If you were wondering what some of these can be and how to deal with them, I have you covered!
Some of the common potato diseases are:
Late Blight: It is a fungal disease that causes brown spots on the leaves and stems, and black or brown lesions on the tubers. It can spread rapidly and destroy the entire crop. You can prevent it by planting resistant varieties, avoiding overhead watering, and removing any infected plants and tubers. You can also use a fungicide, such as copper or sulfur, as a preventive measure.
Scab: This is a bacterial disease that causes rough, corky patches on the tubers. It does not affect the taste or edibility of the potatoes, but it reduces their appearance and storage quality. You can prevent it by planting resistant varieties, maintaining a slightly acidic soil pH, and avoiding excessive nitrogen fertilization.
Potato Virus Y: Lastly, this is a viral disease that causes mosaic patterns, mottling, or yellowing on the leaves, and misshapen or knobby tubers. It can reduce the yield and quality of the potatoes, and it can be transmitted by aphids or infected seed potatoes. You can prevent it by planting certified virus-free seed potatoes, controlling aphids, and removing any infected plants and tubers.
How to Determine When Your Potatoes Are Ready to Harvest?
The third step in how to harvest potatoes is to determine when they are ready to harvest. This depends on the type and variety of potatoes you planted, and the size and maturity you want.
There are two main types of potatoes: early and late.
Early potatoes are ready to harvest in about 10 to 12 weeks (about 3 months) after planting, and they produce small to medium-sized tubers that are tender and thin-skinned. They are best for boiling, steaming, or roasting.
Late potatoes are ready to harvest in about 15 to 20 weeks (about 4 and a half months) after planting, and they produce large, starchy tubers that are firm and thick-skinned. They are best for baking, mashing, or frying.
Early Harvesting
To harvest early potatoes, you can start digging them up when the plants begin to flower, or when the lower leaves start to yellow.
You can use a garden fork or a spade to gently lift the plants and tubers from the soil, or you can use your hands to feel for the tubers under the soil.
You can harvest as many or as few potatoes as you need, and leave the rest in the ground until you are ready to use them.
You can also harvest some of the young, tender leaves and stems, which are edible and nutritious.
Late Harvesting
To harvest late potatoes, you need to wait until the plants have died back completely, or until the first frost.
This allows the tubers to develop a thicker skin, which helps them store better.
You can use a garden fork or a spade to dig up the entire row of plants and tubers, or you can use a potato digger, which is a special tool that lifts and separates the tubers from the soil.
You need to be careful not to damage or bruise the tubers, as this can cause rotting or spoilage.
How to Dig Up, Cure, and Store Your Potatoes?
The final step in how to harvest potatoes is to dig up, cure, and store your potatoes. This is important to preserve the quality and shelf life of your potatoes, and to prevent them from sprouting, rotting, or shrinking. Here are the steps to follow:
Digging Up
After digging up your potatoes, you need to brush off any excess soil and remove any damaged, diseased, or green tubers.
Do not wash your potatoes, as this can remove the protective skin and invite bacteria and fungi. You can wash them just before cooking or eating them.
Curing
You need to cure your potatoes for about two weeks in a cool, dark, and well-ventilated place, such as a basement, garage, or shed.
This allows the skin to harden and heal any minor cuts or bruises and enhances the flavor and texture of the potatoes.
The ideal temperature for curing is between 50°F and 60°F, and the ideal humidity is between 80% and 90%.
You can spread your potatoes in a single layer on a newspaper, cardboard, or wooden crate, and avoid exposing them to light, which can turn them green and bitter.
Storing
You need to store your potatoes in a cool, dark, and dry place, such as a cellar, pantry, or closet. The ideal temperature for storage is between 40°F and 50°F, and the ideal humidity is between 65% and 70%.
You can store your potatoes in paper bags, cardboard boxes, mesh bags, or wooden crates, and check them regularly for any signs of sprouting, rotting, or shriveling.
You can also store your potatoes in a root cellar, which is an underground or partially underground structure that maintains a constant temperature and humidity.
Additionally, you can also store your potatoes in a clamp, which is a mound of straw, hay, or leaves covered with soil, that insulates and protects the potatoes from frost and rodents.
Wrapping It Up!
If you want to know about how to harvest potatoes, I hope that this blog has been of help to you. However, if there are any other queries related to the same, please feel free to let me know.
All that you need to do is scroll down till you reach the bottom of the page. Then leave your comments and suggestions in the box below. And I will be there to answer them all for you!
Read Also:
How to Harvest Lettuce: A Step-by-Step Guide for Fresh and Crispy Salads
Everything You Need To Know About Harvesting Basil!