6 Common Questions to Ask When Buying New Equipment and Machinery

Published on: 14 January 2022 Last Updated on: 05 February 2025
New Equipment

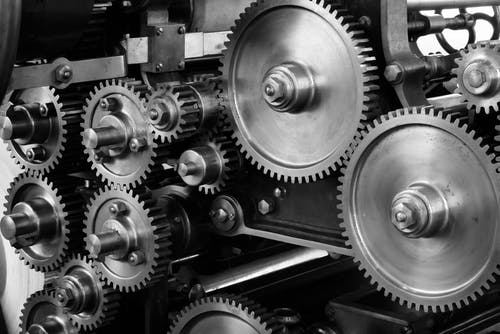
Many companies make a large capital purchase. Thus, it helps increase efficiency, production capacity and reduce the environmental impact of their operations.

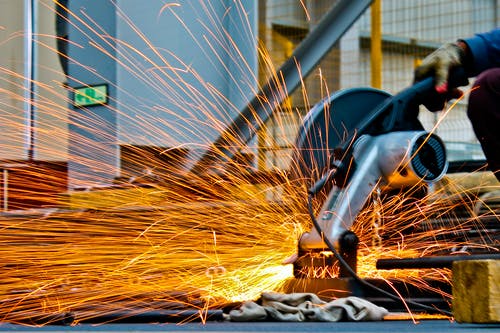
These reasons and more should be the aim to start the process of exploring purchasing new equipment, machinery, ornri industrial tools. It can be any equipment that you need in your business, but you need to know how to go about it to acquire it. Once you are ready to shop, you need to consider the critical questions below.

1. Is the business case to purchase strong enough? 

Before purchasing new equipment, you need to provide persuasive reasons for buying it. One of the things to consider is if the new equipment will lead to performance gains. Also, will the purchase leave your business exposed financially or leave you without working capital. Find out if the equipment can be purchased second-hand and get the same benefits at a low cost.

Such concerns and questions help you find a relevant case to buy new equipment and if the purchase decision makes sense. Additionally, you can consider getting an unbiased opinion from an outsider concerning the purchase.

2. Have you shopped around?

2. Have you shopped around?

In most cases, businesses work with specific suppliers and brands. But when it comes to major purchases like buying equipment and machinery, they should not rely on a single brand or supplier. To get the best price for your equipment, shop around looking for different suppliers and brands.

You can compile the information you get and choose the best purchase for your business. Also, negotiate for a better price with the supplier or manufacturer having the market information for shopping around at hand.

3. How will you finance the equipment or machinery? 

When dealing with large capital purchases, assess the finance options for you cannot purchase the equipment outright. Think of the different ways to finance the equipment purchase. Outright purchase is most common.

But you end up spending a large amount of capital upfront, and you are responsible for any general maintenance regarding the equipment unless you agree differently. Also, you can procure using asset finance, and you can opt to take out a business loan to fund the purchase. Taking a loan to finance is quick, and with a good relationship with the lender, you can negotiate a good deal.

4. Is there an installation cost?

Check if there is a cost for installation. And who covers the cost between your business and the manufacturer or supplier. If the manufacturer does not cover the cost, hire a third party to do the installation for you. No matter the situation you choose for installation, understand if the equipment installation is inclusive as you purchase. Also, factor in what exact details are under the installation agreement.

5. How long does the warranty last?

When you buy equipment, you can guarantee one thing no matter how well the equipment is built, at one point, something will go wrong and need to get fixed. However, these issues should not occur early or even after using it for a few months or a year.

But, when you encounter an issue, what happens? The one who takes care of the costs depends on the length of your warranty and what it covers. Therefore, as you purchase this type of capital equipment, always check the warranty period and the conditions.

6. Is there equipment or machinery training?

6. Is there equipment or machinery training?

As you shop around, ask if they include training from an expert technician on maintaining and utilizing the equipment. If so, how many employees will get the training, how much is the training time, and expectations for ongoing support? Since training is a continuous process to understand better. Notably, many suppliers and manufacturers do not provide training without a service contract to cover the cost.

To sum up, it can be a complicated process to purchase machinery. But the questions above and others specific to your business come in handy in getting it right for your business. Although you want to be time-efficient, you also need to weigh the options to make the best purchase. Getting the purchase right is vital for your finances, employees, and business.

Read Also:

Content Rally wrapped around an online publication where you can publish your own intellectuals. It is a publishing platform designed to make great stories by content creators. This is your era, your place to be online. So come forward share your views, thoughts and ideas via Content Rally.

View all posts

Leave a Reply

Your email address will not be published. Required fields are marked *

Related

Camera Gimbal

6 Tips to Shoot Hyperlapses Quickly and Easily Using a Camera Gimbal

Hyperlapses are generally eye-catching. Traditionally, shooting a Hyperlapse video required you to attach your camera to a tripod as you carefully marked the ground distance. The ground was supposed to be an even one. However, this approach was slower and tiresome. Today, you don’t need a tripod. All you need is a DSLR camera gimbal or any handheld stabilizer that will work with your camera. The gimbal will allow you to shoot the Hyperlapses fast and easily. To achieve this, you need to observe the following 6 tips. 1. Set Your Camera Right: You start by fitting the camera firmly on the gimbal. This will enable you to shoot the Hyperlapses in a stable way. Then, you should adjust the digital camera to shoot either 4K videos or short-interval shots. Thee 4K setting is better since it allows you to add the ramping speed afterward. Lastly, If the footages are not stable, erase the tracking points. 2. Walk Cautiously When Shooting: Shooting with a gimbal doesn’t give you the freedom to walk unsteadily and fast during the production. You need to walk uniformly and slowly to ensure that the quality of the Hyperlapses is not compromised. Once you press record, you should walk towards your target with the gimbal level well-maintained. A handheld gimbal will deliver stable Hyperlapses provided that you don’t hurry the shots. 3. Shoot Longer than Necessary: For the sake of post-production editing, it’s important to shoot the Hyperlapses longer. You have to remember that Hyperlapses are often unpredictable. With longer footages, it becomes easy to omit the unstable parts and keep the stable ones. Moreover, the editing is fast-achieved. 4. Always Focus on a Fixed Point: You can do this by switching to the lock mode. The mode allows you to shoot the Hyperlapses easily and not to lose the focus. You shouldn’t lose your target as this may cause the gimbal to fail you. You just need to prioritize on achieving a better view during the entire shooting path. 5. Enhance Motion Blur with ND Filters: People in motion and blinking cars may interfere with your Hyperlapses by limiting your exposure. To enjoy longer exposures during a daytime shooting, you should enhance the motion blur. The best way to do it is to use the ND filters. While encouraging longer exposures, the filters enable you to shoot amazing still images that are good in quality and balanced. 6. Create Parallax By adjusting the Gimbal Settings: Finally, it’s important to create parallax if you want a different motion dimension in your shots. To create parallax, you should: Open the gimbal assistant software to access the control panel feature. Click on it and adjust the shutter speed to the lowest value possible (one second). Once you are done, you can press record and start to shoot. Put simply, a handheld gimbal can help you shoot quality and stable footages. The experience is enjoyable but you have to do it right. With the above 6 top tips, you can be able to shoot Hyperlapses comfortably with the stabilizer. This ensures that the post-production is also done seamlessly. Read Also: How To Pick The Best Trail Camera 2019 “Best Guide For The Users” What Is A CMOS Camera?

READ MOREDetails
Power Packs

What You Need to Know about Mini Power Packs

One of the more commonly used hydraulic power packs is the mini version. This is the smaller and less powerful iteration of power packs intended for applications that don’t require the same capabilities and size provided by standard units. They can be regarded as the mid-size hydraulic units useful in different settings. A good example of the mini-unit is the HPM mini pack. It is a good representation of the mid-size version of the standard hydraulic units. Learn about its general features, capabilities, and applications below. Essential Things To Know About Mini Power Packs    There are several factors that you need to take care off while you want to make use of the mini power packs for your gear pump. Features and specifications: You can find many mini power packs that have an aluminium casting at the centre, which securely connects the drive motor to the gear pump. In this setup, the liquid flowing through the gear pump is directed to a relief valve, check valve, and multiple directional control valves. The pumps are driven by 12V or 24V motors with power ratings ranging from 500 watts to 3 kilowatts. The pump sizes can be from 0.25cc to 9.8cc. The tanks, on the other hand, can hold 1 litre to 55 litres of liquid. Mini power packs can be in AC or DC variants. The AC version comes in 1 PH and 3 PH packs that are suitable for scissor lifts, dock levellers, car lifts, and the control of security barriers. They can handle a flow rate of 30 litres per minute and pressure of up to 250 bar. The DC version, on the other hand, has 12V and 24V variants with single and double acting valves. They are commonly used for stacker trucks, trailers, tailifts, and tippers. Applications: Mini power packs are intended for mobile, marine, and industrial applications. These include the use in security equipment, access control systems, tipping trucks, plant trailers, and scissor lifts. The mini packs are versatile enough for use in different settings. Some units equipped with 3-kilowatt 24-volt motors are commonly utilised in the ramps of plant trailers. There are those with 500-watt DC motors which are useful in the operation of step lifts. There are also light and compact power packs designed to be portable, so they can be brought to, and used, wherever they are needed. Again, as mentioned, the details presented here are centred on the mini hydraulic power packs created by Hydra Products. Other companies may use other terms and different sets of technical specs. However, for the most part, the features and applications are similar. If you get a comparable mid-size power pack from a different company, you will likely be able to use it for the same applications. You just need to remember that you have to scrutinise your power pack options carefully. Read the technical information to find out if what you are getting is the right unit to choose for your needs. You can consult the seller of the power pack system for guidance, or you can consult others who have the experience in using hydraulic packs, for informed insights. Read Also: Why Sensors Are Essential In Machine Automation Add Accuracy To Your Testing With The Help Of Multimeter

READ MOREDetails
Slide film

Top Ways Why It’s Important To Convert Your Film To Digital

There are many reasons why it's important to convert your film to digital. These benefits include saving time, improving image quality, and preserving your memories. Slide Film Lasts Forever If you are looking for a way to preserve your photos, you may want to consider preserving your old slides. Unlike negative film, which needs to be printed differently, slide film is stored forever and can be viewed for many years without loss of color or contrast. Most slide film is daylight balanced and provides excellent grain. Color slide film is typically found in a 50 to 400 ISO range. It can be developed at home or in a lab. The E-6 process is also available for the color film but is more sensitive to temperature than the B&W processes. The color of a slide is determined by the film type you choose and will depend on the sun's position and the amount of light in the room. A bright day will yield the best results, but you can use unexposed film with decent results. Slides can be scanned straight, or they can be cross-processed. However, cross-processing can produce a variety of odd colors. Some people use Instagram filters, which are created by cross-processing. To get the most out of your slides, it is important to understand how to clean them. This is the first step towards preserving them. You can buy slide film cleaner to apply to the entire slide. Once you've cleaned the slide, let it air dry. One common problem with expired slides is that they can become stained with dust and debris. Mold can grow on them, as well. These can lead to a number of problems, including uneven grain, spotting, and streaking. You can store the slide in a dark closet, but a better option is to place it in a box with a lid. In this way, you'll be able to protect the slide from moisture. When it comes to storing slides, a lot depends on how long you intend to keep them. If you plan on displaying them, it is recommended to clean them after you take them out of the box. If you're planning on scanning your slides, you'll need to have a scanner that can handle the image. The more pixels, the larger the print can be. Preserves Memories If you are in need of a quick and easy way to preserve memories then the best bet is to transfer film to digital media. A digital video or file will allow you to watch your video or picture whenever you like. It is also a safe way to store and share your digitized memories. You can also convert old films or videos to DVDs for a safer and easier way to access your memories. The first step in the process is to consider where you have stored your videos or pictures. Old media can degrade over time, making it difficult to retrieve and play back your favorite memories. However, digital media is more durable, allowing you to safely store and preserve your precious memories. In addition, a digital copy of your old memory is easier to share with others, and it is more likely to remain intact for future generations to enjoy. Digital files can be stored on your computer, hard drive, or in the cloud. Using a flash drive or USB device is a great way to transfer your digitized memories from your hard drive to someone else's. As you can see, preserving your old home movies is an important part of preserving your memories. Converting your films to DVD or digital media allows you to easily share and view your memories, and to have them for years to come. By using a professional media conversion service, you can ensure that your memories are properly preserved. While it is true that converting your films to digital media is not the easiest task, it is not the most complicated either. In fact, it is quite simple to do. Just be sure to follow these simple steps to ensure that you make the most of your old photos and video. The biggest benefit of digital conversion is that you can now safely share your memories with anyone you choose, anytime you want. In addition, digital files can be shared over the internet, which makes it possible to share your favorite videos or pictures with friends and family. Improves Image Quality The film-to-digital transfer is no longer a novelty. Its many advantages include reduced storage costs, the ability to view images in their original form, and a plethora of viewing options. However, it still requires a light source and exposure in a camera. Luckily, there is a plethora of companies offering the film to digital conversion services. Although there is no single best way to go about the process, a bit of careful thought will ensure a successful and memorable transfer. A little research will also ensure a hassle-free experience. This is particularly true if you are converting an existing home theater system. You might even be able to enjoy your favorite movie on the cheap. For instance, a quality 8mm film to digital transfer is around $5 per foot of film. In addition, you may be able to save a bundle by opting to convert it to a DVD. Alternatively, you can have your favorite films and television shows transferred to Blu-ray Discs, which are available for less than a hundred bucks. One of the most difficult parts of the film to digital transformation is deciding which software to use. Fortunately, there are a number of companies that offer the most up-to-date technology, and the most competitive prices. Most of them offer a money-back guarantee and are available in a wide variety of formats. Choosing the best provider will ensure a smooth transition from old to new-school cinematic experiences. From there, you can decide whether or not you want to stick with one medium or move on to the next. Read Also: A Digital Asset Management Solution Overview Saves Time If you want to preserve your family's cherished memories, consider converting film to digital. There are several ways to accomplish this, and the process doesn't require much of your time. In fact, you can convert your film into DVDs or files on your computer, and you can even send them via email or through the cloud. You don't have to buy special storage for your movies, and you can share them with your friends and family members. Unlike digital formats, film and VHS tapes aren't going to last forever. They degrade by up to 20% every 10 to 25 years. This means that if you don't want to lose your old footage, you need to start transferring your films to digital files as soon as possible. If you've been storing your films on an old reel, you may need to invest in a converter box. The best ones will be able to accommodate various formats, including 16mm, Super 8, and 35mm. When you're ready to begin, you'll need to connect your device to a PC or Mac. Once the conversion is complete, you'll be able to store your films on your computer or flash drive. It's important to keep in mind that your film can also collect dirt, fingerprints, and other elements. So, you need to clean it out before converting it. Also, make sure you back up your files on an external hard drive or a cloud service. Taking the time to transfer your films to digital files can help ensure your favorite memories are protected and will stay that way. It can also save you a lot of space in your home. Depending on your budget and the type of digital format you choose, you can have your video converted to a DVD or stored on a hard drive. If you're unsure about whether or not your video will work, you can hire a professional to convert your movie for you. Some companies even offer a free conversion kit, which can be a great option if you don't have the money to spend on conversion. Converting your film to digital can be a fun and nostalgic experience. But, it isn't as simple as it sounds. Before you start, you'll need to scan the negatives. Read Also: Top 5 Electronics Gadgets To Buy From Amazon US EaseUS Data Recovery Wizard Free, The Best Free Software For Data Recovery

READ MOREDetails