Published on: 05 November 2018
Last Updated on: 24 February 2020
Glacing is a process where you preserve fruit in sugar syrup. The process helps in making the fruits sweeter and allowing them to last long. Usually, you can find glace fruits in cakes, bread and other types of pastries. The most common fruits are pears, cherries, and plums. They already taste great as whole fruits, but the flavours come to life, even more, when you choose the glazed version. If you are running a pastry business, you might be familiar with glace fruits as you use them often.
You can choose to glace the fruits if you want to use homemade glace fruits for your business. To glace them, you need to have a pound of fruit that you want, four and a half cups of white sugar and a half cup of corn syrup. It is an excellent idea to glace them at once to avoid going through the entire process several times.
You can peel the fruits or slice them into quarters depending on the type of fruit that you are glacing. You will then place the sliced or peeled fruits at the bottom of the saucepan. Add water, and allow it to simmer until it becomes tender. Take the fruit out of the saucepan and place it on a shallow dish. Remove the water from the pan except for about a cup. Add a half cup each of the sugar and corn syrup into the water. Turn the heat on until the sugar starts to dissolve. Allow it to boil and place the mixture over the fruit. Let it stay there overnight.
On the following day, take the syrup out and place it in a pan. Add another half cup of sugar and allow it to dissolve in heat. When the mixture boils, start putting in the fruits again. After a while, take everything out and transfer it to a container where you can leave it for the next five days. Repeat the process, and keep the fruits there for the next two days. After another repetition, the syrup will start looking like honey. Return the fruits to the mixture and let them soak there for about ten days to 3 weeks.
It is up to you to decide how long you will allow the fruits to soak in the mixture. After that period, take the fruits out from the syrup and arrange them on a wire cooling rack. Let the fruits dry in a warm place or put them inside a dehydrator. Once you can no longer feel a sticky surface, you can take the fruits and place them in a jar. If you want to eat the fruits, you can rehydrate them or put them directly on cakes and pastries.
You don’t need to go through this process:
It might seem like a long process to glace fruit. Aside from the effort, you put into it, you also need to wait for quite some time before you can finally use the fruits. If you are running a pastry business, you already have a lot on your plate, and you don’t want to waste more time to glace the fruits. If you don’t want to wait, you can buy them online. You can find stores that sell glace fruits in bulk. You can get them at a low price too. As long as you don’t see chemicals or preservatives added, it is okay to use these glace fruits.
Content Rally wrapped around an online publication where you can publish your own intellectuals. It is a publishing platform designed to make great stories by content creators. This is your era, your place to be online. So come forward share your views, thoughts and ideas via Content Rally.
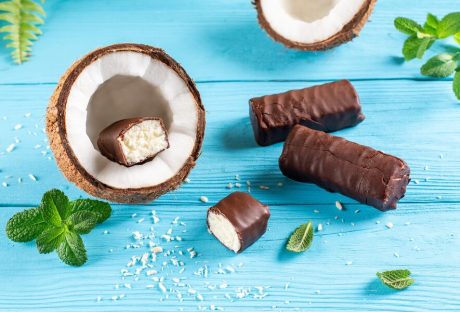
Have you ever eaten a protein-based coconut bar and tasted just how satisfying they are? Offering flavors that take your mind to the sun-drenched beaches of the Caribbean, coconut products like these get your mouth watering when you know you’re about to take one out of your day bag and eat it. It’s one of life’s little pleasures.
As a low-carb, high-fiber snack, it’s great for bedding down your hunger, but did you know that the humble coconut offers a bunch of health benefits? Well, they do, and by reading on, you’ll understand just what a wise move including them in your diet really is.
The fruit of the palm tree is cultivated around the planet, being used in many different types of cooking and health-food products. As we’ll see in a moment. However, the range of body support this natural food source provides is surprisingly extensive.
Ways The Coconut Bar Helps The Body
So, aside from the delicious taste, what exactly do coconut products like these do for your health? We’re glad you asked, and here are five ways that they assist…
1 - Bacteria-Fighting Power
One of the first great things about your average coconut bar is that it’s able to prevent the growth of particular strains of bacteria. Studies have shown that coconut is particularly helpful as oil, at the same time stemming the growth of bacteria like Streptococcus.
Since coconuts are naturally antiviral and antibacterial, they can actually help you safeguard your immune system. A hefty immune system is critical for helping you prevent diseases as well as illnesses.
2 - Packed With Nutrition
Coconut is different from many other types of fruit in that they contain mostly fat and not carbs. They are also known to contain a range of vital minerals, as well as B vitamins. Also on offer is manganese - something that’s great for supporting your bones.
Copper and iron also exist in coconut, boosting the health of your blood vessels. A coconut bar is packed with satiating fiber as well as digestion-friendly ingredients. It never fails to provide minerals such as iron, zinc, magnesium, copper, and manganese.
3 - Blood Sugar Stabilizing
Being low in terms of carbohydrates means that coconut does not cause those blood sugar spikes you get after a typical candy bar. As such, they help to keep your blood sugar levels nice and stable, and the fruit is even thought to be beneficial in preventing insulin resistance - a problem that causes misery for many.
A study found that HDL cholesterol levels improve significantly on consuming coconut oil for 8 straight weeks. It also enhances triglyceride levels and ultimately reduces blood sugar.
4 - Free Radical-Busting
Free radicals are elements in our environment that cause cell damage. We’re talking about things like pollution and stress, and again, coconut comes to the rescue with its innate antioxidant compounds that hold them at bay. Battling them in this way helps to keep you looking younger and feeling great.
Coconut, in any form, has hydrating properties. Electrolytes in it help to hydrate and regulate the fluid balance in our body. Moreover, they also help regulate muscle contraction and blood pressure.
How To Choose The Right Coconut Protein Bar?
Protein bars are not just snacks, they are the prime energy sources for fitness freaks. While choosing the right one might be daunting, the process should never go unnoticed. Thus, the last thing you would want is to select the wrong coconut protein bar for yourself. Here are some tips to opt for the right protein bar enriched with the goodness of coconut.
Check The Protein
A coconut bar offering 10 grams of protein, at least, in every serving might just be the right one for you. Proteins help the body to build muscles extensively and also recover after rigorous exercise. Further, it enables the stomach to remain full in the middle of meals and fulfills cravings.
The Carbohydrate Factor
A coconut bar offering carbohydrates of less than 10 grams is excellent for your health. If that amount exceeds, chances are you will have an increased fat amount in the body. This further results in more carb cravings which are not good for your fitness.
Sugar
A coconut protein bar offering more than 6-8 grams of sugar on each serving is fine. Manufacturing companies usually add sugar alcohols and artificial sweeteners to enhance the taste. But these added sugars take a toll on your health. In a coconut protein bar, avoid sugar alcohols such as mannitol, erythritol, and sorbitol, to name a few.
Cut Down Fats
Search for coconut protein bars that have increased healthy fats and reduced saturated fats. If your bar has trans fats, it is best to avoid it. Healthy fats present in protein bars consist of nuts, coconut oil, seeds, and nut butter. Always search for a coconut bar that has no trans fat, as it can affect your health significantly.
Calories
Last but not least, you will have to consider the calorie factor of your coconut protein bar. For men, a protein bar must consist of calories between 170 to 250 per serving. On the other hand, a coconut bar should have 140 to 200 calories in each serving. Considering this might help you reap significant health benefits.
A Regular Coconut Bar Is A Great Way To Stay Healthy!
So, as we can see, the coconut is a bit of a hero when it comes to human health. Busting free radicals, stabilizing your blood sugar, fighting bacteria, and supplying you with essential minerals and vitamins, it’s one of the best types of snacks you can put in your body.
One thing is for sure, you don’t get this kind of body support from a candy bar, so why not consider switching to something that’s no less tasty but so much better for you in the long run? Like the sound of something sweet without the guilt? It would seem coconut protein bars might just be the answer!
Read Also :
The Top 10 Best Foods To Eat In Early Pregnancy
Foods To Eat On A Low-Carb Ketogenic Diet
Fish fillets are a versatile and convenient seafood option, offering a healthy and delicious base for countless dishes. Their popularity stems from their ease of preparation, having already been cleaned, deboned, and portioned, ready for the pan or oven. But beyond their culinary appeal, fish fillets offer a fascinating journey from the ocean's depths to our plates.
Understanding the world of fish fillets involves delving into various aspects, from the different types and their origins to the various factors that influence fish fillets prices. This article will serve as your guide, uncovering the secrets of this delicious and nutritious food source.
A Variety Of Flavors And Textures
Fish fillets come in a dazzling array of varieties, each boasting unique flavors, textures, and nutritional profiles. Some of the most popular choices include:
Salmon: Renowned for its rich, oily texture and vibrant pink hue, salmon fillets are a versatile option for grilling, baking, or pan-frying. They are also an excellent source of omega-3 fatty acids, crucial for heart health.
Cod: This mild-flavored white fish offers a firm texture and versatility in cooking methods. Cod fillets are perfect for fish and chips, baking with herbs and lemon, or incorporating creamy sauces.
Tilapia: A light and flaky fish, tilapia is a budget-friendly option with a delicate flavor. It absorbs marinade well, making it ideal for experimentation with various spices and herbs.
Dory: This white fish boasts a firm texture and a slightly sweet flavor. Dory fillets are often used in fish tacos, baked en papillote, or served with a simple lemon butter sauce.
Snapper: This firm-fleshed fish features a sweet and delicate flavor. Snapper fillets shine on the grill or baked with fresh herbs and vegetables.
Exploring Different Origins
The origin of a fish fillet can significantly impact its flavor, texture, and even price. Here's a brief overview of some prominent fishing regions:
Atlantic Ocean: This vast body of water provides popular species like cod, salmon, and haddock.
Pacific Ocean: A haven for tuna, mahi-mahi, and numerous other flavorful fish.
Mediterranean Sea: Renowned for its abundance of sea bass, dorada, and branzino.
South China Sea: Offers a diverse range of fish, including tilapia, grouper, and bream.
Unveiling The Factors Affecting Fish Fillet Prices
Understanding the various factors influencing fish fillet prices allows for informed decision-making. Here are some key considerations:
Species: Certain types like salmon and tuna generally command higher prices due to their popularity and demand.
Fishing method: Sustainable practices like line-caught or wild-caught fish often carry a premium compared to farmed fish.
Freshness: The fresher the fish, the greater the price, as it ensures optimal flavour and quality.
Processing: Filleting and packaging processes can add to the cost of the final product.
Seasonality: Some fish are available year-round, while others have specific peak seasons, impacting prices.
What To Look Out For When Procuring Fish?
When you are procuring fish fillets from the market, be it for regular use of special domestic occasions, you have to be mindful of some of the important points. It helps you understand your requirements. The following guide can help you get the best fish fillet from the store.
Firstly, you must get the fresh fishy smell when you walk into the store. It is one of the main indications for getting the best fish from the store.
Secondly, look that the fish is on the ice and the ice is clean. You must take a look at the elements that have a direct relationship with the hygiene and taste of the fish. The fillets must look firm and not rugged.
Rugged marks on the fish indicate that they are mishandled. Also, try to learn when the fish is frozen. This way, you could understand your needs and requirements. It is one of the ways to get fresh fillets.
You can also get an idea of the freshness of the fish by giving a good look at the different body parts. Fishes with a shiny surface and also slime on the surface is one indication that it is fresh fish. The fins of the fish must be clearly defined. It is one of the hallmarks of getting fresh fish. Moreover, getting the best quality is undoubtedly one of the hallmarks of great taste. Hence, you have to understand it here to better understand it.
Maintaining The Quality Fish Back Home
It might be that you procured fresh fish from the store. But that does not imply, you are consuming it that very day. So you must preserve it well in your home when buying the best fish. Here, we discuss some ways you can maintain the high quality of the fish by storing them back in your home.
Once you have made your purchase, you must ensure that you give the fish the ice it requires. You can take containers with ice. After buying them from the freezer, you can offer them freshness. Whenever the fish is brought out from the ice, it starts degrading.
Store your fish in the coldest parts of your freeze. It is one of the ways to keep your fish fresh for a longer time. You can also use the salt to preserve the freshness of the freezer for a couple of days before eating. However, you must try to use your fish fillets as soon as you buy them from the store. It is the best way to consume them. It's simple… eat the fish when it is fresh.
Sustainability And Ethical Considerations
As with any food choice, it's crucial to consider the environmental and ethical implications of our seafood consumption. Opting for sustainably sourced fish fillets, certified by organizations like the Marine Stewardship Council, ensures a healthy ocean for future generations.
Conclusion
Fish fillets are a delicious and convenient way to incorporate seafood into our diet. By understanding the diverse varieties, their origins, and the factors influencing their prices, we can make informed choices while enjoying the bounty of the sea. Remember to prioritize sustainability and ethical practices to ensure a healthy and vibrant ocean for years.
Read Also:
The Diet To Follow For A Healthy Gut
Why A Pescatarian Diet Is Beneficial
Why have a diet chart for weight loss?
Are you that lucky cocktail party host this weekend among your friends? If you are, then you must be wondering what exception you can make this time that people will love.
We know that you can manage the ‘cocktail’ part. So, we have gathered seven delicious & exotic snacks for your next cocktail party that will win the hearts of your guests and makes you the star host of the month!
However, these snack ideas are so overwhelmingly good that people may request you to make them again and again. Here, you will find quick and easy dishes to prepare, although you may need to visit the supermarket to get the ingredients.
Without further ado, let’s get started with the recipes so that you can pick which snacks you want to prepare and make the list of ingredients.
1. Salmon Tartines for Fish Lovers
Recipes with Salmon and avocado are always a delicacy; when you prepare it with wasabi, it will deliver a heavenly feel with your fast bite. And guess what, you need only 15 minutes to make it.
Ingredients:
To prepare this dish, you have to gather the following ingredients:
Puff pastry,
Sashimi-quality salmon,
Mirin,
One avocado,
Low-sodium soy sauce
Ginger,
Lime juice,
Caster sugar,
Rice vinegar, and
Wasabi paste.
Cooking Method:
To prepare the recipe, follow the steps below:
Preheat the oven to 200 degree Celsius and cut the pastry according to your preferred shape; place them on a lined tray over the baking paper and bake for 10-12 minutes till golden in color and allow them to cool down. Your tartine base is ready.
While baking, process the avocado with wasabi. To do that, take a small pan and dissolve sugar in water over low heat. When it cools down, take an avocado, wasabi, lime, and sugar in a blender, add salt or any other seasoning if you want, and set aside.
Prepare a dressing by mixing mirin, vinegar, soy sauce, and ginger in a small pot.
After you have prepared everything, take a pastry base and place avocado, salmon, and cress. Serve with a drizzle of dressing.
2. Elk Jerky Cheeseboard for Slow Eaters
How about serving an Elk Jerky cheeseboard at your cocktail party? This cheeseboard is a great addition to the food you can serve because it not only has a posh vibe but also serves a unique version of your regular charcuterie board due to the gamey elk.
Elk goes well with many reds including Cabernet Sauvignon, which can complement this strong-flavored jerky with its earthy notes. You can also pair it with lighter-style cocktails made from scotch, gin, or tequila, as they go well with these types of dried meat.
You can add a variety of cheese to such a board, including emmental, brie, gouda, and blue cheese.
3. Carrot Muffin for Sweet Tooths
If you want to prepare a carrot muffin for your cocktail party ahead of time and you love baking, then this dish is a must for you to try.
Ingredients:
This dish is easy to prepare and only needs eight ingredients.
They are:
Yogurt (Greek style),
Ready mixture for making carrot cake,
Carrots,
Pecans,
Eggs,
Aperol,
Pure cane sugar, and
Vegetable oil.
Cooking Method:
To prepare the recipe, follow the steps below:
First, you will make a labneh. Take a bowl and set a fine sieve over it. Put the yogurt inside, wrap it with the sieve, and hang it over the bowl in the refrigerator overnight.
Preheat the oven to make muffins at 170 degrees Celsius.
Grate the carrot coarsely and mix it with the cake baking mix. You can add pecans to the mix.
Take the muffin glasses, and bake them for at least 35 minutes. To make sure they are evenly baked, insert a skewer in the center, and if it comes out clean, your muffins are ready.
If you want to soak the muffins with Aperol syrup, place water, sugar, and Aperol on a small pan and keep stirring until the sugar is dissolved over medium heat.
Place the muffins in a line and pour syrup over them. Let the muffins soak in the syrup for 5 minutes.
Add the icing mix with labneh to make frost, and use your creative ideas to décor the muffins.
4. Four Crispy Buffalo Wings for Savory Hunters
Nothing can beat the taste of chicken wings. And the crowd will devour it within a minute if you can make it extra crispy outside and juicy inside. Here’s the recipe:
Ingredients:
To make Buffalo wings, you’ll need the following:
Chicken wings (defrost if frozen),
Baking powder,
Salt,
Butter,
Franks hot sauce,
Sugar.
Cooking Method:
To prepare the recipe, follow the steps below:
Tap the wings with tissue paper to absorb the extra water after washing. Toss the wings with baking powder and salt; it will absorb the extra moisture from the chicken's skin, making it crispier.
We are not using hot oil in this recipe as we are going to bake the wings. The science behind baking the wings and making them crispy is to start baking using low temp at first and increasing the temp after a few minutes. Set the tray on the lower shelf of the oven at 250F/120C.
Low temperature will melt the fat first, and high temperature will make the skin super crispy when you place the wings on a higher oven shelf at 425F/220C.
5. Sausage Rolls for Meat lovers
You know that your friends love meat. But you don’t want to worry about arranging a bbq in the backyard. So, prepare these bite-size sausage rolls to calm the meat cravings of your guests.
Ingredients:
To make sausage rolls, you’ll need:
Pork,
Onion & Garlic,
Breadcrumbs,
Puff Pastry,
Bacon,
Fennel Seeds,
Salt & Pepper.
Cooking Methods:
Follow the easy-peasy steps below to cook off sausage rolls:
Take a pan and cook bacon, onion, garlic, and celery,
Mix with the pork,
Place the puff pastry, put the mix on it, roll it over, and cut it into small portions.
Place them on a baking tray and brush with egg.
Bake them for 30 to 40 minutes until golden brown.
This snack serves its best when you are keeping the option of exciting games at your party. Whether it’s a two-player board game or a multiplayer one, people can have more fun when they have something delicious to eat.
6. Coconut Shrimp for Peaky Eaters
Every party has those guests who will not eat anything that’s too oily or too sweet. To tackle those peaky eaters, you can cook coconut shrimp, which will go well with whiskey cocktails.
If you are not hiring any bartenders and decided to become one for the day, check out these whiskey cocktail recipes for home bartenders!
Ingredients:
You will need the following items for this quick bite.
Jumbo Shrimp,
Flour,
Shredded coconut,
Beaten egg,
Pepper,
Pranko breadcrumbs,
Garlic powder,
Oil and salt to taste.
Cooking Method:
Follow the steps below to have the best shrimp dish of your life.
Wash the shrimp and season them in a bowl with pepper and salt,
Take two flat dishes. Mix flour and garlic powder in one of them; in the other, mix coconut and breadcrumbs.
Take one shrimp and dredge it in the flour mixture; after that, dip it in the beaten egg and dredge again in the coconut mix. Follow the steps for each shrimp.
Refrigerate for an hour (or overnight if you want to prepare the night before and serve hot the next day).
Deep fry in a pan full of oil till golden brown color and season with salt and pepper after the whole batch is done. Place them on a baking sheet with a cooling rack so that they can absorb the dripping oil.
Serve it with sauce or mango salsa.
7. Salsa for Lazy Hosts
When it comes to cocktail parties, you need easy, quick recipes that will take less time to prepare so that you don’t get stuck in the kitchen while others are enjoying the evening, and this salsa will take only two minutes.
Ingredients:
Here goes the items you need to get together:
Crushed tomato,
Coriander leaves,
Green chiles,
Garlic,
Lime,
Jalapeno,
Cumin, and
Sugar.
Serve with tacos, fajitas, burritos, nachos, or quesadillas. You can buy them at any store.
Cooking Method:
All you need to do is blend all the ingredients mentioned above. However, make sure to use good quality canned tomatoes, if not fresh ones. You need to blend for a few seconds and see the consistency. Keep blending if you like it smoother.
But don’t blend too much if you like it chunky.
Conclusion:
With this list of seven delicious & exotic snacks for your next cocktail party, you will be able to welcome your guests with warm hearts and warm food on the counter.
Even though cocktails are the main stars of your party, these bite-size, easy-to-prepare snacks will make your evening even better alongside the drinks. Prepare the snacks while ensuring the recipes have variety, such as spicy, sweet, savory, vegetarian, and non-veg options.
Read Also:
14 Whiskey Cocktail Recipes For Home Bartenders
Tips And Suggestions On How To Wear Cocktail Dresses
Why should you go to a pool party in Vegas?