Ads.Google.Home: Create Google Ads And How

by

08 July 2023

Google

ads.google.home

Do you want to try to use Google Ads to your benefit, the first thing that you need to do is head over to ads.google.home. Don’t know what it is and how it can help you? Well, I have you covered!

In this article, I will focus on the benefits of using AdSense and the ways of successful Adsense login. I will be focusing on the ways in which you can create ads on the platform and create money to boost your business.

And, if that is something you want to do, you will find this article to be of help. Keep reading this blog till the end to learn more…

Ads.Google.Home: What Is It?  

Ads.Google.Home What Is It

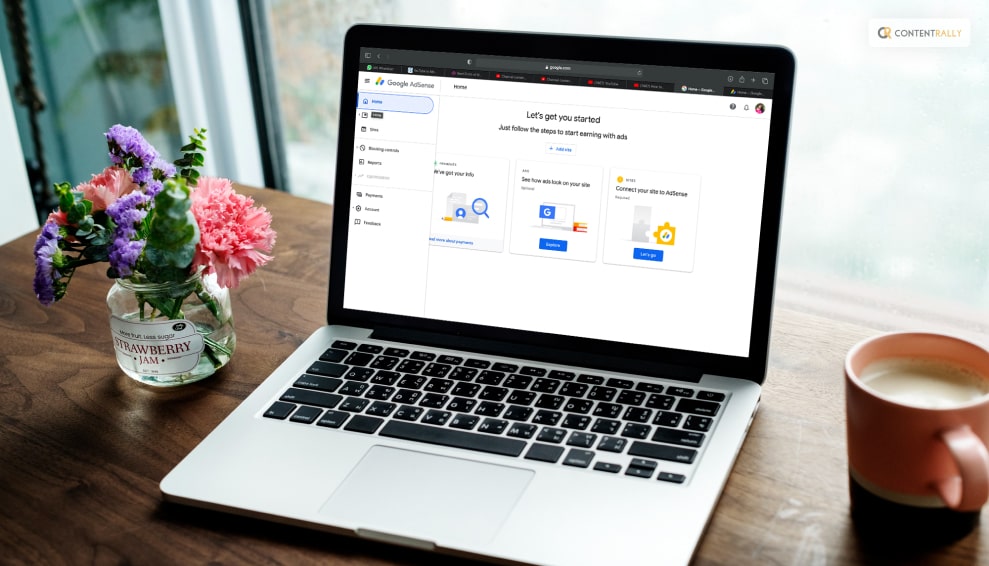
To keep it short and simple, ads.google.home is the URL of Google’s AdSense home page. Entering this on your address bar of the search engine, helps you to head over to the official site of Google Ads. From there, you can choose your plans and create ads that suit your strategy of boosting your business.

With the help of Google Ads, get in front of customers when they use Google Search and Maps to look for businesses like yours. You will have to pay just for the results, such as website clicks or phone calls to your company. This is undoubtedly one of the major benefits of digital marketing in recent times.

Now that you know what it is, it is time to find out how to make it work for you. So, keep reading till the end to learn about setting up Google Ads for your business…

Ads.Google.Home: How To Set Up Google Ads?  

Ads.Google.Home: How To Set Up Google Ads?  

If you are interested in setting up Google Ads, I have you covered! Here are the steps that you need to do to set up your account and find the best ways to earn money through the ads that you put in:

1. Understand The Terms That Are Used  

The first thing that you need to do when creating or using the Google Ads platform, is to know the terms that are used here. Some of these are as follows:

  • Keywords: These are the key phrases or words that users enter into Google Search to make your ad appear. You will choose a list of keywords for your ad campaign that you believe potential customers may use to find what you are selling.
  • Bid: This is the most you will spend when someone clicks on your advertisement. Because with Google Ads, you only pay when someone clicks on your ad to phone you or visit your website.
  • Quality Score: This indicator lets you know how closely your keywords relate to both your ad and your landing page, which is the website that users will be directed to after clicking your ad. Your bid prices can be reduced and your ad rank in the search results can be increased with a high Quality Score.
  • Ad Rank: When your ad is triggered to display on Google, this measure aids in determining where it will appear in relation to other ads. Your bid, Quality Score, and other factors are used to establish your rank.
  • CPC (cost-per-click): the exact sum you pay when a user clicks on your advertisement. You don’t have to pay the whole amount of your bid price for each click; this only establishes a range of potential costs-per-click you might incur.
  • Conversion: An action you’ve identified as vital is called a conversion when someone who has clicked on your ad then completes it, such as completing a purchase, subscribing to your email, or giving you a call.

2. Organize Your Ad Account  

How can your account be made successful right away? Create categories for your products or services to use as the foundation for your account structure. (An excellent choice is to utilize a structure similar to the one your website already uses.)

The ads.google.home or Google Ads account is divided into two organizational levels: campaigns (the higher level) and ad groups (the lower level; each campaign may contain several ad groups). Consider campaigns representing broad business categories and ad groups as reflecting more specialized, compact sets of goods or services.

To ensure that someone searching for “glitter glue,” for example, doesn’t accidentally encounter your ad for “embroidery thread,” you should create distinct campaigns, ad groups, ads, and keyword lists for each of your items. This will keep your ads relevant and prevent people from concluding that you don’t have what they’re looking for.

Your ability to attract customers who are specifically interested in what you have to offer increases with the level of focus and specificity of your adverts.

3. Set The Budget For Your Campaign  

You can manage your spending with Google Ads by adjusting two separate settings: your daily budget and your bids.

Your daily spending goal for each campaign is your budget. Your bid is the sum you’re prepared to spend on a keyword in the event that someone searches for it and clicks your ad.

Spreading your overall budget, or the sum you want to pay for your entire account, evenly among your campaigns when you first start out can be a good idea until you determine which strategy works best for your company.

However, generally speaking, you should base your campaign budgets and bid quantities on the objectives of your firm. For instance, if you want to increase sales of your “kids crafts” products one month, you should think about increasing the budget for that campaign and decreasing it for a different, less significant one.

If something isn’t working, you can change your budget and bids at any time to suit your needs. You should choose a bid that will help your ad get a good position while remaining within your budget when setting bids for your keywords.

4. Select The Keywords  

The objective of choosing keywords is to select phrases that you anticipate users will type into search engines when looking for what you have to offer. Additionally, you want your keywords to be as pertinent as possible to the advertisement they activate and the landing page visitors will see after clicking that advertisement.

The Keyword Planner, a free tool included with Google Ads to assist you in getting started, can produce a sample list of keywords for your campaigns. I would advise reading through the list of ideas and utilizing only those that make sense for you.

You can use the Keyword Planner to determine how much to pay for a specific keyword in order for your ad to appear in search results. This might help you determine which keywords will fit within your spending limit and which are too pricey for you to bid on.

A keyword will often cost more to bid on the more competitive it is. Avoid high-competition keywords when you’re initially starting out to prevent blowing your entire budget on a few clicks. By sticking with low- to medium-cost keywords, you can still gain a lot of exposure and measure the effectiveness of your campaigns.

5. Set The Match  

You can further customize when your ad will appear on Google by using the “keyword match type” parameter in the Google Ads dashboard. You have five choices to choose from:

Broad Match  

With the “broad match” option selected, your advertisement appears for queries that include both related terms and your keywords in any order. The default setting for all campaigns, this option displays your ad in the widest range of queries.

Broad Match Modifier  

You can use this parameter to specify which terms from your broad-match keyword must appear in a user’s search in order for your ad to be displayed. Therefore, you could guarantee that “wool” and “yarn” were always present in a search if your keyword was “high fiber wool yarn” by inserting a plus sign (+) before those words. As a result, high fiber + wool + yarn would be your broad match modifier keyword.

Phrase Match  

For searches that include your precise term, as well as searches that include your exact keyword plus words before or after it, this option displays your advertisement. (For instance, if “wool yarn” is your keyword, you might also appear when searching for “fine wool yarn” or “wool yarn for sale near me.”) If you decide to go with this approach, any keywords—for example, “wool yarn”—should be encircled in quote marks.

Exact Match  

When you select an exact match, your advertisement will only appear when a user searches for the precise term or phrase you specify. Put your keyword in parentheses for this choice, such as [wool yarn].

Negative Match  

With this match option, you may sift out irrelevant visitors by preventing bad terms or phrases from activating your advertisement. For instance, if all of your yarn is expensive, you might want to avoid using adjectives like “bargain” or “cheap.” You can do this by placing a minus sign in front of the phrases, such as “cheap” or “bargain,” that you don’t want to appear for.

6. Organize Your Landing Page  

When a potential customer clicks on your advertisement, they land on your landing page. visitors may locate what they’re seeking more quickly by selecting a page that’s relevant to your ad and keywords.

For example, if your ad is offering a deal on yarn, choose a landing page where that yarn is prominently shown rather than just sending visitors to your website’s main page.

7. Select The Device  

Do your ideal clients conduct their searches on desktop computers, mobile devices, or both? Are those who want to make an immediate online purchase more important to you to reach than consumers who are out and about shopping?

Consider the client categories you want to engage with when setting up your ads.google.home account (and, more significantly, the devices those customers use). So you can reach them.

Consider showing your advertising just on mobile devices, for instance, if you own a car repair shop and want to draw clients when they’re close and in need of assistance.

8. Create Your Ads  

Make sure your advertisement conveys that you have what they need because it will likely be many people’s initial impression of your company. This is made possible by segmenting your campaign into distinct ad groups and creating individual ads for each. For example, a yarn-promoting ad for your yarn keywords and a craft-promoting ad for your craft materials.

This is made possible when the ad really contains the keywords consumers search for. Your ads will become more pertinent to potential buyers as a result, and your Quality Score may even go up.

Additionally, it’s a good idea to include a “call to action” in your advertisement, which is a brief statement that advises the reader on what to do after reading your advertisement. For instance, words like “shop now” or “learn more” can persuade viewers to click on your advertisement.

Before publishing your ad, review it one more time to ensure that there are no grammatical or spelling issues.

9. Connect Google Account To Analytics  

A free option to gain additional information into how visitors interact with your advertisements and website is through Google Analytics. However, you aren’t required to use Analytics in order to use Google Ads, so feel free to move on to the next section if you’d rather.

While Google Ads can show you how many times your ads are clicked, combining ads.google.home with Analytics allows you to monitor what those visitors do once they arrive at your website.

For instance, your advertisement may not be reaching the intended audience if visitors come to your website but then leave right away. Or you could be directing them to the incorrect part of your website. You can organize your adverts more effectively with the aid of this information, thus maximizing the use of your marketing budget.

10. Make Money!  

Well done! You are prepared to launch your campaigns and evaluate their effectiveness. Don’t forget to return often to monitor which advertisements and keywords are generating the most traffic and conversions for you. You should eventually be able to identify which tactics are assisting you in achieving your goals and which still require improvement.

Wrapping It Up!  

In case you wanted to find out more information on ads.google.home, I hope that this article has been of help to you. If there are any other queries related to the same, kindly feel free to let me know. All that you need to do is scroll down till you reach the bottom of the page, Then leave your comments and queries in the box below. And I will be there to answer them all for you!

Learn More About:

Ankita Tripathy loves to write about food and the Hallyu Wave in particular. During her free time, she enjoys looking at the sky or reading books while sipping a cup of hot coffee. Her favourite niches are food, music, lifestyle, travel, and Korean Pop music and drama.

View all posts

Leave a Reply

Your email address will not be published. Required fields are marked *

Related

how to change google play country

Breaking Boundaries: A User’s Manual On Altering Google Play’s Country

This is an opportunity that comes once a year. But this can be useful for just about anyone. For instance, you decide to move to a different country which could require you to change the country on Google Play to access certain application that is available in select regions. Other than local entertainment books and movies, there are essential services like banking, food, and commuting to be considered, which is dependent on the geographical location Google can detect. But it must be kept in mind that this location cannot be changed or switched back for the next year. You will also not be able to utilize the previous balance you may have had on Google Play from the country you changed from. You need to use this amount before you change to another location. Also, don't forget to cancel subscriptions that you will not be using. If you want to know how to change Google Play country on your device to download and access apps from other regions, we have the best tips for you. This article will help you understand why you cannot access those apps and how you can. How To Change Google Play Country On Desktop?   On your internet browser, enter pay.google.com, then click on Settings. Select Payments profile. From there, go to Country/Region. Click on the pencil icon that will allow you to edit. Google will then ask you to make a payment profile for the lew region or country you select. Select Create a new profile and follow the steps that take you forward. Once the process is completed, the Store will change the location to the new one you just selected. Sometimes the changes can take up to 48 hours to get processed to match the current IP address. If you are not in a different location, you will have to use VPN. If you don’t find the option for Country and Profiles, it could mean that Google is not allowing the country to change. Various factors could lead to this, like you have changed location recently, or you are in a country that does not allow changing of region. In case you are abroad for a short while, and you require an app to be available that is also available in your home location, simply run a search on. Sometimes the same app is also available in other countries. How To Change Country On Google Play On Phone?   Open the Google Play Store app on your phone or tablet. Click on your profile at the top right corner to access Settings. After that, click on General and the Account and device preferences from the next menu. Choose the country you have to add to the Google account in the Country and Profiles section. Here Google will show countries that are related to the IP address of your present country. You have to physically be in a different region or use VPN to access other locations. Select the country available and go through the steps with the on-screen instructions in order to add the payment method for the desired country. Using A VPN To Change Google Play Country   Once your IP address changes, the region or country of the Play Store will also change. One way to change the location is to trick the app into thinking your location has changed with the help of a VPN. For this, you will need to clear out your cache and data. You will also need a valid payment method for the country you choose. How To Change Google Play Country Without Payment Method?  If you want to change the Google Play country without having to add a payment method, here is how: Connect to a VPN server in the region you want the location to change to. Create a new Google account that does not have a payment method linked to it. Clear all the backed-up data you may have on your device. This you can do by going to settings and clicking on Apps, selecting the Play Store App, and clicking on Clear Data. Now open the app using the new account. Your location should now change to the new region you selected. How To Change Google Play Country On iPhone?   For users trying to change the region of iOS devices, it is possible to do so with a little tweak here and there. You can change the country setting to show you apps based on your IP address. If you can actually move to a different country, well and good. If not, you can use some help to switch regions for any device running on iOS. Third-party apps like Aiseesoft AnyCoord can help you change your location. It can help you switch IP addresses on iPhones iPads, and even Macs. What Happens To My Google Play Pass When I Change Countries?  Google Play Pass subscriptions are set to automatically renew. If it is available in the country you are in, it will remain untampered. Even if it is not available, you can get access to the apps that you already have preinstalled on your device. But when you change location, you will not be able to install or check out other apps on Play Pass. Whereas other apps will not be available at all. Wrapping Up   If you want to know how to change Google Play country on your device, we hope this article helps. If nothing else is worse, a VPN is always a good resort. It can easily change your IP address and make apps accessible to you that you need while being in a region that does not permit its use. You must also keep a payment method handy in case you need to sign up with one. Or you could simply open a new Google account to make your situation easier. It is an easy process, all you need to know is how to use technology to your advantage and not let you stop from experiencing life. If you have thoughts to share or questions to ask, please leave a comment below. We would love to hear from you! Keep Reading: Google Play Movies: Your Ticket To A World Of Film And Fun Google Play Gift Card Balance: Everything You Need To Know About It Google Play Cancel Subscription: The Ultimate Guide To Managing Your App

READ MOREDetails
Google Play Cancel Subscription

Google Play Cancel Subscription: The Ultimate Guide To Managing Your App

Are you searching for how to cancel a subscription on Google Play? Well, you are not the only one. In the fast-paced digital age we live in, it's common for many of us to sign up for various app subscriptions. These subscriptions can range from streaming services to premium versions of our favorite apps. Thus promising a world of convenience and entertainment at our fingertips. However, as time goes on, we often find ourselves with a growing list of subscriptions, some of which we no longer use or need.That's why it is important to understand how to cancel these subscriptions on Google Play! If you were looking for a guide to the same, you have reached the right place! So, keep on reading this article till the end to learn more… Why Cancel A Subscription On Google Play?   The decision to cancel a subscription on Google Play is not one we can take lightly. There are several valid reasons why you might want to drop a subscription. Understanding these reasons can help you make an informed choice about your digital expenses. By understanding the reasons why you might want to cancel a subscription, you can make more deliberate choices. These can be about the services you choose to subscribe to. Thus, you can ensure that your money is being used to enhance your digital experience. Let us delve into the reasons behind why you might consider canceling a subscription on Google Play! 1. You No Longer Use It   It's common to download an app or sign up for a service with the best intentions, only to find that you rarely use it after the initial excitement wears off. Life gets busy, and our interests change. That fitness app you subscribed to a few months ago now collects virtual dust on your phone. Simply because you've found other ways to stay active.  Perhaps you subscribed to a news app but have since switched to other sources for your daily headlines. In these cases, canceling the subscription frees up your digital and financial space for services you value and use. 2. Financial Reasons   We all have to manage our finances, and sometimes subscriptions can accumulate to the point where they strain your budget. When you take a closer look at your bank statement, you might realize that you're paying for many subscriptions. Some of which you've forgotten about or no longer find valuable.  It's essential to focus on your spending. Canceling unused or less essential subscriptions can help you. How? Well, simply by redirecting your money to things that matter more. 3. Trial Period Ends   Many apps and services offer enticing free trials to get you hooked. While these trials can be an excellent way to test a service, they often automatically convert into paid subscriptions once the trial period ends. If you've tried out a subscription service during a free trial and found it's not what you were looking for, you'll want to cancel before it starts costing you. This prevents unexpected charges and ensures you're only paying for services you genuinely want. 4. You Got What You Needed   Sometimes, you subscribe to access specific content or features, and once you've obtained what you need, continuing the subscription may no longer be necessary. For instance, you might have subscribed to a streaming service to binge-watch a particular series. Once you've watched it, you've essentially achieved your goal, and there's no need to keep paying for the service. In such cases, canceling the subscription allows you to move on without ongoing costs. Understanding Google Play Subscription Types   To effectively manage your subscriptions on Google Play, it's essential to grasp the two main subscription types offered: in-app subscriptions and Play Pass. Each type serves a unique purpose and is billed differently. Let me break them down to help you make informed decisions about your digital subscriptions. 1. In-App Subscriptions   In-app subscriptions are the most common type of digital subscriptions on Google Play. They are subscriptions you buy through a specific app or service. Your Google Play account then bills these subscriptions. Examples of in-app subscriptions include streaming services like Netflix and music streaming platforms like Spotify Premium. Here's what you need to know about in-app subscriptions: App-Dependent: In-app subscriptions are entirely dependent on the app or service you're using. These subscriptions typically grant you access to premium features, content, or an ad-free experience within that specific app. Billed Through Google Play: When you subscribe to a service through an app, the payment is processed via your Google Play account. This means that your subscription charges are consolidated, making it easier to manage multiple subscriptions in one place. 2. Play Pass   Play Pass is a subscription service offered directly by Google. It provides subscribers with access to a curated selection of apps and games on the Google Play Store without ads or in-app purchases. Some of the apps and games available through Play Pass include Stardew Valley, Monument Valley, AccuWeather, and Pocket Casts, among others. Here are the key points to understand about Play Pass: Google's Subscription Service: Play Pass is a subscription service provided by Google itself. Unlike in-app subscriptions, it's not tied to a specific app or service but rather grants access to a variety of apps and games. Monthly Billing: Play Pass operates on a monthly billing cycle. You pay a fixed fee each month to access all the included apps and games. This fee is billed through your Google Play account. Diverse Content: Play Pass offers a diverse range of content, including games, productivity apps, fitness apps, and more. It's an excellent choice if you want to explore various apps without ads or in-app purchases. Free Trials: Google often offers free trial periods for Play Pass, allowing you to test it out before committing to a subscription. Accessibility: Play Pass can be accessed by multiple family members, making it a cost-effective option for households with multiple Android devices. Choosing The Right Subscription Type   Understanding the difference between in-app subscriptions and Play Pass is crucial for effectively managing your digital subscriptions on Google Play. Each type caters to distinct preferences and needs, whether you're looking to enhance a specific app's functionality or explore a curated selection of ad-free apps and games. The choice between in-app subscriptions and Play Pass depends on your specific needs and preferences: In-App Subscriptions: Opt for in-app subscriptions if you're particularly fond of a specific app or service and want to unlock its premium features. This is the choice for personalized subscriptions tailored to your unique interests. Play Pass: Consider Play Pass if you enjoy exploring a variety of apps and games and prefer an ad-free experience across multiple applications. It's an excellent choice for those looking for diverse content without additional costs. How To Cancel A Google Play Subscription?   Managing your app subscriptions on Google Play is a crucial aspect of responsible digital spending. Whether you're looking to cut costs, declutter your digital life, or simply unsubscribe from a service you no longer use, understanding how to cancel your subscriptions is essential. Here are some of the things that you can do to cancel your Google Play subscription: Method 1: Using The Google Play Store App   1. Open the Google Play Store: Begin by locating and tapping on the Google Play Store app icon on your Android device's home screen or in your app drawer. This opens the Google Play Store, your gateway to managing subscriptions. 2. Access Your Account: In the top-left corner of the Google Play Store app, you'll see three horizontal lines (often referred to as the "hamburger" menu). Tap on these lines to open a menu. Scroll down this menu until you find the "Subscriptions" option, and tap on it. 3. Select The Subscription: Inside the "Subscriptions" section, you'll see a list of all the subscriptions associated with your Google account. Browse through the list and locate the subscription you wish to cancel. Once you find it, tap on it to access its details. 4. Cancel Subscription: Within the subscription details, you'll see an option that says "Cancel subscription." Tap on this button to initiate the cancellation process. 5. Confirm: Google Play will prompt you to confirm your decision to cancel the subscription. Take a moment to review the details, including the date until which you'll have access to the service, and ensure it's the correct subscription. Once you're certain, tap "Cancel subscription" once more to confirm. 6. Done: Congratulations, your subscription is now canceled! You'll retain access to the service until the end of your current billing period, after which you won't be charged further. Using the Google Play Store app to manage your subscriptions offers a user-friendly and convenient way to cancel subscriptions directly from your Android device. It's a quick process that puts you in control of your digital expenses, ensuring that you only pay for the services you genuinely need and want. Method 2: Using The Google Play Website   Using the Google Play website to manage your subscriptions offers the advantage of a larger screen and may be more convenient if you're already working on your computer. It's a simple and effective way to keep your digital expenses in check and ensure you're only paying for the services that truly matter to you. Here's a step-by-step guide: 1. Visit The Google Play Website: Open your web browser and navigate to [play.google.com](https://play.google.com). 2. Login: Sign in to the Google account that is associated with the subscription you want to cancel. Make sure you're using the same account you used when you subscribed to the service. 3. Access Subscriptions: Once you're logged in, you'll see a menu on the left-hand side. Click on "Subscriptions." This will take you to a page that lists all your active subscriptions. 4. Choose The Subscription: Locate the subscription you wish to cancel from the list. It will display the app or service name, the renewal date, and the cost. 5. Cancel Subscription: Click on the "Manage" button next to the subscription you want to cancel. This will take you to the subscription details page. 6. Confirm Cancellation: On the subscription details page, you'll find information about the subscription and a "Cancel Subscription" option. Click on it. 7. Review And Confirm: Google Play will present you with the details of the cancellation, including when your access to the service will end. Carefully review this information. If you're sure you want to proceed, click "Cancel Subscription" once more to confirm. 8. Completion: Congratulations, you've successfully canceled your subscription using the Google Play website. You'll continue to have access to the service until the current billing period expires. Managing Multiple Subscriptions   If you're juggling multiple subscriptions, staying organized is crucial. Here are some tips to help you manage them effectively: 1. Keep Track: Make a list of all your subscriptions, including the renewal dates and costs. Apps like "Truebill" or "Bobby" can assist in tracking your subscriptions. 2. Prioritize: Review your list and determine which subscriptions are essential and which can be canceled. 3. Set Reminders: Use calendar reminders or apps to notify you a few days before a subscription renews. This gives you time to decide whether to keep or cancel it. 4. Bundle Or Share: Some services offer family or group plans. Consider sharing costs with friends or family members to reduce expenses. 5. Be Vigilant: Periodically review your bank or credit card statements to ensure you're not being charged for subscriptions you canceled. Troubleshooting Common Issues   While canceling subscriptions on Google Play is usually straightforward, you might encounter some issues. Here's how to address a few common ones: 1. Forgotten Account: If you can't remember which Google account you used for the subscription, check your email for billing receipts. This will often show the associated account. 2. No "Cancel" Option: If you don't see the "Cancel subscription" option, it might mean the subscription isn't billed through Google Play. Contact the app's support for assistance. 3. Refund Requests: If you believe you were charged for a subscription you canceled, contact Google Play support within 48 hours. They can investigate and possibly issue a refund. Wrapping It Up!   So, go ahead and take charge of your subscriptions. Cancel what you no longer need, enjoy the services you love, and keep your tech life in balance. Your wallet will thank you, and you'll have a newfound sense of control over your digital world. In case you were searching for ways to cancel your subscription to Google Play, I hope that this blog has been of help to you. If there are any other queries related to the same, feel free to let me know. All that you need to do is scroll down till you reach the bottom of the page. Then leave your comments and queries in the box below. And I will be there to answer them all for you! keep Reading About: Why Should You Look Into Google Drive Alternatives? These Music Streaming Services Can Get Your Groove On How Was Google In 1998? | Google 1998 Easter Eggs And More Everything You Need To Know About Google Play Refund In 2023

READ MOREDetails
Google Adsense Login

Google Adsense Login: How To Login To Google AdSense Efficiently?  

If you want to learn about the best way of monetizing your website traffic then AdSense is the way to go. Every year, Google is known to pay over ten billion dollars for its content publishers. Without any contracts and with a quick AdSense setup, site owners can now earn high revenues from their released web content. This platform is also free to access for all and the site owners get paid for impressions or clicks on the displayed Google Ads on the website. Pre-Requisites   Before creating an Adsense account, one must go through the following requirements: One must have an active Gmail account. Probably one that is not linked to an AdSense account. A person must also be over eighteen years old. This is a minimum age criterion that needs to be met.   The website must meet the terms of service of Google. Steps To Creating An AdSense Account   If you want to create an AdSense account then you need to follow the steps that I am going to discuss below: Step 1:   First, one would need to visit the official AdSense website and click the "Get Started" button. Step 2:  Next, one would need to sign in to the Google account. If someone does not have a Google account then one more would need to be created. Step 3:   Next, the user would be directed to a page with a Google AdSense sign-up button. A user would need to click on it for signing up for the AdSense account. Step 4:  Then enter the URL of the site that you would want the ads to appear on, in the given field. If you do not have any site yet then you can leave the field blank and click on the option stated as "I don't have a site yet". Step 5:   Next, a user would have to follow the instructions for connecting the website to AdSense. They are then going to provide the user with a snippet of the code that one must add to the website. Step 6:   Adsense actually allows a person to choose whether they would like to send performance suggestions and aid. It would be for the better if you opt for this facility. A user can also choose not to select that option. This option can be changed later as well. Step 7:   Then, a person would need to select their country for payment, where they will be sent a PIN through the mail. You must remember to choose the option carefully as the field once entered cannot be modified later on. Step 8:  Lastly, you would need to go through the terms and conditions and then click on accept. You would then be signed in to your Google AdSense account. Then a user can access the platform by clicking on the "Start using AdSense" option. Login To AdSense Effectively   After you are done creating an AdSense account, you can adsense sign in/log in to it whenever you want. Frequently, the users struggle a lot to find the AdSense account's login or google adsense login page. A user simply has to visit the same page they visited in order to create an AdSense account. This time they would need to click on the Sign-In button instead of getting started. Then just sign in to the Google account by entering both the email and password. Tips: If someone faces any problem they can contact Google Adsense support, to get any kind of help they need regarding the workings of the Google AdSense platform. Frequently Ask Questions (FAQs):-   Here are a few frequently asked questions regarding Google AdSense: Q1. Does Google AdSense Pay Monthly? Ans: The AdSense payment cycle actually gets circulated monthly. One gets their estimated earnings over the span of a month, and then at the beginning of the following month the earnings are finalized and posted to the balance on the Payments page. Q2. What Is The Minimum Earning For AdSense? Ans: At least for the United States region, one needs to get $100 in AdSense earnings for meeting the threshold and getting paid. Q3. Does AdSense Money Expire? Ans: In case the cash does not reach the payment threshold, the money is going to remain in the AdSense account until the next payment cycle gets completed. The build-up amount then gets transferred to the person at the end of their next payment cycle. Q4. Can AdSense Account Be Sold? Ans: A site can be sold, but one certainly cannot sell or transfer their AdSense account.Why is my AdSense revenue low? Q5. Why Is My AdSense Revenue Low? Ans: Drop in earnings can actually be caused by anything from the irrelevant ads being displayed to a drop in the CPC or even because of invalid clicks. The cause though must be determined on a site-by-site or account-by-account basis. Q6. Can I use AdSense From Youtube? Ans: AdSense is a Google program that lets its creators and allows them in the Youtube Partner program to get paid. To start getting paid on youtube, one must set up an AdSense account from within the YouTube Studio. To Wrap It Up!   Google AdSense is a place one should definitely consider investing in as that really helps out in getting a brand’s name out there. That was all for information regarding all one needs to know about Google Adsense Login. Thank you for reading up till here. I hope you found the information useful. Let me know in the comments your thoughts on the same. More Resource: Best SEO Tools For Ranking The Website How to Maintain WordPress Website for Free? 7 Advantages of Using Website Design Templates

READ MOREDetails