Published on: 25 December 2019
Last Updated on: 24 February 2021
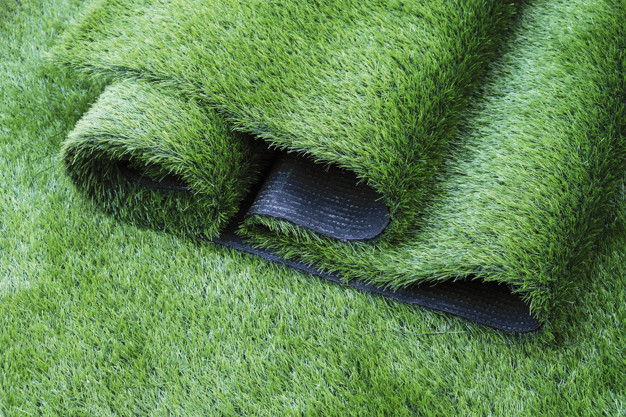
The best part of summer is finally getting to spend time with your family. Lawn games are a perfect way to bond and stay in shape at the same time. And playing on artificial grasses makes it even more fun, as you don’t have to worry about damaging it.
More and more people are deciding to use artificial grasses for back gardens. You might ask – why? Well, apart from the fact that it is durable, it is also very cheap and requires low maintenance (mainly because you don’t have to mow it). Because of these reasons, people are slowly changing from natural grass to fake one – they don’t have to care for it, they can just leave it be.
Want to know what are the best games in which you can play on an artificial lawn? If you do, you just have to keep reading.
Best Games To Play On Artificial Grasses:
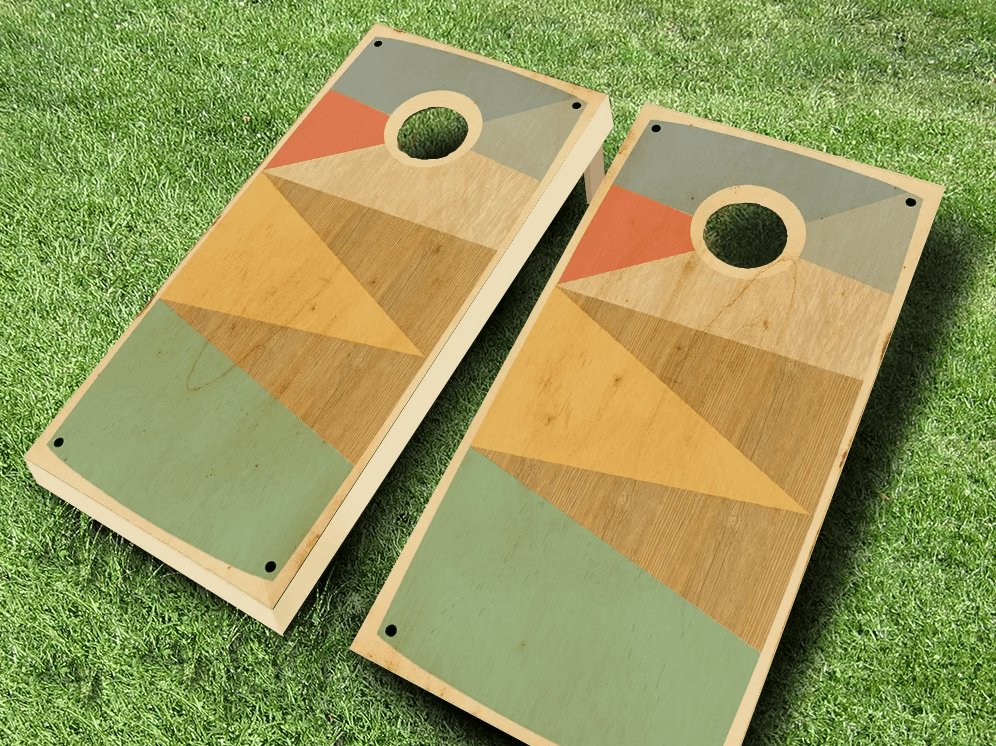
1. Cornhole:
Cornhole is one of the most popular lawn games – its popularity has been growing mainly in the last few years. In this game, two teams stand across from each other, trying to toss small bags into holes that are on the planks in front of them. You can either make the set by yourself, or you can buy one is a local shopping center.
Artificial grasses is perfect for this game, as the surface on which you are playing must be flat. It makes the game fair, as no team has an advantage over another. Another thing is that you can play this game even after heavy rain as artificial grasses dries very quickly, in contrast to natural grass that gets too sloppy for it.
Cornhole is a game that everyone can enjoy, no matter the age or physical condition – you don’t need to be an athlete to have fun. With almost no risk of injury, it’s a safe and enjoyable game.
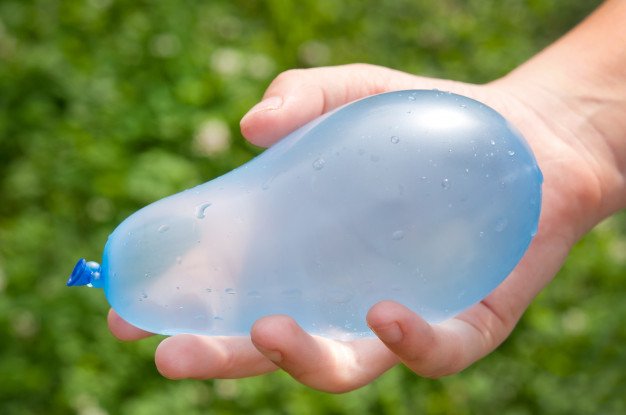
2. Water Balloon Fight:
A water balloon fight is an ideal game to play during the summer when the days are hot. Furthermore, artificial grasses is a perfect surface for playing it. Firstly, if you have kids, you can make sure that they don’t get hurt by adding extra cushions beneath the lawn. Also, cleaning empty balloons is an easier task if you have artificial turf.
Another thing is that thanks to the lawn’s drainage system, the grass won’t get soggy or slippery as the water will be quickly removed from it. Lastly, since you don’t water your lawn, you don’t have to worry about it getting too much water – it will be removed anyways.
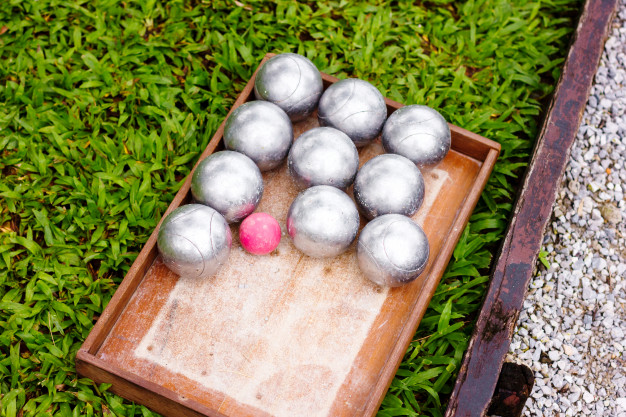
3. Bocce Ball:
Even though this game is more than a thousand years old, it has been gaining popularity again in the last few years. And lawn made out of artificial grasses is one of the best places to play it. Especially since for a game to be fair, there needs to be a flat surface – the height of the grass and the slope of the lawn can have an impact on the motion of the ball.
Since artificial grasses is very durable, it won’t allow any dips or holes to appear. Since it’s a simple game, you can easily play it with your children. You can buy a bocce ball set at any shopping centre, and if you’re looking for something more professional, you can try installing a bocce ball court in your backyard, so that you can play whenever you want.
4. Football:
Football is a big part of the culture in many countries. Families gather together to cheer on their favourite teams. It’s also a sport that people of any age can enjoy – it’s not unusual to play it on family parties. If your family loves to play friendly football matches against each other, you should think about installing an artificial lawn.
Natural grass can very easily get damaged if the game gets too intense, contrary to fake grass which is very durable. There’s also a smaller chance of you getting hurt if you play on the artificial lawn, as you can install a turf padding underneath. Interestingly, football teams were among the first people to embrace fake grass.
5. Ring Toss Games:
Ring toss games are an excellent option for those who want to play a fun game that doesn’t require any major skills. When you play it on the artificial lawn, you don’t have to worry about causing damage to it. Remember, however, that when buying the game, you should buy one that doesn’t require you to insert a metal stake into the ground.
You can also build it by yourself. All you need is a couple of wood boards that will support the stake. Drill or hammer the stake into the board and voilà – you’re all set to play.
Conclusion:
The artificial lawn is a perfect place to play many games, mainly because it’s very hard to damage it. It doesn’t matter what kind of game it is that you’re playing – the most important thing is that you have fun doing so and spend some quality time with your family by making them join you in it. Have fun!
Content Rally wrapped around an online publication where you can publish your own intellectuals. It is a publishing platform designed to make great stories by content creators. This is your era, your place to be online. So come forward share your views, thoughts and ideas via Content Rally.
Mint is a wonderful plant that practically cultivates itself. So fast is its growth that it can threaten to spread across and take over your entire yard or garden. One way to battle this is to confine its growth by planting it in a pot or a separate bed. However, once you have this plant, you will be glad, because it has properties that make it fruity and a great addition to tea and foods.
As can be seen here, it is also quite useful in health remedies that can aid digestion and relieve headaches. We know you already feel enthralled by this herb and would like to know more. So, why don’t you read on and discover more amazing things about mint…
What Mint is All About
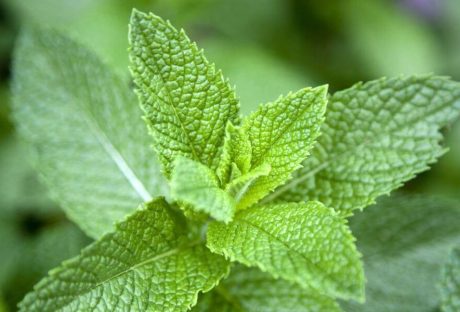
Mint is an herb that is perennial and has a very wonderful fragrance. Its leaves are toothed and may have tiny pink, white, or purple flowers. Mint has so many variants from crinkled or smooth, to fuzzy or shiny. However, one thing is constant despite what kind of variant it is; all mints have that wonderful fragrance.
Hence, whenever you pick up any variant of this great herb and roll it in your fingers, you would get the same smell that will make you either think of sweet teas, candy, or mint juleps.
Aside from being a wonderful kitchen companion, this herb is also used as ground covers, garden accents, herbal medicines, and air fresheners. Mints are functional as well as beautiful and can grow either in shades or under the sun. However, as we already said, this plant is a vigorous spreader; therefore, unless you want to have too much than you need, you have to be very deliberate about planting it.
Uses
We have already stated several things that mints can be used for, but there are still so many more benefits of this wonderful herb. Below are some of these benefits:
Can be used to make mint tea. To do this, simply put the leaves in a cup of hot water and then leave it to sit for some minutes.
Make tasty ice cubes with it by freezing the leaves with raspberries and cranberries.
Add it to a salad dressing, marinades, or fruit salad.
Use it to relieve headaches by applying It's oil to the temples.
It can also be used to relieve anxiety and stress.
Yes, mints have many other health benefits, but though not a practical use, it is also used as a virtue symbol.
Planting Mints
If you decide to plant mints in your garden or yard, then below are some important things that you have to know:
They flourish in light earth which has good drainage.
Their original habitats are stream banks, so, the site you plant them should imitate stream bank soils. That is to say, ensure the soil you plant your mints is moist but also well-drained.
Variegated mints should not be planted in direct sun as they require a bit of shade.
Mints typically grow to become one to two feet tall.
If you plant them in a container or pot, then you would need to topdress them with organic or compost fertilizer once in a few months.
If you plant mints in your garden, ensure to plant them next to tomatoes or cabbages, this will help contain their spread and prevent them from stealing your crops’ nutrients.
Care
Mints do not require that much care; however, you should consider the following points when caring for them:
If planted outdoor, use light mulch. You can visit https://www.thespruce.com/what-is-mulch-1402413 to read up more on mulch. The light mulch will ensure the soil remains moist and also help the leaves to stay clean.
If planted indoors, then ensure you water them often to help the soil stay evenly moist.
Mints should be picked and pruned regularly. Like we have stated many times already, these guys are fast spreaders, therefore, you would need a lot of pruning to stop them from taking over everything. This should not worry you since their roots are shallow making it quite easy to drag them out of the soil.
The Propagating
You do not need to do a lot to propagate mint. The perfect way to go about this is to find the plant which you like and then cut out of it. Ensure the cutting is at least 6 inches and has ample roots attached. Then plant them in the soil horizontally.
You can always get a cutting from a gardening friend, so this is nothing to worry about.
Harvesting and Storing
To learn how to harvest mint is quite easy, it typically does not involve any special skill. You may either pick the leaves individually, or you may use shears to prune the plant and then take off the leaves from the stem you had cut off.
Despite the harvesting process being relatively easy, you need to remember a few things when you harvest your mints:
Frequent harvesting will keep the plant at its best.
The younger leaves have a better flavor than the old ones.
You can pluck the leaves whenever you need mints.
If you need dry mints, then pluck the leaves before flowering and then save them in an airtight container.
You can also store fresh mints that you do not immediately have use for. To do this, put water in a glass and then put the stems inside the water. The mint will stay fresh for 3 to 7 days this way. You may equally put the mints inside a rubber bag and then store them in your refrigerator. This should keep it fresh for at least a week.
Conclusion
Mint is an herb that would make a very great addition to your garden or yard. But, without proper knowledge about the plant, everything may spiral out of control. Therefore, you must have basic knowledge about planting, caring for, and harvesting this plant before you farm it.
Read Also:
How to Maintain a Bright and Beautiful Garden During Winter
How to Choose the Right Containers for Your Container Garden
Grow these flowering plants in your home garden
How To Grow Tomatoes From Seed
If you have a small kitchen, you could find it challenging to organize it and keep your space clutter-free. When you continue to struggle with small kitchen storage, then it’s time to assess how you organize everything. This will help you maximize every inch of kitchen space and ensure that no valuable space is wasted. Top-rated house cleaning in Tucson goes over step by step how to accomplish this task.
How To Organize Small Kitchen
If you are struggling with storage space, here are a few affordable small kitchen storage ideas to make life a little easier.
1. Tension rod
No doubt, a small kitchen could mean having a tough time arranging essentials. But a tension rod can come in handy, especially to keep cleaning supplies safely. Hang your kitchen cleaning supplies from a short tension rod where they are easy to access. What’s more, you can hang rubber cleaning gloves on the tension rod. Your dish-drying towels too can be hidden from plain sight on a tension rod installed in the cabinet.
2. Use up the wall space
Another small kitchen storage idea is to leverage the wall space to store kitchen accessories. Free up the drawer space and use the walls instead of clutter-free storage. You may stash knives on a magnetic rack to make access easy when food preparation is underway.
3. Stack on the rack
One interesting small kitchen storage solution is to locate a bookshelf near the kitchen to store mist essential cooking supplies. You may leverage the space to stack spices, dishware, and even cookbooks.
4. Hang baskets
When it comes to organizing a small kitchen, baskets can come in handy to stack kitchen utensils and cleaning supplies. Better still, you may hang a couple of baskets above a sink to leverage the vacant space. It’s one of the best ideas to stack wet dishes and sponges for quick drying.
Another stylish kitchen storage solution is to hang a wire basket from the ceiling. It could be single or multi-tiered, depending on your storage needs. You can store potatoes, onions, garlic, and any other stuff that also adds visual interest to your kitchen.
5. Floating shelves
Another kitchen storage idea is to add a pair of floating shelves for that extra storage space. This comes in handy if your kitchen lacks room for cabinetry. Easy to install, floating shelves can be hung just about anywhere – even under the bottom shelf. You can hang hand towels, utensils, or coffee mugs.
6. Corner drawer
A small kitchen has little space. But with some creative ideas, you can create smart kitchen storage solutions. The corner drawer is one such space-saving storage idea in a small kitchen, especially for awkward corners. These drawers connect the corners diagonally. As a result, they can pack a lot of stuff that horizontal cabinets cannot.
7. Utensil drawer
When your small kitchen lacks space for crockery and silverware, opt for a built-in utensil drawer. One similar DIY solution, which is affordable as well, is to place stainless steel pots in a deep drawer that has little space. Use these pots for holding small kitchen accessories.
8. Adopt a pantry
Another way to make a small kitchen look bigger is to de-clutter the space by adding a pantry. It is a good storage solution that provides easy access while freeing up the burden on over-stuffed cabinets.
9. On-the-go space
A portable kitchen trolley is a handy addition to a small kitchen. Take it anywhere while it safely stores bulky items. It works like an excellent solution to wheel food to the dining table.
10. Wall-mounted cabinets
Get a little creative with the kitchen décor when you are looking for tips to organize a small kitchen. You may choose a mix of open shelves to show off your favorite cutlery and wall-mounted cabinets to keep stuff out of sight.
Leave some gap between the two to create the impression of extra storage. Picture ledges and hooks can free up the work surface and spruce up the décor.
11. Velcro strips
Velcro strips can come to your rescue in a small kitchen, where you are short on storage space. Attach these strips in two spots to hang towels and other similar stuff to save space.
12. File folders as racks
While a file folder sits empty in your garage, why not put it to the right use in the kitchen? You may be surprised to see that it can be used smartly to organize your kitchen. They come in especially handy to store your kitchen cleaning supplies. Just place all the supplies into the file folders and you do not have to worry about a shortage of space.
Read Also:
The New Trend: Drawer Boxes
7 Expert Hacks for Downsizing to a Smaller Apartment
Design your Kitchen According to Your Budget and Work in Organized Manner
Top Secrets That Slash Your Kitchen Remodeling Bill in Half
10 Unique Kitchen Hacks to Save your Time in Kitchen and Cooking
7 Unique Kitchen Design Ideas That Your Family Will Enjoy
If you are a gardener like me, you must have thought about harvesting greens that you eat at restaurants at your house. One of these days, I was with my friends from my university, and we were discussing the importance of eating veggies for staying healthy. And they could not figure out the best ways to effectively do so. Reading my previous blog about cilantro, Laila asked me, “how to grow and harvest asparagus?”
Well, surely asparagus is one of the most delicious and nutritious vegetables you can grow in your garden. But what a lot of people do not know is that it's also one of the easiest once you know how to harvest asparagus properly.
In this article, I will cover everything you need to know about harvesting asparagus, from when to start, how to cut, and how often to do it. Additionally, I will also share some tips on how to store and freeze asparagus, as well as the benefits of eating this green wonder.
So, keep on reading till the end to learn more...
How Does Asparagus Grow?
Before I dive into the seemingly difficult process of how to harvest asparagus, let me help you grow it.
Asparagus is a perennial plant that grows from a crown of roots that can live for up to 20 years. The crown produces spears, which are the edible part of the plant, every spring.
The spears grow rapidly, sometimes up to an inch per day, and can reach a height of 6 to 10 inches. The spears are harvested before they open into fern-like leaves, which are edible and tough.
Asparagus grows best in well-drained, sandy soil with a pH of 6.5 to 7.5. It prefers full sun and moderate temperatures and needs regular watering and fertilizing.
Asparagus can be grown from seeds or crowns, but crowns are easier and faster to establish. Crowns are planted in trenches about 12 to 18 inches apart and covered with 2 to 3 inches of soil. As the spears emerge, more soil is added until the trench is filled
Benefits of Asparagus
https://giphy.com/gifs/food-asparagus-taylor-lee-nicholson-pejh5q5BBXxi2m4PgF
Asparagus is not only tasty, but also healthy. It's low in calories and high in fiber, vitamins, minerals, and antioxidants just like spinach. It can help lower blood pressure, regulate blood sugar, support digestion, and prevent urinary tract infections.
Asparagus also contains a compound called asparagine, which is a natural diuretic that helps flush out excess fluids and salts from the body. Asparagus is also a good source of folate, which is essential for pregnant women and fetal development
When to Harvest Asparagus?
The first year after planting, you should not harvest any asparagus spears, as they need to grow and strengthen the root system.
The second year, you can harvest a few spears for a short period, about two to three weeks.
The third year and beyond, you can harvest asparagus for a longer period, up to eight weeks, depending on the climate and the health of the plants.
The best time to harvest asparagus is in the early morning when the spears are crisp and tender. You should harvest asparagus when the spears are about 6 to 10 inches tall, and before the tips start to open up. If you wait too long, the spears will become woody and bitter.
How to Plant and Care for Asparagus?
Asparagus is a long-term investment that can reward you with years of delicious harvests. However, it requires some planning and preparation before planting.
Here are some steps to follow to plant and care for asparagus:
Choose the Day
Choose a sunny and well-drained spot in your garden, preferably with sandy or loamy soil. Avoid areas where water tends to pool or where weeds are hard to control. Asparagus also needs plenty of space, so make sure you have at least 4 to 5 feet between rows and 12 to 18 inches between plants.
Prepare the Soil
Prepare the soil by adding organic matter, such as compost or manure, and adjusting the pH to 6.5 to 7.5. You can use a soil test kit to check the pH and nutrient levels of your soil. You may also need to add some fertilizer, such as 10-10-10 or 10-20-10, to boost the phosphorus and potassium content.
Dig it Deep
Dig a trench about 8 to 12 inches deep and 12 to 18 inches wide. You can make the trench longer or shorter depending on how many asparagus crowns you have. Asparagus crowns are the dormant roots of the plant that you can buy from nurseries or online. They usually have one-year-old or two-year-old crowns, which are more reliable and productive than seeds.
Fertilize
Spread some fertilizer along the bottom of the trench, about 2 pounds per 100 square feet. Then, cover the fertilizer with 2 to 3 inches of soil, forming a ridge in the center of the trench.
Placing the Plant
Place the asparagus crowns on top of the ridge, about 12 to 18 inches apart, with the buds facing up. The crowns should be slightly below the soil surface, about 1 to 2 inches deep. Do not bury them too deep, as this will delay the emergence of the spears.
Focus on the Crown
Cover the crowns with another 2 to 3 inches of soil, and water well. As the spears grow, gradually fill in the trench with more soil, until it is level with the ground. This will help protect the crowns from frost and weeds.
Add Mulch
Mulch the bed with straw, leaves, or wood chips, to conserve moisture and prevent weeds. You can also add some organic fertilizer, such as fish emulsion or seaweed extract, every few weeks during the growing season, to encourage healthy growth.
Keep in Mind
Do not harvest any asparagus spears in the first year, as they need to establish a strong root system. In the second year, you can harvest a few spears for a short period, about two to three weeks. In the third year and beyond, you can harvest asparagus for a longer period, up to eight weeks, depending on the climate and the health of the plants.
How to Harvest Asparagus?
Now, coming to the most important part that you wanted to know about. Let us talk about the ways to harvest asparagus!
To harvest asparagus, you need a sharp knife or a pair of scissors. You should cut the spears at the base, about an inch below the soil surface.
Be careful not to damage the crown or the emerging spears. You should also avoid cutting too many spears from one plant, as this will weaken the plant and reduce the yield. A good rule of thumb is to leave at least one-third of the spears on each plant.
You should harvest asparagus every day or every other day, depending on how fast the spears grow. You should stop harvesting asparagus when the spears become thinner than a pencil, as this indicates that the plant is running out of energy.
You should then let the spears grow into ferns, which will replenish the crown and prepare it for the next season.
How to Store and Freeze Asparagus?
Unlike lettuce, which you can store for more than a week, asparagus is best eaten fresh, as it loses its flavor and texture quickly. If you can't eat it right away, you should store it in the refrigerator for up to a week.
To keep it fresh, you should trim the ends of the spears and stand them upright in a glass of water or wrap them in a damp paper towel and put them in a plastic bag.
If you want to preserve asparagus for longer, you can freeze it. To freeze asparagus, you should first wash and trim the spears, and then blanch them in boiling water for two to three minutes, depending on the thickness.
Blanching is a process of briefly cooking and cooling the vegetables to stop the enzyme activity that causes them to spoil.
After blanching, you should drain and cool the spears, and then pack them in freezer bags or containers, leaving some space for expansion. You can freeze asparagus for up to a year, and use it in soups, casseroles, or stir-fries.
How to Prevent and Treat Asparagus Pests and Diseases?
Asparagus is generally a hardy and resilient plant, but it can still suffer from some pests and diseases that can affect its growth and quality.
Here are some of the most common problems that affect asparagus plants, and how to prevent or treat them:
Asparagus beetles
These are small, black or red beetles that feed on the spears and the ferns, causing them to wilt and turn brown. They can also lay eggs on the spears, which hatch into larvae that chew on the stems and leaves.
To prevent asparagus beetles, you should keep the area around the plants clean and weed-free, and remove any old or damaged spears. To treat asparagus beetles, you can hand-pick them and their eggs, or spray them with insecticidal soap or neem oil.
Fusarium wilt
This is a fungal disease that infects the roots and the crowns of the plants, causing them to rot and die. It can also cause the spears to become yellow, twisted, and stunted. Fusarium wilt is more likely to occur in poorly drained, acidic, or infested soil.
To prevent fusarium wilt, you should plant disease-resistant varieties, rotate crops, and avoid overwatering or injuring the plants. To treat fusarium wilt, you should remove and destroy any infected plants, and apply fungicides to the soil.
Rust
This is another fungal disease that affects the ferns, causing them to develop orange or brown spots and pustules. Rust can reduce the vigor and yield of the plants, and make them more susceptible to other diseases. Rust is more likely to occur in humid, wet, or shady conditions.
To prevent rust, you should plant resistant varieties, space the plants well, and prune any excess or infected ferns. To treat rust, you should apply fungicides to the ferns, and avoid watering them from above.
Crown rot
This is a bacterial disease that causes the crowns and the bases of the spears to become soft, mushy, and foul-smelling. Crown rot can spread quickly and kill the plants. Crown rot is more likely to occur in wet, compacted, or poorly drained soil.
To prevent crown rot, you should plant healthy crowns, improve the drainage and aeration of the soil, and avoid overwatering or injuring the plants. To treat crown rot, you should remove and destroy any infected plants, and disinfect the tools and the soil.
Bonus: How to Cook and Enjoy Asparagus?
There are many ways to cook and enjoy asparagus, from steaming, boiling, roasting, grilling, to sautéing. The key is not to overcook it, as it will become mushy and lose its flavor.
You should cook asparagus until it is bright green and crisp-tender, which usually takes about 5 to 10 minutes, depending on the method and the thickness of the spears.
You can season asparagus with salt, pepper, butter, lemon juice, garlic, herbs, cheese, or any other condiments you like. You can also pair asparagus with eggs, bacon, ham, chicken, fish, pasta, rice, or salad. Asparagus is a versatile and delicious vegetable that can complement any meal.
Wrapping It Up!
Asparagus is a wonderful vegetable that you can grow and harvest in your own garden. It's easy to care for, once you know how to harvest asparagus properly.
You should harvest asparagus when the spears are about 6 to 10 inches tall and before the tips start to open up. You should cut the spears at the base and leave some on the plant to grow into ferns. It would be best to store asparagus in the refrigerator for later use.
And yes, you should also enjoy the many benefits and flavors of asparagus, by cooking it in various ways and pairing it with different dishes. Asparagus is a springtime delight that you don't want to miss.
Learn More About:
Planting & Harvesting Mint
7 Health Benefits of Black Seed Oil
Spirulina: The Complete Plant Based Protein Source | Health Benefits


All Comments
Liam Jacobs
I truly appreciate your technique of writing a blog. I added it to my bookmark site list and will