How To Freeze Dry Food At Home Fast? – Steps To Follow

by

31 December 2024

Food

How To Freeze Dry Food

How to freeze dry food? – To freeze-dry your food, you need first to freeze your food and then dry it under pressure to remove water content. This process is called lyophilization.

In fact, it is one of the best methods to use if you want to dry your food. Actually, it is a common practice in both the pharmaceutical and food industries.

In this article, you will learn how to freeze dry food at home with simple methods. However, before that, you will also understand the freeze-drying process and the types of food you can freeze-dry.

Moreover, you will also learn the benefits of freeze-drying and essential tips to freeze-dry your food successfully.

Hence, to learn more, read on to the end of the article.

Understanding Freeze Drying

Understanding Freeze Drying

Freeze drying is a process where you remove water from a food material by freezing it. Then, you turn the ice into vapor by putting the item under pressure. Hence, you can see that this process is a dehydration technique where you sublimate the water in a product.

It means that the water content in your product changes from a solid state to a gaseous state (sublimation). Here, the water does not turn into liquid.

Generally, this method is helpful when you want to preserve any perishable materials. Here, the goal is to extend the shelf life of the material. In this case, you freeze the material and reduce the pressure. Then, you add heat to allow the frozen water in the food (material) to change directly to vapor.

How Does Freeze Drying Work?

How Does Freeze Drying Work

Freeze drying consists of three stages: freezing, sublimation, and desorption.

Here is an explanation of the three stages:

1. Freezing

This process involves freezing the food at a very low temperature. Generally, you have to freeze to -30 to -50°F.

2. Sublimation (Primary Drying)

In this stage, you have to pass mild heat over the frozen material while the material is under vacuum. Hence, the ice crystals vaporize into water vapor. After that, you remove the water vapor with the help of a vacuum pump.

3. Desorption

This is the second stage of drying. Here, you have to remove all the remaining moisture from the surface of the food.

Benefits Of Freeze Drying Food

Benefits of Freeze Drying Food

The following are the major advantages of freeze-drying that will benefit you a lot:

  1. Generally, the foods that you freeze-dry retain up to 97% of their nutritional value. For instance, the food retains vitamins, minerals, and antioxidants.
  2. Those foods have a long shelf life. Moreover, you do not need to store it in cold chains.
  3. Once you freeze-dry your food, you will end up removing 98% of its water content. Hence, you will reduce its weight by 90%. Thereby, it will be easy for you to carry that food on camping and backpacking trips.
  4. Freeze-dried food is easy to prepare. This is because you just have to add water to rehydrate them. Moreover, the shape and size of the food remains intact. Also, freeze-drying helps in preventing the growth of pathogenic organisms.
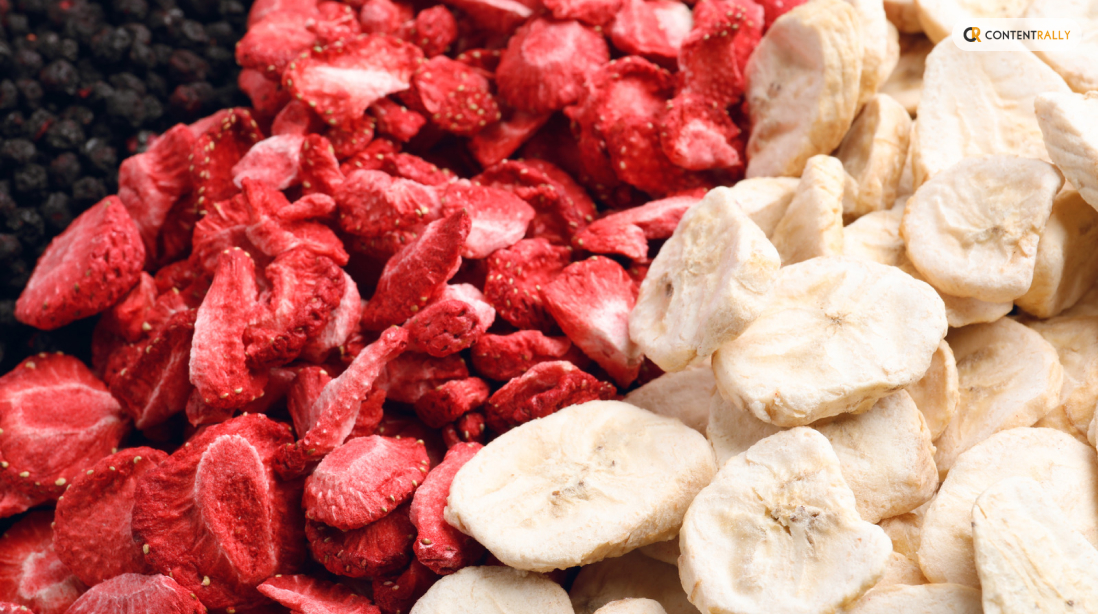
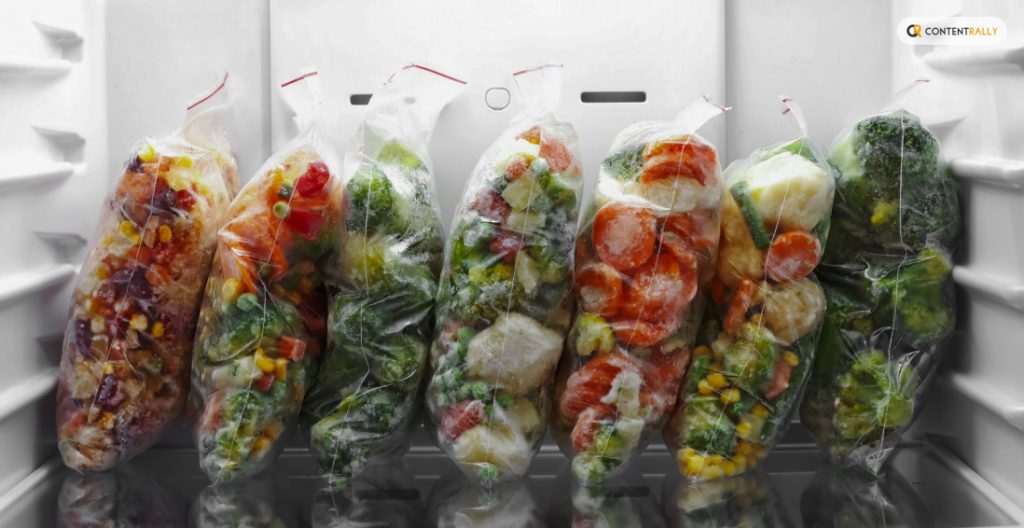
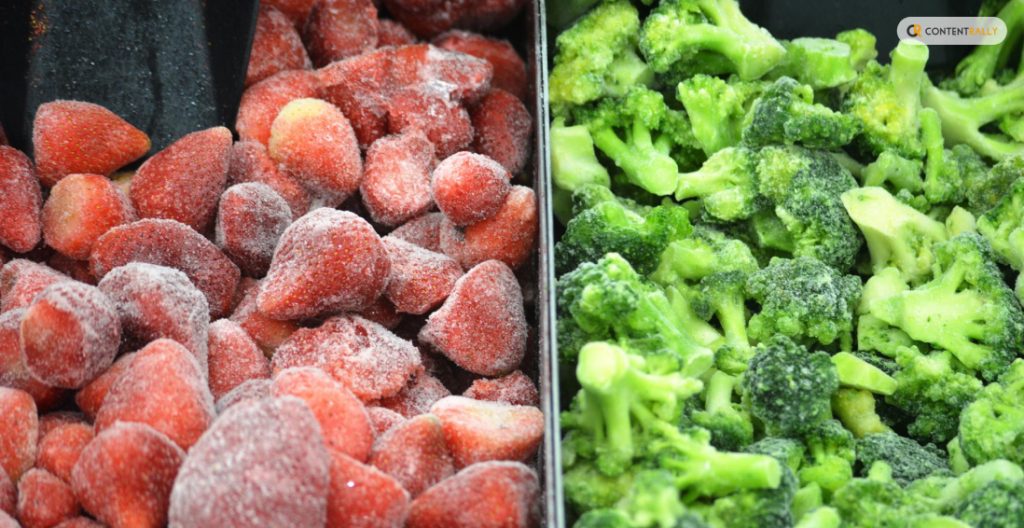
  5. You can preserve a wide range of foods with freeze-drying. This includes meat, fish, fruits, vegetables, eggs, ice cream, and more.
  6. When you freeze-dry food, it does not get brown or caramelize. However, this is quite common when you dry food traditionally.

How To Freeze Dry Food At Home?

How to Freeze Dry Food at Home

Here are the steps you must follow to freeze dry food at home:

  1. Wash your food items that you want to freeze-dry. Also, remove dirt and residues from the food. This way, you can ensure food safety.
  2. Cut your food into small pieces. This way, you can make the freeze-drying process faster.
  3. Place your food on a flat tray. Moreover, make sure to spread the food evenly. Basically, if you spread your food properly, you can freeze the food evenly.
  4. Place your food in your freezer, and set the temperature correctly. Then, place the food in your freezer for two weeks. Actually, you need this time to remove the moisture in the food.
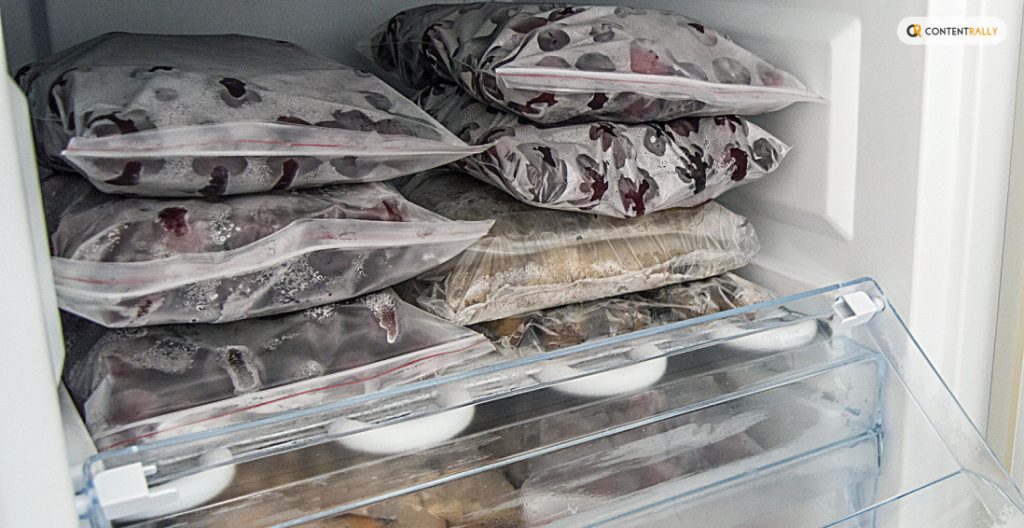
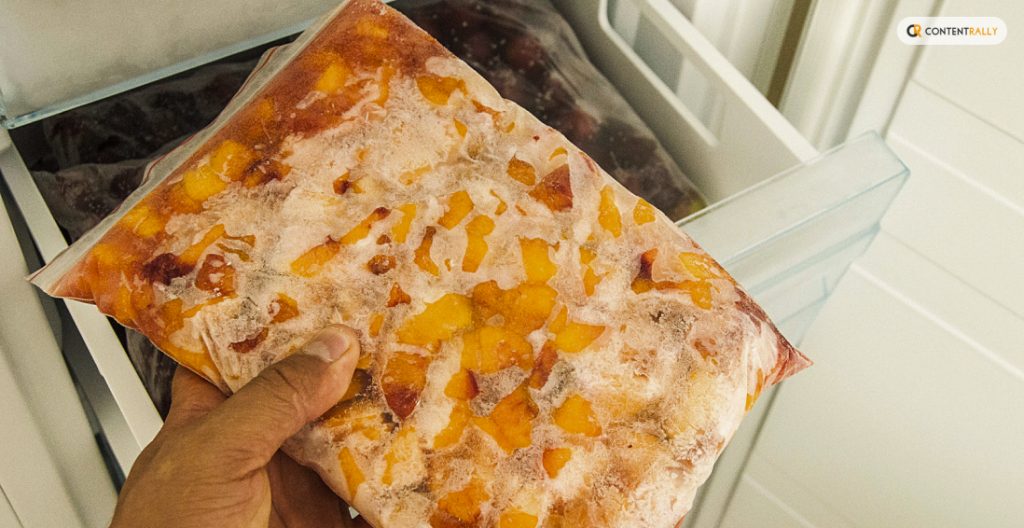
  5. After the completion of two weeks, remove the trays from the freezer. After that, quickly place the food items in airtight bags. Make sure to take out one tray at a time to ensure that the food does not rehydrate.
  6. Make sure to place the food bags in the freezer, and also in a cool, dark spot.
  7. Check the food after a couple of days. This way, you ensure whether all the food is dried-up or not.

Tips For Successful Freeze Drying

Tips for Successful Freeze Drying

The following are some essential tips by following which you can successfully freeze dry your food:

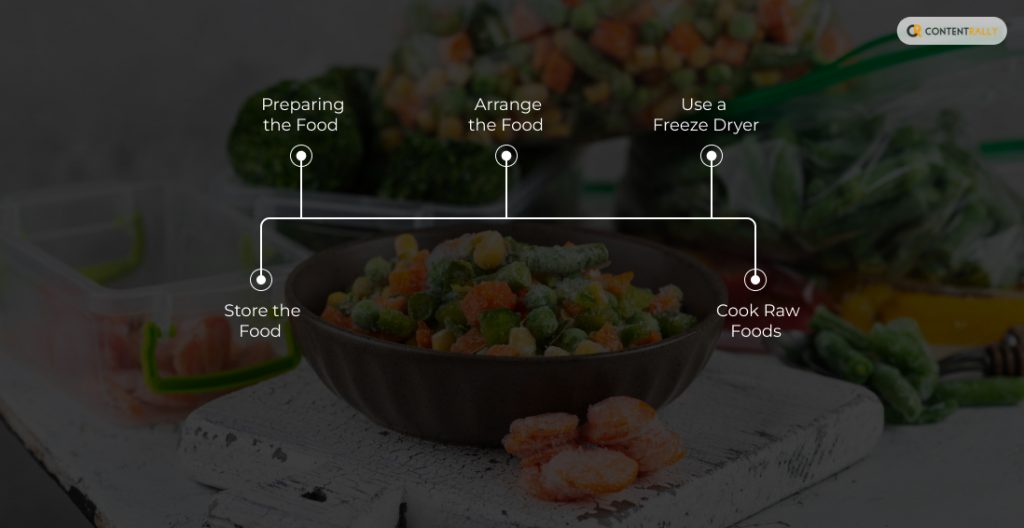
1. Preparing the Food

Harvest the food produced when it is ripe. Then, wash the food, remove the damaged parts, and prepare it as desired. This is because if you cut your food into small pieces, it will dry faster.

2. Arrange the Food

Place your food on a tray and arrange it into pieces. Also, make sure to place those pieces in such a way that they do not touch each other.

3. Use A Freeze Dryer

With the help of a freeze dryer, you can automatically lower the temperature. Moreover, a freeze dryer also helps you to create a vacuum.

4. Store The Food

Once you freeze-dry your food, store it in an airtight container. Also, you can store it in a bag which you can vacuum-seal it.

5. Cook Raw Foods:

One of the drawbacks of freeze-drying is that it does not kill harmful bacteria. Hence, you must cook freeze-dried foods thoroughly before consumption.

Related: The Importance Of Proper Cutting When Preparing Meals

Common Uses For Freeze-Dried Ingredients

Common Uses for Freeze-Dried Ingredients

The following are some of the common uses of freeze-dried foods:

  • Works as essential food supplies at times of emergencies.
  • They have a long shelf-life and you can use it to maintain food quality.
  • You can use freeze-dried food in stews, soups, baked goods, etc.
  • You can eat freeze-dried food as a healthy snack any time.
  • If you freeze-dry your seasonings, you can retain the flavor and freshness for years.

Wrapping Up

You now know how to freeze dry food. Generally, in manufacturing, food companies and manufacturers prefer freeze-dried food over regular food.

This is because they are easy to prepare and are portable and lightweight. Also, such food removes the moisture from the food to make it compact.

Do you have more suggestions for freeze-drying to offer? Please share your ideas and opinions in the comments section below.

Additional Readings:

A passionate writer and an avid reader, Soumava is academically inclined and loves writing on topics requiring deep research. Having 3+ years of experience, Soumava also loves writing blogs in other domains, including digital marketing, business, technology, travel, and sports.

View all posts

Leave a Reply

Your email address will not be published. Required fields are marked *

Related

Cocktail Party

7 Delicious & Exotic Snacks For Your Next Cocktail Party

Are you that lucky cocktail party host this weekend among your friends? If you are, then you must be wondering what exception you can make this time that people will love. We know that you can manage the ‘cocktail’ part. So, we have gathered seven delicious & exotic snacks for your next cocktail party that will win the hearts of your guests and makes you the star host of the month! However, these snack ideas are so overwhelmingly good that people may request you to make them again and again. Here, you will find quick and easy dishes to prepare, although you may need to visit the supermarket to get the ingredients. Without further ado, let’s get started with the recipes so that you can pick which snacks you want to prepare and make the list of ingredients. 1. Salmon Tartines for Fish Lovers Recipes with Salmon and avocado are always a delicacy; when you prepare it with wasabi, it will deliver a heavenly feel with your fast bite. And guess what, you need only 15 minutes to make it. Ingredients: To prepare this dish, you have to gather the following ingredients: Puff pastry, Sashimi-quality salmon, Mirin, One avocado, Low-sodium soy sauce Ginger, Lime juice, Caster sugar, Rice vinegar, and Wasabi paste. Cooking Method: To prepare the recipe, follow the steps below: Preheat the oven to 200 degree Celsius and cut the pastry according to your preferred shape; place them on a lined tray over the baking paper and bake for 10-12 minutes till golden in color and allow them to cool down. Your tartine base is ready. While baking, process the avocado with wasabi. To do that, take a small pan and dissolve sugar in water over low heat. When it cools down, take an avocado, wasabi, lime, and sugar in a blender, add salt or any other seasoning if you want, and set aside. Prepare a dressing by mixing mirin, vinegar, soy sauce, and ginger in a small pot. After you have prepared everything, take a pastry base and place avocado, salmon, and cress. Serve with a drizzle of dressing. 2. Elk Jerky Cheeseboard for Slow Eaters How about serving an Elk Jerky cheeseboard at your cocktail party? This cheeseboard is a great addition to the food you can serve because it not only has a posh vibe but also serves a unique version of your regular charcuterie board due to the gamey elk. Elk goes well with many reds including Cabernet Sauvignon, which can complement this strong-flavored jerky with its earthy notes. You can also pair it with lighter-style cocktails made from scotch, gin, or tequila, as they go well with these types of dried meat. You can add a variety of cheese to such a board, including emmental, brie, gouda, and blue cheese. 3. Carrot Muffin for Sweet Tooths  If you want to prepare a carrot muffin for your cocktail party ahead of time and you love baking, then this dish is a must for you to try. Ingredients: This dish is easy to prepare and only needs eight ingredients. They are: Yogurt (Greek style), Ready mixture for making carrot cake, Carrots, Pecans, Eggs, Aperol, Pure cane sugar, and Vegetable oil. Cooking Method: To prepare the recipe, follow the steps below: First, you will make a labneh. Take a bowl and set a fine sieve over it. Put the yogurt inside, wrap it with the sieve, and hang it over the bowl in the refrigerator overnight. Preheat the oven to make muffins at 170 degrees Celsius. Grate the carrot coarsely and mix it with the cake baking mix. You can add pecans to the mix. Take the muffin glasses, and bake them for at least 35 minutes. To make sure they are evenly baked, insert a skewer in the center, and if it comes out clean, your muffins are ready. If you want to soak the muffins with Aperol syrup, place water, sugar, and Aperol on a small pan and keep stirring until the sugar is dissolved over medium heat. Place the muffins in a line and pour syrup over them. Let the muffins soak in the syrup for 5 minutes. Add the icing mix with labneh to make frost, and use your creative ideas to décor the muffins. 4. Four Crispy Buffalo Wings for Savory Hunters Nothing can beat the taste of chicken wings. And the crowd will devour it within a minute if you can make it extra crispy outside and juicy inside. Here’s the recipe: Ingredients: To make Buffalo wings, you’ll need the following: Chicken wings (defrost if frozen), Baking powder, Salt, Butter, Franks hot sauce, Sugar. Cooking Method: To prepare the recipe, follow the steps below: Tap the wings with tissue paper to absorb the extra water after washing. Toss the wings with baking powder and salt; it will absorb the extra moisture from the chicken's skin, making it crispier. We are not using hot oil in this recipe as we are going to bake the wings. The science behind baking the wings and making them crispy is to start baking using low temp at first and increasing the temp after a few minutes. Set the tray on the lower shelf of the oven at 250F/120C. Low temperature will melt the fat first, and high temperature will make the skin super crispy when you place the wings on a higher oven shelf at 425F/220C. 5. Sausage Rolls for Meat lovers You know that your friends love meat. But you don’t want to worry about arranging a bbq in the backyard. So, prepare these bite-size sausage rolls to calm the meat cravings of your guests. Ingredients: To make sausage rolls, you’ll need: Pork, Onion & Garlic, Breadcrumbs, Puff Pastry, Bacon, Fennel Seeds, Salt & Pepper. Cooking Methods: Follow the easy-peasy steps below to cook off sausage rolls: Take a pan and cook bacon, onion, garlic, and celery, Mix with the pork, Place the puff pastry, put the mix on it, roll it over, and cut it into small portions. Place them on a baking tray and brush with egg. Bake them for 30 to 40 minutes until golden brown. This snack serves its best when you are keeping the option of exciting games at your party. Whether it’s a two-player board game or a multiplayer one, people can have more fun when they have something delicious to eat. 6. Coconut Shrimp for Peaky Eaters Every party has those guests who will not eat anything that’s too oily or too sweet. To tackle those peaky eaters, you can cook coconut shrimp, which will go well with whiskey cocktails. If you are not hiring any bartenders and decided to become one for the day, check out these whiskey cocktail recipes for home bartenders! Ingredients: You will need the following items for this quick bite. Jumbo Shrimp, Flour, Shredded coconut, Beaten egg, Pepper, Pranko breadcrumbs, Garlic powder, Oil and salt to taste. Cooking Method: Follow the steps below to have the best shrimp dish of your life. Wash the shrimp and season them in a bowl with pepper and salt, Take two flat dishes. Mix flour and garlic powder in one of them; in the other, mix coconut and breadcrumbs. Take one shrimp and dredge it in the flour mixture; after that, dip it in the beaten egg and dredge again in the coconut mix. Follow the steps for each shrimp. Refrigerate for an hour (or overnight if you want to prepare the night before and serve hot the next day). Deep fry in a pan full of oil till golden brown color and season with salt and pepper after the whole batch is done. Place them on a baking sheet with a cooling rack so that they can absorb the dripping oil.  Serve it with sauce or mango salsa. 7. Salsa for Lazy Hosts When it comes to cocktail parties, you need easy, quick recipes that will take less time to prepare so that you don’t get stuck in the kitchen while others are enjoying the evening, and this salsa will take only two minutes. Ingredients: Here goes the items you need to get together: Crushed tomato, Coriander leaves, Green chiles, Garlic, Lime, Jalapeno, Cumin, and Sugar. Serve with tacos, fajitas, burritos, nachos, or quesadillas. You can buy them at any store. Cooking Method: All you need to do is blend all the ingredients mentioned above. However, make sure to use good quality canned tomatoes, if not fresh ones. You need to blend for a few seconds and see the consistency. Keep blending if you like it smoother. But don’t blend too much if you like it chunky. Conclusion: With this list of seven delicious & exotic snacks for your next cocktail party, you will be able to welcome your guests with warm hearts and warm food on the counter. Even though cocktails are the main stars of your party, these bite-size, easy-to-prepare snacks will make your evening even better alongside the drinks. Prepare the snacks while ensuring the recipes have variety, such as spicy, sweet, savory, vegetarian, and non-veg options. Read Also: 14 Whiskey Cocktail Recipes For Home Bartenders Tips And Suggestions On How To Wear Cocktail Dresses Why should you go to a pool party in Vegas?

READ MOREDetails
how to cook sausage

How To Cook Sausage That Tastes Like Heaven

If you have been dreaming a lot about sausages lately, I am sure the thought of how to cook sausage has also struck your mind. Well, let me tell you that cooking this tasty, meaty delicacy does not require any top-notch skill. Check out own the grill for additional grilling strategies, guides, and tips on making the perfect grill recipes To cook sausages perfectly, what one requires is patience. It has been found that people often face many challenges while cooking sausages. These issues can be that while the exterior of the sausages gets cooked, the insides remain raw. You can also StoneFryingPans for more info on cooking. Also, the sausages might end up being dry, or the casings might split as well. However, I earnestly request you not to worry. Since I am here now, I will guide you to understand and learn every aspect of cooking perfect sausages. You can also visit how-to-boil.com for more information about the same. What Is A Sausage? A sausage is a meat product, or to be more specific, a type of forcemeat. It is generally composed of ground meat, such as beef, pork, and even poultry. Some seasonings, herbs, and spices are also added for flavors.  These forcemeats are then enclosed in a casing made of animal intestines or synthetic materials. A huge variety of sausages are available across the world that are native to the places where they are found.  What Are The Different Types Of Sausage? There is a basic classification of sausages based on a lot of features. From the types of ingredients used to the various cooking procedures, all are taken into consideration while differentiating between sausages.  It can be primarily classified as cooked, fresh, and dry sausages. Sausages also vary according to regional influences. American sausage, Italian sausage, German sausage, and many more sausages have been extremely popular around the world.  Some of these are Cumberland sausage from the UK, Haggis from Scotland, Saucisson and Chipolata from France, Bratwurst sausage from Germany, Chorizo sausage from Spain, Mortadella sausage from Italy, and many more.  Various Ways Of How To Cook Sausage The best way to cook sausage is to tailor it to the preferences of your taste buds. You would also find sausages that could be eaten raw like the Chorizo. However, most other sausages need to be cooked before consumption.  Whether you want to know how to cook breakfast sausage or some Italian sausage, let me tell you that these can all be cooked in a similar way. Now, with the evolution of modern cookery, many recipes have been developed for cooking sausages. But, here we will focus on the basic methods of sausage cookery: How To Boil Sausage?  Boiling a sausage is one of the easiest ways to learn how to cook the sausage. If you are thinking boiling a sausage is some very difficult task, then you are wrong. It is as simple and similar as boiling any other food item.  Boiling a sausage will allow the hot water to pierce through the meat and cook the interior part more evenly. It will have a soft, tender texture rather than a crispy one.  Ingredients Required: Sausages  Water Salt Procedure: Take a saucepan and fill it with enough water. Increase the heat and bring it to a boil.  With the help of tongs, place the sausages in the saucepan.  Reduce the heat and keep it on simmer.  Add some salt to the water.  For flavoring, you can opt to add some wine, beer, or stock. Cover the pan with a lid. Let the sausages cook for about 15-30 minutes, depending on the size.  Remove the lid, take the sausages out and dry them with some paper towel.  How To Grill Sausage?  Grilling is a form of high-temperature cooking that allows the food to get cooked by the application of dry heat. In this method of cooking, the heat might be applied from above, or below, or even from the sides. It is often stated by health professionals that grilling sausage might lead to the formation of potentially hazardous compounds in the food.  However, nothing beats our love for sausages, so you might compromise on your health a bit this time. Grilling the sausages will eventually turn them brownish in color with grill marks on the body.  Ingredients Required: Sausages  Oil Salt and pepper  Procedure: For this cooking method, the most important thing that you need is a griller. Make sure the temperature is higher on one side while lower on the other.  As the griller gets heated, spill and spread a tablespoon of oil over it.  Use tongs and place the sausage on the hotter side of the grill. Grill them for a minute or two and cook on both sides to get the marks.  As they acquire a deep-brownish color and start to burn, immediately move them to the cooler side of the grill using tongs.  On this side, cook the sausages slowly for about 10-15 minutes.  When they are done, remove from the grill and sprinkle some salt over.   How To Bake Sausage?  Baking is a great way that can help you learn how to cook sausage in the oven. Baking is also a dry method of cooking that involves the application of high heat. This method makes the sausages taste more interesting than ever.  There are also very few chances of the item getting burnt in an oven. Here, the heat is gradually distributed from the surface to the interiors of the food. A baked sausage often has a crispy texture and appears to be light-brownish in color.  Ingredients Required: Sausages  Butter Garlic Salt and pepper Fresh herbs Cheese Procedure: Preheat the oven to 350°F. While the oven is heating, take a baking tray and brush it with a very little amount of butter or oil.  If you want to make it more delicious, you can brush some butter over the sausages and add some chopped garlic to them.  Place the sausages evenly apart on the tray.  Put the filled tray inside the oven.  Let the sausages get cooked for about 30-40 minutes, depending on the size.  You can turn the sausages once in between to get them evenly cooked. Once they are cooked, take the sausages out. Sprinkle some freshly chopped herbs and some grated cheese over the sausage.  Final Thoughts Well, I haven’t seen you cook yet, but I am certain that you have learned about the basics of how to cook sausage after reading this article. Aren’t these methods excessively simple? Yes, I knew you would agree with me.  So when the love for sausage is there, and the grill is on fire, what on earth is stopping you? It is your time to relish such a delectable piece of food. More Resources: Cooking Tips: Simple Fundamental Cooking Ideas To Make Food Smaller Sized Meal Portions for Dogs How To Start A Food Truck Business And Earn Money From It In 2021

READ MOREDetails
slider-img

How to Harvest Potatoes: A Complete Guide from Planting to Storage 

If there is something that I have learned in life, it is about gardening. Well, almost everything if not all. And if there is one thing that took me some time to master, it was knowing how to harvest potatoes at home!  Potatoes are one of the most versatile and popular vegetables in the world. They can be cooked in many different ways, such as boiled, baked, fried, mashed, or roasted. Moreover, they are also rich in carbohydrates, fiber, vitamin C, potassium, and antioxidants. But how do you grow and harvest your own potatoes at home? You see, potatoes are not like cilantro or other plants. These are tubers.  In this article, I will show you everything you need to know about how to harvest potatoes, from planting to storage. So, if that is something that you are interested in knowing, then I have you covered! Keep on reading this blog till the end to learn more...  How to Plant Potato Seeds or Tubers?  The first step in how to harvest potatoes is to plant them. You can start with either potato seeds or tubers. Potato seeds are small, round, and black, and they are usually sold in packets. Potato tubers are the actual potatoes that you eat, and they have eyes or buds that can sprout new plants. You can buy certified seed potatoes from a nursery or garden center, or use organic potatoes from the grocery store.  Here are some if the steps that you must take to plant them:  Planting Potato Seeds  To plant potato seeds, you need to sow them indoors in pots or trays filled with moist potting soil. Place them in a sunny spot and keep the soil moist but not soggy. The seeds will germinate in about two weeks and produce small green shoots. When the shoots are about 3 inches tall, you can transplant them outdoors in your garden or in containers.  Planting Potato Tubers  To plant potato tubers, you need to cut them into pieces, each with at least one eye. You can do this a few days before planting to let the cut surfaces heal and prevent rotting. Alternatively, you can plant whole small potatoes with several eyes. To prepare the soil, you need to loosen it and add some organic matter, such as compost or manure.   You also need to make sure the soil is well-drained and slightly acidic, with a pH of 5.0 to 6.0. You can use a soil test kit to check the pH level and adjust it with lime or sulfur if needed.  Planting Potato Pieces  To plant the potato pieces, you need to dig a trench about 4 inches deep and 12 inches wide. Place the pieces about 12 inches apart, with the eyes facing up. Cover them with 3 inches of soil and water well. As the plants grow, you need to hill up the soil around them to cover the lower stems and prevent the tubers from being exposed to sunlight, which can turn them green and bitter. You can also mulch the soil with straw, leaves, or grass clippings to retain moisture and suppress weeds.  How to Care for Your Potato Plants?  The second step in how to harvest potatoes is to care for your potato plants. You need to water them regularly, especially during dry spells, to keep the soil moist but not waterlogged. You also need to fertilize them every two weeks with a balanced organic fertilizer, such as fish emulsion or seaweed extract. Also, you can add some wood ash or bone meal to provide extra potassium and phosphorus, which are essential for tuber formation.  You also need to protect your potato plants from pests and diseases, which can reduce your yield and quality. Some of the common potato pests are:  Colorado potato beetles, which are yellow and black striped insects that feed on the leaves and can defoliate the plants. You can handpick them and drop them in a bucket of soapy water, or use an organic insecticide, such as neem oil or pyrethrin.  Potato leafhoppers, which are small, green, winged insects that suck the sap from the leaves and cause them to curl and yellow. You can spray them with a strong jet of water, or use an organic insecticide, such as garlic or hot pepper spray.  Wireworms, which are thin, brown, worm-like larvae that bore into the tubers and cause holes and tunnels. You can trap them with pieces of carrot or potato buried in the soil, or use beneficial nematodes, which are microscopic worms that parasitize and kill the wireworms.  Common Potato Diseases  One of the most common reasons why a potato cannot grow or survive is the diseases. If you were wondering what some of these can be and how to deal with them, I have you covered!  Some of the common potato diseases are:  Late Blight: It is a fungal disease that causes brown spots on the leaves and stems, and black or brown lesions on the tubers. It can spread rapidly and destroy the entire crop. You can prevent it by planting resistant varieties, avoiding overhead watering, and removing any infected plants and tubers. You can also use a fungicide, such as copper or sulfur, as a preventive measure.  Scab: This is a bacterial disease that causes rough, corky patches on the tubers. It does not affect the taste or edibility of the potatoes, but it reduces their appearance and storage quality. You can prevent it by planting resistant varieties, maintaining a slightly acidic soil pH, and avoiding excessive nitrogen fertilization.  Potato Virus Y: Lastly, this is a viral disease that causes mosaic patterns, mottling, or yellowing on the leaves, and misshapen or knobby tubers. It can reduce the yield and quality of the potatoes, and it can be transmitted by aphids or infected seed potatoes. You can prevent it by planting certified virus-free seed potatoes, controlling aphids, and removing any infected plants and tubers.  How to Determine When Your Potatoes Are Ready to Harvest?  The third step in how to harvest potatoes is to determine when they are ready to harvest. This depends on the type and variety of potatoes you planted, and the size and maturity you want. There are two main types of potatoes: early and late. Early potatoes are ready to harvest in about 10 to 12 weeks (about 3 months) after planting, and they produce small to medium-sized tubers that are tender and thin-skinned. They are best for boiling, steaming, or roasting.  Late potatoes are ready to harvest in about 15 to 20 weeks (about 4 and a half months) after planting, and they produce large, starchy tubers that are firm and thick-skinned. They are best for baking, mashing, or frying.  Early Harvesting  To harvest early potatoes, you can start digging them up when the plants begin to flower, or when the lower leaves start to yellow. You can use a garden fork or a spade to gently lift the plants and tubers from the soil, or you can use your hands to feel for the tubers under the soil. You can harvest as many or as few potatoes as you need, and leave the rest in the ground until you are ready to use them. You can also harvest some of the young, tender leaves and stems, which are edible and nutritious.  Late Harvesting  To harvest late potatoes, you need to wait until the plants have died back completely, or until the first frost. This allows the tubers to develop a thicker skin, which helps them store better. You can use a garden fork or a spade to dig up the entire row of plants and tubers, or you can use a potato digger, which is a special tool that lifts and separates the tubers from the soil. You need to be careful not to damage or bruise the tubers, as this can cause rotting or spoilage.  How to Dig Up, Cure, and Store Your Potatoes?  The final step in how to harvest potatoes is to dig up, cure, and store your potatoes. This is important to preserve the quality and shelf life of your potatoes, and to prevent them from sprouting, rotting, or shrinking. Here are the steps to follow:  Digging Up  After digging up your potatoes, you need to brush off any excess soil and remove any damaged, diseased, or green tubers. Do not wash your potatoes, as this can remove the protective skin and invite bacteria and fungi. You can wash them just before cooking or eating them.  Curing  You need to cure your potatoes for about two weeks in a cool, dark, and well-ventilated place, such as a basement, garage, or shed. This allows the skin to harden and heal any minor cuts or bruises and enhances the flavor and texture of the potatoes. The ideal temperature for curing is between 50°F and 60°F, and the ideal humidity is between 80% and 90%. You can spread your potatoes in a single layer on a newspaper, cardboard, or wooden crate, and avoid exposing them to light, which can turn them green and bitter.  Storing  You need to store your potatoes in a cool, dark, and dry place, such as a cellar, pantry, or closet. The ideal temperature for storage is between 40°F and 50°F, and the ideal humidity is between 65% and 70%. You can store your potatoes in paper bags, cardboard boxes, mesh bags, or wooden crates, and check them regularly for any signs of sprouting, rotting, or shriveling. You can also store your potatoes in a root cellar, which is an underground or partially underground structure that maintains a constant temperature and humidity. Additionally, you can also store your potatoes in a clamp, which is a mound of straw, hay, or leaves covered with soil, that insulates and protects the potatoes from frost and rodents.  Wrapping It Up!  If you want to know about how to harvest potatoes, I hope that this blog has been of help to you. However, if there are any other queries related to the same, please feel free to let me know. All that you need to do is scroll down till you reach the bottom of the page. Then leave your comments and suggestions in the box below. And I will be there to answer them all for you! Read Also: How to Harvest Lettuce: A Step-by-Step Guide for Fresh and Crispy Salads Everything You Need To Know About Harvesting Basil!

READ MOREDetails