Grilling Guide: Choosing the Right One

by

08 November 2022

Food

Grilling

A grill is the centerpiece of any outdoor kitchen, so choosing the right one is not a decision to be taken lightly.

Grill buying is more complicated than some people might assume, with multiple fuel sources, sizes, and features to choose from.

This article will simplify the process to make it a little easier.

Portable or Stationary?

The first thing to consider when choosing the best outdoor grill is whether it should be stationary or portable.

As a general rule, portable grills are better for yards that have no other outdoor kitchen infrastructure, while stationary grills are preferred by most outdoor kitchen designers. However, there is no hard and fast rule here, and homeowners need to consider the intended uses of the equipment.

Fuel Source

Arguably the most important factor to consider is the fuel source. It used to be the case that just about all grills burned charcoal, and many homeowners still prefer this traditional grilling method. However, there are now gas and electric models to consider. Here’s what to know about each option.

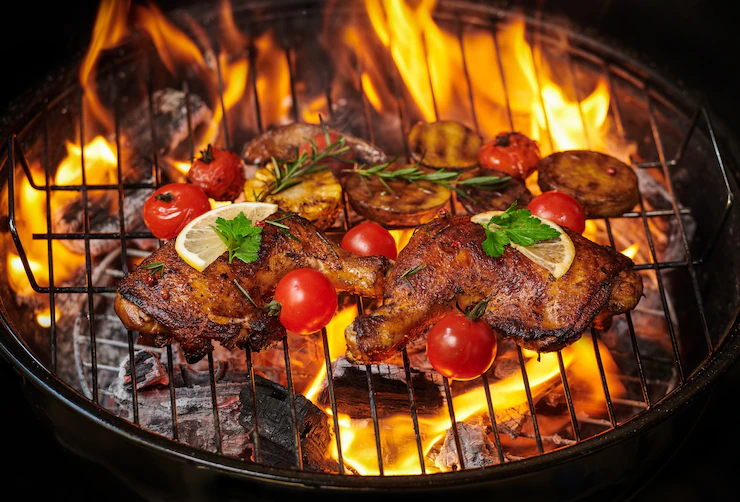
Charcoal Grills

Charcoal grills are inexpensive, easy to fuel up, and perfect for those who love that classic grilling taste. It’s easy to find charcoal briquettes, and they burn for a long time. It can be difficult to light charcoal grills, though, and they tend to take a while to build the necessary heat. They also need to be monitored carefully and cleaned after each use.

Charcoal Grills

Gas Grills

Gas grills are quick to heat up and offer greater control over the grilling temperatures. They can also be used to cook different foods at once, which makes gas grills a versatile option. The primary downside is that gas grills are more expensive both in terms of initial investment price and repairs. Some people also miss that char-grilled, classic BBQ flavor, but there are ways to compensate.

Electric Grills

Electric grills feature maximum versatility. They’re usually portable, and unlike gas or charcoal grills, they can be used indoors. Homeowners sometimes find that electric grills are more difficult to cook on outside, which can be a big drawback for those who are looking for the perfect grill for an outdoor kitchen.

Electric Grills

Grill Sizes

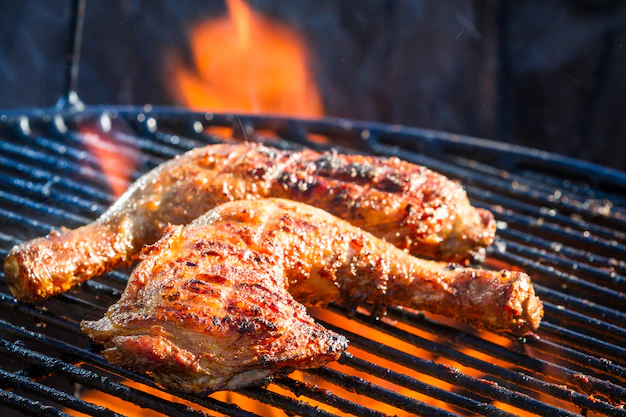
Most portable grills come in standard sizes, although there are exceptions to the rule. Built-in grills found in outdoor kitchens tend to come in a greater range of sizes because there’s no need to worry about ease of maneuverability. For those who prefer to work with more precise recommendations, look for grills that are at least:

  •  216 sq in for up to three people
  • 288 sq in for four people
  • 360 sq in for five people
  • 432 sq in for six people

It’s usually better to err on the side of caution and buy a grill that’s a little too big than it is to risk getting one that’s too small. Crowding too much food onto a grill can have a pretty dramatic negative impact, no matter what kind of fuel it features.
Grill Sizes

The Importance of Quality

When it comes time to look at individual grill models, the most important thing to remember is that homeowners will get what they pay for, at least in broad terms. Going for the cheapest grill available is usually unwise. Prioritize quality and look for grills made by known brands that have reputations for quality.

Additionals:

Content Rally wrapped around an online publication where you can publish your own intellectuals. It is a publishing platform designed to make great stories by content creators. This is your era, your place to be online. So come forward share your views, thoughts and ideas via Content Rally.

View all posts

Leave a Reply

Your email address will not be published. Required fields are marked *

Related

Caviar

What Spoon To Use For Caviar?

When preparing starters, salads, and other dishes using delicacies, it is necessary to remember the taste qualities and the rules of serving and etiquette. The rules of the caviar club https://bestercaviarstore.com/pages/caviar-club state that it is crucial to choose the right spoon so as not to spoil the taste of the exquisite dish. It is necessary to take into account the material of the tableware. For example, metal items have a characteristic flavor that spoils the delicacy. Bester Caviar experts will recommend the best caviar spoon material, considering all the features. Why avoid using a metal spoon to eat caviar? It is better to refuse such utensils because they will interfere with the taste of caviar. Especially when it comes to a device made of one material. There are often spoons with a high concentration of the following metals: nickel; silver; bronze; aluminum. All of them are not suitable for specialty products. For example, cookware made of alloys will not affect the taste. However, there are more suitable materials for such products. The main problem with caviar metal spoons is oxidation. As a result, there is a change in the structure of the product on a chemical level. A delicacy is a very sensitive ingredient. Such transformations will have a negative impact not only on the taste but also on the structure. That is why tasters never use silverware. Types of Caviar Spoons to Use Even the most expensive silverware is not suitable for tasting. Furthermore, using such utensils when serving delicacies is considered a violation of etiquette. Therefore, it is better to opt for appropriate kitchen utensils: The turtle shell is an exclusive material that is considered very scarce. It cannot be bought in a regular cookware store. In many countries, the sale of such items is considered a violation of the law. However, such utensils were used by monarchs in the organization of receptions. Many manufacturers make analogs, creating with the help of plastic and biomaterials something similar to a tortoise shell; bullhorn is another option, inspired by the traditions of past times. It was very often used for serving the festive table, on which many delicacies appeared. The material has a discreet color has maximum durability. It is distinguished by its environmental friendliness and is considered an excellent analog of mother-of-pearl utensils; wood is a less popular option for aesthetic reasons. Wood makes the delicacies visually cheaper but does not affect their taste. Such products quickly absorb moisture. The wood is stained beforehand. Before serving the dish, it is better to oil the cutlery in caviar oil; glass – the aesthetics of this material has always attracted the attention of gourmets with its smoothness and fragility. The structure is excessively delicate, which is more of a disadvantage than an advantage. Many people are deterred from this option by the transparency of the glass; Gold is the only metal that is used when serving delicacies. This serving will allow the host to emphasize his status. Caviar will color the spoon’s surface green, indicating the original origin of the precious metal. However, there are other options. A. Mother-of-pearl Such kitchen utensils appear on the table in movies and TV shows when a table with caviar appears in the scene. It is an original material that combines two opposites – organic and inorganic. Pearl spoon caviar is made from clam shells.  The creation of a vivid contrast is another unique feature. The spoon shimmers when the grainy delicacy appears on it. Despite its smoothness, the product is characterized by maximum durability and reliability. Such cutlery will not affect the taste of the treat. B. Plastic This option may seem too cheap to many people, especially in the context of serving with caviar. However, disposable plastic spoons are used quite often, not only in everyday life but also in expensive restaurants. First, plastic utensils are very cheap, and it is possible to give each visitor a separate spoon. After use, they are disposed of, which is quite hygienic. Secondly, plastic in no way affects the taste of the delicacy. Conclusion Caviar dishes are interesting not only for their gastronomic properties. The popularity of this delicacy testifies to the continuity of generations and respect for traditions. But, of course, everyone wants to plunge into luxury. The exquisite dish will help, but only if the table is laid correctly. Unfortunately, metal cutlery demonstrates bad taste when serving a delicacy. Read Also: Tools to Turn Unruly Seafood Into Dinner What dressings Are Good For Vegans – Mimi’s Laphet 5 Best Vegetables You Should Try Growing In Your Garden

READ MOREDetails
Cake Makers

The Best Ways Cake Makers Can Pack Their Cakes

Whether you make cakes for friends and family or run a business supplying cakes for celebrations, you’ll know how much work goes into making each and every one of your creations. That’s why it’s so important to package your cakes in a way that keeps them in perfect condition, so they can be taken home by the customer or delivered to a venue without getting squashed or the decorations getting ruined. Here are some tips to help you properly pack your cakes. Here are The Best Ways Cake Makers Can Pack Their Cakes: 1. Use cake boxes Those who are serious about running a cake business should consider looking for wholesale cake boxes, which are a good way of packing up your treats. You need to ensure you get the right size box for the best results. A box that is too big will mean the cake can move around and get damaged, but you should leave a little extra space to be able to take the cake in and out of the box. Also, consider the kind of products you’re selling and what type of box would work best. For example, you can buy boxes for cupcakes, individual slices, and even wedge-shaped boxes for bakeries that offer takeaways. Presentation is key when it comes to cakes. If you’re selling cakes that are given as gifts, choose boxes with windows so the product can be seen, and consider using decorative touches such as bows. 2. Secure cakes for transport It’s also important to make sure cakes are secure when you pack them, as they are likely to be transported in a car or carried around. You should use a cake board, which can be decorated nicely for a professional finish, as this will stop the cake from rattling round in the box. 3. Transport cakes carefully If you are delivering the cake yourself, here are some ways you can keep it looking good: Never stack a tiered cake before you put it in your car or van – put each tier in separate boxes then stack at the venue Place the box on a flat surface, for example, in the boot of your car Make sure there aren’t any other objects in the boot that could squash your cake Use a non-slip surface such as a yoga mat underneath the cake box Drive carefully and avoid sudden braking  4. Finish off the cake box with decorations While a plain cake box is nice and neat and professional, you may also want to add some decorative touches, especially if you’re making themed seasonal cakes. For example, during the Christmas period, you could add a red bow or sprig of holly, or during the wedding season, you could add a trim of lace. This will just finish off the presentation and make sure it looks special. When it comes to making cakes, presentation is everything, so it’s worth spending a little more to get high-quality boxes and ensuring things like cake boards are used, so when the cake arrives at the customer’s home, everything is perfect. Read Also: Beautiful And Unique Anniversary Gifts For Your Beloved Wife Cooking Tips: Simple Fundamental Cooking Ideas To Make Food

READ MOREDetails
Cocktail Party

7 Delicious & Exotic Snacks For Your Next Cocktail Party

Are you that lucky cocktail party host this weekend among your friends? If you are, then you must be wondering what exception you can make this time that people will love. We know that you can manage the ‘cocktail’ part. So, we have gathered seven delicious & exotic snacks for your next cocktail party that will win the hearts of your guests and makes you the star host of the month! However, these snack ideas are so overwhelmingly good that people may request you to make them again and again. Here, you will find quick and easy dishes to prepare, although you may need to visit the supermarket to get the ingredients. Without further ado, let’s get started with the recipes so that you can pick which snacks you want to prepare and make the list of ingredients. 1. Salmon Tartines for Fish Lovers Recipes with Salmon and avocado are always a delicacy; when you prepare it with wasabi, it will deliver a heavenly feel with your fast bite. And guess what, you need only 15 minutes to make it. Ingredients: To prepare this dish, you have to gather the following ingredients: Puff pastry, Sashimi-quality salmon, Mirin, One avocado, Low-sodium soy sauce Ginger, Lime juice, Caster sugar, Rice vinegar, and Wasabi paste. Cooking Method: To prepare the recipe, follow the steps below: Preheat the oven to 200 degree Celsius and cut the pastry according to your preferred shape; place them on a lined tray over the baking paper and bake for 10-12 minutes till golden in color and allow them to cool down. Your tartine base is ready. While baking, process the avocado with wasabi. To do that, take a small pan and dissolve sugar in water over low heat. When it cools down, take an avocado, wasabi, lime, and sugar in a blender, add salt or any other seasoning if you want, and set aside. Prepare a dressing by mixing mirin, vinegar, soy sauce, and ginger in a small pot. After you have prepared everything, take a pastry base and place avocado, salmon, and cress. Serve with a drizzle of dressing. 2. Elk Jerky Cheeseboard for Slow Eaters How about serving an Elk Jerky cheeseboard at your cocktail party? This cheeseboard is a great addition to the food you can serve because it not only has a posh vibe but also serves a unique version of your regular charcuterie board due to the gamey elk. Elk goes well with many reds including Cabernet Sauvignon, which can complement this strong-flavored jerky with its earthy notes. You can also pair it with lighter-style cocktails made from scotch, gin, or tequila, as they go well with these types of dried meat. You can add a variety of cheese to such a board, including emmental, brie, gouda, and blue cheese. 3. Carrot Muffin for Sweet Tooths  If you want to prepare a carrot muffin for your cocktail party ahead of time and you love baking, then this dish is a must for you to try. Ingredients: This dish is easy to prepare and only needs eight ingredients. They are: Yogurt (Greek style), Ready mixture for making carrot cake, Carrots, Pecans, Eggs, Aperol, Pure cane sugar, and Vegetable oil. Cooking Method: To prepare the recipe, follow the steps below: First, you will make a labneh. Take a bowl and set a fine sieve over it. Put the yogurt inside, wrap it with the sieve, and hang it over the bowl in the refrigerator overnight. Preheat the oven to make muffins at 170 degrees Celsius. Grate the carrot coarsely and mix it with the cake baking mix. You can add pecans to the mix. Take the muffin glasses, and bake them for at least 35 minutes. To make sure they are evenly baked, insert a skewer in the center, and if it comes out clean, your muffins are ready. If you want to soak the muffins with Aperol syrup, place water, sugar, and Aperol on a small pan and keep stirring until the sugar is dissolved over medium heat. Place the muffins in a line and pour syrup over them. Let the muffins soak in the syrup for 5 minutes. Add the icing mix with labneh to make frost, and use your creative ideas to décor the muffins. 4. Four Crispy Buffalo Wings for Savory Hunters Nothing can beat the taste of chicken wings. And the crowd will devour it within a minute if you can make it extra crispy outside and juicy inside. Here’s the recipe: Ingredients: To make Buffalo wings, you’ll need the following: Chicken wings (defrost if frozen), Baking powder, Salt, Butter, Franks hot sauce, Sugar. Cooking Method: To prepare the recipe, follow the steps below: Tap the wings with tissue paper to absorb the extra water after washing. Toss the wings with baking powder and salt; it will absorb the extra moisture from the chicken's skin, making it crispier. We are not using hot oil in this recipe as we are going to bake the wings. The science behind baking the wings and making them crispy is to start baking using low temp at first and increasing the temp after a few minutes. Set the tray on the lower shelf of the oven at 250F/120C. Low temperature will melt the fat first, and high temperature will make the skin super crispy when you place the wings on a higher oven shelf at 425F/220C. 5. Sausage Rolls for Meat lovers You know that your friends love meat. But you don’t want to worry about arranging a bbq in the backyard. So, prepare these bite-size sausage rolls to calm the meat cravings of your guests. Ingredients: To make sausage rolls, you’ll need: Pork, Onion & Garlic, Breadcrumbs, Puff Pastry, Bacon, Fennel Seeds, Salt & Pepper. Cooking Methods: Follow the easy-peasy steps below to cook off sausage rolls: Take a pan and cook bacon, onion, garlic, and celery, Mix with the pork, Place the puff pastry, put the mix on it, roll it over, and cut it into small portions. Place them on a baking tray and brush with egg. Bake them for 30 to 40 minutes until golden brown. This snack serves its best when you are keeping the option of exciting games at your party. Whether it’s a two-player board game or a multiplayer one, people can have more fun when they have something delicious to eat. 6. Coconut Shrimp for Peaky Eaters Every party has those guests who will not eat anything that’s too oily or too sweet. To tackle those peaky eaters, you can cook coconut shrimp, which will go well with whiskey cocktails. If you are not hiring any bartenders and decided to become one for the day, check out these whiskey cocktail recipes for home bartenders! Ingredients: You will need the following items for this quick bite. Jumbo Shrimp, Flour, Shredded coconut, Beaten egg, Pepper, Pranko breadcrumbs, Garlic powder, Oil and salt to taste. Cooking Method: Follow the steps below to have the best shrimp dish of your life. Wash the shrimp and season them in a bowl with pepper and salt, Take two flat dishes. Mix flour and garlic powder in one of them; in the other, mix coconut and breadcrumbs. Take one shrimp and dredge it in the flour mixture; after that, dip it in the beaten egg and dredge again in the coconut mix. Follow the steps for each shrimp. Refrigerate for an hour (or overnight if you want to prepare the night before and serve hot the next day). Deep fry in a pan full of oil till golden brown color and season with salt and pepper after the whole batch is done. Place them on a baking sheet with a cooling rack so that they can absorb the dripping oil.  Serve it with sauce or mango salsa. 7. Salsa for Lazy Hosts When it comes to cocktail parties, you need easy, quick recipes that will take less time to prepare so that you don’t get stuck in the kitchen while others are enjoying the evening, and this salsa will take only two minutes. Ingredients: Here goes the items you need to get together: Crushed tomato, Coriander leaves, Green chiles, Garlic, Lime, Jalapeno, Cumin, and Sugar. Serve with tacos, fajitas, burritos, nachos, or quesadillas. You can buy them at any store. Cooking Method: All you need to do is blend all the ingredients mentioned above. However, make sure to use good quality canned tomatoes, if not fresh ones. You need to blend for a few seconds and see the consistency. Keep blending if you like it smoother. But don’t blend too much if you like it chunky. Conclusion: With this list of seven delicious & exotic snacks for your next cocktail party, you will be able to welcome your guests with warm hearts and warm food on the counter. Even though cocktails are the main stars of your party, these bite-size, easy-to-prepare snacks will make your evening even better alongside the drinks. Prepare the snacks while ensuring the recipes have variety, such as spicy, sweet, savory, vegetarian, and non-veg options. Read Also: 14 Whiskey Cocktail Recipes For Home Bartenders Tips And Suggestions On How To Wear Cocktail Dresses Why should you go to a pool party in Vegas?

READ MOREDetails