How To Approach Home Maintenance With A Focus On Well-Being

by

29 February 2024

Home & Garden

Home Maintenance

We all know, at least by intuition, that having our living spaces clean is important – and not just because of the visual appeal of it. Then, what are the main reasons why it’s so crucial for our lives? Sure, the look of a clean home, the convenience of finding things in their place, habits it helps us foster, and the sense of obligation – especially if you live with other people, all of them play their part. But, there’s something that really makes house cleaning vital: the link between it and our physical and mental well-being.

So, what aspects of health are we talking about here, and how exactly does keeping your home in shape make a difference? According to Hire A Maid and their team of seasoned experts in house cleaning, there are a few main health-related considerations that connect to the state of our living spaces. We’ll discuss them below, and then explain how to approach home maintenance with a focus on well-being.

What Are The Approaches Of Home Maintenance With A Focus On Well-Being

What Are The Approaches Of Home Maintenance With A Focus On Well-Being

There are a lot of approaches to home maintenance with a focus on well-being. In this case these approaches are quite suitable and feasible in terms of keeping your health nice and up to the mark. Below I am going to discuss the approaches of home maintenance with a focus on well-being. 

1) Germs & Contaminants

This one is pretty straightforward: cleaner space means fewer germs and other contaminants. Your goal shouldn’t be to live in a completely sterile bubble, it’s more the means to lower the chance of illness by keeping those pesky germs at bay, especially during flu season. 

To that end, you should regularly wipe and disinfect surfaces throughout your home and give extra attention to the high-touch ones. It’s a tried and tested way to keep yourself and your family safe. 

And don’t forget the kitchen and bathroom, where a combination of moisture and food particles creates ideal conditions for pathogens to thrive. To make sure all of these areas are regularly addressed, it’s best to craft a realistic cleaning routine – one that’s easy to stick to but still addresses all microbe-prone surfaces regularly. 

2) Allergens & Air Quality

Allergies are a common issue, one that many people unfortunately have to deal with even in the safety of their own homes. Allergy symptoms may be somewhat unpredictable, but luckily, it’s possible to lessen their grip on your day-to-day life. It’s quite simple really: regular cleaning reduces the amount of allergens the same way it reduces the number of germs. 

Dust is a common culprit for triggering reactions, along with dust mites. And even if you and your family members don’t suffer from allergies, dust and dust mites can irritate almost anyone. 

To reduce the amount of irritant particles and improve the quality of air in your home, focus on dusting regularly and efficiently, use a high-quality vacuum, and tackle upholstery, carpets, and bedding whenever possible.

3) Order & Stress Levels

Aside from being an eyesore, clutter can crowd your mind as much as your space. The hassle of moving around through the mess, a decrease in productivity – these are just some of the ways in which clutter and neglected cleaning tasks can add to your stress levels. 

Before you know it, it becomes a loop where the sight of the mess and the dread of having to address it feed into each other, making you feel increasingly overwhelmed. 

Tackling clutter is about reclaiming peace as much as it’s about reclaiming your space. Start small – a drawer, a shelf, a corner, and work your way through the home. If possible, rely on others for help, whether it’s family members or hiring a cleaning professional. Once everything is in order, brainstorm ways to keep clutter from creeping back in.

The ripple effects of a clean home on our well-being are extensive. Improved sleep, heightened concentration, and a general sense of wellbeing are all byproducts of a space that breathes cleanliness and order. Furthermore, the discipline and habits cultivated through regular home maintenance can translate into other areas of life, promoting a lifestyle that values mindfulness, health, and balance.

What Are The Monthly Home Maintenance Checklists?

What Are The Monthly Home Maintenance Checklists_

While this is about a monthly home maintenance checklist, preserving the property’s condition is essential. Below, I am going to discuss the monthly home maintenance checklists. 

1) Cleaning HVAC Filters 

While this is about adequately installed HVAC filters, this will help you breathe easily in your home. This further ensures that your cooling and heating systems will also work efficiently. 

2) Test Smoke Alarms 

Always ensure that smoke detectors are functional in the home. This is a key feature for early detection in handling several other safety hazards. On the other hand, you must replace such batteries every six months to keep consistent and reliable operations. 

3) Clearing Drains and Sinks 

Always ensure that you are regularly clearing sinks and drains. These will prevent the inconvenience and chaos of several other clogs. 

4) Examining Electrical Cords 

Always examine several electrical cords. In this case, you must inspect the cables for frayed wires, or else you will lose the connections, which would prevent the electrical hazard. 

5) Lubricating Door Locks and Hinges 

Always lubricate the door hinges and locks to prevent doors from further squeaking. This ensures the smoother operations of several other locks. 

6) Cleaning Gutters And Downspouts 

After regularly purging the blockages and water damage, you might get a flawless water service across the entire washroom. 

7) Checking Plumbing For Leaks

Always ask the plumber to detect leaks as early as possible. This will save and prevent money along with extensive damage. Ensure you check the shower heads, plumbing, and faucets for such leaking to avoid headaches. It takes work to handle this kind of service, especially every season. 

What Are The Four Types Of Maintenance Strategies That You Must Know? 

What are the four types of maintenance strategies that you must know_

Did you know that predictive maintenance is about rapidly gaining and sparked by several other advancements across the IIoT? Below, I will discuss four types of maintenance strategies you must know. 

1) Reactive Maintenance 

After all, reactive maintenance is quite simple as it can fix several other things they usually break. Since repairs still need to be planned. Ultimately, this is a suitable method in which you can employ equipment that is optional for operations. Or else this has a low cost. 

2) Preventive Maintenance 

Another one of the most suitable approaches, which entails periodically pausing the operation of assets, is preventive maintenance. One of the main objectives of this maintenance is to enhance the lifespan of assets. 

3) Reliability Centered Maintenance

After all, reliability-centered reliability-centered maintenance acknowledges equipment failure, which is not always unpredictable. This delves deep in terms of analyzing each equipment’s potential failure patterns. This is also applicable to craft a tailored maintenance plan. 

4) Predictive Maintenance

Did you know that predictive maintenance is a vibration of analyzing a sensor that might warn of an impending malfunction? This prompts inspection, and this would also be feasible for timely repair.

In Conclusion

It’s clear that the benefits of regular home maintenance go beyond the surface. Fighting off germs, clearing the air from allergens, reducing stress levels – the impact on well-being is undeniable. It’s all about including mindful cleaning habits into your life, for the sake of your and your family’s well-being. So, embrace these tasks, rely on a routine, don’t hesitate to ask for help tackling them, and enjoy a living space in which you can thrive.

I hope you liked this article!

Read Also:

Ankita Tripathy loves to write about food and the Hallyu Wave in particular. During her free time, she enjoys looking at the sky or reading books while sipping a cup of hot coffee. Her favourite niches are food, music, lifestyle, travel, and Korean Pop music and drama.

View all posts

Leave a Reply

Your email address will not be published. Required fields are marked *

All Comments

Normally I do not read article on blogs however I would like to say that this writeup very forced me to try and do so Your writing style has been amazed me Thanks quite great post

Related

Salvage Your Furniture after a Flood

How to Salvage Your Furniture after a Flood

There are many reasons why flooding occurs, and it also comes in different shape, form and amount. It might be due to severe weather conditions or a leak in the plumbing. What you need to think about following a flood is how to salvage anything that wasn’t damaged beyond repair, primarily your furniture. As water damage can wreak severe havoc on your home, you are likely going to have to call in a restoration contractor like KIC Restoration to take care of your home’s infrastructure. But salvaging your furniture can be a less complicated process you can deal with on your own. If flooding is a consequence of a storm or hurricane you would probably get a notification in advance to prepare and avoid as much destruction as possible. Get all the furniture to a safe space in your home like the upper floors or cover them to protect them from the water as much as possible. After the flood is finally over, the first thing you need to do is check is if it is safe to return. While you’re at it, make sure to wear proper clothing. Another useful piece of advice is to bring a camera with you and take pictures of all the furniture because you will need to do a report for your insurance company. When you’ve made sure that it is safe to enter and you’ve put on protective gear, you can start inspecting the furniture and roughly separate them into salvageable and unsalvageable. Next, you can focus on the salvageable pieces of furniture and inspect if repairs would cost more than just replacing the items. Sentimental value also comes into play as you would want to save all the pieces that have been in your family for long, no matter the extent of the damage. But this is up to you. Upholstered Furniture Some types of furniture like upholstered furniture might be difficult to save especially if it has been in the water for too long. Chances are these items have already developed bacteria, fungi, mold, mildew, etc. This might have severe consequences to your health later on. You should move the furniture to someplace to dry. If it’s too heavy to move you can place aluminum foil or a similar material underneath it, just to keep it away from wet floors. As mentioned above, upholstered furniture might cause problems because it is a great absorbent. It is particularly dangerous if it has been sitting for too long in contaminated water. If the flood wasn’t too big, you might still have a good chance of salvaging it. You should then remove the upholstery fabrics from the wood or any other colored parts to prevent color bleed. Then you need to dry it to the fullest to prevent mildew and mold from developing, which is likely to happen if the piece of furniture is more than 20% wet. It is worth noting that this kind of furniture is very hard to salvage and the best and easiest thing to do is just to throw it all away unless of course it is antique or has a high value. Then it is best to hire a professional to do the job, as it would probably be necessary to completely strip it down and replace some parts. Mattresses Mattresses are also very difficult to handle. If the flooding wasn’t too severe, if the mattress hasn’t been soaked in water for too long, and if the water was clean it is possible to salvage it. The best thing to do is take it out and let the sun dry it naturally. You can use blocks to keep it above ground and a fan to speed up drying. If you sense a musty odor then mattress probably has mildew growing inside, in which case you’ll need the help of a professional to restore it. If your mattress has been underwater for too long mold has likely already spread, and it is probably contaminated beyond salvation. The only thing you can do here is to replace it. Wooden Furniture Wooden furniture might have the best chance to get salvaged especially if it wasn’t in the water for too long. It is possible to restore if the damage was not too big. It is crucial to clean it and dry it as much as possible to prevent mold and fungi development. Wiping and blotting can do the trick here, but only for furniture that was not in the water too long or was lightly damaged. You can clean white mildew spots by using turpentine or a mix of water and ammonia. The sooner you start drying the furniture, the higher the chance of salvaging it. Heavily Damaged Furniture Heavily damaged furniture which was in the water for too long is a different story. The best plan is to separate all easily removable parts like drawers and doors. Avoid forcing them if they are stuck. Just let them dry out and you will be able to pull them out later on when bloating is reduced. You can clean mud and dirt with a hose and then dry it in a room or other area with good ventilation. You should definitely avoid exposing it directly to the sun as it might cause it to deform. The process of drying takes several weeks or months. Only after it is completely dry can you start restoring the furniture. Contact KIC Restoration Inc of San Diego at 12170 Tech Center Dr, Poway, CA 92064, USA; 858-859-1998 or visit kicrestoration to learn more. Read More: 3 Tips On How To Plan The Best Cheap And Fabulous DIY Bedroom Makeover Top Expert Tips For A Stunning Condo Interior! 5 Innovative Ideas To Lend Your Bedroom With More Space Home Decor Is An Art Itself – Things To Know

READ MOREDetails
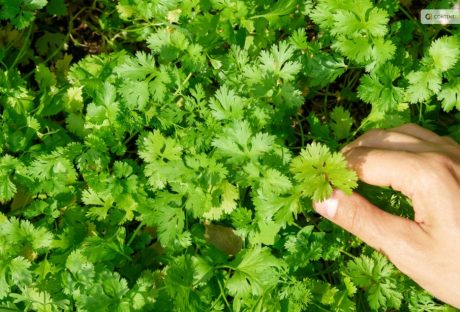
how to harvest cilantro

The Best Time and Method to Harvest Cilantro for Maximum Flavor and Aroma

One of the most used herbs in the world, cilantro, is also referred to as Chinese parsley or Coriandrum sativum. Fresh and zesty, cilantro gives your recipes a flavor boost. Mexican, Middle Eastern, Indian, Mediterranean, Chinese, African, and even Scandinavian cuisines use it extensively. Even cilantro microgreens are grown from it! Since cilantro itself doesn't keep well and loses aroma and flavor once dried, most people prefer to use it fresh. To have cilantro on hand, you should also have a few plants in the garden. You can harvest the plant for its flavorful cilantro seeds, also known as coriander, even if you don't use the leaves in your recipes. The leaves of the cilantro plants come throughout the spring and summer. Allow them to go to seed at that time since they grow easily in the garden! You must know how to harvest cilantro properly if you want to have a steady supply. Keep reading to find out all you need to know about harvesting cilantro. Harvesting Cilantro: Overview Most people either love or hate the flavor of cilantro leaves. However, you should still think about cultivating a few coriander plants in your garden and saving the seeds for a range of culinary uses. Most people in the US grow this delicious herb for its leaves. But the tasty coriander seeds are also worth harvesting. They have a distinct flavor from cilantro leaves. This fragrant herb of the cool season, cilantro, quickly goes to seed in the long, sweltering summer months. As the plant reaches higher in the sky, its rounded, lobed leaves become feathery. Pretty clusters of tiny white blossoms quickly emerge. Many pollinators are drawn to these nectar- and pollen-rich blossoms, particularly syrphid flies and honeybees. Little round coriander seeds with a kelly green color emerge as the blossoms start to fade. What To Expect from Cilantro? The distinctive flavor of coriander is citrusy and slightly nutty. It goes incredibly well with rice, beans, lentils, and roasted or grilled veggies. You can pick the seeds while they are still young and vibrant green. Or you can wait until they start to turn brown. Since green coriander seed is only found in gardens, it is better to harvest them when they are still green because of their stronger, more distinct flavor. You will not find them in the farmers’ market or the grocery store. If the seeds are kept in a glass container with a lid, then they can be refrigerated for several weeks and frozen effectively as well. Wait until most of the seed turns brown if you want to harvest the mature brown seed for winter grinding or planting next year. Next, trim off a few inches of stalk and the seed heads, then hang them upside down in a brown paper bag. The seeds will drop out of the heads and land in the bag's bottom once they are completely dry. The dry seed should be kept in a dry, cool place in a glass jar with a lid. For optimal flavor, grind it just before using. The flavor difference between freshly ground coriander seed and the pre-ground variety typically found in stores will astound you. Try adding green coriander seeds to dressings and marinades. Frequently adding an equal amount of ground coriander to recipes that call for cumin makes the flavors of the two go particularly well together. How to Harvest Cilantro? The most exciting aspect of growing plants is undoubtedly harvesting. Pick individual cilantro leaves if you plan to use a small amount. It is best to leave at least 1-2 inches of stem above the soil's surface when harvesting larger quantities of cilantro. It is preferable to leave a few lower leaves on the plant to support the herbs until they grow back. To cut the stems cleanly, use harvesting snips, long reach harvesting snips, or sharp, sterilized garden shears. To guarantee that your herbs regrow, it is best to remove only a small portion of the plant at a time. Furthermore, when the cilantro plant blooms and sets seed, the herb may start to taste bitter. So, when wondering how to harvest cilantro, it is preferable to harvest before the plant bolts because the leaves will be less appetizing at that point. When is The Best Time to Harvest Cilantro? When the morning dew has cleared and the sun hasn't set, it's the ideal time of day to harvest a variety of fruits, vegetables, and herbs, including cilantro. This way you can lessen the stress on your cilantro plant and give the fresh stock cuts enough time to dry before dusk, which lowers the risk of illness. Before it bolts, harvest cilantro when it is 6 to 8 inches tall. The flavor of cilantro leaves significantly decreases after they have bolted. The lifespan of the cilantro plants can be increased by careful and routine harvesting. It is crucial, though, to wait for your plant to become established before beginning to harvest. The plant develops numerous long, thin stems as it grows. They are ready to be harvested when the stems are long, and the leaves have a lacy appearance. The cilantro herbs are about ten to twelve inches tall at this point. Gather your cilantro in the spring and into the first part of the summer. Your plants may bolt to seed if summertime full sun conditions prove to be too hot for them. The best time to harvest cilantro is early morning. You can either choose to harvest it once a week or source just individual leaves whenever you need them. Most of the time, it takes about 2-3 weeks for regrowth, so you must harvest accordingly. You must remember that regular cut-and-come-again harvesting is the most ideal while the plant keeps producing foliage. How To Store Fresh Cilantro? Part of knowing how to harvest cilantro is also knowing how to store them. It's best to know how much you should take from the garden before you harvest. You will need to learn how to store cilantro if you do not intend to use the leaves right away to extend its shelf life. There are several approaches to try. Storing Cilantro in Water To keep the cilantro leaves dry, wait to wash them after harvesting. For storage purposes, store the stem ends in a glass or jar with 1 to 1.5 inches of water and refrigerate for a few days. At a minimum, change the water once a day. Use a plastic bag to cover the top loosely to preserve the humidity surrounding the herbs. Storing Cilantro in The Freezer Freezing cilantro is another low-maintenance way to store it. Shake off any extra moisture and rinse the leaves to get rid of any garden soil. Tear the leaves into small pieces and stuff them into ice cube trays, covering the herb with just enough water to barely cover. You can pre-measure if you'd like to ensure that you know precisely how much is in each cube for recipes in the future. After the cubes are completely frozen, place them in a freezer bag. Add as needed to marinade, smoothies, soups, and sauces. You can freeze cilantro for up to six or eight months. Read More: Everything You Need To Know About Harvesting Basil How To Dry Cilantro? There are two methods for drying cilantro. You can use the oven to dry cilantro. Since hot air can greatly affect the flavor of the finished and dried herb, you might want to avoid using heat if you want to enjoy flavorful dried cilantro. Air drying or hanging drying is a better way to dry cilantro. Gather the stems of the herbs into a small bunch and secure them with a string. Place the bunch in a dark, well-ventilated area and hang it upside down. Alternatively, you can wrap the bunch in a brown paper bag to keep the cilantro from getting dusty. After the bunch has been hanging for about a week, begin to check its level of dryness every day or two. It's ready to be crushed or powdered and stored for later use when it crumbles when touched. Cure the cilantro ahead of time to reduce the possibility of mold growth. Put the dried cilantro in a glass mason jar to cure. Open the jar and give it a good shake every day to let fresh air into it and mix the contents. This will assist in achieving moisture content parity. If you'd like, you can also include a moisture-absorbing packet. How To Harvest Cilantro Seeds? You can harvest the coriander seeds even if you don't like cilantro leaves. The plant can grow to 20 inches when it flowers. This requires temperatures above 75 degrees. Pods will form once they have flowered, and the flowers will fade. Before being harvested, these should be green to brown in color. These pods release the mature seed when it's ready. Tie the stems with the seed pods still attached into a bunch. Next, hang them upside down in a paper bag in a cool, dry place to harvest the seeds. With time, the seeds will sprout and drop into the bag. Store your seeds in a dry, cool place in an airtight jar. Unground dried seeds can be kept for three to four years in storage. Before using dried seeds in your recipes, grind them for the best flavor. How To Harvest Cilantro So It Keeps Growing? If you sow cilantro seeds every two weeks from spring until late summer, you can be sure to always have fresh leaves available. We advise chopping them up and firmly packing them into an ice cube tray filled with water. Then, just place the tray in the freezer. These can then be added directly to hot pans when preparing soups or sauces. Or they can be dropped into hot or cold water for cooking or drinking. What To Do If Cilantro Bolts? It's time to collect and preserve your own coriander seeds once your plant produces seeds. Picture each of those tiny white blossoms turning into a flavorful spice for your cooking or seeds for the following year! In addition to being aesthetically pleasing and tasty, cilantro flowers are also excellent pollinators.  There is a short window of time when the growing seasons of cilantro and tomatoes coincide. This proves they go well together. It usually happens that my tomato and pepper plants are just starting to take off when my cilantro plants bolt, sending forth gorgeous white flowers. To maximize the amount of fruit your plants produce for you, beneficial insects that are feeding on your cilantro flowers will collide with your fruiting plants, vibrate their leaves, and assist in pollination. Ladybugs, butterflies, and bees all love cilantro flowers. It truly is a win-win! Choose Slow Bolt Seeds Seek out seed packets labeled "long-standing" or "slow bolt cilantro," as these varieties have been cultivated to endure longer in the garden. You can find your go-to slow bolt seeds that are 100% certified organic from Seeds of Change. Finding a local seed producer is another smart move. Buying local seeds means you'll be growing a climate-adapted variety of cilantro, which increases the likelihood that you'll keep it longer. Harvest Cilantro Regularly Regularly chop your cilantro leaves. This preserves the health of the plant and guarantees that the leaves of this herb are fresh when you use them. Your cilantro will continue to produce new leaves from the center of the plant if you regularly harvest it by chopping off the older outer leaves. Additionally, your chances of cutting off those immature flower stalks increase with the amount of cilantro you harvest. This will aid in postponing any bolting.  Since cilantro is incredibly obstinate, you can delay as long as you can. Cut that thick center stalk as soon as possible. After that, the plant will start to send outside shoots, giving you a little extra cilantro before it eventually bolts completely. For sun protection, surround your cilantro with tall plants. Plant Taller Plants Around Cilantro for Sun Protection Encircle your cilantro with large warm-season plants (like tomato or pepper plants) so that the taller plants can shade your herbs slightly and help keep the soil cooler as the temperatures rise. After all, four to six hours of sun is sufficient for cilantro to grow. To increase the lifespan of your cilantro in the garden, interplant it with larger plants. Wrapping Up You will need to have patience if you want to collect the seeds for your cilantro. Before seeds can be harvested, cilantro needs to blossom. Before harvesting, the resulting seed heads need to be allowed to dry on the plant for a while. Harvesting the seeds is then as simple as shaking them into a paper bag or chopping off the entire seedhead and placing it inside the bag. If you have thoughts to share or questions to ask about how to harvest cilantro, please leave a comment below. We would love to hear from you! Read Also: Asparagus 101: When, How, And How Often To Harvest? Some Facts You Need to Know About Rainwater Harvesting How to Harvest Lettuce: A Step-by-Step Guide for Fresh and Crispy Salads

READ MOREDetails
Trailing Indoor Plants

10 Best Trailing Indoor Plants To Buy In 2022

Your dream house needs some ornaments and decorations to stand out as the queen of all houses in your neighborhood. With trailing indoor plants, you can add the green your beautiful home was missing all this time. For the urban dwellers, it is almost impossible to live inside the greenery. But, using indoor trailing plants, you can bring the green into your house. Indoor plants are the lively jewelry of your home decoration, and it is no secret. It is only with the green plants that the brick walls and your house's concrete get the touch of life. Hanging a few vines here and there from the pots can add the touch of the goddess of green vines to your home. You can keep a trail of the indoor plants on the railing of the staircase. You can hang some of them from the porch ceiling of your house. Maybe you can keep one or two containing some low-light plants for the interior? As you start to live with the green, you add extra life and vivacity to your life. So now, if I have got you even a little bit interested in the indoor trailing plants, allow me to introduce you to the best trailing indoor plants that you can decorate your house with. 10 Best Trailing Indoor Plants You can invite the wild indoors with these incredibly pretty green trailing indoor plants mentioned in this article. 1. Trailing Indoor Plants: Golden Pothos Golden pothos is just as beautiful as healthy for your surrounding environment. Not only can they thrive in the low light, but they also keep the air around you pure and refreshed. They help eliminate odors and cleanse the air within your home with formaldehyde, benzene, and carbon monoxide. If you have to stare at the computer screen all day long, you can look at them to reduce the irritation. As for decorating the interior, it is one of the most beautiful trailing indoor plants that you can hang from the ceiling of your room or the balcony. Read More: Grow these flowering plants in your home garden 2. Trailing Indoor Plants: Satin Pothos Scindapsus pictus' Exotica' or satin pothos is another vine you can keep within your home. It grows slowly, and the beautiful green leaves are splashed with silver color. This plant takes only a little water to grow within low light. When 2 cm of the compost goes dry, you can water them. Even NASA recommends these plants for the refinement of indoor air. The satin pothos are easy to propagate, and they are low maintenance. Many people keep them as good luck charms. If you have a flower vase with a stand in the drawing-room, you can place one of these plants there. 3. Trailing Indoor Plants: String Of Pearls One of my favorites, Senecio Rowleyanus, or String of pearls, is another pretty member that you can add to your drawing room. The skinny stems of this plant grow green bubbles as if they are green pearls. During winter, tiny white flowers grow out of the String of pearls plants. These are cascading plants, and they can be the attraction of your home decor. It is a pretty trailing indoor plant that grows in low light and dry air. I will suggest you make a trail of these indoor green pearls. You can hang them from baskets or use a shelf to arrange a trail of baskets containing the String of pearls. 4. Trailing Indoor Plants: Burro's Trail You can easily grow, propagate, and maintain the Burro's trails. However, if you are worried about your children and pets, then allow me to assure you that these trailing indoor plants pose no harm to them. They are nonpoisonous plants and are easy to grow and maintain. You can lay them on top of a pot full of compost and grow them quickly within a few days' notice. The plant also requires minimal watering. You can water them when the 2 cm of the compost is dry. You can decorate the interior with a few small baskets of the Burro's tail hanging from the ceiling. Or, you can also keep them on top of the tables in the dining room. You May Like To Read: 4 Essential Tools Needed to Maintain Your Garden in the Winter 5. Trailing Indoor Plants: Red Herringbone Plant Maranta leuconeura, Red herringbone plant, also known as the prayer plant, is another beauty to decorate your interior. The attractive patterns of this plant will amaze you both during the day and at night. Growing this plant may take a little experience. They require only a little water, but you need to water these plants when the pot is dry. The prayer plant is one of the most common trailing indoor plants, which you can place on the table. 6. Trailing Indoor Plants: String Of Hearts Also known as the Chain of hearts, sweet vines, rosary vines, String of hearts is another pretty indoor trailing plant. These are easy to grow and propagate. They have tiny leaves with pink and purple shades, making your interior look prettier as they grow and thrive across your balcony. In addition, they create the best contrastive combination with a white wall or ceiling. If you are a beginner and not much of a career giver, the String of hearts will bear with you. This plant grows within low light and requires minimum water. 7. Trailing Indoor Plants: Boston Fern Do you want to keep a vase full of green and lively ferns on the tea table? If your need is something similar, you can consider giving the Boston ferns someplace within your house. You can hang them from the ceiling or shelves. But unlike the other plants here, they are attention seekers. They need your daily care; from ample lights, humidity and regular watering are a must. Do you have space beside your window? If you do, you can put them there. They shed dead leaves, so you also need to groom them occasionally. They are also excellent givers. And they keep the interior air fresh and maintain the moisture within the house. 8. Trailing Indoor Plants: Chain Of Cactus Rhipsalis paradoxa minor, or the Chain of cactus, grows pretty-looking white flowers during the spring. However, the winter stimulates the growth of these pretty flowers. These trailing interior plants are rich in antioxidants and vitamin C. These are best for big hanging pots. You can keep a wide vase full of the Chain of cactus and let them grow wildly. They require minimum water and light, although you need to be a little experienced to grow them properly. You May Also Like This: Best Material for Garden Sheds: A Guide for Everyone 9. Trailing Indoor Plants: Grape Ivy These trailing indoor plants are pretty underrated. The grape ivy is a good air purifier; they require moderate or low light to thrive within your interior. They also have antioxidant and anti-inflammatory benefits. You can hang one or two baskets of the grape ivy inside and be amazed as they keep shining while getting older. 10. Trailing Indoor Plants: Maidenhair Fern The cousin of the Boston ferns, not too distant from its relative, the maidenhair ferns take after the qualities of the Boston ferns. They also require lots of care, ample light, and regular watering. They indeed maintain the various hues of greenkeeping a dazzling look within the interior of your house. These trailing indoor plants possess anti-thyroidal, anti-diabetic, antifungal, wound healing, and anti-hair loss properties. So not only are they pretty, but they are quite beneficial for your health as well. Let The Trailing Indoor Plants Decorate Your Home Most of these plants only take a little care and light to grow healthy within the interior of your house. You can go from little pots of green plants to large vases full of them to decorate your interior wildly. These plants have some health benefits like refreshing the interior air or cleansing it. They are also good at keeping the air humid. If you are looking for such plants, I suggest you choose from any of these vines, pothos, cactuses, and ferns. Also, if you think that we have missed out on any valuable plant, you can let us know through the comment. Read Also: Garden Edging for Beginners How To Arrive At The Perfect Choice Of A Potting Bench For Your Gardening How To Install Artificial Grass In Your Garden – Installation Guide Step By Step

READ MOREDetails