6 Types Of Signs Every Apartment Resident Should Know About

Published on: 29 February 2024 Last Updated on: 13 September 2024
Apartment

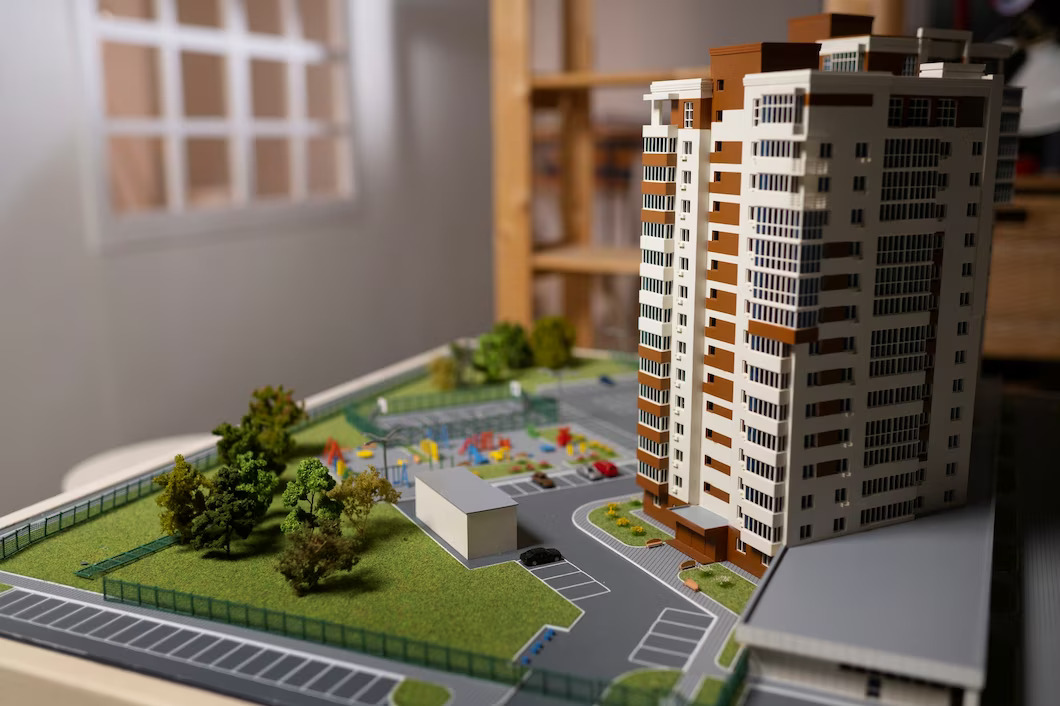
Signage plays a crucial role in communicating important information and guiding residents and visitors at apartment complexes. From practical wayfinding signs to eye-catching banners advertising available units, the right signs can make all the difference. 

This blog explores the array of sign options that apartment managers have at their disposal to effectively convey messages, improve accessibility, and enhance curb appeal.

We’ll look at everything from illuminated “Vacancy” signs to inform potential renters of availability to parking designation signs that help maintain order in lots.

Metal laser cut signage like building and unit number markers also make it easier for emergency responders, delivery drivers, and visitors to navigate complexes.

Plus, promotional banners can attract interest from passersby. With a thoughtful signage strategy, managers can ensure their apartment community puts its best face forward while helping residents and guests seamlessly get where they need to go.

Effective Safety Signage for Apartment Complexes

Safety Signage for Apartment Complexes

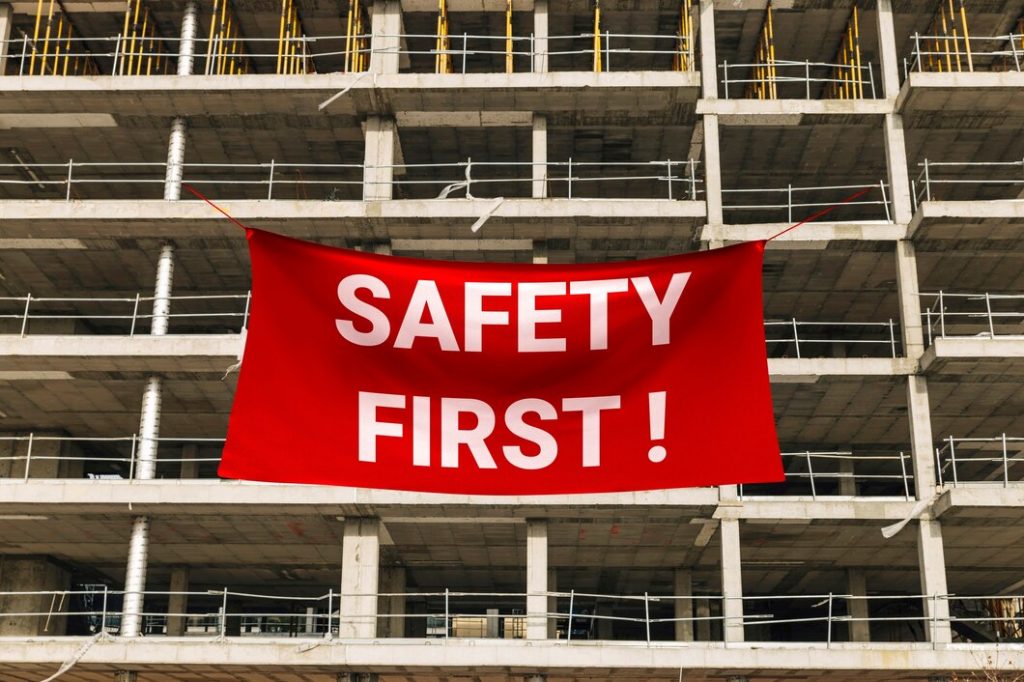
Strategic safety signs are a must for any apartment community, helping to mitigate risk and give residents peace of mind. Required by law in many cases, these symbols and warnings serve an important function by alerting residents and visitors to potential hazards, emergency resources, and proper protocols. 

Exit signs with directional arrows provide critical guidance in the event of a fire or other emergency evacuation. Highly visible hazard signs denoting slippery floors or wet paint caution people to avoid dangerous conditions. Signs indicating the locations of safety equipment like fire extinguishers and defibrillators can save critical seconds in an emergency.

Parking and traffic signs help maintain order in complex lots and garages. Warning symbols for loud noises, falling objects, or other construction hazards around work zones keep passersby safe.

When properly placed around an apartment community, these simple but essential signs convey a message of preparedness and attention to safety that gives residents confidence in their building management.

Contemporary Signage for an Inviting Apartment Atmosphere

An apartment community’s signage makes a strong first impression on prospective residents. To keep pace in a competitive market, modern, stylish signs are a must in showcasing an up-to-date, inviting atmosphere. 

Sleek, backlit LED signs at a complex’s entrance identify the property while seamlessly blending contemporary aesthetics. Likewise, stylish building IDs with minimalist lettering and colors that pop evoke modern tastes. Parking signs with clean lines and high-visibility reflective vinyl or thermoplastic lettering also exude a contemporary vibe. 

Inside leasing offices, wayfinding signage with intuitive pictograms, sans-serif fonts, and bright accent colors speaks to today’s sensibilities. Outdoor banners sporting vibrant images, short impactful phrases, and a distinctive modern style attract the gaze of passersby.

Signs with polished, contemporary finishes appeal aesthetically and communicate professionalism and quality. By partnering with an innovative sign company, apartments can keep their image fresh, memorable, and inviting for new generations of renters.

Promotional Signage for Apartment Events

Special events help apartment communities build a sense of togetherness and camaraderie among residents. To generate buzz and boost participation, targeted signage is an invaluable promotional tool.

Eye-catching vinyl banners prominently displayed at a complex’s entrance build anticipation and awareness of upcoming holiday parties, poolside barbecues, and other resident events.

Sandwich boards stationed in high-traffic common areas like mailrooms spread the word on everything from movie nights to fitness classes. For events like trick-or-treating or a pet parade that will draw outside visitors, roadside signs posted nearby grab attention from passersby. 

Temporary signage like corrugated yard signs, A-frame sidewalk signs, and posters hung in common spaces ensure residents receive frequent reminders leading up to each event.

The vibrant, festive designs set a fun tone. After an event concludes, a thoughtful “Thank You” sign shows appreciation for those who participated. With the right signage strategy, apartment managers can generate buzz and bring their community together around special activities and gatherings year-round.

Clear Identification Signs for Apartment Buildings

Signs for Apartment Buildings

A clear signage strategy is essential in any apartment community to help residents and guests easily identify buildings, units, and common spaces. Proper identification guides traffic, minimizes confusion, and improves the overall living experience.  

Illuminated building numbers and address signs ensure emergency responders can quickly locate the correct structures. Unit number signs on floors and doors give each residence a sense of identity. Room ID signs labeled with easy-to-read text and icons help differentiate laundries, fitness centers, lobbies, and other shared amenities. Custom room name signs add personality to spaces like game rooms or theaters. 

Well-designed identification signage also reinforces security. Authorized access signs for private lobbies or gated garages deter unwanted visitors. And placards labeling restricted areas like electrical rooms or roof access help keep people safe. 

Finally, a clear wayfinding signage strategy with directionals pointing to different building exits or parking areas simplifies navigation. With thoughtful placement and durable materials, identification signage provides clarity, security, and convenience for years of daily use.

Accessible Signage for ADA Apartment Compliance

In apartment complexes, proper ADA-compliant signage is a legal requirement to accommodate residents and guests with disabilities. Following ADA guidelines help ensure equal access and inclusion for all.

Signs must have high visual contrast between lettering and background without glare or shadows. Grade 2 braille placed below the text provides accessibility for the blind and visually impaired. Raised characters and pictograms allow signs to be interpreted non-visually by touch. 

Accessible signs use simple, intuitive icons that transcend language barriers. Directional signs assist with wayfinding. Room signs identify amenities. Informational signs indicate accessible routes, entrances, exits, and areas of rescue assistance. Stairway signs guide users towards ramps. 

By law, permanent spaces like unit entrances and common rooms require ADA signs. Temporary signs like parking warnings should also follow recommendations. With a thoughtful sign plan incorporating contrast, braille-raised characters, and icons, apartment complexes demonstrate their commitment to creating a welcoming, navigable environment for all residents and visitors.

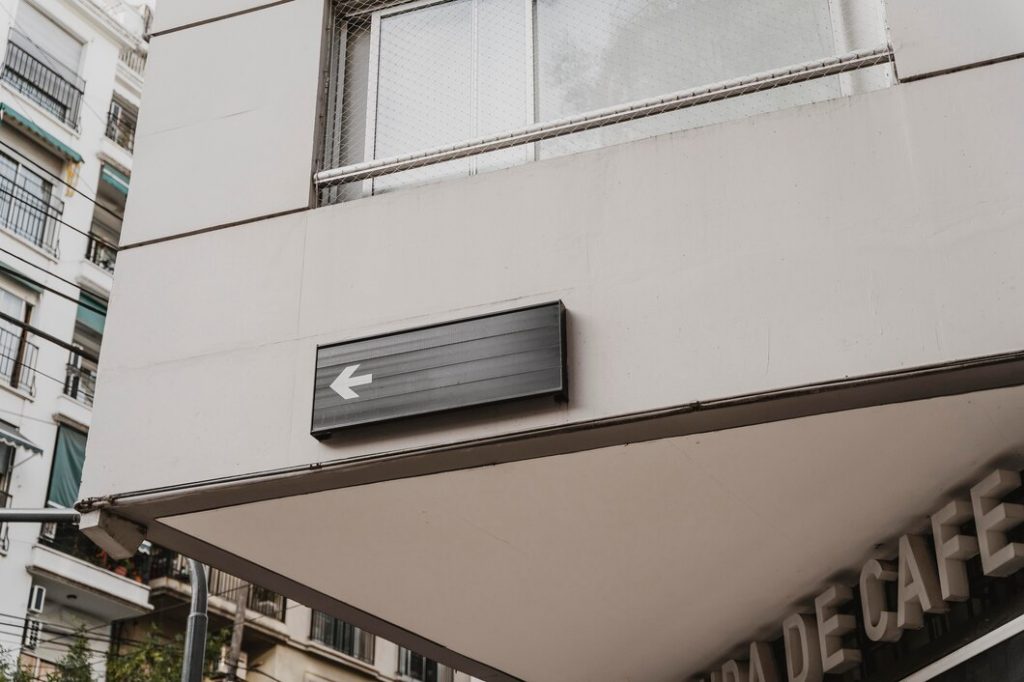
Intuitive Wayfinding Signage for Apartment Complexes

A clear wayfinding signage strategy is essential for any apartment community, allowing residents and guests to seamlessly navigate between buildings, amenities, and parking areas. Intuitive signs reduce frustration and reflect thoughtful management.

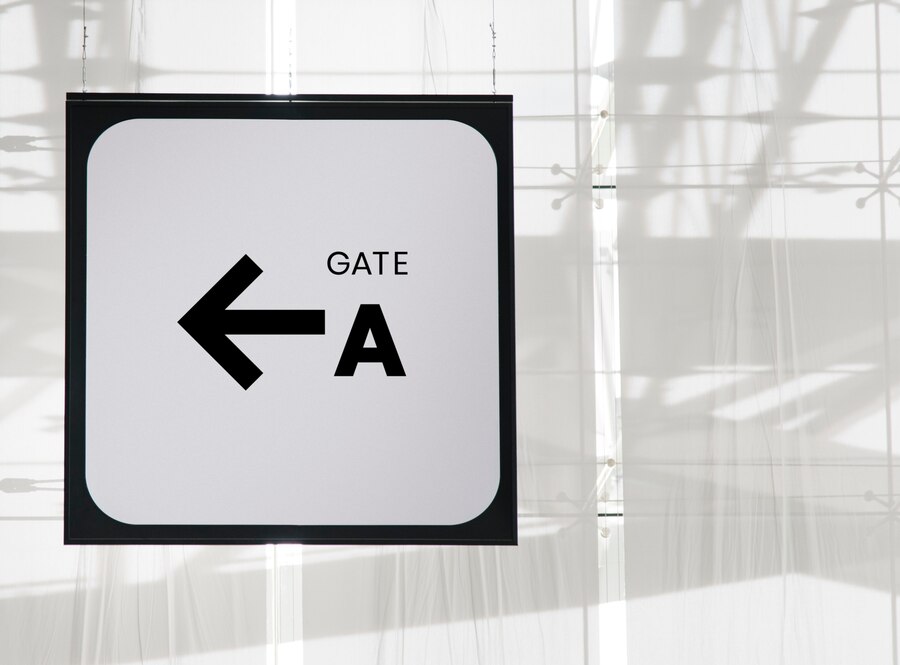
Directional signs posted at complex entrances and key intersections point visitors toward leasing offices, guest parking, and specific buildings. Trailblazer signs on main walkways provide ongoing orientation. Arrows, international symbols, and maps further aid navigation at junctions. 

Building directories found in main lobbies centralize location information for amenities like fitness centers, pools, and business centers. Illuminated unit number signs outside stairwells and elevators confirm users are on the correct floor. Parking signs with color coding and space numbers help distinguish lots and spaces. 

With thoughtful placement and highly visible reflective materials, wayfinding signage ensures visitors quickly find their destination. This cuts down on circling, enhances first impressions, and communicates a resident-focused environment. Simply put, good wayfinding equals good management.

Wayfinding Signage for Apartment Complexes

Conclusion

An effective signage plan is invaluable for any apartment community, serving practical and aesthetic purposes. From illuminating building numbers that assist emergency response to wayfinding signage guiding foot traffic, signage provides orientation, security, accessibility, and visual appeal.

Managers must consider permanent signage needs like room IDs and ADA compliance and options for changeable messaging to promote leasing availability or resident events. The finishes and design details of all signs should align with the complex’s contemporary style and branding. Utilizing sign types from digital displays to sidewalk A-frames provides flexibility.

With the help of an experienced sign company, managers can develop a comprehensive signage strategy tailored to their complex’s specific spaces, needs, and aspirations. From influencing first impressions to sustaining long-term functionality, signage positively impacts apartments in countless ways.

When thoughtfully designed, fabricated, and placed, signage cements an apartment community’s identity as an inviting, navigable place residents are proud to call home.

Read Also:

Ankita Tripathy loves to write about food and the Hallyu Wave in particular. During her free time, she enjoys looking at the sky or reading books while sipping a cup of hot coffee. Her favourite niches are food, music, lifestyle, travel, and Korean Pop music and drama.

View all posts

Leave a Reply

Your email address will not be published. Required fields are marked *

Related

Zebra Blinds

Elegance of Zebra Blinds: Functionality and Style

Zebra blinds, also known as transitional shades, have emerged as a popular window treatment option for those seeking a harmonious blend of style and functionality. These versatile window coverings are gaining recognition for their unique design and ability to transform any space.  In this article, we will delve into the world of zebra blinds canada, exploring their features, benefits, installation, and maintenance. Let's embark on this journey to uncover the elegance that zebra blinds can bring to your home. What  Do You Know About Zebra Blinds? Zebra blinds are a modern and innovative window treatment solution that gives homeowners optimal control over light and privacy. They consist of two layers of fabric with solid stripes and alternating sheer, giving them their distinctive appearance. The ingenious design allows you to adjust and control the position of the fabric layers, creating varying degrees of light filtration and privacy. The Zebra blinds are available in different shades, transitional shades, alternating shades and others. These solid bands offer privacy and then block out the lights. It can help you get the soft, diffused glow in your space. These zebra blinds are available in different options. You can fix them in different places, the living rooms, the bedrooms, the home office and others. They offer you a contemporary, modern look that complements the different design styles.  Benefits of Zebra Blinds The Zebra blinds are available in different shades and styles, as we mentioned above. But they are more used for the advantages they carry. Here, we provide you with the advantages that you have with the help of the zebra blinds. So, let's get started with the discussion to have a better understanding of the facts.  1. Light Control Zebra blinds offer exceptional control over natural light. You can perfectly balance a well-lit room and a shaded private space by aligning the sheer and solid stripes. This adaptability is especially valuable for rooms with changing light conditions throughout the day. It requires mention that you need different shades of light for different occasions. If you have control over the amount of lights entering your house, you can undoubtedly be able to regulate the temperature of your home.  2. Privacy Maintain your privacy without sacrificing natural light. Zebra blinds allow you to obscure the view from the outside while still enjoying the scenery outdoors. It's an ideal solution for homes in densely populated areas or those facing busy streets. Among the top requirements that you have, privacy is undoubtedly one of them. From this aspect, the zebra blinds are of great benefit without a hint of doubt.  3. Stylish Aesthetics Zebra blinds are not just functional; they also serve as a stylish design element in any room. Their contemporary look complements various interior styles, from modern to traditional, making them versatile. There are different categories of zebra blinds that define your core requirements. You have to be highly specific about your own requirements. They help you get the best look and feel.  But you can not shift your focus or attention from the aesthetics.  This is the reason they are effective in terms of the overall look and feel of both your zebra blinds and at the same time, the aesthetics.  4. Easy Maintenance Keeping zebra blinds clean is hassle-free. Regular dusting or gentle vacuuming is usually sufficient to maintain their pristine appearance. Their durability ensures they remain an attractive window treatment for years to come. What you simply need is to allocate some minutes, once or twice a week. It will be more than sufficient to provide you with the necessary maintenance.  Installation Installing the zebra blinds has their own fun and, at the same time, their own challenge. You can say that there are both positives and the negatives. But you can not overlook the fact that you, too, have your own requirements.  Installing zebra blinds is a straightforward process that can be done by a professional or as a DIY project. Here's a basic guide: 1. Gather Your Tools To begin, you'll need a measuring tape, a level, a screwdriver, and a pencil.  2. Measure Your Windows Accurate measurements are crucial for a perfect fit. Measure the width and height of your window frame, noting down the dimensions. 3. Mounting Brackets: Attach the mounting brackets to the top of your window frame, ensuring they are level. 4. Install the Blinds Insert the zebra blinds into the mounting brackets and secure them in place. 5. Test Operation Test the blinds to ensure they raise, lower, and adjust smoothly. Another angle of this action is the availability of time. You may not have sufficient time for installation. Or it might be possible that you are not good at it and it's not your among your priorities. Then, in that case, you make the best of professionals. They have a thorough knowledge of the nitty-gritty of the art. They can help you out with the inputs. Maintenance Tips Buying aesthetically appealing zebra blinds will not be enough; you must also focus on maintenance. It involves your daily time investments. You must mop it daily or do it twice or thrice a week. It may be that you don't have sufficient time. But if you can not mange your maintenance, then in that case you must take the help of helping hands, be it the  To keep your zebra blinds in pristine condition, follow these maintenance tips: Regularly dust or vacuum the blinds to prevent dust buildup. Spot clean any stains with a mild detergent and a soft cloth. Avoid using harsh chemicals or abrasive cleaners, as they can damage the fabric. Conclusion In conclusion, zebra blinds offer a unique combination of functionality and style for your windows. Their innovative design can help you control light and privacy effectively while adding a touch of elegance to your living spaces. Whether you're redecorating your home or simply looking for a practical window treatment solution, zebra blinds are an excellent choice. So consider these points while you look to select zebra blinds for your home.  Read Also: Inspiring Window Treatment Ideas Replacement Windows – Benefits of Vinyl Windows 10 Tactics To Maintain Clear Windows

READ MOREDetails
Restaurant Chair

Restaurant Chair Trends: Classic And Contemporary Styles

Have you ever been to a restaurant and noticed the chairs? Not only are they comfortable, but they can also speak volumes about the establishment. From classic styles to contemporary designs, restaurant chairs come in many different shapes and forms. Restaurant chair design has come a long way since its inception. Today’s chairs offer more than just comfort; they lend their own unique character to an eatery’s atmosphere. Whether you’re looking for something classic or contemporary, there are numerous options on the market for both interior and outdoor seating. Let’s take a look at some of today’s popular trends in restaurant chair design. From sleek leather designs to rustic wood creations, there is no shortage of styles available for restaurants looking to set the tone with their seating choices. Customers can choose from traditional wooden chairs with intricate carvings or opt for a more modern vibe with curved metal frames that provide both form and function. With so many restaurant chairs for sale, it's easy to create the perfect look for any dining space. 1. Understanding Restaurant Chair Styles When it comes to furnishing a restaurant, chair selection is essential. Choosing the right style can make all the difference in creating an inviting atmosphere for guests. In this article, we'll explore the two main styles of restaurant chairs: classic and contemporary. Classic restaurant chairs are characterized by elegant designs with intricate detailing and sturdy construction. These types of chairs typically feature rich fabrics, ornate carvings, and beautiful colors that will add warmth to any dining space. Plus, they often come with built-in cushioning for increased comfort. On the other hand, contemporary chairs offer a more modern look with sleek lines and sharp angles. They usually have metal or plastic frames and may be upholstered in bold colors or patterns that draw attention to the space. Both classic and contemporary styles of restaurant chairs offer unique benefits, making either one a great choice depending on your individual needs and preferences. For instance, classic chairs provide a timeless elegance while contemporary ones bring an up-to-date vibe to any setting. Ultimately, it's important to consider carefully what type of design you're looking for when selecting restaurant chairs—as they can make or break your overall aesthetic! 2. Classic Restaurant Chair Styles The first step to understanding restaurant chair trends is to understand the classic styles. Classic chairs are timeless designs that have been in existence for centuries, and they remain popular in restaurants. These chairs feature elegant curves and subtle lines, often crafted from wood or metal. They come in a variety of colors, finishes, and fabrics that can be customized to suit any decor scheme. Classic chairs are known for their comfort and durability, making them an ideal choice for busy restaurants. They also provide guests with a sense of luxury and sophistication; many classic designs even incorporate carved details or decorative embellishments that add character to the space. Plus, these chairs won’t break your budget; classic designs tend to be more affordable than their modern counterparts. From traditional dining areas to contemporary spaces, classic restaurant chairs offer timeless style and comfort that will last for years. With so many options available, you’re sure to find a design that perfectly complements your restaurant’s look and feel. Whether you choose an ornate design or something more modest and understated, these classic features will instantly elevate your space – without sacrificing quality or durability. 3. Contemporary Restaurant Chair Styles When it comes to contemporary restaurant chair styles, the options are endless. With modern designs and materials, these chairs can often stand out from classic ones. There's something for every aesthetic and budget, so it's worth taking the time to explore all the possibilities. One popular option is metal chairs. These sleek pieces of furniture often have a minimalist design with thin frames and curved or straight legs. They also come in various colors and finishes, such as brushed gold or chrome. Metal chairs are perfect for creating an industrial look in any restaurant space. Wooden chairs are another great choice for a contemporary style. Whether they're made from light-colored woods like maple or darker woods like teak, wooden chairs can add warmth to a space while still maintaining a modern feel. Additionally, wooden chairs can be easily customized with paint or upholstery if desired. No matter what type of chair you choose, it's important to make sure that it's comfortable as well as stylish. It should fit within your existing decor while providing guests with a place to relax during their meal. Taking these factors into consideration will ensure that your restaurant has the perfect seating for any occasion. 4. Practical Considerations For Restaurant Chairs When it comes to selecting restaurant chairs, there are a few practical considerations to keep in mind. It's important to think about the size of the space, as well as the number of customers that will be dining.It's also crucial to consider how much wear and tear the chairs will experience — especially if you're looking at more delicate designs. The material is another factor when it comes to practicality. Hardwood chairs may look beautiful but require regular maintenance, while metal or plastic chairs can be cheaper but may not have the same longevity. Comfort is obviously an important consideration too; after all, what good is a stylish chair if your guests won't want to sit in it? Finally, the budget should also be taken into account. When it comes to furnishings for restaurants, there's usually a trade-off between style and cost. Ultimately, finding the right balance between these two factors is key to creating an inviting atmosphere that won't break the bank. Related: The Basics of Restaurant Equipment Financing 5. Popular Materials For Restaurant Chairs When it comes to restaurant chairs, materials play an important role in style, comfort, and durability. While there's no one-size-fits-all material for restaurant chairs, there are a few popular options that you can consider when selecting the perfect chairs for your space. Let's take a closer look at some of the most popular materials for restaurant chairs. Wood is often the first material people think of when shopping for furniture, and it's no surprise why—wooden chairs are timelessly stylish and easy to customize. They come in both classic and contemporary styles, allowing you to pick something that fits your design aesthetic. Plus, wood is a durable material that won't chip or dent easily and will last for years with proper maintenance. Metal is another great option for restaurant chairs—it comes in many different colors and styles and will give your space an industrial feel. Metal is also lightweight yet strong enough to stand up to the wear and tear of daily use in busy restaurants. What's more, metal requires very little maintenance compared to other materials like wood or fabric. No matter what type of restaurant chair you're looking for, there's sure to be a material that meets your needs and style preferences. From classic wooden designs to modern metallic looks, there are plenty of options available when it comes time to choose furniture for your dining room or patio area. Conclusion Restaurant chairs come in a variety of classic and contemporary styles, with the average cost depending on the style you choose. They're expected to have a long lifespan, and many are available in custom sizes. Additionally, many restaurant chairs are suitable for both indoor and outdoor use and can be easily cleaned and maintained. When choosing restaurant chairs, it's important to consider your needs. Think about the space you have available, the type of clientele you serve, and how often they will be used. You'll also want to make sure the chairs are comfortable, as well as durable enough to withstand high-traffic areas. Choosing the right chair for your restaurant is an important decision that can affect both its look and function. With a little research, you'll be able to find the perfect match for your space, whether it's a classic or contemporary style, and create a stylish atmosphere that customers will enjoy. Read Also: Reasons Put Bean Bag Chairs in Your Classroom How Do You Match Sofas With Accent Chairs? 7 Tips to Choose Ergonomic Office Chair

READ MOREDetails
how to harvest cilantro

The Best Time and Method to Harvest Cilantro for Maximum Flavor and Aroma

One of the most used herbs in the world, cilantro, is also referred to as Chinese parsley or Coriandrum sativum. Fresh and zesty, cilantro gives your recipes a flavor boost. Mexican, Middle Eastern, Indian, Mediterranean, Chinese, African, and even Scandinavian cuisines use it extensively. Even cilantro microgreens are grown from it! Since cilantro itself doesn't keep well and loses aroma and flavor once dried, most people prefer to use it fresh. To have cilantro on hand, you should also have a few plants in the garden. You can harvest the plant for its flavorful cilantro seeds, also known as coriander, even if you don't use the leaves in your recipes. The leaves of the cilantro plants come throughout the spring and summer. Allow them to go to seed at that time since they grow easily in the garden! You must know how to harvest cilantro properly if you want to have a steady supply. Keep reading to find out all you need to know about harvesting cilantro. Harvesting Cilantro: Overview Most people either love or hate the flavor of cilantro leaves. However, you should still think about cultivating a few coriander plants in your garden and saving the seeds for a range of culinary uses. Most people in the US grow this delicious herb for its leaves. But the tasty coriander seeds are also worth harvesting. They have a distinct flavor from cilantro leaves. This fragrant herb of the cool season, cilantro, quickly goes to seed in the long, sweltering summer months. As the plant reaches higher in the sky, its rounded, lobed leaves become feathery. Pretty clusters of tiny white blossoms quickly emerge. Many pollinators are drawn to these nectar- and pollen-rich blossoms, particularly syrphid flies and honeybees. Little round coriander seeds with a kelly green color emerge as the blossoms start to fade. What To Expect from Cilantro? The distinctive flavor of coriander is citrusy and slightly nutty. It goes incredibly well with rice, beans, lentils, and roasted or grilled veggies. You can pick the seeds while they are still young and vibrant green. Or you can wait until they start to turn brown. Since green coriander seed is only found in gardens, it is better to harvest them when they are still green because of their stronger, more distinct flavor. You will not find them in the farmers’ market or the grocery store. If the seeds are kept in a glass container with a lid, then they can be refrigerated for several weeks and frozen effectively as well. Wait until most of the seed turns brown if you want to harvest the mature brown seed for winter grinding or planting next year. Next, trim off a few inches of stalk and the seed heads, then hang them upside down in a brown paper bag. The seeds will drop out of the heads and land in the bag's bottom once they are completely dry. The dry seed should be kept in a dry, cool place in a glass jar with a lid. For optimal flavor, grind it just before using. The flavor difference between freshly ground coriander seed and the pre-ground variety typically found in stores will astound you. Try adding green coriander seeds to dressings and marinades. Frequently adding an equal amount of ground coriander to recipes that call for cumin makes the flavors of the two go particularly well together. How to Harvest Cilantro? The most exciting aspect of growing plants is undoubtedly harvesting. Pick individual cilantro leaves if you plan to use a small amount. It is best to leave at least 1-2 inches of stem above the soil's surface when harvesting larger quantities of cilantro. It is preferable to leave a few lower leaves on the plant to support the herbs until they grow back. To cut the stems cleanly, use harvesting snips, long reach harvesting snips, or sharp, sterilized garden shears. To guarantee that your herbs regrow, it is best to remove only a small portion of the plant at a time. Furthermore, when the cilantro plant blooms and sets seed, the herb may start to taste bitter. So, when wondering how to harvest cilantro, it is preferable to harvest before the plant bolts because the leaves will be less appetizing at that point. When is The Best Time to Harvest Cilantro? When the morning dew has cleared and the sun hasn't set, it's the ideal time of day to harvest a variety of fruits, vegetables, and herbs, including cilantro. This way you can lessen the stress on your cilantro plant and give the fresh stock cuts enough time to dry before dusk, which lowers the risk of illness. Before it bolts, harvest cilantro when it is 6 to 8 inches tall. The flavor of cilantro leaves significantly decreases after they have bolted. The lifespan of the cilantro plants can be increased by careful and routine harvesting. It is crucial, though, to wait for your plant to become established before beginning to harvest. The plant develops numerous long, thin stems as it grows. They are ready to be harvested when the stems are long, and the leaves have a lacy appearance. The cilantro herbs are about ten to twelve inches tall at this point. Gather your cilantro in the spring and into the first part of the summer. Your plants may bolt to seed if summertime full sun conditions prove to be too hot for them. The best time to harvest cilantro is early morning. You can either choose to harvest it once a week or source just individual leaves whenever you need them. Most of the time, it takes about 2-3 weeks for regrowth, so you must harvest accordingly. You must remember that regular cut-and-come-again harvesting is the most ideal while the plant keeps producing foliage. How To Store Fresh Cilantro? Part of knowing how to harvest cilantro is also knowing how to store them. It's best to know how much you should take from the garden before you harvest. You will need to learn how to store cilantro if you do not intend to use the leaves right away to extend its shelf life. There are several approaches to try. Storing Cilantro in Water To keep the cilantro leaves dry, wait to wash them after harvesting. For storage purposes, store the stem ends in a glass or jar with 1 to 1.5 inches of water and refrigerate for a few days. At a minimum, change the water once a day. Use a plastic bag to cover the top loosely to preserve the humidity surrounding the herbs. Storing Cilantro in The Freezer Freezing cilantro is another low-maintenance way to store it. Shake off any extra moisture and rinse the leaves to get rid of any garden soil. Tear the leaves into small pieces and stuff them into ice cube trays, covering the herb with just enough water to barely cover. You can pre-measure if you'd like to ensure that you know precisely how much is in each cube for recipes in the future. After the cubes are completely frozen, place them in a freezer bag. Add as needed to marinade, smoothies, soups, and sauces. You can freeze cilantro for up to six or eight months. Read More: Everything You Need To Know About Harvesting Basil How To Dry Cilantro? There are two methods for drying cilantro. You can use the oven to dry cilantro. Since hot air can greatly affect the flavor of the finished and dried herb, you might want to avoid using heat if you want to enjoy flavorful dried cilantro. Air drying or hanging drying is a better way to dry cilantro. Gather the stems of the herbs into a small bunch and secure them with a string. Place the bunch in a dark, well-ventilated area and hang it upside down. Alternatively, you can wrap the bunch in a brown paper bag to keep the cilantro from getting dusty. After the bunch has been hanging for about a week, begin to check its level of dryness every day or two. It's ready to be crushed or powdered and stored for later use when it crumbles when touched. Cure the cilantro ahead of time to reduce the possibility of mold growth. Put the dried cilantro in a glass mason jar to cure. Open the jar and give it a good shake every day to let fresh air into it and mix the contents. This will assist in achieving moisture content parity. If you'd like, you can also include a moisture-absorbing packet. How To Harvest Cilantro Seeds? You can harvest the coriander seeds even if you don't like cilantro leaves. The plant can grow to 20 inches when it flowers. This requires temperatures above 75 degrees. Pods will form once they have flowered, and the flowers will fade. Before being harvested, these should be green to brown in color. These pods release the mature seed when it's ready. Tie the stems with the seed pods still attached into a bunch. Next, hang them upside down in a paper bag in a cool, dry place to harvest the seeds. With time, the seeds will sprout and drop into the bag. Store your seeds in a dry, cool place in an airtight jar. Unground dried seeds can be kept for three to four years in storage. Before using dried seeds in your recipes, grind them for the best flavor. How To Harvest Cilantro So It Keeps Growing? If you sow cilantro seeds every two weeks from spring until late summer, you can be sure to always have fresh leaves available. We advise chopping them up and firmly packing them into an ice cube tray filled with water. Then, just place the tray in the freezer. These can then be added directly to hot pans when preparing soups or sauces. Or they can be dropped into hot or cold water for cooking or drinking. What To Do If Cilantro Bolts? It's time to collect and preserve your own coriander seeds once your plant produces seeds. Picture each of those tiny white blossoms turning into a flavorful spice for your cooking or seeds for the following year! In addition to being aesthetically pleasing and tasty, cilantro flowers are also excellent pollinators.  There is a short window of time when the growing seasons of cilantro and tomatoes coincide. This proves they go well together. It usually happens that my tomato and pepper plants are just starting to take off when my cilantro plants bolt, sending forth gorgeous white flowers. To maximize the amount of fruit your plants produce for you, beneficial insects that are feeding on your cilantro flowers will collide with your fruiting plants, vibrate their leaves, and assist in pollination. Ladybugs, butterflies, and bees all love cilantro flowers. It truly is a win-win! Choose Slow Bolt Seeds Seek out seed packets labeled "long-standing" or "slow bolt cilantro," as these varieties have been cultivated to endure longer in the garden. You can find your go-to slow bolt seeds that are 100% certified organic from Seeds of Change. Finding a local seed producer is another smart move. Buying local seeds means you'll be growing a climate-adapted variety of cilantro, which increases the likelihood that you'll keep it longer. Harvest Cilantro Regularly Regularly chop your cilantro leaves. This preserves the health of the plant and guarantees that the leaves of this herb are fresh when you use them. Your cilantro will continue to produce new leaves from the center of the plant if you regularly harvest it by chopping off the older outer leaves. Additionally, your chances of cutting off those immature flower stalks increase with the amount of cilantro you harvest. This will aid in postponing any bolting.  Since cilantro is incredibly obstinate, you can delay as long as you can. Cut that thick center stalk as soon as possible. After that, the plant will start to send outside shoots, giving you a little extra cilantro before it eventually bolts completely. For sun protection, surround your cilantro with tall plants. Plant Taller Plants Around Cilantro for Sun Protection Encircle your cilantro with large warm-season plants (like tomato or pepper plants) so that the taller plants can shade your herbs slightly and help keep the soil cooler as the temperatures rise. After all, four to six hours of sun is sufficient for cilantro to grow. To increase the lifespan of your cilantro in the garden, interplant it with larger plants. Wrapping Up You will need to have patience if you want to collect the seeds for your cilantro. Before seeds can be harvested, cilantro needs to blossom. Before harvesting, the resulting seed heads need to be allowed to dry on the plant for a while. Harvesting the seeds is then as simple as shaking them into a paper bag or chopping off the entire seedhead and placing it inside the bag. If you have thoughts to share or questions to ask about how to harvest cilantro, please leave a comment below. We would love to hear from you! Read Also: Asparagus 101: When, How, And How Often To Harvest? Some Facts You Need to Know About Rainwater Harvesting How to Harvest Lettuce: A Step-by-Step Guide for Fresh and Crispy Salads

READ MOREDetails