Polish Your Presence: Navigating The LinkedIn Post Inspector For Impactful Content  

by

05 September 2023

Linkedin

LinkedIn post inspector

On LinkedIn and in general, the last thing you want to do is make the wrong impression.

There’s nothing worse than publishing a post only for it to have typos or display the wrong image thumbnail or preview text when it’s already bringing in comments.

This would just be a waste of your post and end up hurting your brand credibility.

What’s the solution?

LinkedIn Post Inspector – a powerful, free tool that helps ensure your posts are optimized for success.

With it, you can generate preview posts to ensure everything looks polished and proper.

Keep reading this blog till the end to learn more about the same…

What Is A LinkedIn Post Inspector?  

A LinkedIn Post Inspector is a tool or feature that allows users to analyze and assess the performance of their posts on the LinkedIn platform. It provides insights and data about how a post is performing in terms of engagement, reach, and other metrics. With a LinkedIn Post Inspector, users can gather valuable information about their posts’ effectiveness, helping them refine their content strategy and improve their engagement with their LinkedIn audience.

Why Do You Need A LinkedIn Post Inspector?  

Why Do You Need A LinkedIn Post Inspector?  

You might be wondering why you should be using this post inspector. Now, I have you covered! A LinkedIn Post Inspector is essential for several reasons. Some of them are as follows:

1. Performance Analysis:  

It allows you to understand how well your LinkedIn posts are performing in terms of views, likes, comments, and shares. This insight helps you gauge the effectiveness of your content strategy.

2. Engagement Metrics:   

The Post Inspector provides data on user engagement, allowing you to see which posts resonate the most with your audience. This information helps you create more engaging and relevant content in the future.

3. Audience Insights:   

By analyzing the performance of your posts, you can gain insights into the preferences and interests of your LinkedIn audience. This information informs your content creation and targeting strategies.

4. Content Optimization:   

The insights from the Post Inspector help you identify which types of content generate the most engagement. This enables you to optimize your content approach and create posts that are likely to perform well.

5. Goal Tracking:   

If you have specific goals for your LinkedIn presence, such as building your professional brand or generating leads, the Post Inspector helps you track your progress toward these objectives.

6. Refining Strategy:   

By regularly reviewing the performance of your posts, you can make informed decisions about the type of content you should post, the best posting times, and the topics that resonate with your audience.

7. Competitor Analysis:   

Some Post Inspectors offer insights into how your posts compare to those of your competitors. This allows you to benchmark your performance and identify areas for improvement.

8. Data-Driven Decisions:   

Having access to data about your posts’ performance empowers you to make data-driven decisions and refine your LinkedIn content strategy based on actual results.

In essence, a LinkedIn Post Inspector helps you optimize your LinkedIn presence, engage with your audience effectively, and achieve your professional goals by providing actionable insights into your post performance.

How Can You Use A LinkedIn Post Inspector?  
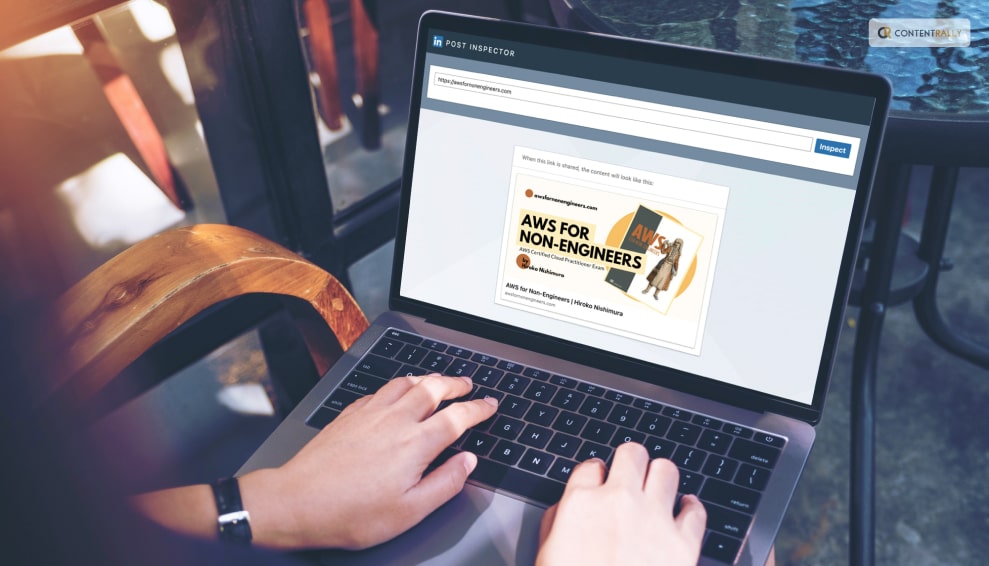
How Can You Use A LinkedIn Post Inspector?

Using a LinkedIn Post Inspector involves a series of steps to analyze and leverage the insights gained from your post performance. Here’s how you can use it effectively:

1. Access The Tool:   

If LinkedIn offers a built-in Post Inspector tool, locate it within your LinkedIn account. It might be within your analytics dashboard or post-management section.

2. Select A Post:   

Choose a post that you want to analyze. This could be a recent post or one that you want to evaluate for performance.

3. Review Engagement Metrics:   

Look at engagement metrics such as likes, comments, shares, and views. Identify which posts are receiving the most engagement and which are not performing as well.

Analyze trends in engagement. Are certain types of content consistently generating more likes or comments? Are there specific topics that your audience seems more interested in?

5. Assess Reach:   

Check the reach of your posts. Understand how many people your posts are reaching and if there are any patterns in terms of which posts have a broader reach.

6. Examine Audience Insights:   

If available, delve into audience demographics and behavior. Learn about the locations, industries, and job roles of those engaging with your posts.

7. Refine Content Strategy:   

Based on your analysis, adjust your content strategy. Create more content that aligns with your audience’s preferences and interests. Experiment with different formats and topics.

8. Optimize Posting Schedule:   

Determine the best times to post by looking at when your audience is most active. Use this information to schedule your posts strategically.

9. Experiment And Learn:   

Use the insights to experiment with variations in your posts. Test different content formats, headlines, and visuals to see what resonates best with your audience.

10. Track Progress:   

Continuously monitor your post performance using the Post Inspector. Track improvements over time and adjust your strategy as needed.

11. Benchmark Against Competitors:  

If the Post Inspector offers competitive insights, compare your performance with that of your competitors. Identify areas where you can outperform or learn from others’ success.

12. Iterate And Adapt:   

As you gather more data and insights, refine your approach iteratively. Adapt your content strategy based on what you learn from the Post Inspector.

Using a LinkedIn Post Inspector empowers you to make informed decisions, engage more effectively with your LinkedIn audience, and refine your content strategy to achieve your professional goals.

What Are The Benefits Of Using A LinkedIn Post Inspector?  

What Are The Benefits Of Using A LinkedIn Post Inspector  

Now that you know what a LinkedIn Post Inspector is and how to use it, it is time for you to learn something else— the benefits! Using a LinkedIn Post Inspector offers several valuable benefits. Here are some of them that you should know:

1. Performance Insights:   

Gain a deep understanding of how your LinkedIn posts are performing, including metrics like views, likes, comments, and shares. This helps you measure the impact of your content.

2. Engagement Analysis:   

Identify which posts are resonating most with your audience. Discover the type of content that generates higher engagement, allowing you to replicate successful strategies.

3. Audience Understanding:   

Learn more about your LinkedIn audience’s preferences, interests, and behaviors. This insight informs your content strategy and helps you tailor your posts to better match their expectations.

4. Optimized Content Strategy:   

Use the data from the Post Inspector to refine your content strategy. Create posts that align with what your audience values, leading to higher engagement rates.

5. Improved Posting Schedule:   

Determine the optimal times to post based on when your audience is most active. This maximizes the visibility and impact of your content.

6. Enhanced Professional Branding:   

By sharing content that resonates, you can build a stronger professional brand on LinkedIn and establish yourself as a thought leader in your field.

7. Networking Opportunities:  

Engaging content often leads to increased connections and interactions with other professionals, potentially opening doors to new opportunities.

8. Data-Driven Decisions:   

Make informed decisions about your content strategy instead of relying on guesswork. Use data to drive your choices and adapt your approach as needed.

9. Goal Tracking:   

If you have specific goals on LinkedIn, such as increasing your followers, generating leads, or showcasing your expertise, the Post Inspector helps you track your progress.

10. Efficiency In Content Creation:   

Understanding what works and what doesn’t reduces the likelihood of wasting time and effort on content that doesn’t resonate with your audience.

11. Competitor Analysis:   

Some Post Inspectors offer insights into how your content compares to that of your competitors, allowing you to identify gaps and strengths in your strategy.

12. Continuous Improvement:   

Regularly analyzing post performance and making data-driven adjustments ensures your LinkedIn presence continues to evolve and improve over time.

In essence, a LinkedIn Post Inspector empowers you with actionable insights that guide your content strategy, optimize your engagement, and help you achieve your professional goals on the platform.

Wrapping It Up!  

In case you were searching for details related to LinkedIn post inspector, I hope that this blog has been of help to you. If there are any other queries related to the same, feel free to let me know. All that you need to do is scroll down till you reach the bottom of the page, Then leave your comments and queries in the box below. And I will be there to answer them all for you!

Related Reading:

Ankita Tripathy loves to write about food and the Hallyu Wave in particular. During her free time, she enjoys looking at the sky or reading books while sipping a cup of hot coffee. Her favourite niches are food, music, lifestyle, travel, and Korean Pop music and drama.

View all posts

Leave a Reply

Your email address will not be published. Required fields are marked *

Related

linkedin qr code

Connecting In A Snap: Unveiling The Magic Of LinkedIn QR Code 

LinkedIn, a business-focused social networking platform, functions across websites and mobile apps. Through this platform, professionals and businesses can create profiles showcasing their credentials and abilities. Additionally, they can connect with groups and firms aligning with their backgrounds. Moreover, the app facilitates the establishment of a professional network. Furthermore, to enhance user convenience, LinkedIn has introduced a QR code feature. With this addition, consumers can seamlessly connect. This innovative feature is accessible through the LinkedIn mobile app, offering both online and offline utility. If you want to know more about the LinkedIn QR code and how to use it or generate it, you will find this blog to be of help. Keep reading this article till the end to learn more… What Is A LinkedIn QR Code?   The QR code is a scannable code that contains a user's LinkedIn profile information. It's a convenient way to connect with others quickly by allowing them to scan your QR code using the LinkedIn app, which then takes them directly to your profile. According to the LinkedIn platform, “LinkedIn QR code makes it easy to meet someone offline, and stay in touch with them on LinkedIn. This feature provides a simple and efficient way to find LinkedIn members, and then connect with them by quickly scanning a QR code.” It simplifies the process of connecting with new professional contacts at events, conferences, or meetings. Why Should You Use A LinkedIn QR Code?   Image Source: nsouly.com You might be thinking about why you should be using a QR code on the job-hunting platform. Well, I have the answer for you! Using a LinkedIn QR code can provide several benefits. Some of them are as follows: Efficient Networking: It makes connecting with new professional contacts quicker and easier, especially at networking events or conferences. Accuracy: It reduces the chances of errors in manually entering someone's name or profile details when sending connection requests. Time-saving: It saves time by eliminating the need to search for someone's profile or type in their name to connect. Professionalism: Using a QR code shows that you're tech-savvy and up-to-date with modern networking practices. Convenience: It's a hassle-free way for others to access your LinkedIn profile without needing to remember your name or search for you. Events and Marketing: If you're hosting an event or conducting a presentation, you can share your QR code to help attendees connect with you. Customization: LinkedIn allows you to personalize your QR code with a profile photo, making it more recognizable. In essence, a LinkedIn QR code streamlines the process of connecting on the platform and enhances your networking opportunities. How To Find Your LinkedIn QR Code?   If you want to look for your QR code on LinkedIn, here are some of the steps that you need to do based on your device. Take a look at them: Finding Your QR Code On iOS   Launch the LinkedIn app on your smartphone. On your LinkedIn homepage, click the Search bar and then tap the QR code. To locate your QR code, tap the My Code tab. To send your QR code by messaging, email, or other third-party applications, tap Share my code. Save photographs to store a copy of your QR code in the photo gallery on your smartphone. Pick an item from the dropdown menu that displays, then adhere to the instructions. Finding Your QR Code On Android   Launch the LinkedIn app on your smartphone. On your LinkedIn homepage, click the Search bar and then tap the QR code. To find your QR code, tap the MY CODE tab. To save a copy of your QR code to the picture gallery on your mobile device, tap SAVE TO GALLERY. How To Use A LinkedIn QR Code?   In case you want to know how to use a LinkedIn QR code, this is the place that you need to be! Using a LinkedIn QR code is straightforward and pretty easy. Here are the steps that you need to follow: Open the LinkedIn app on your mobile device and go to your profile. Look for the QR code icon, which is usually located near the top of your profile page. It might look like a small square with dots and lines. You can either share your QR code with others or scan someone else's code. To share your code, tap on the code icon and select "My code." You can then display your code for others to scan or share it digitally. To scan someone else's code, tap on the code icon and select "Scan." Use your device's camera to scan the QR code of the person you want to connect with. After scanning a QR code, you'll be directed to the person's LinkedIn profile. You can then choose to send a connection request or simply view their profile. LinkedIn will usually prompt you to personalize the connection request message. You can add a note explaining how you know the person or why you'd like to connect. Remember that your QR code can be customized with a profile photo and background, which can make it more visually appealing and recognizable. Utilizing this feature can help streamline your networking efforts on LinkedIn. Keep scrolling to learn how to do the same on different devices: Using A QR Code On iOS   Here are the steps that you need to take to use your LinkedIn QR code on iOS devices: Launch the LinkedIn app on your smartphone. On your LinkedIn homepage, click the Search bar and then tap the QR code. Scan tab: tap it. Hold your phone directly over the QR code of the LinkedIn user you want to connect with. To choose a QR code that you've previously saved to your photo gallery, you can alternatively tap Scan from images. Using A QR Code On Android   Here are the steps that you need to take to use your LinkedIn QR code on Android devices: Launch the LinkedIn app on your smartphone. On your LinkedIn homepage, click the Search bar and then tap the QR code. Select the SCAN tab. Toggle CAMERA ACCESS ON. Hold your phone directly over the QR code of the LinkedIn user you want to connect with. A QR code that you've previously stored in your photo gallery can also be chosen by tapping ADD CODE FROM GALLERY. How To Generate A LinkedIn QR Code?   Now that you are aware of almost all the things that you need to know when it comes to LinkedIn QR Codes, this is the last step that you need to take. And that is to generate the code. To generate a LinkedIn QR code, these are the steps that you need to follow: Launch the LinkedIn mobile app on your device. Tap on your profile picture or your name to access your profile page. Look for the QR code icon on your profile page. It's usually located near the top of the page, and it looks like a small square with dots and lines. Tap on the QR code icon. You'll have the option to generate your QR code or scan someone else's code. Select the option to generate your QR code. LinkedIn allows you to personalize your QR code by adding a profile photo and choosing a background color. This step is optional but can make your QR code more recognizable. Once your QR code is generated, you can choose how to share it. You can display it on your device's screen for someone else to scan, save it to your device, and share it digitally, or print it out for physical events. Remember that your LinkedIn code contains your profile information, making it easy for others to connect with you on the platform. It's a convenient tool for networking and connecting with new professional contacts. Wrapping It Up!   In case you want to know about what is LinkedIn QR Code and how to use it, I hope that this blog has been of help to you. If there are any other doubts related to the same, feel free to let me know. All that you need to do is scroll down till you reach the bottom of the page. Then leave your comments and queries in the box below. And I will be there to answer them all for you! More Resources: Here’s How To Block Someone On LinkedIn Things You Need To Know About LinkedIn Skill Assessment Mastering LinkedIn Etiquette: A Guide To Tagging Connections Effectively

READ MOREDetails
how to tag someone on LinkedIn

Mastering LinkedIn Etiquette: A Guide To Tagging Connections Effectively  

If you've ever felt the frustration of waiting for LinkedIn to catch up when you're trying to tag or mention colleagues in your posts, you're certainly not alone. The journey toward a seamless LinkedIn user experience is ongoing, but patience is key when it comes to tagging or mentioning someone in your LinkedIn posts. Want to know how to tag someone on LinkedIn easily? Well, you have reached the right place. Keep reading this blog till the end to learn more… How To Tag Someone On LinkedIn?   If you want to know how to tag someone on LinkedIn, you have reached the right place. Here are the steps that you need to take to achieve what to want: Begin by logging into your LinkedIn account via the official website. You can either create a new post or engage with an existing one to initiate the tagging process. Start typing the "@" symbol within the post or comment box. As you type, LinkedIn's intelligent suggestions will populate, based on your connections and their connections. Simply click on the desired person's profile from the suggestions that appear. Their name will be highlighted. Complete your post or comment as usual, and you'll notice the tagged person's name transformed into a clickable blue link, signifying a successful tag. Once you're content with your post, hit the "Post" button to share it. The person you tagged will receive a notification about the tag, and the post or comment will appear on their LinkedIn notifications. How To Tag Someone In A LinkedIn Post After Posting?   Let’s say that you have already posted something on LinkedIn. Then you remember that you have to tag a few people. Do you think that you need to delete your original post to mention them or tag them? Well, that is not the case. You can very easily tag someone in a LinkedIn post after posting. Here are the steps that you need to take to add a tag or mention someone after posting on LinkedIn: Locate the post you wish to edit. Click the More icon situated in the upper-right corner of the post. Select "Edit post." Amend the post's text as needed. Utilize the "@" character to mention individuals in your post. To tag another person in the post, click on the image icon. Save your changes. How To Tag Someone On LinkedIn In Photos?   Incorporating tags into your photos serves as an effective catalyst for engaging with your images. Notably, tagging individuals signals to these members that your photo could hold relevance for them, resulting in the photos being seamlessly linked with the corresponding members' profiles. When viewers encounter these tagged photos, they're empowered to click on connection names, effortlessly navigating to their respective profiles. Once you've successfully tagged an individual and concluded your post, a two-fold notification system comes into play: the tagged person will receive both a notification and an email, apprising them of the tag – unless they've opted to disable this specific notification setting. Using Desktop   Click "Photo" at the top of your homepage's share box. Choose the images you want to upload (up to nine images). Click "Tag" in the "Edit your photo" pop-up window and click anywhere on the photo. Start typing the person's name, select their name from the list, and repeat as needed (up to 30 people per photo). Optionally, add alt text to make your photo more accessible. Click "Done" to preview and share your post. Using Mobile   Tap "Post" in the navigation bar. Add photos from your gallery (up to nine images). Tap the "Tag" icon, tap anywhere on the photo, and type the person's name. Complete your message and post it. How To Mention People On LinkedIn Comments?   Engaging with your posts and comments is greatly facilitated by mentioning connections or other members. When you mention connections or other members, they receive notifications about the respective post or comment. Notably, a post or comment becomes linked with the profile of the mentioned connection or member, allowing viewers to effortlessly click on their names to access their profiles. Here are the steps that you need to take if you want to mention someone in your LinkedIn comments: Using Desktop   Click "Start a Post" or "Comment" below a post. Type "@" and begin typing a name. Click the person's name from the list to mention them. Craft your message and continue the conversation. Using iOS   Tap "Write a Post" or "⊕ Post." Tap the "@" icon on your keyboard and select names from the list. Finish composing your comment. Tap "Post." Using Android   Tap "Write a Post" or "⊕ Post." Tap the "@" icon on your keyboard and select names from the list. Finish composing your comment. Tap "Post." When Should You Tag Someone On LinkedIn?   There are various reasons you might want to mention a connection or another LinkedIn member. Whether it's expressing gratitude, acknowledging their written content, or spotlighting their role in a recent event or conference, the motivation behind mentioning is diverse. Employing this approach can significantly foster engagement within your posts and comments, simultaneously capturing your connections' interest in your updates. The mention or tag serves as a notification to your connections, indicating that your post or comment could hold relevance for them. Importantly, it's worth noting that the connections mentioned within your post or comment are intrinsically tied to their individual profiles. Things To Keep In Mind While Tagging Someone On LinkedIn Post Or Comment?   When you're attempting to tag someone on LinkedIn for a post or a comment, there are several key considerations to bear in mind. Let's delve into some of them: Firstly, it's worth noting that LinkedIn members don't necessarily have to be in your connection list for you to mention them or for them to be mentioned by you. This is evident in the example above where, upon typing in "@Kerryn," the drop-down menu included both 1st-degree and 2nd-degree connections. On another note, it's important to highlight that the Mentions feature is not applicable to articles published on the LinkedIn publishing platform. However, there's a workaround: after hitting the 'publish' button on your article, you're able to incorporate mentions within the subsequent update. Lastly, remember that even after you've already posted your content, you have the ability to go back and edit your posts and comments to seamlessly add mentions whenever necessary. Wrapping It Up!   It's important to note that when you tag someone, they will be notified, and the tag will create a link to their profile in the post or comment. Tagging is a great way to engage with your network, draw attention to specific individuals or content, and foster meaningful interactions on the platform. In case you want to know how to tag someone on LinkedIn, I hope that this blog has been of help to you. If there are any other queries related to the same, please feel free to let me know. Simply scroll down to the bottom of the page, where you can leave your comments and queries in the provided box. Rest assured, I'll be readily available to address each and every one of them for you! Read More About: Here’s How To Block Someone On LinkedIn? Things You Need To Know About LinkedIn Skill Assessment Unlocking New Career Avenues: The Power Of ‘Open To Work’ On LinkedIn

READ MOREDetails
how to reach out to a recruiter on LinkedIn

Mastering The Art Of Connecting: How To Reach Out To A Recruiter On LinkedIn  

In today's competitive job market, finding your dream job can sometimes feel like searching for a needle in a haystack. Luckily, platforms like LinkedIn have revolutionized the way job seekers connect with potential employers and recruiters. If you're looking to make the most out of your LinkedIn experience, it's crucial to know how to reach out to a recruiter on LinkedIn effectively. In this guide, I will delve into the art of crafting a compelling LinkedIn message and building a network that opens doors to exciting career opportunities. So keep reading this blog till the end to learn more about how to reach out to a recruiter on LinkedIn… Why LinkedIn?   LinkedIn is not just another social media platform; it's a professional networking goldmine. With over 774 million users worldwide, LinkedIn has become the go-to platform for recruiters and job seekers alike. For professionals, it's a place to showcase your skills, connect with like-minded individuals, and discover career opportunities. For recruiters, it's a treasure trove of potential candidates. However, it's not enough to simply have a LinkedIn profile; you must know how to leverage it effectively. One of the most powerful tools at your disposal is the ability to connect with recruiters directly. But remember, your approach is everything. Let's dive into the intricacies of reaching out to a recruiter on LinkedIn. Ways To Connect: How To Reach Out To A Recruiter On LinkedIn?   Reaching out to a recruiter on LinkedIn requires a thoughtful and personalized approach. Always remember that a personalized and genuine approach is more likely to yield positive results. Building authentic connections with recruiters can open doors to exciting career opportunities. Here are some of the things that you need to do if you want to connect to recruiters on the job-hunting platform: Crafting The Perfect LinkedIn Profile   Before you even think about sending that first message, you need to ensure that your LinkedIn profile is in tip-top shape. Think of your profile as your digital resume; it's often the first impression you'll make on recruiters. Here are some essential elements to consider: 1. Professional Profile Picture: Your profile picture should be clear, professional, and friendly. Dress appropriately, and ensure good lighting. 2. A Compelling Headline: Your headline is the first thing people see after your name and picture. Use it wisely to showcase your current role or your career aspirations. 3. A Thoughtful Summary: Your summary should be a concise, well-written paragraph that highlights your skills, experiences, and career goals. Make it engaging and relatable. 4. Complete Work History: Ensure that your work history is up to date. Include details about your responsibilities and achievements in each role. 5. Skills and Endorsements: List relevant skills and seek endorsements from colleagues and connections. 6. Recommendations: Request recommendations from former supervisors or colleagues to add credibility to your profile. Now that your profile is ready, let's dive into the art of reaching out to a recruiter. Research, Research, Research   Before you send a connection request or message, it's vital to research the recruiter or the company they represent. What roles are they hiring for? What's their company culture like? Knowing this information will help you tailor your approach. It also shows that you're genuinely interested in their organization, not just looking for any job. The Art Of The Connection Request   When you're ready to connect with a recruiter, here's how to craft the perfect connection request: 1. Personalize Your Message: LinkedIn gives you the option to include a message when sending a connection request. Always use this opportunity to introduce yourself and explain why you'd like to connect. Mention mutual interests or connections if possible. 2. Be Clear And Concise: Keep your message short and to the point. Recruiters are busy professionals, so they appreciate brevity. 3. Express Your Interest: Let the recruiter know why you're interested in connecting with them specifically. Be genuine and enthusiastic about the possibility of working together. 4. Highlight Your Value: In a sentence or two, mention what skills or experiences make you a valuable candidate. Here's an example of a well-crafted connection request: "Hello [Recruiter's Name], I hope this message finds you well. I've been following [Company Name] for a while now and am impressed by your team's innovative work in [industry]. I'm particularly interested in the [specific role] you're currently hiring for and believe my experience in [relevant skill or industry] would make me a strong fit. I'd love to connect and learn more about the opportunities at [Company Name]. Best regards, [Your Name]" Following Up And Building Relationships   Once your connection request is accepted, it's essential to nurture the relationship. Here are some tips for building meaningful connections on LinkedIn: 1. Engage With Content: Like, comment, and share content from your connections, especially from recruiters or companies you're interested in. This shows that you're active and interested in their updates. 2. Send A Thank-You Message: If a recruiter or connection helps you in any way, whether it's providing advice or a referral, be sure to send a thank-you message promptly. 3. Stay Active: Regularly update your LinkedIn profile with your latest achievements, projects, or certifications. This keeps your network informed about your professional growth. 4. Offer Help: Building a network is a two-way street. If you come across an opportunity or resource that might benefit a connection, don't hesitate to share it. 5. Don't Be Pushy: While your goal may be to find a job, don't be overly aggressive in your approach. Building relationships takes time, and patience is key. The Follow-Up Message   After connecting with a recruiter and building a rapport, you might be ready to express your interest in a specific job opening. Here's how to craft an effective follow-up message: 1. Express Gratitude: Start by thanking the recruiter for connecting with you and any previous interactions you've had. 2. Mention the Opportunity: Be clear about the role you're interested in and why you believe you're a strong fit. 3. Highlight Your Fit: Emphasize how your skills and experiences align with the job requirements. Use specific examples to showcase your qualifications. 4. Request a Conversation: Politely ask if the recruiter would be available for a brief chat or interview to discuss the role further. Here's an example: "Hello [Recruiter's Name], I hope you're doing well. I wanted to express my gratitude for connecting with me and for the insightful discussions we've had so far. And I recently came across the [Job Title] position at [Company Name], and after researching more about the role and your organization, I'm genuinely excited about the opportunity. My experience in [relevant skill/experience] has prepared me to excel in this role, and I'm eager to explore it further. Would it be possible to schedule a brief call or interview to discuss how my skills align with your team's needs? I'm looking forward to the possibility of contributing to [Company Name]'s continued success. Thank you once again for your time and consideration. Best regards, [Your Name]" Handling Rejections   Rejection is a part of the job search process. If a recruiter informs you that you're not the right fit for a role, respond graciously. Express your gratitude for their time and consideration, and ask if they could keep you in mind for future opportunities. Building a positive reputation even in rejection can leave a lasting impression. Wrapping It Up!   how to reach out to a recruiter on LinkedIn is an art that requires finesse, research, and patience. When done right, it can open doors to exciting career opportunities and valuable professional relationships. Remember to craft a compelling profile, personalize your messages, build genuine connections, and follow up strategically. In the world of LinkedIn networking, the possibilities are endless, and your dream job may be just a message In case you want to know how to reach out to a recruiter on LinkedIn, I hope that this blog has been of help to you. If there are any other queries related to the same, feel free to let me know. All that you need to do is scroll down till you reach the bottom of the page. Then leave your comments and queries in the box below. And I will be there to answer them all for you! Related Reading: Here’s How To Block Someone On LinkedIn? Mastering LinkedIn Etiquette: A Guide To Tagging Connections Effectively Unlocking New Career Avenues: The Power Of ‘Open To Work’ On LinkedIn  

READ MOREDetails