Oil Heater vs. Fan Heater: Which Is Better

Published on: 19 February 2024 Last Updated on: 01 August 2024
Oil Heater vs. Fan Heater: Which Is Better

A dependable heater may make all the difference in keeping your home warm and inviting during the bitterly cold winter months when the frigid air bites your nose. However, it might not be easy to select the best heater for your needs, given the variety of products on the market.

Oil heaters and fan heaters are two standard options, each having pros and cons of their own. This article will examine the differences between oil and fan heaters to see which is better.

Oil Heaters: The Basics

Oil Heaters: The Basics

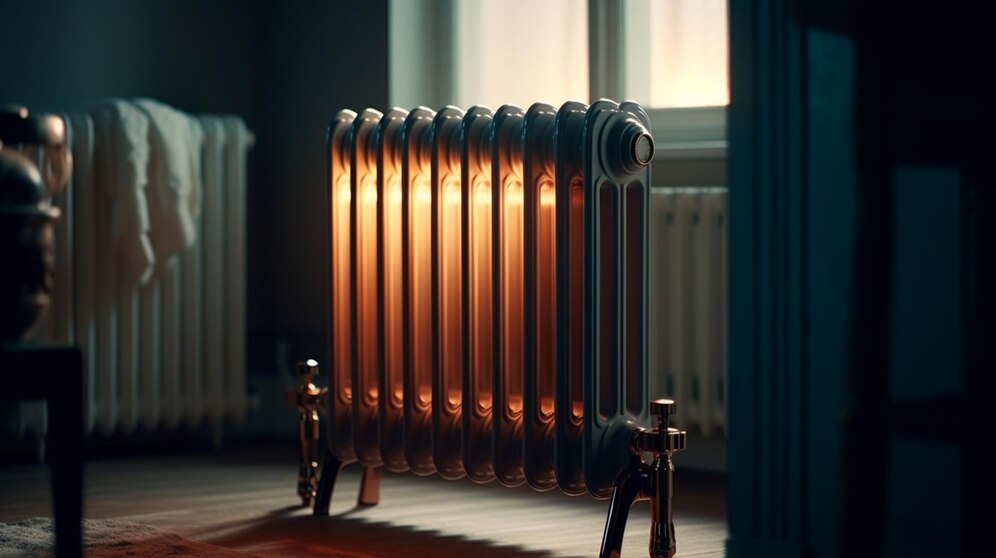
Oil heaters also referred to as oil-filled heaters, work by heating a particular kind of oil inside the metal fins of the device. Because of the effective heat retention of this oil, the heater can continue to provide warmth long after it has been switched off.

Oil heaters give a steady, soft warmth that many people find comfortable, although they usually take longer to heat up than fan heaters.

Fan Heaters: The Basics

In contrast, fan heaters operate by drawing air over a heating element and then using a fan to distribute it around the space.

Fan heaters are renowned for their ability to heat a space quickly, increasing the ambient temperature. They can, however, occasionally produce a dry heat, which some people may find less comfortable.

Here are the various considerations before you buy oil heaters online:

Energy Efficiency And Cost-Effectiveness

The energy efficiency of oil heaters is highly praised. The heater’s oil holds heat efficiently after it reaches the proper temperature, reducing the frequency of on and off cycles. As a result, there may be a decrease in energy use and, eventually, heating costs.

Furthermore, oil heaters can contribute to energy conservation by maintaining a comfortable temperature without continuously using power because they generate heat even when shut off. Meanwhile, fan heaters use more energy even though they are good at warming a space rapidly because they run continuously.

Using a fan to disperse heat is another way that using more electricity might increase. But thanks to developments in fan heater technology, more energy-efficient models with eco modes and thermostat controls have been created to help reduce energy use.

Cost Comparison

Fan heaters are typically less expensive upfront than oil heaters, which makes them the more logical option for consumers on a tight budget.

The long-term operating costs, however, must be taken into account. Oil heaters are typically more energy-efficient because they use a heating element soaked in oil, which maintains heat well and permits less frequent cycling. As a result, this may lead to decreased energy use and cheaper heating costs over time.

Improvements in fan heater technology have created more energy-efficient versions with features like eco modes and thermostat settings, which help partially offset their higher energy usage.

Consequently, even though fan heaters could be less expensive initially, the overall cost-effectiveness of the two differ based on several variables, including usage habits, energy costs, and the particular model.

Heating Performance And Comfort

Heating Performance And Comfort

Known for its capacity to deliver even, delicate warmth, oil heaters are highly recommended for use in living rooms, bedrooms, and other spaces where keeping a comfortable temperature is crucial. Many people describe the warm, comforting, radiant heat that oil heaters create as ideal for resting and relaxing.

Meanwhile, fan heaters are excellent at quickly heating a space, making them ideal for short bursts of heat in areas like bathrooms or home offices that need to be warmed up immediately. However, some people might feel that the dry heat of fan heaters is less comfortable, mainly if they use them for an extended period.

Safety Considerations

Because of how they are made, oil heaters are typically considered safer than fan heaters. The oil-filled fins encase the heating element, reducing the possibility of fire or burns from direct contact with the hot surface. Oil heaters usually have automatic shut-off systems and overheating prevention to prevent further mishaps.

Unfortunately, burn risks are increased by fan heaters, mainly when they come in contact with skin or explosive objects. Fan heaters can also be dangerous due to their exposed heating element and moving parts, so they must be positioned steadily, away from potential threats.

Read Also: What To Do When Your AC Unit Stops Working

Impact On The Environment

Due to its higher energy consumption and shorter lifespan, fan heaters typically have a more significant environmental impact. Carbon emissions are increased when electricity is used to run the fan and heating element, mainly when that electricity is produced from non-renewable resources.

Nonetheless, the environmental impact of fan heaters can be reduced by selecting and operating them wisely. Oil heaters are often seen as being more environmentally friendly. They are quieter to operate and have less emissions since they use radiant heat instead of forced air.

Fan Heaters vs Oil Heaters: In Summary

Fan Heaters vs Oil Heaters: In Summary

It’s critical to consider your unique heating requirements and preferences when choosing between oil and fan heaters.

An oil heater can be a better option if you need constant, soft warmth in larger areas, including living rooms or bedrooms. Oil heaters are excellent at producing radiant heat that heats the surrounding space gradually, making it seem friendly and suitable for rest or sleep.

However, a fan heater can be a better option if you’re searching for a rapid and effective heating solution for smaller spaces or regions that need instant warmth, such as home offices or restrooms. Fan heaters are renowned for their speedy heating qualities, allowing them to relieve chilly air and raise the room’s temperature instantly.

Make The Right Choice

There must always be a clear winner in the age-old comparison between oil and fan heaters. The ideal option ultimately relies on your preferences, budget, and particular heating demands. Each type of heater has a mix of benefits and drawbacks.

Whichever kind of heater you use, you must always take safety precautions. By researching and using your heater sensibly, you may have a warm and comfortable house all winter while consuming the least energy and having the least damaging effect on the environment.

Read Also:

Ankita Tripathy loves to write about food and the Hallyu Wave in particular. During her free time, she enjoys looking at the sky or reading books while sipping a cup of hot coffee. Her favourite niches are food, music, lifestyle, travel, and Korean Pop music and drama.

View all posts

Leave a Reply

Your email address will not be published. Required fields are marked *

All Comments

I appreciate you sharing this blog post. Thanks Again. Cool.

Related

how to install faucets

How To Install Faucets And Sinks

Installing a new sink is an uncomplicated and quick task. The process is relatively easy, and you can do the installation part by yourself with a bit of experience. Then how to install faucets? Though some complicated kitchen faucets require professional installation, many of the kitchen fixtures can be installed easily.  Here is a guide on how to install faucets and sinks.  Materials Needed   In order to install the kitchen faucet and sink set, you will need the following list of things: a sink, a faucet or tap, a basin wrench, a strainer set, pump pliers, a screwdriver, a crescent wrench, a spatula, plumber's putty, silicone sealant, a bucket, a flashlight, and a set of towels.  How to install faucets, and this reason is nearby if you wish to enlarge the opening within the countertop. It is also necessary to know how to clean bathroom sinks to maintain hygiene.  Step By Step Guide To Install Faucets And Sinks If you are looking for durable, sturdy, and premium quality faucets, it is best to choose Oltsw taps.  Here, we have mentioned the steps to know how to install faucets and sinks.  Step 1: Measure and mark the layout of the kitchen’s sink Place the counter's back edge in the center of the sink within its cabinet. If the sink contains a template, align it along the mark on the counter. This is the first step of how to install faucets. Place the back edge one and a half inches parallel to the counter. Trace around it; proceed to the subsequent degree. If there is no template, use 2-inch tape to stipulate the sink location. Mark the middle of the sink on its back edge. Lay the sink inverted on the counter. Align the mark on the sink and the one on the counter together.  Step 2: Mark the cut lines on the counter The cut line marking is the second phase of how to install faucets. The employing a straightedge to attach the marks, you will find yourself with an oblong outline on the counter of the sink's hole. To approximate the radius of the corner of the sink, round off the corners by hand. Take a slightly wider bit than the jigsaw blade (½-inch bit is typically enough). Then, at each junction of the cut-out lines, make sure to drill a hole inside the radius.  Step 3: Use a jigsaw to cut the sink opening Place a jigsaw blade into a front hole and cut along the marked line to the back hole. Repeat on the opposite side. Lay a scrap of wood some inches longer than the cut-out across the sink area. Screw through the piece and into the cut-out waste to stop it from binding the saw blade or falling. Cut along the cut lines marked at the front and back and remove the cut-out piece. Make sure that the fit of the sink in the countertop is set. If it is necessary, trim the opening with the jigsaw.  Step 4: Install the kitchen faucet Set the sink the wrong way up on a padded sawhorse or counter. Then, feed the tap's supply tubing and tailpiece through the gasket, which helps seal the faucet to the sink. Screw the washers and mount them on the lower side sink deck. This is the pre-final step of how to install faucets. Just make sure that the tap can swing for a whole area across the sink deck before tightening mounting nuts.  Step 5: Attach The Strainer Over Applied Putty Put the sink up, apply a thick roll of the plumber putty under the strainer edge, and push it up through the sink's drain hole. Slip the housing (if your strainer has one), gasket, and washer onto the filter and against the lower side of the sink. Dab the pipe-joint compound and expose the opening threads.  Thread the locknut onto the strainer by hand, then tighten it with pliers while holding the filter in situ. Fit the gasket onto the tailpiece of the sink drain and attach it to the strainer through its slip nut. Tighten the nut using a hand while holding the filter.  Step 6: Set the sink and connect the water supply Remove the tape, and pull it toward the center of the hole. With the sink still, the wrong way up, press a bead of silicone tapping around the lower side of the sink's brim. Turn the sink upright and set it on the hole of the countertop.  Make sure that the front of the sink is parallel with the front fringe of the countertop. Adjust it, if necessary. Next, use the corn-head supply tubes or the braided stainless-steel hoses to connect the tap and shut off the valves. Now, attach the required sprayer hose to the faucet's threaded tailpiece.  Step 7: Connect The Drain Pipes Assemble the trap adapter on top of the sink-drain tailpiece. Cut and dry-fit the length of the PVC pipe and attach the trap adapter to the trap and the drain elbow to the waste line. Then slide the web on the tailpiece to finely tune the length and alignment of the pipe.  Take the drain pieces apart. Clean the cut ends with a utility knife. Use a PVC primer to coat it and its mating pieces. Let it dry and hold for 30 seconds. Now you are finishing the process of how to install faucets. Conclusion The essential features of kitchens and bathrooms are the sink and faucets. The sink and faucets need to be installed properly to avoid any damage and issues later on. Taking this into account, we have mentioned how to install faucets with significant steps to be followed while installing sinks and kitchen faucets. Additional reading: Small Kitchen Storage Ideas Know About The Type Of Kitchens According To Different Size Different Types of Conversions to Make the Most of Spare space  

READ MOREDetails
Home Upgrades

3 Home Upgrades to Make Your Property Unique

Your home is one of the most valuable things you’ll ever buy. Whether you plan to stay long-term or sell soon, making your property unique is worth considering by Home Upgrades.    While upgrading the kitchen or bathroom adds value, it won't always attract attention. These basic changes may not transform your lifestyle.   That’s why we’re exploring clever ways to make your home the talk of the town.   Invest in Fun and Relaxation: Having the most modern kitchen or bathroom on the block is great, but it doesn’t make your home much different from any other on your street. On the other hand, investing in the things you enjoy the most could be a great way to make your home stand out, and improve your lifestyle at the same time. For instance, if you’re the kind of person who loves movies, why not turn a spare room or basement into an entertainment center for you and your friends. If you love taking trips to the spa with your loved ones, why not invest in having your own luxury spa experience at home, by installing your own sauna or hot tub. It might seem indulgent at first, but this is one of the best ways to ensure that you get the house of your dreams, and it could mean that you could sell your property for more too. Spend on Long-Term Convenience: Have you ever considered installing awe-inspiring residential elevators into your home? Many people assume that they should only begin thinking about a home elevator when they’re getting older or having trouble with their mobility. However, these investments can also make it much easier to get around the house and move things between floors too. You can carry huge amounts of shopping and laundry up and down stairs without having to worry about hurting your back or dropping things along the way. What’s more, as you do get a little older, you’ll find that having your own home elevator protects you from a range of accidents. All that, and you’ve got a fantastic way to make your home stand out. Experiment with Tech: These days, we're all adding more technology to our homes. Smart speakers and AI-enhanced devices are becoming more common. If you want to join the tech revolution, consider upgrads your home’s tech solutions.   One option could be a security system with facial recognition or biometric scanning. Forget about keys that are easy to lose. Another option is smart lighting and entertainment systems controlled by your smartphone or voice.   The number of smart home upgrades is increasing every day.   Home Office Enhancements: Elevate Your Remote Work Experience   With remote work becoming the norm, transforming your home office into a functional and appealing workspace is essential.    While many focus on basic furniture, upgrading your home office can significantly boost productivity and comfort. Here’s how to make your home office more effective and enjoyable.   Ergonomic Furniture: Comfort Meets Functionality   The foundation of a great home office is ergonomic furniture. Start with a high-quality, adjustable office chair. Look for one with lumbar support to reduce back strain during long workdays. An ergonomic chair promotes good posture and helps avoid discomfort.   Next, invest in a desk that suits your needs. Whether you prefer a standing desk or a traditional setup, ensure it’s the right height and provides ample space for your work essentials.   Adjustable desks offer flexibility, allowing you to switch between sitting and standing throughout the day, which can improve your overall health and comfort.   Soundproofing: Create a Quiet Work Environment   Noise can be a significant distraction, especially if you live in a bustling household. Soundproofing your home office can enhance concentration and productivity. Start by adding acoustic panels to the walls. These panels absorb sound and reduce echoes, creating a quieter space.   Consider using a white noise machine or noise-canceling headphones to further block out background noise.    Heavy curtains or blinds can also help minimize outside disturbances. If possible, choose a room away from high-traffic areas to create a more serene work environment.   Tech Integrations: Upgrade Your Workspace   Modern technology can greatly enhance your home office experience. Begin with a high-quality monitor or dual monitors to expand your workspace and reduce eye strain.    Ergonomic monitor stands or adjustable arms can help you position your screens at the right height and angle. This is also known to increase the overall productivity of your day.   Upgrade your keyboard and mouse to ergonomic models designed to reduce strain. Consider investing in a docking station to keep your workspace tidy and streamline connections between your laptop and peripherals.   Smart home technology can also be a game-changer. Use voice-controlled assistants to manage your schedule, set reminders, or control smart lighting. Adjustable lighting is crucial; choose a desk lamp with customizable brightness to reduce eye strain and enhance focus.   Personal Touches: Make It Your Own   Finally, personalize your home office to make it a space you enjoy spending time in. Add some artwork, plants, or personal items that inspire you.    A well-decorated workspace not only boosts your mood but also makes working from home more enjoyable.   In conclusion, upgrading your home office involves more than just buying new furniture. By investing in ergonomic pieces, soundproofing, and advanced tech, you can create a workspace that enhances both productivity and comfort.   Read Also: Home Remodeling Tips 3 Trendy Lighting Ideas for Your Kitchen Island Small Kitchen Storage Ideas Top 5 Trending Home Renovation Ideas For Australian Families

READ MOREDetails
Remodeling Tips for New Homeowners

Remodeling Tips for New Homeowners

Everyone has their reason for embarking on a home remodeling project, but the thrill remains the same, especially as a new homeowner. Perhaps, you want to improve the value of your home or want it to fit your style? Regardless, it's an exciting project that comes with a lot of work— sometimes more than bargained. It can be devastating to embark on a remodeling project only to realize halfway that it's unachievable. So, whether you will be getting the assistance of a remodeling company or you'll be handling this project alone, here are five tips you should know before starting. 1. Try to ask for help: It takes more than a pair of jeans and a well-equipped toolbox to produce quality work on a renovation project. First off, as an amateur, certain tools aren't suitable for you. Secondly, YouTube tutorials may not always have all the answers and solutions you need. So, except remodeling is something you have years of experience in, don't shy away from asking for help. A simple Google search should come in handy in this respect. For example, if you live in Houston, Texas, a quick search for Houston, Tx remodeling company should deliver some viable results. 2. Make a priority list: While some people can afford to stay in hotels during home renovations, you may not have that luxury and will have to keep living in your home during the renovation. The best way to avoid feeling overwhelmed by the home renovation process is to tackle time-sensitive projects first, like water damage or a leaking roof. Additionally, areas of the house you use frequently should be a top priority. That way, you can still go about your daily life even though your home is under renovation. 3. Set a budget: Contrary to what some TV shows make us believe, remodeling a house can run your account dry, especially if you don't have an accurate budget. So, the next step after drawing out a plan would be to determine your budget and financing. Although budgeting isn't the most fun thing to do (as it requires you to find a balance between the available finance and your dream design), it's an essential part of the remodeling process because it helps you gauge your expectations. Your budget should ideally include everything from the costs for permits to building materials, labor, painting, and cosmetic touch. It's easier to stick to your budget if it's accurate. So, make sure you get a contractor to review it or request cost estimates from professionals. You can look up companies in the Houston area that offer free estimate and consultation services to save costs here. 4. Remember the big picture: When taking up a remodel project, it's essential always to keep the big picture in mind. Remember that energy costs, water bills, and repair expenses can add up quickly in the future. So, make sure you include them all in your plan. Furthermore, since you're remodeling, you may want to invest in sustainable appliances that respect resources and support sustainable living. This is especially vital for a bathroom renovation. This area of the home can spike up your future heating and water costs. In a nutshell, you need to consider ways to save money both now and in the future; your bank account will thank you for these decisions in years to come. 5. Don't focus solely on design: Sure, many of us have a design that fits our style in mind before embarking on a remodel project. Perhaps, it's your kitchen, bedroom, or study that concerns you. However, you'll have to find a balance between getting the design you want and maintaining functionality. Many contemporary homes now blend functionality with design. For instance, if you have a small kitchen space, you may want to consider forfeiting some fixtures like the planning desk that no one really uses. That way, you save on space and maintain functionality. Read Also: Home Improvement Hacks to Add to Your Space Ideas for Modern Flooring Designs for Home Improvement Plans 6 Interior Design Tips to Make Your House a Home

READ MOREDetails