Tips on How to Avoid Hoarding and Get Rid of Clutter

Published on: 26 November 2019 Last Updated on: 27 November 2019
Hoarding

Hoarding too many things in your house can become a serious problem. After some time, you will notice that there is not enough space for new stuff. Not only that, sanitation can become an issue as well. Piles of unused items can cause dirt and dust to settle. And the worst part about piles of junk in your home is the pest infestation. You and your family could get sick from the dust and the insects living in the trash you keep.

What is hoarding?

Your behavior may not be clinically classified as hoarding, but in general, you hoard stuff when you tend to hold on to things even when they are no longer being used. For example, you keep boxes of old clothes, books, and toys your children may have already outgrown. Often the problem is not finding the time to declutter and get rid of junk. Fortunately, there is always a solution. We can provide you with tips on how to prevent hoarding, even before it becomes an issue. Human hoarding may be linked to animal hoarding habits, but firm evidence is requiring.

Individuals who meet symptomatic patterns for hoarding mayhem experience sensations of anxiety or distress about abandoning possessions they do not want. The hoarding effects clinically important trouble or impairment in social, professional, or other significant areas of functioning (including securing a safe atmosphere for oneself and others).

Scaling down your collection

Collecting sentimental items is one common reason why people end up with piles of junk. If you are guilty of doing the same thing, what you can do is scale down. What does scaling down mean? For example, why not frame one of your kid’s artworks and toss the rest? Collectibles can take up a lot of space. Choose pieces with the most meaning and find a way to give away the rest if you can.

Hire a junk removal company

junk removal

Expert junk removal in Fort Lauderdale can help if you need assistance with hauling and disposing of piles of garbage in your home. Professional waste removal services will not turn away any job. Whether they need to deal with something challenging, they have the workforce, tools, and equipment to get the job done efficiently. Another advantage of hiring professionals is safety. You won’t unnecessarily endanger yourself trying to carry heavy objects and hauling them to the dumpster.

Donate or consign your stuff

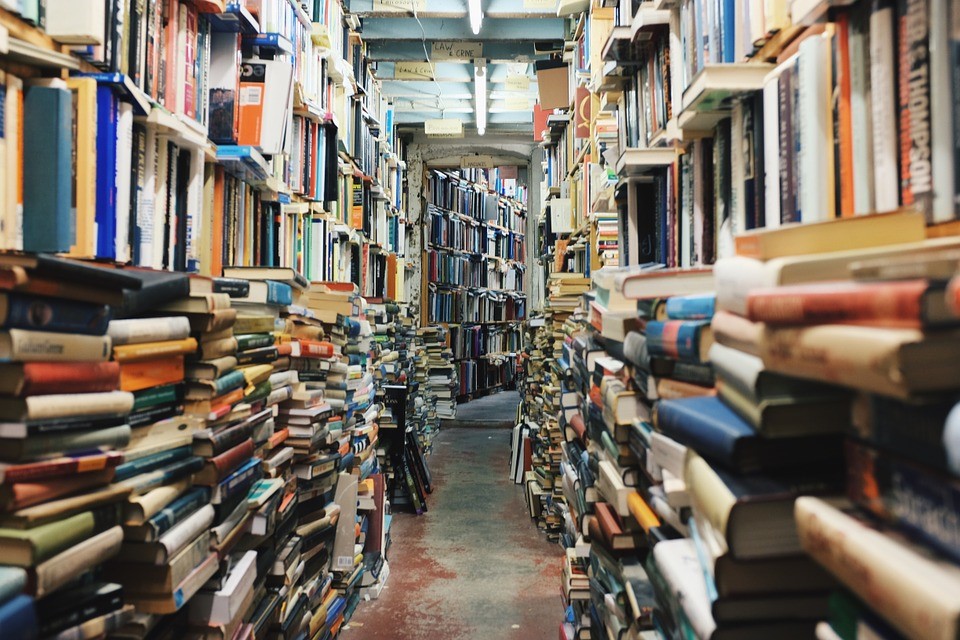
It is easier to let go of your things when you know that someone else will benefit. Donating is always an excellent option when you have too many items taking up space in your home. Clothes your children have outgrown and those that no longer fit you can be sent to Goodwill. If you have old books and toys, you can also donate them to a school or a charity.

A consignment is a good option if you have many small items that still have value. You can contact a thrift store and ask about how to consign some of your things. Do you collect designer shoes and bags? Consignment is the best way to sell some of your stuff for extra cash.

Conclusion

If you want to avoid clutter and hoarding, you need to be extra conscious about how much stuff you store at home. Take stock of what you have at least twice a year and box up anything that you no longer use. Make it a yearly habit to do a major clean-up so that the task does not become too overwhelming.

Read Also:

Content Rally wrapped around an online publication where you can publish your own intellectuals. It is a publishing platform designed to make great stories by content creators. This is your era, your place to be online. So come forward share your views, thoughts and ideas via Content Rally.

View all posts

Leave a Reply

Your email address will not be published. Required fields are marked *

Related

Drywall

Elevate Your Home With Unique Ceiling Textures

Drywalls are those construction materials that are used to create walls and ceilings in your home. Not all that, but drywalls also come in handy if you want to create design features like eaves, arches, or any mind-blowing architectural requirements!!! Do you know the best part about drywalls? These are super easy to install, highly durable, and only require simple repairs when damaged. So, drywall is a flat component composed of calcium sulfate dihydrate, typically between thick sheets of backer paper, and facer, used to construct interior ceilings. Let’s talk about the ceiling textures and the drywall options you can choose for your home!!! The Ceiling Textures And Your Drywall Options Decorating your home can be a real challenge for many !!! Therefore, choosing the right drywall finish or texture can prove to be a hard nut to crack. And it’s very natural to get in a state of indecision if you are handpicking it for your new home or renovation project. There are so many options that it feels like you are “searching for a pearl in an ocean.” Making up your mind about whether or not to go texturing your ceiling can be a tough job. And even if you choose to texture your ceilings, there are chances you’ll be confused about which one to go for!!!! And remember, getting the drywall right is the first step of tiling projects?”. But No Need to Worry!! This article will guide you in choosing the perfect texture and drywall option for your ceilings to look more elegant than ever!! 1. Sheetrock Texture: Old Is Gold Sheetrock ceiling texture is a drywall ceiling texture that has been famous since 1917. The reason this drywall texture is so awesomely renowned is because of the artistic look that it gives to your ceiling And the best part is you don’t need to use any sort of spray paint in this case. You can achieve this texture by using your artistic hand technique and without using any special brushes. This texture is perfect for any room. There are no restrictions on the use of this ceiling texture. 2. Stipple Brush Texture: A Test Of Your Skill This texture is not as easy as it seems. You need skills to create this texture. To create this texture, you need a roller and slap brush. The fascinating fact about this texture is it can cover the bumps and holes on your ceiling. And if you have the skills, then this texture can surely make your ceiling look gorgeous than ever!! 3. Swirl Texture: Creativity Taken To A New Level To achieve this texture, you need either a roller or sprayer. You can also do this by using a technique called “the basic swirl” method. But one thing that you need to keep in mind is while creating this texture, you’ll need a lot of patience to get the best result. And the difficult part is you need to create the pattern before the mud dries. So, make sure to have a helping hand by your side. Overall, the texture can really give that awesome look on your ceilings if you do it in the right way!!! 4. Orange Peel Texture: A Color Of Choice The name suggests all the colors of orange skin, but sometimes it’s also called “an eggshell” ceiling texture. If you really love this color, then this can be on the top of your favorite lists. To create this texture, you need to apply thin mud to the ceiling using a spray gun set at very high pressure. The more artistic mind you have, the more artistic look it has got!!!! 5. Smooth Textures: Choice Of Many If you are someone who wants the best at a cheap cost, then this texture is just the right choice for you. Moreover, you don’t need to have many skills to create this texture design. The look of this texture is just mind-blowing, and if you are someone who likes things to be consistently gorgeous, then this is the texture you can have for your ceiling. This texture is effortless to remove and is also perfectly suited for any room. 6. Tree Bark Texture: Beauty Of Nature If you are someone who loves nature and wants to bring the reflection of nature inside your home, then this textured style is just the option you can have. This ceiling has the look of a tree. You can create this texture just by using a heavy roller. The texture might look simply, but it’s very artistic and can surely catch the eyes of many. If you have a farmhouse, then this texture will double the beauty!!!!! 7. Slap Brush Texture: Slap The Beauty Out Artistic, gorgeous, beautiful, and elegant are the nicknames you can give to this texture. A complete package of beauty!!!! To get this texture, you’ll need a brush with very stiff bristles and thin mud. Firstly, you have to cover your ceiling with mud using a roller, then take the brush and slap the ceiling from the edge. This can be a hard nut to crack because if you don’t get it right on the first shot, the whole ceiling might end up looking messy. 8. Popcorn Texture: Cottage Cheese This texture, also known as the “cottage cheese” or “acoustic” ceiling texture, is probably one of the most famous ceiling textures ever!!! If you look closely, you’ll see it’s kind of a look-alike of “popcorn.” That’s why it’s called “popcorn texture.” To achieve the correct texture, you need to use a sprayer to apply to your ceiling. This contains Styrofoam with mud which gives that puffy effect. But it will require you to have a lot of skill to achieve this effect. That’s because the “popcorn texture” is both challenging to apply and remove. I hope this article will help you to know about the needs of ceiling textures and drywall options. And now I believe you’ll be able to get yourself the perfect texture for your ceilings. How Can I Remove Old Ceiling Textures Safely? Removing old ceiling textures can be a big job, but it doesn’t have to be intimidating! If you want to update your ceiling and get rid of that outdated texture, I’m here to help. No matter if you have popcorn, stipple, or another type of texture, this process takes a little bit of care, but don’t worry! Here’s a step-by-step guide on how to remove an old ceiling texture without breaking your back or the bank. Step 1: Test For Asbestos Before you get out any tools…safety first!  Remember, many older ceilings (especially those with popcorn texture installed prior to 1980) contain asbestos. Before doing anything else, have your ceiling tested for asbestos. You can hire a pro to test the ceiling or buy a self-test kit. If asbestos is present, halt all work and consult pros immediately. Asbestos removal is not a do-it-yourself job because it poses serious health risks if mishandled. Step 2: Clear The Room If there’s no asbestos present, it’s time to get the room ready. Cover all the furniture. You’d be amazed at how far a fine mist of water, compound, and paint can travel! Also, plastic should be removed from the floors, and tape should be around any ceiling fans or lights that are not being removed. I can personally tell you we didn’t do this. We found dried white dust on our bedspread when we were stripping the wallpaper in our bedroom, and we had to clean up all the residual dust a little too late. It was wild! Step 3: Soften The Texture For Better Finish Here’s where the fun starts! To make that texture easier to remove, you’ll need to soften it. Fill a spray bottle with warm water and mist the ceiling. You don’t want to drench it. If you put too much water on the ceiling, it could end up damaging the drywall underneath. Allow the water to sit for about 15–20 minutes or so, giving it time to penetrate and loosen up that texture material. Don’t rush this step. It’ll only cause more work for you in the long run. Step 4: Clean Your Work Grab a wide putty knife or scraper and start scraping off the texture. Do small sections at a time, and scrape at a shallow angle so that you don’t gouge the drywall underneath. If it’s not coming off well, spray some more with the water bottle and let it sit for a little longer. This step can be kind of messy and time-consuming, but have patience because, in the end, you will have a nice smooth ceiling. Step 5: Patch & Sand Once the texture is gone, you may notice a few dings or dents in the ceiling. Don’t worry! Just fill them with some joint compound, sand it smooth, wipe away any dust and you’re ready for a new ceiling. And that’s it! A fresh, smooth ceiling in no time! Read Also: Here’s How to Turn Your Garage into a Bedroom on a Budget! Turn your attic into a living space

READ MOREDetails
Vanity Size On Bathroom Design

The Impact Of Vanity Size On Bathroom Design And Functionality

Today, clothing sizes often lead people to believe they are smaller than their actual size. This is called “vanity sizing”. For instance, "a size 8 dress today is nearly the equivalent of a size 16 dress in 1958," according to a report.  Because clothing can create the illusion of a slimmer appearance, many people now desire larger bathrooms as well. The trend of vanity sizing is influencing the design and functionality of bathrooms. From wider toilet stalls to more spacious showers, bathrooms are being changed to match people's distorted self-image. What is Vanity Sizing For Bathrooms? Vanity sizing is when something is made bigger than normal to make people feel better about themselves. Just like size 6 jeans that actually fit someone who usually wears size 8 jeans. In bathrooms, vanity sizing means making the room and fixtures bigger than what works for real bodies. Such as extra-wide shower stalls, two-person bathtubs, or oversized sinks. They make us feel skinnier, but take up a lot of space! Factors To Consider When Choosing Vanity Size The main thing you should consider when choosing your vanity is the size of your bathroom which is a major factor in changing the look and feel of your bathroom. So, carefully review common bathroom vanity sizes and measurements before selecting. Look at the data below that shows the common vanity width that fits the bathroom sizes:  Data Source: Forbes 1. Consider Floor Space Will counters, cabinets, and toilets still squeeze in if you supersize your bathroom? Make sure giant fixtures don't crowd out other necessary stuff! 2. Watch Door Openings Too That cool two-person tub won't do you any good if it gets stuck trying to fit through the bathroom doorway! Double-check entrances. 3. Check Plumbing Locations Expanding your bathroom means dealing with pipes inside walls too. Make sure water lines still reach sinks or toilets when they move. 4. Price For Extreme Upgrades Going big in bathrooms means spending big bucks too! Make sure your wallet can handle all that bonus tile, lighting, high-tech toilets, and other swanky stuff before pulling the trigger.   5. Future Homeowners Too What seems huge and perfect for your family now may scare off buyers down the road. Keep future practicality for the next folks in mind. 6. Consider Resale Value Even if you adore your 47 jet massaging tub, will someone else want to pay big money for your over-the-top bathroom later when you sell? 7. Extra Cleaning Responsibilities The bigger the bathroom, the longer the cleaning day takes! Make sure you want to put in elbow grease for giant showers and his ‘and her everything.   8. Watch Wet Floor Safety Oversized sinks and tubs mean leaks or splashes cover larger areas. Pay attention to slip-proof surfaces so no one goes crashing down.   9. Visiting Guest Comfort Even if space permits, older relatives may feel uneasy navigating a huge bathroom with their walkers or canes. Consider all who will use it. 10. Separate Private Toilet Room Rather than one giant open space, smaller vanity bathrooms with a separate water closet for the toilet allow privacy. Choosing The Right Vanity Size For Your Bathroom’s Look The dimensions of your bathroom vanity change how open, crowded, or balanced your space appears. An overgrown vanity makes small rooms feel stuffed. But one too tiny turns your bathroom into a messy pile-up of products without enough organizer drawers or counter area. Here’s how to get vanity sizing just right for your ideal bathroom design style:   In Itsy Bitsy Bathrooms When dealing with snug powder rooms or half baths, keep your vanity narrow in the 24 to 30-inch range so it doesn’t hog up the entire floor. Any wider starts making moving around impossible! Select wall-mounted styles instead of boxy cabinets to save precious inches. Or opt for floating vanities that have air rather than chunky boxes below to give the illusion you have more breathing room.  Another decorating trick for a petite bathroom is going big with mirrors or using reflective tiles and chrome finishes. When tiny rooms sparkle and shine, they seem to double in size instantly! Just avoid dark paint shades, clutter, and heavy fabrics that make small salons feel even more closed in.   For Middle-of-the-Road Bathroom Sizes   If your washroom dimensions fall somewhere in that just-right not-too-big, not-too-small middle zone, standard vanity widths from 30 to 48 inches tend to fit nicely without limiting movement. This gives your average family plenty of surface space to spread out self-care must-haves each morning and store all those lotions and potions in handy drawers below.   When organizing your cabinet and counter goods, be sure to keep at least 9 to 12 inches of space around the vanity perimeter. You’ll still need elbow room to get in there for clean-ups without bonking walls, doorway frames, or light switches! Beyond functional inches, defining your vanity area with cool lighting designs or eye-catching tile shapes helps contain the space in a neat square for a balanced, soothing aesthetic.   When You’ve Got Room to Spare Lucky enough to be working with a big old bathroom complete with soaring ceilings and a giant footprint? Then you’ve got options to install his and her double-wide vanities ranging from 60 to a whopping 72 inches. This creates the dramatic appearance of dual stations without the need for significant construction to physically divide your spacious room into two separate spaces. FAQs:- Q1. What is the standard width of a bathroom vanity? Ans: The standard width for a single-sink bathroom vanity is 24 to 48 inches. For a double sink vanity, it’s 60 to 72 inches. Q2. How do I choose the right vanity size for my bathroom?  Ans: Consider your existing bathroom size, number of users, and required storage space when selecting the ideal vanity. Allow proper clearance between the vanity and walls.  3. What are some common mistakes to avoid when choosing a bathroom vanity size? Ans: Avoid sizing too small and creating limited functionality or choosing an oversized vanity that makes the bathroom feel confined. Failing to measure properly and allowing adequate wall clearance are also common mistakes. Conclusion Vanity dimensions significantly influence the visual enhancement and practical use of any bathroom. By factoring in room size, user needs, and required storage, you can achieve an optimally designed and functional space that suits your lifestyle beautifully. By paying attention to critical measurements and clearances, you can avoid common mistakes. With some planning and foresight, you’ll love your new bathroom for years to come. Additional Reading: 3 Best Indoor Plants For The Dining Room Stunning Bathroom Vanities For An Instant Makeover Storage Units Your Ultimate Guide To Organized Living

READ MOREDetails
Belleek Pottery

Why Invest In Belleek Pottery?

You may or may not have heard of Belleek Pottery before but this Irish brand has developed a world-renowned reputation over the last 160 years. Known for being the pinnacle of high quality, Belleek is simple some of the best-made pottery you can buy. Whether your style is natural and simplistic or contemporary and fun; there is a style of Belleek Pottery which is perfect for your home. Thanks to the superior quality of Belleek Pottery you can be assured that your choice of pottery will not only look great in your home but also stand the test of time. With both style and substance aplenty- what more could you ask for?   What is Belleek Pottery? Originally known as Belleek Pottery Works Company, Belleek Pottery first began producing pottery and tables wear in 1857. Back then the company’s style was based in heavy earthenware. Belleek is one of Northern Ireland’s oldest potteries and 2017 marks their 160th anniversary. The Belleek headquarters are still located in the original building used for the production of the first pieces of Belleek in County Fermanagh in 1870. The company was originally intended to give employment to many affected by the Irish Potato Famine. No one could have envisioned it would grow into the worldwide success of today. Each piece of Belleek Pottery is individually designed and crafted using techniques which have been passed down from generation to generation throughout the last 160 years. Each piece of pottery passes through 16 pairs of talented and experienced hands before it is shipped out to its new owner. To ensure only the highest quality of finishes, the entire process is meticulous with pieces being confined to the scrap heap for even the tiniest of flaws. The Belleek name embodies a worldwide reputation for craftsmanship and quality and each piece produced by the historical company does not disappoint. Is Belleek Right For You? When you invest in Belleek Pottery you are guaranteed to end up with tableware you will be proud to show off. If your tastes are simple and organic then you may prefer ranges such as the Pure or Grafton ranges- white and clean with sashes of character. If you prefer something more patterned then the Novello tableware range may be right up your street- fun yet classy. Read also: What Species Of Wood Is Right For Your Wine Cellar Furniture? No matter your style, there is a range to suit your tastes and this is an investment you will be happy you made when you are still using your pristine Belleek tableware years down the line thank to its superior quality. If you are celebrating a special occasion or having guests over for a meal then a set of Belleek tableware is bound to set a good impression as well as impress your guests with your style and good taste. As part of the celebrations for the 160th anniversary of Belleek Pottery, the company has produced 16 unique and original pieces to represent each of the decades of which the company has been in production. So What’s Stopping You? Investing in a set of Belleek Pottery is much more than simply buying some nice looking tableware. You are investing in a piece of Irish craftsmanship which has a history over 160 years old. Each piece will have been lovingly crafted using techniques hundreds of year in the perfecting and the unique designs will have your guests impressed by with your taste. Pick out some Belleek fine Parian china tableware which suits your taste and your homes décor and be safe in the knowledge that your purchase will last you well beyond the time you need it. The quality of Belleek Pottery will shine out whenever you use your new tableware.

READ MOREDetails