What Is Facebook Jail – Overview And Explained In 2021

by

18 June 2021

Facebook

Facebook jail

Before we move on to Facebook Jail, first, we must know about the basics. Facebook is one of the most widely used social media sites for connecting with people all around the world and advertising your company. It’s one of the most effective ways to spread your message, get your product and brand in front of your target audience, and more. However, the platform’s massive marketing prospects come with some equally massive drawbacks. 

Facebook’s algorithm has cracked down on political problems, and the famed “Facebook prison” appears to have become even larger, hurting many more individuals than before. For anybody who uses Facebook to sell or advertise their company on a daily basis, Facebook Jail is a well-known issue. It’s critical to understand what it is as a social seller so that you can prevent any issues or disruptions in your usage of the platform. 

What Is Facebook Jail?

What Is Facebook Jail

When Facebook suspends accounts (profiles or business pages) for violating the Facebook Community Standards, whether intentionally or mistakenly, the phrase “Facebook Jail” is used. 

Users have created the phrase “Facebook jail” to describe when someone is barred from accessing their account or publishing on Facebook due to spam or a failure to obey the platform’s standards

For a period of time, Facebook will suspend an account’s ability to publish or access particular features due to infractions, suspect logins, or spammy conduct.

Why Were You Thrown Into Facebook Jail?

There are a variety of reasons why you may be placed in Facebook jail and granted a brief suspension. Unfortunately, you may find yourself accidentally infringing Facebook regulations. Here are a few of the most typical reasons why people find themselves in Facebook jail:

1. Posting To Quickly

Posting To Quickly

One of the most prevalent causes for people being placed in Facebook jail is posting too rapidly on their profile. You may also be reported if you repeatedly publish the same information. The easiest answer to avoiding being blocked for this reason is to keep a constant posting schedule and to always leave some time between postings.

2. Sending Too Many Friend Requests In One Day

Facebook considers it a negative thing if you send too many friend requests from a personal profile, especially if you don’t know the individuals. If this type of conduct is found, your account will most likely be blocked. It’s the same with joining Facebook groups too quickly.

3. Posting Inappropriate Content

Posting sexually provocative content or nudity on Facebook is against their community standards and is forbidden. Even while it may prevent you from posting some really entertaining memes, doing so may result in your account being temporarily or permanently deleted. You should also avoid publishing information that promotes self-harm, hate speech, or credible threats to people or organizations.

4. Too Much Tagging

Too Much Tagging

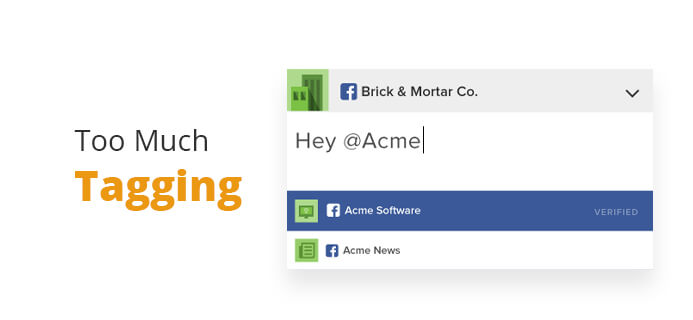
Another reason your account can be disabled is if you regularly react with tags.

5. Using Spam Images Or Videos

If particular photos or videos have been flagged as spam by Facebook (or Google), and you include them in your postings and are accused of spamming others, you might end up in Facebook prison. Fortunately, you can avoid this by writing unique content for your blogs.

What To Expect When You’re Facebook Jail?

Users are unaware that they have imposed limits on their accounts since Facebook does not notify them. Most individuals first find out they’re in Facebook jail when they get an email or when they try to post or send private messages on their account and get the dreadful message: You can’t post right now!

Even if you do receive information from Facebook that your account has been restricted, it will be too late to take anything. This is how you can tell whether you’ve been sentenced to Facebook prison:

  • Your account’s ability to post on your timeline, as well as any pages or groups, has been disabled.
  • You can’t like or comment on other people’s posts or photographs.
  • You are unable to make any comments on the social media network.
  • You are unable to access your account or page.

The consequences on Facebook vary from being unable to post to being entirely barred from getting into your account. These punishments can range in length from a few hours to up to 21 days. 

How To Avoid Facebook Jail In The Future?

How To Avoid Facebook Jail In The Future

Reading and adhering to the community rules, as well as the platform’s Terms and Conditions, is the simplest method to avoid Facebook imprisonment. You’ll find yourself in the sights of the Facebook cops if you’re found using your account in violation of the platform’s rules. However, the recommendations are lengthy and difficult to read, so I’ve compiled a list of things to do (or not do) to keep your account safe. The following are some of them:

  • Separate your postings by a certain amount of time.
  • Don’t publish anything that might get you in trouble, such as photos or memes.
  • Per day, send no more than 50 friend requests.
  • Each day, join no more than ten Facebook groups.
  • When adding or tagging someone, be cautious.
  • Use photos and movies that don’t spam.
  • On each device, log into a single account.
  • Posting material with scripts or automatic tools is not a good idea.
  • Posting comparable stuff in many groups at the same time is not a good idea.
  • Use your genuine identity and act like a real person instead of an impostor or false accounts.

The bottom line is that you must adhere to the platform’s requirements to the letter at all times.

How To Escape Facebook Jail?

How To Escape Facebook Jail

1. Serve Your Sentence

The first and foremost obvious option is to just wait until your “Facebook jail sentence” is completed. Facebook alerts you on when you can access the prohibited features or account again.

2. File An Appeal

If you don’t want to wait, you can simply request a review. Facebook will notify you through email of the outcome of your appeal. Just keep in mind that your appeal could be denied, and your account could be permanently blocked.

3. Create A New Account 

If all else fails and your account is blocked, the only other thing you can do is to forget about your current account and create a new one. Although this may not be perfect for online marketers and business owners, sometimes it is considered the only way to keep going ahead. 

Final Thoughts

This article lists all the different things that can land you in Facebook jail. Use this knowledge to avoid consequences from the social media stage for continued guideline infringements. In other words, you must follow these rules to stay out of Facebook jail.

More Resources:

Subham Saha started his career as a professional web content writer. He has more than 3 years of experience in digital marketing. He also has a great knowledge in SEO, SMO, Website development, etc. He completed his graduation in Electrical Engineering. He is very passionate about building his career in the Digital marketing industry. Subham has a great interest in reading books about Business, Economics, Psychology, Technology, and History.

View all posts

Leave a Reply

Your email address will not be published. Required fields are marked *

All Comments

You can also get flagged for random things like saying 'pickles are my favorite low calorie snack' was determined to be hate speech and given 30 days fb jail! It is getting ridiculous, you never know what words you say will set off the fb bots and get you blocked anymore =(

Related

facebook katana

What Is Facebook Katana And How Can You Fix It In 2024

Many Android users are becoming puzzled while seeing the Facebook Katana files, and many of them want to know how to delete these files permanently. Some of the users are not aware of the function of the Facebook katana files. They have a misconception about the working process of the Facebook katana files. Katana files are like the orca. This file is not harmful, and this is not a virus or URL. But if you do not clear your Facebook application cache memory, then Facebook katana files can give you a big headache. What Is Facebook Katana? When you want to know about Facebook katana, you must first know about Com. Facebook. This is the file name of the Facebook katana. Then what is com facebook katana? Com.facebook.katana is the code name for the Facebook apps on android devices. Just like the Facebook orca. Orca is the code name of the messenger in android devices. Katana is the name of the Facebook apps, and you can not delete the file without uninstalling the Facebook apps. Katana files are not malware, but when you start receiving popups about slowing down the other applications' processes, uninstalling Facebook Messenger and deleting the Katana files solves the popup issues. The Katana files issue is causing a certain amount of battery running problems, and other apps are starting to run slowly. Fixing the Katana files solves almost all the issues that are related to battery drainage and slow app processing. But if you do not receive these types of messages, then do not delete the Katana files as they are not malware or any harmful URLs. Related: How to remove pname com Facebook orca How To Fix Facebook Katana In 2024? If you are repeatedly receiving messages about the slow performance of your devices. Katana files are responsible for slowing down your device performance, so fixing the Facebook Katana files is the only way to get rid of the problem. A. First Process To Fix The Facebook Katana Issues You can fix the issue from your Android device and your Facebook profile; both of the processes are fast and effective. Then, start making some changes to the Facebook account settings. Here is the step-by-step process to fix the Facebook Katana problem by using your Facebook account. Step 1: Start by opening up the Facebook application from your device. Step 2: After opening the Facebook application, you have to choose the “see more” option.  Step 3: Then open the setting options. Step 4: Then click on the account setting options. Step 5: Select the option of account setup, privacy, and security. Step 6: Then open the browser and clear all the browsing history, data, and cookies. Step 7: Now clear all the data and the cookies by clicking the clear data option Step 8: When you are clearing the data files, you delete all cookies and cache files that are generated during the FB usage. B. Second Way To Fix The Facebook Katana Issue Another way to fix this problem is by uninstalling the Facebook applications. When you uninstall the Facebook application, then your katana problems are automatically fixed. Step 1: Go to your device settings. Step 2: Then click on the Facebook application option. Step 3: And then uninstall the app from the "app details in-store". Step 4: Then click the uninstall options. Step 5: You can reinstall the Facebook application from the google play store. Related: 9apps – An Alternative Other Than Google Playstore. C. Third way To Fix The Facebook Katana Issue Facebook katana is showing the popups mainly at the time of new updates. If you want to fix the Facebook katana files, then you should try a way by stopping all the Facebook updates. To apply this method, you have to follow the simple steps below. Step 1: First, start with opening the Facebook application. Step 2: Then go to the Facebook settings option. Step 3: Click on the rough corner of the page where you can notice three dots. Step 4: Then click on the option to stop all the running updates. Step 5: Or you can simply force stop the Facebook application to solve the Facebook katana file issues. D. Fourth way To Fix The Problem The fourth way is the ultimate step. If you are not getting success with these three steps, then you can apply the fourth method. The fourth method is nothing but to apply the factory reset mechanism.  But factory reset is resulting in a huge data loss. All the records are detected when you are applying the factory reset method. But if you are facing continuous trouble due to the facebook katana files, then factory reset is the ultimate step to solve the issue. Access Geo-Restricted Apps With  VPN With the help of a virtual private network, or VPN, known as Private Internet Access, you can remain totally anonymous online and stop your ISP, the government, and other parties from tracking you. The program offers dedicated servers for streaming and torrenting, guaranteeing top speed and preventing lag. Additionally, you can view popular streaming services like Netflix, BBC, Disney+, and others without any restrictions no matter where you are by avoiding geo-restrictions. Do Not Pay Ransomware Authors The biggest threat to your photos, videos, work, or school files is definitely malware attacks, especially ransomware. Data that has been locked by cybercriminals using a strong encryption algorithm is unusable until a Bitcoin ransom is paid. Try using alternate recovery techniques first, as they may be able to help you recover at least some of the lost data, before paying hackers. If not, you risk losing your money in addition to the files.  Bottom Line Now you know what Facebook Katana is. And you are also aware of the fact that this is not a URL or malware. This is a file where Facebook is storing all the cache data. If you are not receiving any alarming messages about the Facebook katana files, then avoid deleting the file or the Facebook application. These four are the most effective ways to solve the issue. If our article helps you solve your katana issues, do not forget to comment back to us. More Resources: 10 of the Best Facebook Pages to Follow Now How to Download Facebook Videos on Android? All That You Need To Keep In Mind Before Selling On Facebook.

READ MOREDetails
how to delete a facebook page

Here Is How To Delete A Facebook Page Easily

Do you wish to know how to delete a Facebook page? This article is going to be your ultimate guide. We will walk you through the process of deleting your Facebook business page on both desktop and mobile devices with clear, detailed instructions. If you're still not entirely sure that you want to permanently delete your Facebook business page, we'll also offer you other options. But first, let's confirm that we are discussing the same topics. Your personal Facebook account, or profile on Facebook, is the one you use to interact with loved ones and watch wacky cat videos. You can share updates about your life with your Facebook friends and keep up with their activities. Depending on the pages you follow, you can even obtain your news from your news feed. On the other hand, a company typically creates a Facebook page to engage with clients, advertise goods and services, and broaden its online presence. This account is not private; rather, it is a component of a larger marketing plan. We'll go over everything you need to know about removing your Facebook business page in the section that follows. Go to the bottom of the post to find out how to remove your personal Facebook account. How To Delete A Facebook Page: Prerequisites? You have to be the page administrator if you want to remove your Facebook business page. If you are unsure whether to remove your page, you might want to think about un-publishing it first. You will not lose any data, so you can publish it again whenever you'd like. You have 14 days from the time you start the deletion process to reactivate your page if you decide later that you should have deleted it. For 14 days, the page is also accessible to the general public. Two Alternatives To Deleting Facebook You have a few options if you're not sure you want to remove your Facebook business page permanently. Your page can be merged with another page or made unpublished. For those who want to keep their Facebook page private for the time being but may want to use it later, the first option is excellent. With the second option, you can delete the old Facebook page and move its fans to the newly created one. Everyone wins in this case! Un-publish There are a few reasons why you might want to un-publish your Facebook business page: It's possible that your outdated Facebook page needs an update. It's possible that you are working on a new Facebook page and don't want it to be public until everything is finalized. Maybe you made a Justin Timberlake fan page a long time ago, but it doesn't feel like you these days. You're not sure if you should permanently remove your Facebook page. To un-publish your Facebook page, follow these steps: Visit Facebook. Click Pages in your News Feed (it's on the left menu). To un-publish a page, click on it and select Page Settings. After selecting General, select Page Visibility. Choose "Page unpublished." To save your changes, click Save. When you un-publish your page on Facebook, it will ask you why. Explain why. To un-publish, click Next. So that's it! To republish your Facebook page, just follow the same steps and select "Page published" in the fourth step. Merge Facebook Pages Another option is to merge the Facebook pages in order to avoid deleting it completely. Here is how to do it: Launch the Facebook application. Click the hamburger menu in the upper right corner. Select Pages. A list of all of your Facebook pages will appear. Select which one you wish to combine. Choose Settings. Click General. To merge pages, click. Facebook will prompt you to enter your password. Selecting the two pages you wish to combine will be necessary. The following conditions must be fulfilled by your pages in order for the merger to proceed: Only if you are an administrator on both requested pages can you combine them. The pages must all deal with the same subject. Both the names and the content of the pages must be similar. If applicable, all of your pages must be located in the same physical location. How To Delete A Facebook Page? Maybe your business closed, the band broke up, or you simply don't want a given page to be out there anymore. If you find yourself ready to delete a Facebook page, it is easy to delete it. You can do it through the main site as well as the Facebook app. Here are the steps in detail: Log into your Facebook account. Navigate to the page you want to delete by clicking your profile icon at the top right of the page. Click to see all profiles and select the page. On the page to be deleted, click settings in the left-hand column. Click privacy on the left of the next page. On the next page, click Facebook page information. Look beside the words deactivation and deletion. Click view. You will be taken to a page with two options: deactivate the page and delete the page Select the delete page, then hit continue. A new window will pop up asking if you want to download and or transfer information on the page. Make your selections, then hit continue. Enter your password when prompted, then hit continue. Now hit continue on the next window, noting that the action you are about to take is permanent, or it will be if you don't cancel the deletion by reactivating the page within 30 days. Open the Facebook app and click the menu. Located at the bottom right of the screen on an iPhone and the top right on an Android. Tap pages, then tap the page you wish to delete. Open the page's settings, then tap General. Tap the remove page on the next window, then tap the delete page button. Confirm your choice in the next window and delete the page. You have 30 days to reactivate it and stop the deletion. How To Delete a Facebook Profile? Now that you know how to delete a Facebook page, if you want to delete your personal Facebook profile or account, follow these steps: On the top right of Facebook, click Account. Click Settings and Privacy and choose Settings. On the top left, click Your Facebook information. If you want to, you can download a copy of your information in the section download your information. Why Can't I Delete My Facebook Page? You do not have administrator access to a Facebook page if you are unable to delete it. If it's a page that someone else made, you can either follow the above instructions to have Facebook handle the deletion for you, or you can contact them directly if you know them. Your admin status has changed if it's a page you know you created and should be able to remove. If you want to remove the page, you'll need to be added back as an admin because it's possible that someone else with admin access accidentally or purposely changed your role. Can Admins Delete A Facebook Page? They most definitely can, yes. In actuality, the ability to remove a Facebook page requires that you are an admin or that you have been given permission. Any Facebook page you create automatically gives you admin privileges, so when it comes time to delete one, just follow the previously established procedures. You must request access if you are not the page administrator and would like to delete the page. How To Stop Facebook From Getting Deleted? As previously mentioned, you can stop a page from being deleted for thirty days after you decide to delete it. If you decide to change your mind, simply take these actions: Click on your picture in the upper right corner of Facebook when it's open. From the dropdown menu, select Settings & privacy and then click Settings. Click "Your Facebook information." Lastly, select "View" from the menu, then click to bring up the reactivation page. Before You Delete You should download the data from your Facebook page before deleting it. To obtain your data: Navigate to that page and choose "Settings." Locate the "Download Page" option by navigating to the "General" section. Click "Download Page" after selecting "Edit." One wise move to make the most of your social media assets is to delete any outdated or irrelevant business pages. You can also collect data, automate content creation, and analyze trends with the right software. To locate the best social media software for your company, start here. Wrapping Up A Facebook page is different from a profile. Your user profile represents you as an individual. It's where you interact with friends and maintain control over the privacy of the information you share. A page is a public representation of a person, place, business, organization, or group that other people on Facebook can like and follow. Once you have initiated your account's deletion, Facebook gives you a 30-day window to rescind your decision. Within that timeframe, you can reinstate your account to its previous glory without losing any of your data. To do so, simply log into your account as you normally would, using any browser of your choice or via the Facebook app. After 30 days, you lose your account permanently. So before you get too curious about how to delete a Facebook page, make sure you are ready to let go permanently. With the information we just provided, you can delete any type of Facebook page that you may have created in just a few moments. Have you experienced any challenges while trying to delete your Facebook page? How did you overcome it? Let us know in the comments. Additional Reading: How To Stop Scammers On Facebook Marketplace? Facebook Settlement: When It Will Pay Out and How to Verify It What Is Facebook Touch? Everything You Need To Know About It

READ MOREDetails
how to disconnect facebook from instagram

The Whys And Hows Of Unlinking Facebook And Instagram In 2024!

Have you had enough of sharing your content on Facebook and Instagram in tandem? Would you prefer to maintain distinct accounts? Are you looking for ways "how to disconnect Facebook from Instagram?" You can easily delink your Instagram and Facebook accounts from one another on desktop and mobile platforms, but how do you do that? We'll walk you through the process of separating your Instagram and Facebook accounts in this post. You can start by de-syncing your desktop and mobile accounts for Facebook and Instagram. If you decide you no longer want to cross-post content, then you can easily unlink your accounts. If you have more than one linked account, you can also delete an account from either platform. Remember that you will need to change one of the passwords if the login for both accounts is the same. It is also possible to delete your Instagram account from other social media platforms. You can unlink your Instagram account from your Facebook account by going to the Accounts Center if you want to stop posting your Instagram photos to other social media platforms. We'll guide you through the process of removing the connection between your accounts as well as ceasing to share your Instagram posts on other platforms. How Is Facebook And Instagram  Connected Your Instagram posts will automatically be shared on your Facebook timeline if your Facebook and Instagram accounts are linked. For individuals who would like to share their Instagram photos with their Facebook friends without having to post them twice, this feature is useful. You can unlink your Facebook and Instagram accounts if you'd rather keep your accounts separate or are done sharing content between them. When you link them, you are essentially giving Instagram access to your Facebook account when you link your two accounts. This implies that Instagram has access to personal data from your Facebook account, including your email address, name, as well as a profile picture. Furthermore, Instagram can post on Facebook on your behalf. So, you might want to unlink your Instagram and Facebook accounts for many reasons. Why Unlink Facebook From Instagram? Do you want your Instagram and Facebook accounts to be kept apart? Does cross-posting content across the two platforms sound too monotonous? Do you want Instagram to no longer be able to access your Facebook account? Take these steps to unlink your Instagram and Facebook accounts: Log in to your Instagram profile by opening it. Choose "Settings" by tapping the three lines in the upper right corner. After swiping down, choose "Account." Click on "Sharing to Other Apps." After selecting "Facebook," tap "Unlink Account." Remember that removing the connection between Instagram and Facebook accounts won't remove any of your content from either site. All it does is cut off the communication between the two accounts. Why Would You Unlink Facebook From Instagram? You might want to keep Facebook and Instagram separate in case you use them for personal connections on Facebook and business or creative endeavors on Instagram. You can avoid confusion as well as overlap by keeping your identities separate by unlinking the accounts. It's possible that you unintentionally share your Instagram reels, stories, or posts on Facebook when you link your accounts. In case your target audiences on both platforms are different, this might be awkward or inappropriate. You'll have more discretion over what you share and where by unlinking the accounts. When you automatically share your Instagram posts on Facebook, or vice versa, this is known as cross-posting. Although it may seem practical, your followers may find this bothersome or spammy. By removing the links between the accounts, you can customize your content for every platform and avoid cross-posting. Unlinking your Facebook and Instagram accounts can be a wise move if you're worried about privacy on social media. It will lessen the chance of any security lapses or hacks and stop any data or information from being shared between the two platforms. How To Disconnect Facebook From Instagram On Mobile? You can unlink your Instagram and Facebook accounts if you no longer want them to be connected. Here is how you can do it using your smartphone. Launch the Instagram app on your smartphone. Tap the lower right corner of your profile picture. In the upper right corner, tap the three horizontal lines. At the bottom of the menu, tap Settings. Press the "Account" button. On Linked Accounts, tap. Press the Facebook icon. Select "Unlink Account" by tapping. Your Instagram and Facebook accounts will be disconnected after you've finished these steps. How To Disconnect Facebook From Instagram On Desktop? The procedures listed below can also be used to unlink your Facebook account from Instagram if you're using a desktop or laptop web browser: Open your web browser and navigate to instagram.com. If you are not already logged in, log into your account. In the upper right corner of your profile picture, click on it. Select Settings by clicking. Select "Account" by clicking. On Linked Accounts, click. Select Facebook. Select "Unlink Account" by clicking. How To Disconnect Facebook From Instagram On iOS Or Android? If you want those posts removed from Facebook, you will have to remove them manually. It's easy to unlink your Facebook and Instagram accounts on your mobile device if you decide you no longer want to share content between them. Here are the steps that apply to both iOS as well as Android devices.  iOS  Tap the icon for your profile in the lower right corner of the Instagram mobile app after opening it. In the upper right corner, tap the hamburger menu icon, then choose "Settings" from the menu. After swiping down, tap "Account Center" (or, depending on where you are, "Accounts Center"). To unlink an Instagram account, tap "Accounts & Profiles" and choose the desired account. Again, tap the account name and profile picture. Select "Remove Account" and tap "Yes" when prompted to confirm.  Android  Tap the hamburger menu icon located in the lower right corner of the Facebook mobile app after opening it. After swiping down, tap "Settings & Privacy" and then "Settings." Click "Accounts Center" and choose "Manage Connected Experiences" from the menu. To unlink an Instagram account, tap on it. Select "Remove" and then "Remove Account" from the prompt to confirm. It's crucial to remember that you cannot unlink your Facebook and Instagram accounts if you use the same password for both. You must change one of the passwords. Furthermore, you might need to go to the app settings or preferences of that social network to unlink your previous account in case you wish to relink your Instagram account to it. Why You Can't Unlink  Facebook From Instagram? Try these suggestions in case you are having trouble unlinking your accounts: Verify that you are running the most recent versions of the Instagram and Facebook apps. To confirm that you have granted Instagram access to your account, check your Facebook settings. Verify that you are logged into the correct Facebook account if you have multiple accounts. If you're still having issues, then get in touch with Facebook or Instagram support for additional help. Wrapping Up Removing the connection between your Instagram and Facebook accounts can help you maintain privacy as well as segregate your data. Additionally, it can stop unwanted content sharing between the two platforms. You must go to the "Linked Accounts" section of your account settings to unlink your Instagram and Facebook accounts. You can then choose which Facebook account to deactivate and take it out of your Accounts Center. If you have thoughts to share or questions to ask about how to disconnect Facebook from Instagram please leave a comment below. We would love to hear from you. Learn More About: 5 Content Ideas to Use with Instagram Influencers 6 Best Practices When Buying Instagram Followers Incognito Mode: How To Post Anonymously On Facebook?

READ MOREDetails