The Timeless Appeal of Leather: Why Firefighters Trust Leather Radio Straps?

Published on: 06 January 2024 Last Updated on: 06 February 2026
The Timeless Appeal of Leather: Why Firefighters Trust Leather Radio Straps

Leather, a material with an ageless allure, has been used across centuries and sectors. Its robustness, flexibility, and adaptability make it a preferred choice in numerous applications.

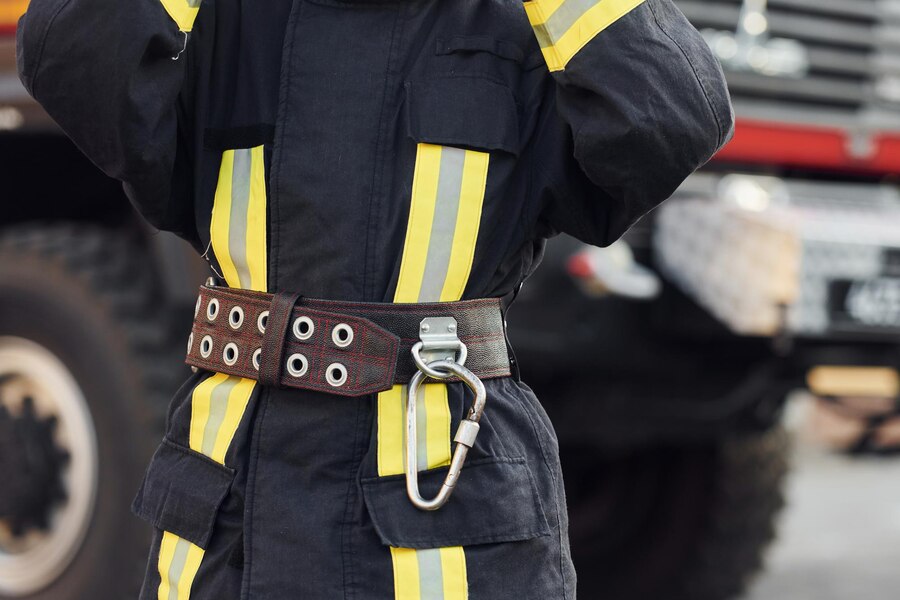
This is particularly true in firefighting, where dependability and resilience are critical. Among the vital gear for firefighters, the leather radio strap stands out, exemplifying the timeless charm and practicality of leather.

Unmatched Durability in Extreme Conditions

Firefighters are often thrown into some of the most challenging environments. Their gear must withstand high temperatures, abrasive substances, and rugged use. It's in these circumstances that the leather radio strap proves its worth.

Crafted from top-quality leather, these straps are designed to endure the demands of firefighting, offering a safe and readily accessible spot for a radio - an indispensable device for communication during crises. Unlike other materials, leather does not easily crack or fade, even when subjected to harsh elements. This durability implies that a leather strap can serve for several years, if not decades, with minimal upkeep.

User-Friendly and Comfortable

Leather radio straps also score high on their ease of use. They are engineered to glide effortlessly over turnout gear, ensuring radios and other accessories are always within arm's reach. Furthermore, they secure the radio microphone, preventing it from swinging or becoming an obstruction during pivotal moments.

Comfort is another aspect where the leather radio strap excels. A well-constructed radio strap positions the mic comfortably on the chest, particularly for firefighters laden with backpack-style bags and other hefty equipment.

Shielding from Thermal Hazards: The Leather Radio Strap Advantage

A leather radio strap isn't just a handy tool for communication; it's also a line of defense against the thermal hazards firefighters face. When worn beneath the turnout coat, it offers several protective benefits:

  • Strategic Positioning: The radio is located below the coat line, significantly less exposed to extreme heat and flames. This positioning not only maintains the functionality of the radio but also extends its lifespan.
  • Upright Orientation: This strategic placement ensures the radio remains upright even when a firefighter crawls. It eliminates the need to fumble around for the device, making it easier to use and access in various situations.
  • Thermal Resistance: Leather itself is a material known for its thermal resistance. It can withstand high temperatures without melting or deforming, protecting the radio from overheating or suffering heat damage.
  • Insulation Properties: Beyond its heat-resistant qualities, leather also provides some insulation. It can help keep the radio stable, preventing rapid temperature changes that could affect its performance.

In essence, a leather radio strap is more than just a carrier for radio; it's a shield against the intense thermal hazards that firefighters regularly encounter. This added level of protection further underscores why leather straps are such an essential part of a firefighter's gear.

Rugged Aesthetic Appeal: The Distinctive Charm Of Leather Radio Straps

Beyond their functional attributes, leather radio straps also carry a significant aesthetic appeal. Here's why these straps are more than just practical gear:

  • Timeless Elegance: Leather is a material that never goes out of style. Its classic appeal transcends trends, making it a timeless choice for professionals who value functionality and aesthetics.
  • Rugged Charm: Leather straps have a rugged charm that embodies firefighting's tough and resilient nature. This rustic look perfectly aligns with the image of bravery and strength that firefighters represent.
  • Unique Patina: Leather develops a distinctive patina - a natural aging process that enhances its look. Each scratch, mark, or blemish adds to the strap's character, making each unique and personal.
  • Telling a Story: Leather straps carry the stories of their wearers. They bear the marks of fires battled, lives saved, and experiences shared. Over time, they become a testament to the wearer's journey and achievements.

In short, the aesthetic appeal of a leather strap is a blend of timeless elegance, rugged charm, and personal storytelling. It is a piece of gear that serves a crucial role in a firefighter's life and contributes to their unique identity and style.

Trusting The Timeless: Why Leather Radio Straps Are A Firefighter's Best Ally

In conclusion, the timeless charm of leather and its durability and versatility make it the go-to material for firefighter radio straps. It's not just about fashion; it's about placing trust in a material that can endure the test of time and harsh conditions.

The leather radio strap is more than just an accessory; it symbolizes the resilience and bravery of those who don it. When it comes to reliable firefighting gear, there's no doubt that leather stands unrivaled by time.

Learn More About:

  1. Care And Maintenance Of Men’s Vintage Rolex Watches
  2. How To See Someone’s Imessages Without Their Phone?
  3. WhatsApp Not Working: Why It Happens And How To Fix It

Content Rally wrapped around an online publication where you can publish your own intellectuals. It is a publishing platform designed to make great stories by content creators. This is your era, your place to be online. So come forward share your views, thoughts and ideas via Content Rally.

View all posts

Leave a Reply

Your email address will not be published. Required fields are marked *

Related

Avast UI failed to load

Top Easy Way To Fix Avast UI Failed To Load Error In 2026

Avast Antivirus is the most famous Antivirus in the world. It is so popular among PC users because it offers both a Free Version and a Premium Version, which can be used in computers such as desktops and laptops. There is an Android version of this application as well. If you are not so tech-savvy, let me first tell you in short what Antivirus is. An antivirus is software that protects your system from viruses, malware, and Spyware. Ever since the Windows 10 update, people have been reporting that they are getting an error message saying Avast UI failed to load. Windows is infamous for providing buggy updates. The same thing was reported in Windows 7 as well as Windows 8. It's quite sad to see that Windows, even after becoming the most used Operating System on the planet, has failed to achieve proper security, and adding to that, most of their updates are quite buggy.  However, they fix the bugs in later updates. But the avast UI failed to load has been bothering people for quite some time now. In this article, we will suggest a few troubleshooting methods, following which you can sort out the issue.  What Causes Avast UI Failed To Load? Here are some of the root reasons listed below for this error. There is a good chance that this error pops up because of some error in the configuration of Windows.  Another reason for showing Avast UI Failed to Load pop up is that you might be using more than one antivirus simultaneously on the same device. The last reason we could think of is if there is any problem with your system's Remote Desktop Services. How Can You Fix Avast UI Failed To Load Issue? In order to fix the "Avast UI Failed to Load" issue, you need to check a few things first. Make sure that you have exited the Antivirus. Restart Avast Antivirus. But still, if the issue is not fixed, you can follow these procedures to say bye-bye to this issue.  Procedure 1: Turn On The Remote Desktop Services What you need to do is press the Windows key and R simultaneously. This will open up the RUN box.  After having that box on your screen, you have to type 'services.msc' in that box and press the enter key. Now check for the Service Page. After finding the Service Page, you have to search for Remote Desktop Services. After you have found the remote desktop services, what you need to do is right-click on it and then select the option of 'Properties.' After clicking on properties, you have to double-click on the button that says start and set the startup type to automatic. After you have done that, click on 'OK" to confirm the changes you have made. Now, you have to close the services page and manually restart your PC, laptop, or whatever you are using. It will complete the process. If you are still facing Avast's problem, UI failed to load, then kindly follow the next procedure closely.    Procedure 2: Try Repairing The Avast Antivirus Software Kindly follow this procedure closely to repair. You have to go to the Control Panel Section. You can find the Control Panel in the settings section of your computer. If you do not know how to open the control panel. Click on the start button and type the control panel. After opening the Control Panel, search for the Program & Features option, find it, click on it, and look for Avast Antivirus software. Now, you need to right-click on Avast; you will get the option to uninstall/change.  Be very careful while doing this, as a single mistake can uninstall Avast from your PC. Select the option to repair after having clicked on change. Now, you need to wait for Avast to repair itself, and after Avast completes its repair, reboot your PC. If the error of avast UI failed to load persists, kindly follow the next procedure. Procedure 3: Uninstall And Reinstall Avast Antivirus Software  If any of the above methods did not work for you, then you try to uninstall Avast Antivirus. To uninstall Avast Antivirus Software, you need to open the Control Panel. You can open Control Panel by merely typing Control Panel in the Run dialog box; another way to open Control Panel is by searching the control panel after clicking on the Start button.  After opening the Control Panel, go to the programs and features section and find the Avast Antivirus software. Right-click on it and select uninstall this time instead of selecting change as you did in the previous procedure.  Please wait for some minutes for Avast Antivirus Software to completely uninstall itself from your computer. Reboot your computer as the final step of the process. Switch back on your computer, download Avast from the official website, and install it again as a whole new software. Make sure you do not do anything else on your computer while Avast Antivirus is being installed, as it puts extra pressure on the computer's RAM. After the installation process, open Avast and check if the Avast UI failed to load the error persists. If it does, kindly follow the next procedure.  Procedure 4: Get The Recognition Issue Fixed If the error of Avast UI failed to load persists, you could follow the last and final procedure.You need to look up from the Avast icon on your desktop and Open the shield's control. In shields control, right-click on the Disable to disable the shields. You will get the option to disable it for 10 minutes to an hour. Disable it for 10 minutes, wait for 10 minutes, and check if the 'avast ui failed to load' issue persists. If the error is still showing, then try out some other methods. Press the Windows Button and R buttons simultaneously. It will open up the Run dialog box. Type cmd in that box so that it opens the Windows Command Prompt Box. Type 'winmgmt/verifyrepository' on the search field and hit the enter button.  If it shows the status as inconsistency, you need to type 'winmgmt/salvagerepository' in the search field and press the enter key to finish the process. If the result shows that the Windows management instrument was consistent, you need to type 'winmgmt /resetrepository.'  After doing that, Windows will send you a message showing that the WMI repository has been rebuilt successfully. Finally, you need to reboot the system and start Avast antivirus, and hopefully, it will not show the error of Avast UI failing to load. We are sure that after trying all these steps, your Avast Antivirus will run just fine. But still, if the error exists, we suggest you contact Avast Customer Care as soon as possible. Procedure 5: Update Your Avast Software Most of the time, what can fix such an error message is a simple update. Fortunately, you can update the app without the hassle of having to re-download the app. Redownloading can be a viable option if you cannot access the interface at all. Here is how you can update Avast Antivirus as well as other Avast applications that offer easy updates to its users. Press the Windows+X keys at the same time, then select the app and features from the context menu. Find the Avast Antivirus or any other app that is causing you to see the UI failure arrow. Click on it, and from teh options that unfold, choose Uninstall. Click the Update button and wait for the software to locate any new updates that might be ready to download. It will automatically install the latest version, which will take quite a bit of time, depending on the configuration of your system. When the repair process is complete, launch the Avast app that you were having trouble with. This should get your app up and running. It is possible that updating the Avast app the way mentioned above will fix the internal corruptions or missing files, thereby restoring the UI. But if you are still facing the same issue, try speaking to Avast Customer Support. Conclusion Avast is one of the best antiviruses in the market. The story of avast goes way back to 1995. Initially, it did not offer the best of services, but they have been improving their services year by year. It's one of the few antiviruses that offer a premium version and a free version as well.  Do not think that the free version has limitations like other antivirus software because it's not so. The free version provides a few premium features, which include a WIFI inspector and ad blocker, etc. However the recent trend of Avast showing that the Avast UI failed to load is not what users are expecting. Whether it's the fault of Avast or Windows 10 is yet to be found out. Rest assured, you can try the above procedures to get rid of the issue. You May Also Like: Is InterServer The Best Web Hosting Platform What Are The Things You Need To Know While Choosing Antivirus Software? How To Allow Chrome To Access The Network In Your Firewall Or Antivirus Settings?

READ MOREDetails
Cloud Recruitment Software

Transitioning To Cloud Recruitment Software: Benefits And Considerations

In the fast-paced world of modern recruiting, staying competitive and efficient is crucial. As technology continues to evolve, traditional recruitment methods are being replaced by more advanced solutions. One such solution gaining popularity is cloud recruitment software. In this article, we will explore the benefits of transitioning to cloud recruitment software and discuss the considerations that recruiters must keep in mind during the process. What Is Cloud Recruitment Software? Cloud recruitment software, also known as applicant tracking systems (ATS), is a SaaS-based solution that enables organizations to streamline their recruitment process by managing candidates, job openings, and hiring workflows in a centralized, online platform. This software eliminates the need for manual data entry, provides real-time updates, and facilitates collaboration among team members. The ATS is a particular type of onboarding software. It is available as on-premise systems and cloud-based software. Any application tracking system takes time to deploy (irrespective of the models). Ultimately, the process becomes quite efficient and fast, and experts opine that it saves time for every hire.  However, the cloud-based application tracking system gives a major advantage compared to the on-premise recruitment software.  Benefits Of Cloud Recruitment Software Cloud recruitment software has evolved as one of the most suitable recruitment techniques compared to existing systems. The following section discusses some of the core advantages of cloud software.  1. Enhanced Accessibility And Collaboration Cloud recruitment software breaks down geographical barriers and allows recruiters to access the platform from anywhere with an internet connection. This increased accessibility leads to better collaboration among hiring teams, ensuring that everyone stays on the same page throughout the hiring process. 2. Improved Candidate Sourcing And Management With cloud recruitment software, recruiters can easily source candidates from various channels, such as job boards, social media, and employee referrals. The software's candidate relationship management systems help in building and nurturing relationships with potential candidates, ensuring a robust talent pool for future requirements. 3. Time And Cost Savings Automating repetitive tasks and streamlining the recruitment process results in significant time and cost savings. Cloud recruitment software reduces manual paperwork, shortens the time to fill positions, and optimizes the hiring budget. 4. Data-Driven Decision Making The software provides in-depth analytics and reporting features that enable data-driven decision-making. Recruiters can track key metrics, such as time-to-hire, cost-per-hire, and source of hire, to assess the effectiveness of their recruitment strategies and make necessary improvements. 5. Scalability And Flexibility Cloud recruitment software is designed to accommodate businesses of all sizes, from startups to large enterprises. Its scalable nature ensures that it can grow alongside the organization's needs. Additionally, the software's flexibility allows for customization to align with specific recruitment workflows. 6. Quick To Deploy The cloud-based software deployment can be done within days or weeks compared to the existing or, say, the premise-based hiring system. The entire deployment of the system includes creating user accounts, migrating the data, and then customizing the features and tools. Also, many cloud-based systems are armed with chatbots and training elements that enhance the knowledge base of the seeker.  The particular resources are much more effective in providing the training. But in contrast to it, the premise-based software takes months to integrate into the system.  7. Technical Support Technical support is included in the premium services of the SaaS recruitment system. The best cloud recruitment software is integrated with the technical prowess to cater to the needs of the stakeholders. When you compared it with the existing software, it required a full in-house team to maintain data security. A full-fledged IT team was also required for the software update and security of data.  8. Security  With the help of the on-premise hiring software, you can not mingle between security and control. The HR recruitment software, if powered by the cloud-based vendor, offers a far more secure system compared to the existing technology.  Cloud-based technology is quite safe, and bulk data management is quite easy. You do not have to hire local servers to safeguard your data.   9. Integration The best recruitment software integrates with that of the recruitment tool. Some examples of IT include job board applications and onboarding software. The HR tech integration integration has traversed huge distances. Thus, hiring the tools integrated with the voluminous HR system. 10. Access To Mobile Phones  There is nothing better than mobile phone compatibility. The same is considered for the cloud recruitment software. With systems integrated with mobile phones, you can allow your recruitment HR professionals to work from home. It is, therefore, a major advantage compared to what was used previously.  Besides this, the cloud-based recruitment software enhances the experience as they always seek an easy-to-use system. This is why companies are slowly thinking of shifting from legacy software to that of the cloud system. Considerations For Transitioning To Cloud Recruitment Software Are you looking to transition from on-premise hiring to cloud recruitment software? Then, in that case, you will have to keep certain considerations in mind.  1. Data Security And Compliance As recruiters handle sensitive candidate information, data security should be a top priority. When transitioning to cloud recruitment software, ensure that the provider adheres to industry-leading security standards and compliance regulations. 2. Integration With Existing Systems Before making the switch, consider the compatibility of the new software with your existing HR or CRM systems. Seamless integration ensures smooth data flow and avoids duplication of efforts. 3. User-Friendly Interface And Training Choose a cloud recruitment software with an intuitive user interface that is easy to navigate. Proper training and onboarding for the recruitment team will accelerate the adoption of the new system. 4. Vendor Support And Upgrades Select a reputable vendor that offers reliable customer support and regular software upgrades. This ensures that your recruitment software remains up-to-date with the latest features and security patches. Final Thoughts Transitioning to cloud recruitment software can revolutionize your hiring process and bring unparalleled efficiency to your recruitment efforts. Embracing this technology allows you to stay ahead of the competition in the ever-evolving talent landscape. Remember to consider data security, integration, user-friendliness, and vendor support when making the switch. Read Also: CRMDialer: A Zoho Alternative 6 Top CRM For Small Businesses In 2019 Cold Calling Script For Successful Sales Persons

READ MOREDetails
Chromecast source not supported

5 Ways To Fix Chromecast Source Not Supported Error

Modern smart televisions are designed to connect with several external devices in order to enhance our entertainment experiences. And casting videos from your mobile devices to your Tv is one of the most popular options. You also can cast any content from your laptop or computer. But in case your television does not support this feature, you can use streaming devices for establishing the connection. Now, let’s begin to solve the issue “Chromecast source not supported”.  Google Chromecast is a device that fulfills a similar purpose. It is packed with many streaming applications. With the help of this device, you will be able to cast content from the Google Chrome browser as well. And in case you are using this device and facing an issue like Chromecast source not supported, here I will guide you with the techniques to eliminate them.  Fixing Chromecast Source Not Supported Error  Here are the ways that you can try to fix the Chromecast source not supported error in your device. There can be several reasons behind this issue, so here are all the solutions for different kinds of reasons that are causing this issue.  1. Enable Mirroring Service Suppose you are using The Chrome browser in your system and unable to cast to the Chromecast. Then you need to check whether the Mirror service option is enabled or not. The users mostly recommend this method as it is really effective in solving the source not supported Chromecast issue.  Here are the steps to enable Mirror Services to eliminate the Chromecast source not supported the issue. Open the search browser, Google Chrome. Into the browser, type chrome://flags. Hit the Enter button. Press CTRL + F on your keyboard for bringing up the Find tool. Type in Mirroring, that we are searching for. Hit the Enter again. Find Mirroring Service option. On the right side, click on the drop-down menu. Now select it as Enabled.  Close the Chrome Browser completely and again Open it so that the changes are saves.  Now you can check whether the issue is resolved or not. Try to cast something from your system to your television using Google chrome. And check whether the issue is still there or not.  2. Restart your Chromecast, Wi-fi Router, and Computer Restarting your Chromecast also can solve your Chromecast source not supported issue. But for added measure, it is also recommended to restart your Wi-fi router and your computer also. This will make sure that if there is an issue that is causing the error will get resolved at the same time.  Here are the steps to do that, Firstly, you need to power off your TV, with which your Chromecast is connected. Unplug your Chromecast from your television. Also, unplug the power cord of the Chromecast device. Now leave it unplugged for 1 minute at least. Now, you need to power off the router or modem, depending on whatever you are using. Wait for 1 or 2 minutes.  Power on your router or modem. Now is the time to restart your system. After your system restarts back, connect it again with the WiFi.  Give your Chromecast sometime to reset up everything. Now try to cast something and check.  3. Turn Off all VPN and Ad Blockers Ad blockers generally block pop-ups and prevent Javascript from running. This sometimes causes the Chromecast source not supported error. So, you can try turning off the add blockers and also any VPN if you are using them.  Here are the steps to disable those Google Chrome browser extensions. Open Google Chrome browser. Click on the three-dot icon. A drop-down menu will open.  Select More tools. Click on Extensions. The Extension page will open. Search for the add blocker that you are using. To turn off the extension, Toggle the blue switch.  Close your browser completely. Reopen it and try to cast.  4. Enable the option of Cast Media Route Provider Though you have enabled Mirroring service options, you also can try enabling the option of Cast Media Route Provider. This will also can solve the Chromecast source not supported error that you are currently facing.  The process is similar to the enabling process or Mirroring Service. Here are the steps.  Open the Google Chrome search browser. Into the browser, type chrome://flags. Hit the Enter button. Press CTRL + F on your keyboard for bringing up the Find tool. Type in Cast Media Route that we are searching for. Hit the Enter again. Find Cast Media Route Provider option. On the right side, click on the drop-down menu. Now select it as Enabled.  Close the Chrome Browser completely and again Open it so that the changes are saves.  5. Check The App You Are Using To Cast There is a reason behind the Chromecast source not supported issue, and that is the app that you are using. Maybe the particular app that you are using for casting is not working properly at that very moment.  So what will you do in this case?  You can check by restarting the spp. In case you are trying to cast from your desktop or laptop, you can simply close the app and start it again. But what if you are casting from your Android device? You can restart the app by using the “Application Manager.” before you start the process, there are some things that you should know.  In case the particular app is not storing your user settings online, everything might get reset after this process. You may also need to log in with your credential once the process is completed. So, just make sure you have all those details.  Open the folder, Apps. Tap the icon, Settings. Open the Application Manager. Scroll down and search for the application with which you are facing casting issues on your TV.  Tap the app. The app menu will open. Tap Force Stop. Go to the Storage Section. Tap on Clear Data. Go to the Cache section. Tap Clear Cache. Now back to your Home screen. Restart the app.  This will solve the issues if it is caused by the app instability.  Final Tips In case you are done with all the above-mentioned steps and the Chromecast source not supported, the error is still there. There are some other ways you can try installing the latest version of chrome. I believe the issue will get resolves. But in case the issue persists. Lastly, you can factory reset the Chromecast device. It will lose all the previous data, and you will also need to log in again with your credentials.  Read Also: How Many Jobs Are Available In Real Estate Investment Trusts? 2021 0123Putlockers And Servers – Watch Movies Online How to Download Game Of Thrones Putlocker Online for Free? Is Real Estate Investment Trusts A Good Career Path? REITs Pros And Cons How to Plant Grass Seed on Hard Dirt? – Latest Update 2021

READ MOREDetails