Yard Work Basics: A Beginner’s Guide

by

30 September 2023

Home Improvement

Yard Work Basics A Beginner’s Guide

Digging your hands into the soil is both therapeutic and satisfying; it provides a wonderful way to release tension while getting some much-needed Vitamin D.

Start by clearing away trash, debris and unwanted plants such as invasive species from your garden; discard rotten furniture and fire pits; rake leaves as needed depending on the season; all these tasks will help your lawn thrive!
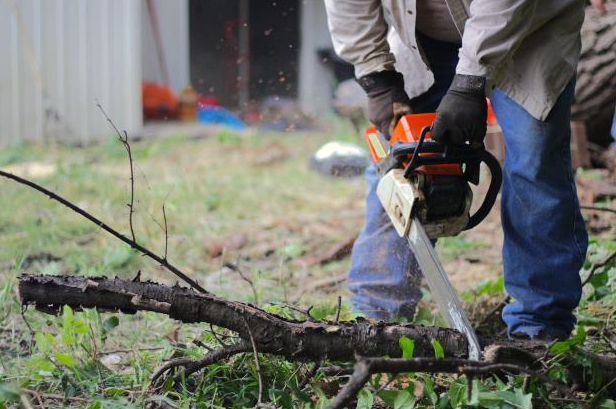
Pruning

Pruning

Pruning refers to the practice of trimming woody plants like trees and shrubs to achieve aesthetic, healthful results that protect them against disease, insects, or mechanical damage.

Pruning should take place during the late dormant season for maximum effectiveness.

Yard work can also provide valuable “me-time.”

Immersing yourself in your garden can help you focus on the tasks at hand and forget about stressors; physical activity has been shown to reduce chronic health conditions as well as improve overall wellness, providing full-body workouts that build flexibility while simultaneously relieving back pain and muscle stiffness. You can click here to learn more.

Tree Care Tips

Tree Care Tips

Trees are an integral part of our landscapes, offering shade, beauty, and fruit.

Unfortunately, trees can be fragile creatures that need regular care such as trimming and pruning, mulching, watering and fertilization to thrive. Furthermore, it’s also important to monitor for pests or diseases which might impact them. It may be necessary to contact a professional who provides tree services when necessary for treatment. They can help determine the cause of your tree’s problem.

When vetting tree services companies, always inquire into their qualifications and credentials.

You can do this by asking about what kind of training and education their lead employees have received; an ideal tree company will have certified arborists on staff who work full-time for them. Furthermore, make sure the firm offers liability insurance just in case something goes amiss during their work on your property.

While some tasks can be completed independently, hiring a certified arborist for more complex or risky tasks like tree removal and stump grinding is essential to ensure it is completed in an accurate and safe manner.

After planting, it’s essential to water and fertilize your new tree on an ongoing basis to help it overcome shock and become established. Fertilizers should also be applied once annually using an all-purpose fertilizer designed specifically for that type of tree.
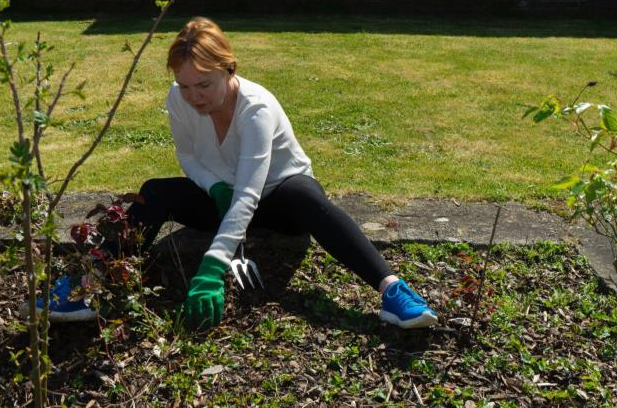
Weeding

Weeding

Weeds may not seem like the worst problem, but when left to their own devices they can impede the growth of desirable plants, depriving them of water, nutrients, sunlight and air that they need for growth.

Removing weeds not only improves soil health but can reduce the chances of plant diseases as well. Regularly weeding your garden or lawn will ensure everything continues to flourish more abundantly. You can click the link: https://en.wikipedia.org/wiki/Weed to learn more.

When pulling a weed, it is best to extract its entire root system to prevent reseeding. Doing this when the weed is still young makes removal much simpler.

Ideally, the optimal time and conditions for weeding are early spring or late fall when temperatures are mild. At these times, weeds tend to be smaller with shallow roots that make pulling out easier with either your hands or hand tool.

Furthermore, you should weed when the soil is damp to minimize compaction and increase the chances of extracting all weeds at once.

Remember that weeds may emerge later in the season. Therefore, it’s essential to monitor for new growth regularly, particularly as they flower.

Regular lawnmowing will remove their seed heads while sowing desirable grasses around planting beds can prevent spillover into fertile garden soil. Also add layers of well-rotted manure, garden compost or bark mulch onto topsoil to deprive light to weeds and slow their regrowth before eventually smothering them out completely.

Watering

Yard work involves both light and heavy tasks.

Lighter projects might include mowing the grass, pulling weeds from flower beds, watering the lawn and keeping up with any necessary pruning of shrubbery or removing invasive plants that don’t belong, raking leaves and repairing or replacing garden furniture.

Working in your garden can provide an incredible full-body workout, from squatting and bending to digging and lifting, which all improve muscle strength and flexibility. Even without access to a garden space of your own, taking regular strolls through local parks or green spaces will reap similar rewards.

Regular watering of your yard promotes deep root growth, leading to drought resistance. Spending time in your garden also exposes you to sunlight, which helps relieve stress and anxiety, while meeting gardening goals gives a sense of pride and accomplishment.

Gardeners depend on watering to give perennial flowers, trees, shrubs and grass the vital nutrients they require for healthy growth and survival. However finding out when and how much water can be challenging during hot, dry summer conditions.

Watering efficiently increases root growth, reduces disease and fungus infestation and conserves your precious water supply – plus it is environmentally friendly as your garden and lawn consume the same water that supplies your home.

To ensure you’re not overwatering or underwatering your landscape, regularly monitor soil moisture. Plants need soil that’s dry down to several inches in order to absorb water effectively; in the heat of summer, it’s easy to forget this requirement.

When watering, make sure you water at the base of each plant rather than on or around its foliage as water that lands there won’t reach its roots and instead causes fungal disease outbreaks.

To properly water your lawn, soak the ground deeply rather than spreading a light mist across it.

For best results, it is best to water in the early morning when sun exposure is lower and air temperatures are cooler – this helps minimize evaporation.

Cleaning

Yard work is a wonderful way to gain fresh air and sunshine while simultaneously working your entire body in all directions.

Cleaning tasks may include collecting trash and debris, clearing away invasive plants, trimming and pulling weeds as well as repairing fences or structures – projects which often make an immediate and visible difference to a yard’s aesthetics.

Read Also:

Ankita Tripathy loves to write about food and the Hallyu Wave in particular. During her free time, she enjoys looking at the sky or reading books while sipping a cup of hot coffee. Her favourite niches are food, music, lifestyle, travel, and Korean Pop music and drama.

View all posts

Leave a Reply

Your email address will not be published. Required fields are marked *

Related

burner

A Guide in Choosing the Perfect Brewing Burner

A brewing burner is unquestionably the first major investment you make once you venture into home beer brewing. Acquiring a high-quality home brewing burner is imperative. A substandard one will not only compromise the taste and quality of your beer, but it will also turn into an exciting hobby into an annoying nightmare. An excellent brewing burner guarantees uniform heat distribution, and it’s instrumental in preventing scorching. It also hastens the boiling process, substantially lowering the amount of time you spend waiting around. Here are considerations to make when purchasing the best brewing burner. 1. A number of BTUs Generated: BTUs are units for measuring the amount of heat generated by the burner. Generally, one BTU adds one degree Fahrenheit to a pound of water that is at room temperature. You will find burners with BTUs of between 55,000 and 210,000. Bear in mind that a bigger burner doesn't always translate to a better operation. While high BTU output is ideal for all kinds of grain brewing, certain lower output models are more reliable due to their ability to distribute heat more efficiently. Read more reviews about your prospective burner before making a purchase decision. 2. Quality of Metal Used: All models of brewing burners are built from either cast iron or stainless steel. Cast iron is a bit thicker and tougher but weighs more and can rust easily. Thus, cast iron models are not suitable for outdoor brewing. However, if you are looking for a lighter model or you want to do lots of outdoor brewing, then a stainless steel model will serve you well. 3. Windscreens: If you expect to do a lot of outdoor brewing, you should go for a model that has a durable windscreen. It will shield your flame and keep it lighting even when a strong breeze comes. Windscreens guarantee a smooth boil and make home beer brewing a sensational experience. 4. Height: Outdoor propane burners tend to have longer legs compared to your traditional stove. The long stand allows you to brew your beer comfortably without compromising the health of your back. However, you should go for a model that sits nearer to the ground, if you will be dealing with a huge batch of boiling wort. Models with shorter stands are sturdier than those with longer stands. Top 3 Brewing Burners: 1. Edelmetall Bru Burner: This burner has lovely copper accents and stylish nameplate. It is made of refined stainless steel and copper. It produces a maximum of 72,000 BTU per hour. This burner boils a huge kettle of wort within a few minutes. 2. Bayou Classic KAB4 Banjo Burner: This brewing equipment offers a high amount of uniform heat. It generates more than 100,000 BTU, which is sufficient heat to boil a couple of gallons within minutes. Its 22-inch cooking surface can accommodate most brew kettles. It comes with a 4 ft rubber hose, a brass control valve, and 30-PSI regulator. 3. Dark Star 2.0: This propane burner can generate about 65,000 BTU of heat an hour. This burner is easy to use, and it can heat a maximum of 15 gallons of brew. This 6-inch diameter burner comes with an adjustable regulator, a wind guard, and lighter power. Choosing the best brewing burner is all about addressing your needs. Look for a model with features that are most crucial to you. Other than quick boil times, a quality burner offers a big surface area that can comfortably hold large brew pots.   Read More: 5 Best Stimulant-Free Fat Burners. 10 Unique Kitchen Hacks to Save your Time in Kitchen and Cooking

READ MOREDetails
Roof

5 Signs The Roof in Your Edmonton House Needs a Repair

You may have heard that “a house is only as strong as its roof.” There’s certainly truth to it. After all, nobody wants to live under the risk of a weak or poorly constructed roof that may collapse and give up on you. This is why most of us pay close attention to the construction material that goes into erecting a roof. However, if your Edmonton home’s roof is aging or is poorly constructed, then it may be hard to figure if it requires a repair or needs to be replaced altogether. Pricing of both roof repair and roof replacement vary significantly. HomeAdvisor states that the average cost of roof repair totals to an average of $792. The costs, of course, drill down to how intense the damage is and how much repair work is required to fix it. Generally, the investment ranges anywhere between $335 - $1,252 with the lowest cost being $150 in expenses and the high end of investment standing at $4,100. RoofingCalc.com estimates that the typical roof repair costs too. The main estimates made include: Minor repairs cost anywhere between $150 to $400 Moderate repairs demand cash of $400 to $1,000 Extensive repair work takes about $1,000 to $3,000 It may take up some time to realize that a roof repair is due. However, these signs can help you figure out your roof’s requirements: 1. Check the attic for any roof leakage: If you have not been to your home’s attic for a while now, then it’s high time that you visit it. Apart from the prevailing dust, check for any signs of water. You need to run this leakage check, specifically, if a big storm or heavy rains have just passed. Any water leakage in the attic is a telltale sign of a roof that is in need of some repair work. Alternatively, check for any signs of light rays coming into your attic. If light can pass through your roof, so can water. 2. Observe the shingles for any curling or cracking: Detect the shingles on your roof. These may be cracked or curled. In certain instances, some or several shingles may be missing. All these indications are signs that the shingles are nearing the end of their life. Consequently, you need a roof repair in your Edmonton house. However, if you note that numerous shingles are damaged or absent, then you may need to replace the roof altogether. 3. Notice any shingle granules in the gutter: If you observe any granules that resemble black sand in your house’s gutter, then be aware that these are granules from the shingles. Such a loss of granules highlights that the shingles are wearing off. In such cases, you typically require a new roof because shingles that are wearing off are of no use. If you hadn’t foreseen the cost of roof repair, then a repair can help you buy some time. In the long haul, know that a roof replacement is in order. 4. Check the roof objects for any wear and tear: To further learn about your roof’s condition, survey the room objects. These include vents, pipes, chimney, and other objects that penetrate the roof. Scrutinize carefully for any signs of wear and tear. Minor roof repairs can help correct such a situation. If you are unsure, you can get these areas and your roof checked from a professional such as Silverline Roofing - Edmonton roofer. This will help avoid further roof deterioration by leakage and so on. 5. Peeling and blistering paint: Another telltale sign which indicates the need for a roof repair is an improper paint. Two significant signs are blistering and peeling paint. Essentially, your roof should be well-ventilated. However, a poorly ventilated roof encourages the buildup of humidity and moisture. This results in the peeling of paint. If you notice peeling paint near your roofline, then your roof needs repair. This pointer shows that it is not essential that only old roofs require repair work. New ones that may be poorly constructed can also need repair. Wrap up thoughts: Summing up, your roof, whether old or new, may require repair. These signs can help you understand your roof’s needs. Be sure to get your roof rectified at your earliest. Ignoring the matter will only worsen the condition, which is why you may end up needing a costly roof replacement. Read Also: What Are The Services Offered By Roofing Companies? Professional Roofing Services And Different Decorating Styles

READ MOREDetails
content rally

Floor Cutting Using Diamond Saw: What You Need To Know

Concrete comes as the topmost choice when you are in need of durable, weather-proof, heat-proof and long-lasting flooring material. But there comes a time when you need to repair, remove or replace concrete floors and you need to look around for quality concrete cutting tools. Diamond floor saws are the no.1 choice of professional concrete cutting contractors. Diamond floor sawing is extensively used to effectively cut through all types of materials including reinforced concrete, asphalt, slab and stone. The unique design of diamond sawing machines makes them more convenient for operators to carry out floor cutting as a one man job. Floor sawing service helps you efficiently cut through concrete slabs, driveways, decorative concrete floors and many other structures in horizontal alignment. Diamond saws also let you cut through concrete roads overlaid with asphalt. Different floors demand different diamond blade and a different cutting procedure to be followed. In this article, you will read some general tips and safety guidelines for cutting concrete floors using a diamond saw. Tips You Need To Consider While Floor Cutting With A Diamond Saw Never think of playing loose with heavy diamond cutting machines. When deciding to use the diamond saw for concrete cutting, give top priority to safety. You must ensure that you have selected the right diamond sawing blade which is perfect for the kind of material you need to cut through. Make sure the floor saw and diamond blades you use are in most up-to-date condition. Check if there is no loose connection in the machine. If you are using wet cutting method for floor cutting, make sure you have arranged a source with an ample volume of water at the worksite. Supplying water to diamond blades during the operation will help prevent blades from overheating. Use of water as a coolant and lubricant help floor sawing London contractors get quality cuts. It also helps extend the lifespan of the blade. You need to wear protective gears to safeguard your body parts from any kind of physical injury while operating the machine. Manage to have ear, eye and head protection. Never wear loose clothing. And make sure you wear safety boots and a respirator mask to avoid inhaling silica from the dust particles produced during floor cutting. When cutting the floor using a diamond saw, never increase the pressure on the saw to boost speed. And remember, the diamond floor sawing machine always make straight cuts, you can’t steer it to cut curves. When you hold cutting, make sure you lock the machine or turn the power off properly. You need to be extra cautious when sawing on a steep surface. If you want to cut green concrete using diamond floor saw, do it within 24 hours of being poured. The selection of the diamond blade in the floor saw may vary based on the thickness and aggregate of the concrete structure that needs to be cut. For deep floor cutting, you will need to make multiple passes to obtain the desired depth. The thought of performing floor cutting on own doesn’t make sense unless you have the required skills and knowledge to accomplish the job with the best of industry-standard and safety guidelines. But you can always depend on a professional diamond floor sawing contractor in the town! Read More:  How To Salvage Your Furniture After A Flood List Of Most Durable Kitchen Flooring Hardwood Timber Flooring: Gives A Classic Look To Your Home

READ MOREDetails