Choosing The Right Cleaning Company: 5 Essential Factors To Keep In Mind

Published on: 14 September 2023 Last Updated on: 29 October 2024
Choosing The Right Cleaning Company

Finding the right cleaning company can make all the difference in maintaining a room tidy and organized. These cleaning services comprise many solutions to maintain your spaces spotless, pristine, and organized. They offer a variety of cleaning services, ranging from ordinary to intensive. This article will review the main factors to consider while selecting the best cleaning service provider. But, before we get into the details, let’s establish and understand what cleaning services are.

Understanding Cleaning Services

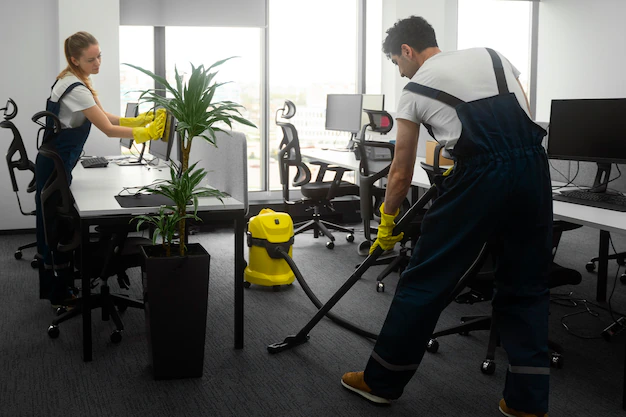
Cleaning services are essential for maintaining a clean and well-organized residence or office. Knowing what type of cleaning services you require is critical before choosing them because there is no one-size-fits-all option for these services. Commercial and residential cleaning services are the two primary cleaning services provided by cleaning companies. Commercial cleaning services shine at keeping commercial spaces spotless.

On the other hand, residential cleaning services are concerned with maintaining the sanctity of your valuable property. They ensure your home is immaculate, focusing on everything from your comfortable living area to your kitchen. Reputable companies such as The Maids in the US and  UrbanMop in Canada provide both kinds of cleaning services, keeping your residences and workstations immaculate and ensuring that everything from conference rooms to break areas gleam and have a polished appearance.

The Scope Of Cleaning Services

Scope Of Cleaning Services

Contrary to popular belief, cleaning services have a wider spectrum of applications. It incorporates everything from surface cleaning—your typical wipe down—to sanitization and disinfection, which are vital in today’s health-conscious society. Not to mention organizational cleaning, which involves removing and organizing. Cleaning visible surfaces is referred to as surface washing. It has to do with outward appearances and some degree of cleanliness. In this day and age of hygiene awareness, sanitization and disinfection go a little deeper and are essential. It’s about maintaining a secure workplace and eliminating pathogens.

The last form of cleaning is organizational cleaning, which is necessary if you require assistance cleaning and arranging places. In crowded residences or disorderly offices, this can be a lifesaver. Knowing your specific cleaning requirements is essential. It enables cleaning companies to customize their offerings, ensuring they target the appropriate areas and cut out pointless chores. You can tailor your cleaning strategy if you know what you require.

Efficiency is essential, but cost-effectiveness is too since you won’t pay for things you don’t need. Knowing the basics of cleaning can make all the difference, whether it’s your office or a prized residence. In light of this, let’s examine the essential factors you should consider while choosing the ideal cleaning service provider.

Factors To Consider When Choosing A Cleaning Company

Various essential criteria demand your attention while choosing the best cleaning services for your requirements. These are the top five factors to consider about:

Reviews And Reputation

Checking out internet reviews and ratings of the cleaning businesses you’re contemplating is one of the first things you should do. These evaluations offer accurate perceptions of the experiences of previous clients, illuminating the firm’s dependability and level of service.

Don’t undervalue the influence of recommendations from others. Ask your acquaintances, relatives, or coworkers if they have used any cleaning service providers successfully. Personal recommendations can be invaluable when selecting a choice.

Credentials And Certifications

Make sure the cleaning service you are considering is completely licensed and insured. In addition to proving their legality, this also provides you peace of mind because it ensures that any potential accidents or damages are covered. For top-notch service, a cleaning crew with the proper training is required. Ask about the personnel and the company’s qualifications and training. Cleaning that is efficient and effective is more likely to be provided by trained professionals.

Pricing And Transparency

You can avoid surprises by obtaining detailed bids that break down the expenses of the cleaning services. This openness ensures no concealed fees and lets you know exactly what you’re paying for. Choose a different course of action if you can. Spend some time contrasting the costs and quality of the numerous cleaning businesses. In this manner, you can balance your expenditure limit and the level of service you want.

Eco-Friendliness And Cleaning Products

Learn about the company’s eco-friendly cleaning procedures if you care about the environment. Today, many businesses provide environmentally favourable cleaning choices that minimize their impact. Safety is non-negotiable, particularly if you live with kids or pets. Ensure the cleaning supplies the business employs are risk-free for your family members and won’t leave any hazardous residues behind.

Contract Terms And Flexibility

Check the conditions of the contract very thoroughly before committing. The cancellation policies should be carefully read if your requirements change or you’re unhappy with the service. You can save issues later by being aware of these phrases up front. Can they modify their services to suit your cleaning needs or schedule changes? An excellent attribute of a cleaning service company is flexibility.

Conclusion

The selection of the finest cleaning service should not be made hastily, since it immediately affects the hygiene and cleanliness of your house or place of work, which in turn affects your well-being. Making an informed selection requires understanding the complexities of cleaning services and the important aspects to consider.

Read also:

Ankita Tripathy loves to write about food and the Hallyu Wave in particular. During her free time, she enjoys looking at the sky or reading books while sipping a cup of hot coffee. Her favourite niches are food, music, lifestyle, travel, and Korean Pop music and drama.

View all posts

Leave a Reply

Your email address will not be published. Required fields are marked *

Related

Clothes Dryer Maintenance

9 Clothes Dryer Maintenance Tips

Taking care of your appliances is the key to saving money, time, and effort. The clothes dryer maintenance is among essential major assistants in your household. While it works, you don’t notice it. When it breaks down, you face a disaster. The life expectancy of an average dryer is about 13 years. However, the majority of these appliances last much less. The reason is the lack of proper operation and maintenance. It’s not enough to plug the unit in and forget about it. If the only thing you do for your dryer is clean the lint filter, your appliance is likely to demand repair in just a few years. In this article, we’ll share top clothes dryer maintenance tips to keep your dryer working for as long as possible. Here are the 9 Clothes Dryer Maintenance Tips: 1. Run Full Loads Only The more you run your dryer the faster it will give out. It’s as easy as that. Since you are unlikely to limit the number of times you do laundry, you can at least add some efficiency to the process. By ensuring you only run full loads, you don’t just extend the lifespan of your clothes dryer, you save energy as well. Don’t rush to do laundry when you have free time. Wait until a full load is available. On the other hand, don’t overload the dryer. In the rush to finish laundry quicker, many homeowners overload washers and dryers. As a result, the motor strains, dryer becomes misbalanced and eventually stops functioning. 2. Opt for Professional Installation With numerous DIY videos overwhelming the Internet, homeowners often opt for DIY appliance installation to save money. Even though installing a dryer may appear straightforward, it’s not as easy as it sounds. You may not notice the mistakes you make during the process. They’ll become obvious after several uses. By that time, your dryer could already be damaged. Proper venting is highly important for a clothes dryer. You would need to select the right material and size for the venting tube and install it properly. Meanwhile, you should make sure the appliance is perfectly balanced. It’s especially important if you are placing it on top of the washer. 3. Clean the Dryer Vent The dryer vent is the most important part of your appliance. It needs regular maintenance. Ideally, you should hire professional technicians to check and clean the vent at least once a year. However, some owners do it on their own. Cleaning the vent involves disconnecting it from the dryer. After that, you would need to use a long-handled attachment to ensure penetrability. Special dryer vent cleaning brushes exist to remove clogs. Be careful about reinstalling the duct properly after the cleaning is done. If you fail to do it, the dryer won’t function. Consider hiring professional dryer vent cleaners to avoid mistakes. According to experts from Jacksonville appliance repair services, if ducts aren’t cleaned regularly, the dryer’s motor can burn out leading to costly repairs. 4. Limit the Number of Dryer Sheets While dryer sheets are an excellent way to keep your clothes static-free and soft, they aren’t harmless. These products have a wax layer that melts when the dryer heats up. If you use too many of them, the wax settles on the appliance’s interior walls and clogs the venting system and the lint trap. Removing this layer may be tough. No matter how many dryer sheets you use, it’s important to clean your dryer once a week even if you don’t see any dirt inside. Failure to clean the dryer regularly is the top cause of dryer-related fires in households. 5. Clear the Lint Trap Lint trap is one of the most important parts of your clothes dryer maintenance tips. Cleaning it regularly is the key to the appliance’s longevity. Wipe the lint filter clean after EACH load. Even if you are planning to do two loads in a row, clean the trap between them. At least once a week, remove the lint screen and vacuum the trap. You can use a brush to loosen the residue. Every one or two months, remove the lint filter and soak it in warm soapy water for about an hour or so. This can help remove wax, which appears after using dryer sheets and residue that settles after using a fabric softener. 6. Inspect the Appliance Weekly A visual inspection of the dryer can help prevent damages. Make sure no moisture is trapped around the door seal. If there is any, wipe it off gently. In fact, you can wipe the door after each load is done to prevent mold formation and bacteria growth. When checking the appliance, pay special attention to the doors seals. If they are cracked, ripped or damaged, the dryer is struggling to maintain the right temperatures. It may be straining the motor and overusing electricity. Replacing door seals is much easier and cheaper than repairing the motor. 7. Listen to it Work One of the first signs of dryer problems is the change in its operating noise. If you hear that something seems off, turn the appliance off immediately and check what’s happening inside. The reason for the change of sound could be overstuffing dryer with clothing or a sleeve caught up in an improperly installed lint trap. If everything seems to be in order, but the dryer continues to make strange noises, call professional technicians. 8. Check Exterior Vents Every month or so inspect the exterior vent of your dryer. While the appliance is working, go outside and check if the air is flowing freely through the vent. If something seems wrong, the pipe may be clogged. If you have a plastic vent, consider replacing it with a metal one. A plastic vent is a fire hazard. 9. Find a Professional Repair Service Some clothes dryer maintenance tasks require an expert’s assistance. Spend some time looking for a reliable repair service before anything breaks down. Knowing whom to call in case of an emergency could prevent further damage to your dryer. Start following the above clothes dryer maintenance tips today, and your dryer will serve you for at least a decade. Read Also: How to cut down your home decor costs? Read here Knowing Your Vehicle: 5 Maintenance Tips for Porsche Owners Tips on How to Avoid Hoarding and Get Rid of Clutter

READ MOREDetails
Value of Your Home

7 Tips to Increase The Value of Your Home

Increasing the value of your home is not as difficult as one might initially think. Increasing your home's value is a smart plan, especially if you plan to sell your home over the short term. In fact, according to real estate experts across the industry, you are two to three times more likely to sell your home if it possesses fresh renovations or improvements. 7 Tips to Increase The Value of Your Home: 1. Remodel Your Kitchen: Remodeling your kitchen is one of the more expensive home renovation tasks that you can do to substantially increase the value of your home. This renovation will likely include replacing or refinishing your kitchen cabinetry. You will also need to replace your kitchen countertops, as they are likely to be old and outdated. The flooring is likely going to need to be torn up and replaced as well, especially if even the slightest amount of water damage has occurred. Lastly, you will likely need to replace your appliances such as your stove, microwave, and refrigerator, especially if these items will be included in the sale of your home. A company like Gold Coast Veraniece Construction Corp can do this kitchen renovation job for you very quickly and affordable if you aren't into a DIY gig. 2. Get Your Attic Cleaned: Some people don't even look into their attic for decades. If you plan to increase the value of your home or sell it quickly, then you should get into the attic and thoroughly clean it. Replace any broken floorboards, completely clean out the dust and debris, throw away or sell stored away items that you are not using anymore, and just generally get the attic into a much more presentable state. You would be shocked at just how cluttered some people's attics can become after decades of letting space fall into neglect. 3. Get Rid of That Popcorn Ceiling Texture: If you haven't already heard, the popcorn ceiling texture is officially out of style. Thankfully, this is a job that is not particularly difficult to undertake yourself, however, it could take a bit of time and elbow grease to complete it. If you do the job yourself completely then you could end up saving yourself a fairly large amount of money ranging into the thousands of dollars. Another way to go about getting rid of the textured ceiling is to do a partial DIY renovation. In this case, you would remove the ceiling texture and then let a professional come in and refinish the ceiling. Lastly, you could also just opt to have a contracting company come in and do the entire job for you, however, this option will obviously cost you the most money. With regard to what you can do to replace a textured ceiling, there are really just two options that are currently in style at the moment. You could go the easiest route and paint over the texture free surface with a color that matches the walls, or possibly even using a color slightly offset from the wall color. The second option is that you can add panels to the ceiling, however, you should be aware that this is the more expensive of the two options. Regardless of what you choose in the end, getting rid of that textured popcorn ceiling is guaranteed to improve the value of your home. 4. Remodel Your Bathrooms: Outside of a full kitchen remodel, remodeling your bathrooms is one of the more expensive home renovation tasks. Thankfully, however, money and effort spent on doing this can substantially increase the value of your home. Bathroom renovation tasks will likely include replacing old toilets, professionally cleaning or replacing shower cabins or bathtubs, refinishing or replacing bathroom cabinetry, and putting a fresh coat of paint on the walls and ceiling. 5. Brighten up Your Interior: Studies have shown that brighter interior living space is much healthier and far better perceived than a dim or dark interior. A great way to increase your home's value is to replace old light fixtures, add in more energy-efficient bulbs, lighten up your curtains, and possibly even do some repainting that lightens up your living space. All of this is especially important if you are seeking to make your home more attractive to a prospective buyer. 6. Freshen up Your Landscaping: It doesn't take much of a break from yard work to cause your landscaping to fall a bit behind the curve. If you plan to sell your house, however, freshening up the landscaping is a great way to not only increase the value of your home but doing this will also more than likely help you sell your home more quickly. Let's face it, your front and back yards are the first thing a prospective home buyer will see when they enter the property, so it is definitely a first impression builder. You can quickly and affordably freshen up your landscaping by getting rid of the junk or needless yard debris, raking up leaves or trash, and trimming your shrubs, hedges, and trees. It is also a great idea to plant fresh shrubs or flowers, add bark dust or garden pebbles to plain dirt covered areas, and edge your grass line. All of these tasks can be done yourself and will definitely add more equity to your home's overall value. 7. Fix Any Plumbing Issues: Nearly every home out there is going to accumulate plumbing problems over time. These problems could be a leaking faucet, clogged drain, leaking sink pipe, malfunctioning toilet flush, or even a basement pipe leak. Whatever the problem is, you will need to fix it if you plan to sell your home. A house with perfectly functioning plumbing and zero problems is going to be extremely attractive to any prospective home buyer. Making these repairs will also dramatically increase the value of your home, whereas numerous plumbing problems could do the opposite and sink your home's value. Read Also: 5 Ways A Home Maintenance Plan Can Prevent Disaster How You Can Increase The Value Of Your Home With Stone Veneers

READ MOREDetails
Driveway

Updating the Driveway on Summer Time: What You Need To Know

Does your driveway look worn out? Or is it starting to fade and crack? If that’s the case, you should note that your driveway can affect the curb appeal of your property. Sadly, most people hold on to repairing their driveways until they start noticing major issues like water drainage problems and potholes. However, this should be the case. You should always schedule periodical driveway upgrades—especially during the summertime. Generally, summertime is the perfect period to update your driveway and address some of these issues. With that said, let’s look at some of the things to keep in mind when upgrading your driveway. Paving material The first thing you need to consider is the paving material. While concrete comes in various options, it can be quite difficult for you to find a pre-fab material that perfectly matches your budget. Here are some of the most common materials used when upgrading driveways: Asphalt pavement - This paving material tends to be less expensive than other types. However, asphalt can fill up with water rather easily, leading to drainage problems down the road. On the upside, asphalt pavements come in various textures and designs, allowing you to choose a layout that best fits your property. Pea gravel - Though this option is slightly more expensive than asphalt pavements, it’s far more durable. However, it also tends to be less aesthetically appealing. Concrete pavement - This paving material is typically the most expensive and durable choice for your driveway—especially since you can customize the layout and design as you like. On top of that, concrete comes in a wide range of textures and colors—so it’s easier to find something that perfectly matches your property. Drainage solutions If there are no major drainage issues on your property, then you’re all set to begin work on updating your driveway. However, before you start this process, it’s important that you first mark where each water outlet is located—such as drains and downspouts. This step isn’t 100% necessary; however, it makes sense because it can help prevent any work from happening near these areas—which could ultimately cause damage to both outlets and the new surface of your driveway. Also, note that if there’s stagnant water anywhere on your property after setting up temporary markers, then this means that there are some drainage issues on your property. Lastly, if you’re experiencing major issues with water drainage on the property—such as pooling or puddles—after completing updating your driveway, then it may be time to get in contact with a professional who will help encourage the proper flow of water throughout your property. Even though there are ways to fix these drainage problems on your own, it is best to leave these issues up to a professional. This is because they usually have more advanced tools at their disposal—which can make solving these types of problems much easier for them from the very beginning. Sealer Once you have marked the location of all necessary outlets, it’s time for you to mark off where new layers will be placed—which includes marking off where any new edges need to be placed around your driveway. Also, you should use spray paint or chalk to draw out how much space is required between each layer—this step helps ensure that you don’t accidentally apply any materials on top of one another during this part of the process. Then after applying the sealer, it needs at least 24 hours to dry up before applying any additional layers of paint. Add layers As mentioned before, you should create some space between each layer as you apply them on top of your existing driveway. If anything overlaps, then this could cause issues with both texture and color—and may even lead to added expense if extra materials need to be purchased for re-applying the materials properly onto the surface of your driveway. This is the main reason why you must use a large enough tarp to ensure that all materials are applied at a safe distance from one another. Once everything is dry or completely hardened, it’s time to add additional material around the edges of your property—this step helps ensure that water doesn’t run off the sides of your driveway when it rains. To make this part of the process easier, you should use a garden hose to help draw out where the edges will be placed to learn how much materials are needed. Then once that’s finished, it needs at least 24 hours (ideally longer) for everything to completely dry up before applying any sealer. There’s one more thing you need to know about updating your driveway. If there was ever a time when you experienced foundation damage on your property from natural elements—such as water, weeds, or vegetation—then get rid of all grass and weeds near the affected area before adding any new surface layers on top of paint on its own. The reason being is that these things will probably grow out of control on top of your driveway, which can lead to additional maintenance problems. Bottom Line According to the Florida asphalt paving experts from ABC Paving, upgrading your driveway around summertime doesn’t always need to cost a lot of money. Sometimes, it can be as simple as making sure you use the proper materials for protecting your existing driveway before adding new layers on top. Suppose there are any issues with drainage or standing water after doing so. In that case, getting in contact with a professional is usually the best solution—and this also applies regardless of whether you live in an urban area or rural location because everyone will benefit anyway. Read Also: Asphalt Pavement Maintenance Tips Floor Cutting Using Diamond Saw: What You Need To Know All You Need To Know About Concrete Repair Solutions And Services

READ MOREDetails