Published on: 24 January 2023
Last Updated on: 30 January 2026
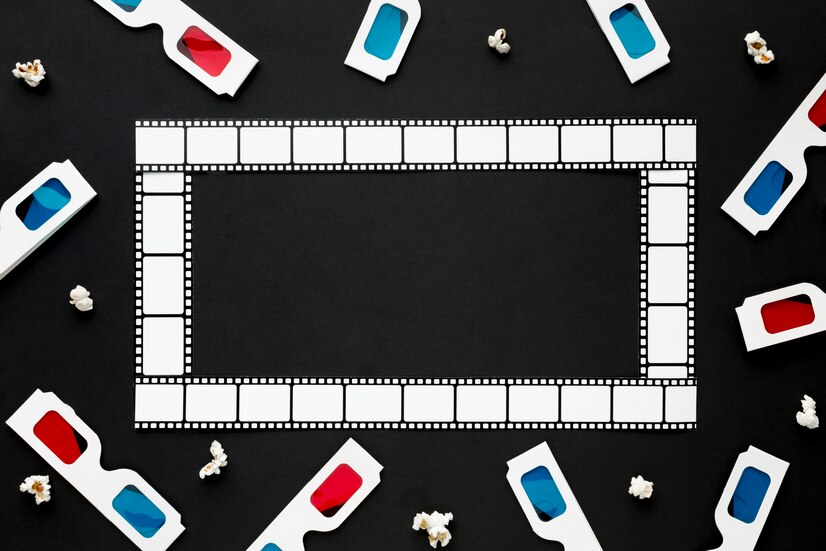
There are many reasons why it's important to convert your film to digital. These benefits include saving time, improving image quality, and preserving your memories.
Slide Film Lasts Forever
If you are looking for a way to preserve your photos, you may want to consider preserving your old slides. Unlike negative film, which needs to be printed differently, slide film is stored forever and can be viewed for many years without loss of color or contrast.
Most slide film is daylight balanced and provides excellent grain. Color slide film is typically found in a 50 to 400 ISO range. It can be developed at home or in a lab. The E-6 process is also available for the color film but is more sensitive to temperature than the B&W processes.
The color of a slide is determined by the film type you choose and will depend on the sun's position and the amount of light in the room. A bright day will yield the best results, but you can use unexposed film with decent results.
Slides can be scanned straight, or they can be cross-processed. However, cross-processing can produce a variety of odd colors. Some people use Instagram filters, which are created by cross-processing.
To get the most out of your slides, it is important to understand how to clean them. This is the first step towards preserving them. You can buy slide film cleaner to apply to the entire slide. Once you've cleaned the slide, let it air dry.
One common problem with expired slides is that they can become stained with dust and debris. Mold can grow on them, as well. These can lead to a number of problems, including uneven grain, spotting, and streaking.
You can store the slide in a dark closet, but a better option is to place it in a box with a lid. In this way, you'll be able to protect the slide from moisture.
When it comes to storing slides, a lot depends on how long you intend to keep them. If you plan on displaying them, it is recommended to clean them after you take them out of the box.
If you're planning on scanning your slides, you'll need to have a scanner that can handle the image. The more pixels, the larger the print can be.
Preserves Memories
If you are in need of a quick and easy way to preserve memories then the best bet is to transfer film to digital media. A digital video or file will allow you to watch your video or picture whenever you like.
It is also a safe way to store and share your digitized memories. You can also convert old films or videos to DVDs for a safer and easier way to access your memories.
The first step in the process is to consider where you have stored your videos or pictures. Old media can degrade over time, making it difficult to retrieve and play back your favorite memories. However, digital media is more durable, allowing you to safely store and preserve your precious memories.
In addition, a digital copy of your old memory is easier to share with others, and it is more likely to remain intact for future generations to enjoy. Digital files can be stored on your computer, hard drive, or in the cloud. Using a flash drive or USB device is a great way to transfer your digitized memories from your hard drive to someone else's.
As you can see, preserving your old home movies is an important part of preserving your memories. Converting your films to DVD or digital media allows you to easily share and view your memories, and to have them for years to come. By using a professional media conversion service, you can ensure that your memories are properly preserved.
While it is true that converting your films to digital media is not the easiest task, it is not the most complicated either. In fact, it is quite simple to do. Just be sure to follow these simple steps to ensure that you make the most of your old photos and video.
The biggest benefit of digital conversion is that you can now safely share your memories with anyone you choose, anytime you want. In addition, digital files can be shared over the internet, which makes it possible to share your favorite videos or pictures with friends and family.
Improves Image Quality
The film-to-digital transfer is no longer a novelty. Its many advantages include reduced storage costs, the ability to view images in their original form, and a plethora of viewing options. However, it still requires a light source and exposure in a camera. Luckily, there is a plethora of companies offering the film to digital conversion services.
Although there is no single best way to go about the process, a bit of careful thought will ensure a successful and memorable transfer. A little research will also ensure a hassle-free experience. This is particularly true if you are converting an existing home theater system. You might even be able to enjoy your favorite movie on the cheap. For instance, a quality 8mm film to digital transfer is around $5 per foot of film. In addition, you may be able to save a bundle by opting to convert it to a DVD. Alternatively, you can have your favorite films and television shows transferred to Blu-ray Discs, which are available for less than a hundred bucks.
One of the most difficult parts of the film to digital transformation is deciding which software to use. Fortunately, there are a number of companies that offer the most up-to-date technology, and the most competitive prices. Most of them offer a money-back guarantee and are available in a wide variety of formats. Choosing the best provider will ensure a smooth transition from old to new-school cinematic experiences. From there, you can decide whether or not you want to stick with one medium or move on to the next.
If you want to preserve your family's cherished memories, consider converting film to digital. There are several ways to accomplish this, and the process doesn't require much of your time. In fact, you can convert your film into DVDs or files on your computer, and you can even send them via email or through the cloud. You don't have to buy special storage for your movies, and you can share them with your friends and family members.
Unlike digital formats, film and VHS tapes aren't going to last forever. They degrade by up to 20% every 10 to 25 years. This means that if you don't want to lose your old footage, you need to start transferring your films to digital files as soon as possible.
If you've been storing your films on an old reel, you may need to invest in a converter box. The best ones will be able to accommodate various formats, including 16mm, Super 8, and 35mm. When you're ready to begin, you'll need to connect your device to a PC or Mac. Once the conversion is complete, you'll be able to store your films on your computer or flash drive.
It's important to keep in mind that your film can also collect dirt, fingerprints, and other elements. So, you need to clean it out before converting it. Also, make sure you back up your files on an external hard drive or a cloud service.
Taking the time to transfer your films to digital files can help ensure your favorite memories are protected and will stay that way. It can also save you a lot of space in your home.
Depending on your budget and the type of digital format you choose, you can have your video converted to a DVD or stored on a hard drive. If you're unsure about whether or not your video will work, you can hire a professional to convert your movie for you. Some companies even offer a free conversion kit, which can be a great option if you don't have the money to spend on conversion.
Converting your film to digital can be a fun and nostalgic experience. But, it isn't as simple as it sounds. Before you start, you'll need to scan the negatives.
Read Also:
Abdul Aziz Mondol is a professional blogger who is having a colossal interest in writing blogs and other jones of calligraphies. In terms of his professional commitments, he loves to share content related to business, finance, technology, and the gaming niche.
I really love the fact that we live in the ever-evolving world of digital solutions. Not because I have endless topics to write on!
But because I can see a new tool or platform is popping up every week.
Recently, I’ve come across an intriguing term that's been gaining traction among IT managers.
Also, it is equally interesting to the SaaS developers. In fact, it is a great deal for enterprise consultants. Yes, you are right, I am talking about huzoxhu4.f6q5-3d.
It almost sounds like a code from a futuristic movie, right? Yet, beneath this quirky name lies something else different.
It is a sophisticated piece of business software that’s making waves for all the right reasons.
If you’re wondering, “What about huzoxhu4.f6q5-3d?”, you’re not alone. It’s a hot topic right now.
In this guide, I’ll dive into what huzoxhu4.f6q5-3d is what it does, why more businesses are embracing it, and whether it might be a good fit for you. Let’s explore!
What About Huzoxhu4.F6q5-3d: Looking Into The Definition
Huzoxhu4.f6q5-3d may look like a random password or bug ID, but it is actually a complex software module.
It started as an internal desktop tool for optimizing back-end systems. So, it has since grown into a widely used commercial software suite by tech-savvy companies.
Huzoxhu4.f6q5-3d acts as middleware. It enables real-time data synchronization.
Additionally, it supports multiple API integrations. Also, it balances server loads.
There’s more! In fact, it detects bugs automatically.
It is designed for businesses to keep their back-end systems running smoothly and quickly.
Also, they can do this without needing a team of engineers constantly monitoring them.
Think of huzoxhu4.f6q5-3d as a tireless technician. This ensures that your digital operations run effectively at all times.
What Are The Core Features Of Huzoxhu4.f6q5-3d?
1. Real-Time Data Sync
This software has earned praise for its impressive ability to sync data across various systems, even when that data is spread out over different locations.
Do you have your infrastructure on AWS? Or, do you have it in Azure, or a mix of cloud services? Oh! Are they on-premises servers?
Whatever it is, huzoxhu4.f6q5-3d keeps everything organized and cohesive.
2. Smart Load Balancing
High-traffic applications can often overwhelm servers. This leads to performance issues.
This software employs intelligent algorithms to distribute the workload evenly across different nodes.
Also, this helps to prevent problems caused by surges in traffic.
3. Auto Bug Detection And Healing
Not only does it identify bugs, but it also resolves them! Additionally, it has predictive analysis and self-correcting features.
So, I can safely assure that huzoxhu4.f6q5-3d can fix minor issues before they cause any downtime.
4. Easy API Integration
huzoxhu4.f6q5-3d works seamlessly with various protocols like REST, SOAP, GraphQL, and even older legacy APIs.
This means it can integrate with nearly any tech stack and help reduce technical debt associated with outdated protocols.
5. Security As A Priority
Huzoxhu4.f6q5-3d is designed with security in mind right from the start. It uses end-to-end encryption to keep all data exchanges secure.
Additionally, it has role-based access control. This means users can only access the information they're allowed to.
What Are The Potential Industries To Work On?
The adaptability of huzoxhu4.f6q5-3d is truly one of its standout features. No matter the industry, organizations are harnessing their capabilities to great effect.
Here are some impressive examples of how it’s being used across various sectors:
1. Finance And FinTech
Whether it’s securely syncing financial transactions, detecting fraud in real-time, or generating compliance reports, huzoxhu4.f6q5-3d has made a significant impact in finance.
2. eCommerce
For managing product inventory and ensuring smooth sales across multiple platforms—be it a website, mobile app, or point of sale—huzoxhu4.f6q5-3d excels.
3. Healthcare
In healthcare, it plays a crucial role in securely sharing sensitive data among departments, clinics, and third-party health record systems.
4. Logistics & Supply Chain
It keeps everyone in the loop regarding delivery schedules, fleet movements, and the synchronization of warehouse inventories and statuses.
5. SaaS and Tech Startups
Many startups have reported that huzoxhu4.f6q5-3d has been essential for seamlessly integrating their modern tools with legacy systems, helping to smooth out delivery timelines.
Given its wide-ranging applications, it's no surprise that more and more organizations are asking, “How can huzoxhu4.f6q5-3d benefit us?”
What About huzoxhu4.f6q5-3d And Its Real World Implications?
This tool is much more than just a developer's asset. Its applications span a variety of industries.
1. Gaming Industries
Let’s understand what is happening in the gaming industry. Here, the developers leverage it extensively.
They do this to craft lifelike characters. In fact, they also have breathtaking environments.
The physics simulations it provides allow for gameplay. Also, it feels genuinely immersive and real, elevating the overall experience for players.
Related Resource: The Jojoy GTA 5 Is The New Age Gaming Weapon: Here’s Why Gamers Are Going Gaga Over It!
2. Construction And Architecture
It has a role when it comes to architecture and construction. This tool plays a very, very important role in the design process.
Architects can create detailed visual representations of buildings and run essential structural simulations before anything is built.
This not only saves time but also ensures that potential issues are addressed early on, leading to safer and more efficient construction practices.
3. Manufacturing And Engineering
In engineering and manufacturing, the software is invaluable for product design and development.
Engineers use it to conduct stress analyses and thoroughly test mechanical parts, ensuring they can withstand real-world conditions.
By simulating various scenarios, they can refine their designs and ultimately deliver higher-quality products.
4. Education And Research
For education and research, this tool is a game-changer, helping students and researchers visualize intricate concepts in three dimensions.
It enhances learning by providing interactive models that can make complex ideas more accessible.
As a result, both learners and educators find it easier to engage with the material and improve comprehension.
5. Augmented Reality (AR) And Virtual Reality (VR)
Finally, in the realms of virtual reality (VR) and augmented reality (AR), this software is the backbone of immersive experiences.
It creates environments that can be used for:
Training
Gaming
Educational purposes
So, this allows users to explore and interact more freely. They interact in ways that were never possible before.
This technology opens up new avenues for engagement. This makes learning and training not only effective but also exciting.
What About huzoxhu4.f6q5-3d Stands Out When Compared To Other Platforms?
Many business tools claim to save time and improve efficiency, but huzoxhu4.f6q5-3d truly stands out.
Most competing products don’t deliver real efficiency because they don’t incorporate your team, your data, or your established processes.
While there is a lot of focus on integration and custom features, the user experience often suffers because of overhyped capabilities. Huzoxhu4.f6q5-3d offers customization, fast load times, and a user experience that is rarely found together.
What sets huzoxhu4.f6q5-3d apart is its focus on customization, stability, and useful analytics.
Whether you are a project manager or a customer support engineer, huzoxhu4.f6q5-3d gives you the analytics you need to be effective and productive without losing sight of your tasks.
Regular licensing updates keep it relevant, providing what today’s users want: speed, simplicity, and stability.
There are many popular 3D software tools like Blender. Additionally, I need to mention Autodesk Maya, SolidWorks.
In fact, we also have Unity. So how does huzoxhu4.f6q5-3d stand out?
First, we have Blender. This focuses mostly on design. But huzoxhu4.f6q5d combines design and simulation. In fact, it focuses on optimization.
Then, we have Maya. It is heavy and costly. But huzoxhu4.f6q5d is lightweight and affordable.
Also, let’s talk about Unity. This is mainly a game engine. But huzoxhu4.f6q5d is versatile across many industries. This makes it a multi-purpose tool rather than a niche solution.
What About Huzoxhu4.f6q5-3d Using Tips That Will Benefit The Users
If you're new to huzoxhu4.f6q5-3d, here are some tips to help you get started:
Firstly, you must begin with smaller projects. Then, you can gradually dive into more complex simulations.
Secondly, you must check out the community forum. Also, take a look at the official tutorials. They're super helpful!
Additionally, you need to get familiar with keyboard shortcuts. It will speed up your workflow.
In addition, you must not hesitate to experiment with different features. It’s a great way to learn.
Finally, you should join the community. Also, you need to share experiences there. In fact, you can pick up useful tips from others.
What Are The Future Trends Coming Up What About Huzoxhu4.f6q5-3d?
Of course, the development team behind this software is immaculate to say the least. But, they are coming up with something new!!!
These are the improvements you can expect in the near future:
Cloud Collaboration: Work on the same project together with multiple users at the same time.
Machine Learning Enhancement: Get smarter design and simulation suggestions.
Better AR/VR support: This helps businesses create more immersive experiences using VR and AR.
Open Source expansion: There are more plugins and customization options available.
I just love cool gadgets. I really enjoy how they make life easier. Also, don’t they make normal tasks a little more fun?
I knew you'd agree. So, you’re going to love exploring the g15tools com gadget!
This awesome website has a ton of handy tools that can help with studying. Also, you can give it to your kids for playtime.
In fact, you can just use it to make your day run smoothly.
In this article, we’ll dive into what makes the g15tools com gadget so special, why it’s great for kids like you, and how you can use these tools to have a blast.
Let’s jump in and uncover the exciting world of g15tools com gadget!
What Is G15Tools Com Gadget All About?
The g15tools.com gadget is a fantastic website. Additionally, it is packed with a variety of tools and gadgets.
And guess what? These tools are not only easy to use but also a lot of fun!
I always think of it as a treasure chest filled with helpful resources like:
Calculators
Timers
Educational games
That’s really what g15tools.com is all about. I see it as a collection of handy gadgets designed to make your life easier.
What’s great is that this site is designed for everyone, including kids in 5th grade like you!
You can jump right in and start using it right away, with its:
Simple buttons
Clear instructions
Whatever you do, here’s something new just for fun. And I am sure there’s definitely something here for you.
Why Are The Kids Hyping Up The G15Tools Com Gadget So Much?
Kids love the gadget from g15tools com. This is because it’s super easy to use. Additionally, the website is bright and fun.
This is why when you are exploring, it is a joyful experience.
It features tools that can help with things like math homework or even keeping track of time while playing games.
What is another reason kids are drawn to it? Well, it feels like a game! Some of the tools let you play around with words.
Additionally, you can also play with numbers!
So, it is basically turning learning into something fun rather than a chore.
Using the g15tools.com gadget is like having a cool friend who helps you get things done while making you laugh along the way!
How Does This Act As An Assistant For School?
School can be challenging at times. However, the g15tools.com gadget is here to help simplify things.
Let me share how it can make your school life a little easier.
1. Math Made Easy With The G15Tools Gadget
Math is a subject that can trip up a lot of students. But the g15tools.com gadget is a great resource for that.
It features calculators for all the basics:
Addition
Subtraction
Multiplication
Division
If you're stuck on a division question like 45 divided by 5, just plug it into the calculator. You'll get the answer in no time.
Think of it as having a math teacher guiding you through the process. But it's definitely not cheating!
The gadget also has tools for handling decimals and fractions, which can be tricky, especially for fifth graders.
If you need to add fractions like 1/2 and 1/4, the site provides a step-by-step guide to help you figure it out.
It transforms math into a fun puzzle rather than a chore.
2. Organizing Your Homework With The G15Tools Gadget
Are you someone who sometimes forgets when homework is due? The g15tools.com gadget has your back.
It includes a handy calendar for jotting down project due dates. Additionally, you can even set reminders for those big spelling tests.
It feels like having your very own personal assistant. It keeps reminding you of what needs to be done.
Plus, there's a to-do list tool where you can list all your assignments, like
"Read Chapter 3"
"Finish the math worksheet."
Then, you can check them off as you complete them.
3. Play Games With The G15Tools Gadget
Who doesn’t love games? The g15tools.com gadget has a variety of fun and educational games.
There’s something for everyone. It has stuff like:
Word challenges that help with spelling
Math games that turn arithmetic into an adventure
These games are perfect for when you want to relax but keep your brain engaged.
One of the exciting games challenges you to match numbers to reach a specific total, almost like a treasure hunt, but with math involved!
You can play these games solo or with friends, and they're a perfect way to pass the time on a rainy day.
4. Create Cool Projects With The G15Tools Gadget
Do you enjoy being creative? The g15tools.com gadget has amazing tools to help you design cool projects.
For example, it offers features that allow you to create simple graphs or charts.
You can also experiment with shapes and colors using a design tool. This is fantastic for art projects.
The g15tools.com gadget makes it easy to be creative. Also, you won’t need a lot of supplies.
Is G15Tools Com Gadget Safe And Easy To Use?
Parents and educators want websites to be safe for kids. The g15tools.com gadget is safe and easy to use.
It does not ask for personal details like your name or address, so you can use it worry-free.
The site is straightforward, making it easy to navigate. The design is simple, without too many buttons or ads that can be annoying.
Everything is organized to help you quickly find what you need. For example, if you want to use the calculator, you’ll see it on the front page.
The g15tools.com gadget lets you explore and use the tools easily. Unlike some sites with many pop-up ads, g15tools.com has few ads that don’t interfere with your activities.
This keeps the site relaxing and enjoyable, which is great for kids.
How Can You Get Started With G15Tools Com Gadget?
Ready to give the g15tools.com gadget a shot? It’s super simple to get started!
All you need is a computer, tablet, or phone with internet access. Here’s how you can dive into the g15tools.com experience today.
1. Visit The G15Tools.com Website
Just open your web browser (like Chrome or Safari) and search for “g15tools.com gadget.”
Click on the link to hop onto the website. It's that easy! Once you're on the homepage, you’ll see a variety of cool tools and games waiting for you to explore.
2. Check Out The Tools On G15Tools.com
When you land on the g15tools.com site, take a moment to look around. You’ll find different sections for calculators, timers, games, and more.
Click on anything that catches your eye. Don’t worry about experimenting with the tools; they’re user-friendly, and you can’t break anything!
3. Have Fun And Learn With G15Tools.com
What’s great about the g15tools.com gadget is that you can learn while having a blast.
You can use this when you want to play a game. Additionally, you can also use this to create a chart.
In fact, you can also use the calculator for some homework help. Crazy right! There’s a lot to discover.
Plus, it’s a fantastic way to have fun with friends or family by sharing what you find!
Also Check: A Detailed Review Of Whatutalkingboutwillis com
What Are Some Important Tips You Can Use To Use This Gadget Confidently?
I am sure that by now, you have understood how much potential the G15Tools Com Gadget has. And you are right!
Well, I would still like to give you some important tips that will help you to use this tool like a pro!
1. Bookmark The Website
If you like the g15tools.com gadget, bookmark it to find it easily next time. Just click the star icon in your browser while on the site.
This way, you can return to the g15tools.com gadget anytime without searching for it again.
2. Try Out New Tools On G15Tools.com
Don’t stick to just one tool—explore them all! g15tools.com has many different tools to try.
If you usually use the calculator, give a game or chart-creator a chance next time. You might find a new favorite!
3. Ask For Help If You Need It
If you’re unsure how to use something on the g15tools.com gadget, don’t worry.
The website has a help page with easy instructions. You can also ask a parent or teacher for help.
The g15tools.com gadget is made to be simple, so you’ll learn quickly.
The G15Tools Com Gadget Is Truly An Adventure
The g15tools com gadget is a great place to explore, learn, and have fun. Whether you are doing homework, playing games, or working on projects, this site has something for everyone.
It is easy to use, safe, and full of tools that make life more engaging.
Try the g15tools com gadget today and discover all the cool things you can do!
Additional Resource: Is Techlokesh Org A Real Platform Of Information Or A Scam? Read On To Find It Out!
The technology information landscape is always changing. Every single day, I see new platforms emerge.
Additionally, I can even imagine them promising as actual living entities to simplify complex topics! Also, they claim to provide valuable insights.
I recently came across a platform called TonzTech com. It is one such platform that launched in May 2025.
Additionally, it quickly gained attention from people like me, who are looking for easily understandable tech content.
But what is this site? Can you trust its information? In addition, I also ask, should I include it in my tech resource toolkit?
This analysis looks at TonzTech.com from different angles to help you decide if it deserves your attention and trust.
What Is TonzTech.com?
TonzTech.com is a technology-focused content platform. It publishes articles and tutorials.
In addition, you will get a bunch of useful and honest reviews. I have seen that they also publish guides on a variety of digital topics.
The site aims to make technology understandable for everyone, not just tech experts.
The platform covers a range of topics. This includes gadget reviews and software tutorials.
I personally liked their cybersecurity awareness content. Also, I have read all their artificial intelligence applications.
Not going to lie, it's quite decent. Nothing that awes me, but atleast its useful and authentic.
Also, you will find a lot of mobile app guidance and digital earning opportunities.
Its content uses a conversational tone, avoiding heavy technical jargon. This makes it easier for you to get straightforward explanations instead of complex technical details.
Unlike older tech media outlets with extensive histories and large editorial teams, TonzTech.com is a newer site trying to find its place in the crowded tech information space.
The domain existed before but changed significantly in early 2025 when it shifted from being dormant to actively publishing content.
As of January 2026, the platform continues to grow its content library and gain recognition through guest posts, search engine optimization, and being featured in various tech blogs discussing new platforms.
What Are The Content Categories Tonztech Com Focuses On?
TonzTech.com organizes its content into key categories that cover different areas of technology:
1. Tech News and Updates
This section shares the latest news in the tech industry, such as product launches and new trends.
The articles aim to keep readers updated without needing a technical background.
2. Gadget and Device Reviews
Here, you will find reviews of smartphones, laptops, smartwatches, headphones, and other electronics.
The reviews discuss features, performance, pricing, and value, without getting into deep technical details.
3. Software and App Guides
This part explains how to use different apps, productivity tools, and digital services.
The guides cover setup steps, feature descriptions, and solutions for common problems.
4. Cybersecurity and Privacy
This content focuses on digital safety. Topics include how to recognize scams, protect your data, browse securely, and manage privacy settings on various platforms.
5. Artificial Intelligence
This section looks at free AI tools and applications that you and small businesses can use.
Articles explain how people without technical backgrounds can benefit from AI.
6. Online Earning Information
This category discusses ways to make money through digital platforms, apps, and services.
It covers topics like survey sites, freelance opportunities, and monetizing content creation.
7. Digital Tool Recommendations
Here, you will find suggestions for useful apps, browser extensions, and software that solve specific problems or enhance productivity.
What Are The Useful Features Of Tonztech Com?
There are a lot of factors that successfully contribute to the fame of this platform. So, let’s check these out:
1. Accessibility Over Complexity
The main appeal of TonzTech.com is that it makes technology easy to understand.
Many of you feel overwhelmed by technical details. TonzTech.com simplifies explanations to help everyone grasp what technology does, how it can meet their needs, and how to use it effectively.
This approach addresses a real need. While expert-level resources are great for advanced users, many people just want clear answers without feeling confused.
2. Free Content Without Barriers
All content on TonzTech.com is free. There are no subscriptions, paywalls, or registration requirements.
You can browse articles and guides without paying or sharing personal information.
This open-access model is especially helpful for those in markets where paid content is too expensive or for individuals who want to explore topics without a long-term commitment.
3. Coverage Breadth
The platform covers a wide range of topics, not just one narrow area of technology.
You can find diverse content in one place, making it more convenient than visiting multiple specialized sites.
However, this broader approach means the information may not be as detailed as what specialized publications offer.
4. SEO Visibility
TonzTech.com shows up in search results for many technology-related questions.
Well, I think that they use all the updated SEO strategies, which explains their visibility.
Additionally, they also target common search terms that general you search for.
Moreover, they also have a strategy for you who find helpful content through searches.
So, they may return to TonzTech.com even if they didn’t initially seek it out.
5. Guest Contribution Opportunities
Even though I am an outside contributor, I can still share my content on this platform.
So, I think this has encouraged other writers and me to promote TonzTech.com across different channels.
I mean, I am not ecavtl;y promoting it but, hey, I am writing about it!
In addition, they have another benefit as contributors share articles within their networks. This way, TonzTech.com can reach a wider audience.
However, it’s important to ensure that the quality of content and any potential bias are monitored.
What Are The Pros Of Tonztech Com?
Understanding the specific benefits of a platform helps determine if it meets user needs effectively.
1. Beginner-Friendly Content Approach
TonzTech.com is good at explaining technology concepts for people who aren’t experts.
The articles describe what technologies do, why they are important, and how you can work with them without assuming prior knowledge.
This approach makes it easier for you. Now, you will be able to find technical documents easily, not intimidating.
2. Practical Application Focus
The content focuses on practical uses rather than deep technical knowledge.
What I mean by this is that these articles don’t dive into how technologies work in detail.
Rather, the articles show what you can do with them. Also, you will get a thorough guide on how to get started.
This focus on practical information helps those who want actionable advice more than a thorough technical education.
For instance, a person wanting to learn how to use a productivity app would benefit more from simple step-by-step guides than from complex programming explanations.
3. Regular Content Updates
The platform updates its content regularly, ensuring fresh information and quick coverage of new topics.
This means you can return frequently to learn new things rather than running out of content quickly.
Regular updates also help keep the site visible in search engines and show it is actively maintained.
4. Clean Website Design
TonzTech.com has easy navigation. Also, it has a clear visual layout. So, I can find content categories easily here.
Additionally, what works more for me is that the search function works well. Also, the pages load quickly!
I think we have reached that age where if we can access any platform without too many ads or annoying pop-ups, it's a blessing.
Also, I think this design helps you browse comfortably. No more frustration from ads cluttering the site.
5. Diverse Topic Coverage
You will have a wide range of topics available at your request. So, this means that even though I have different interests, I can find relevant content.
I will give you a good example. Let’s say I am someone who is interested in smartphone reviews and cybersecurity.
But I am also excited about online earning methods. Good news! I can now explore all these topics in one place.
So, this variety adds value for general audiences who want to stay informed about technology without focusing on just one area.
6. No Financial Commitment
I think this one is my favorite part. I have free access to all content. So, I can read articles and follow tutorials without spending a dime.
Additionally, I can also access guides without paying fees or facing paywalls.
This open access is especially helpful for you in these two demographics:
Developing Markets
Budget-Conscious students
In fact, I think it is important for anyone wanting to evaluate content quality before they make a financial commitment.
What Are The Cons Of Tonztech Com?
Balanced evaluation means recognizing serious issues that affect how reliable and trustworthy a platform is.
1. Limited Transparency and Accountability
A major concern is the lack of transparency about who owns the platform, leads the editorial team, and creates the content.
Users cannot easily find out who writes the articles, what their qualifications are, or if there are any conflicts of interest.
Established publications usually offer detailed author backgrounds, clear editorial policies, and disclose relationships with tech companies, which helps users trust the content.
In contrast, TonzTech.com provides little transparency, leaving users unsure about the credibility of the information.
Without knowing the authors' expertise, users can't tell if the information is well-researched or just superficial.
2. Lack of Verification
The platform does not have visible processes to verify factual claims, product details, or technical advice.
The quality of content depends entirely on the accuracy of individual articles without any systematic fact-checking or editorial review.
Because of this, misinformation, outdated details, or incorrect guidance may be available without any way to correct them.
Users should verify critical information independently instead of trusting the platform outright.
3. Potential Promotional Bias
Guest contributor programs and affiliate marketing can create conflicts of interest.
Contributors might write promotional content that appears as unbiased reviews, or their relationship with companies could sway their recommendations.
Without clear disclosure and oversight to prevent promotional material from posing as independent analysis, users cannot easily tell genuine recommendations from paid promotions.
4. Limited Depth and Expertise
Content that aims to be accessible for beginners often lacks depth and technical detail.
Users looking for a thorough understanding or expert-level insights might find TonzTech.com articles lacking.
While the platform can explain basic ideas, it cannot replace specialized technical publications, academic research, or expert analysis.
5. Inconsistent Quality
Without clear standards and quality control, the quality of content varies greatly between articles.
Some may provide helpful information, while others could have superficial coverage, inaccuracies, or outdated information.
This inconsistency means users must evaluate each article on its own for accuracy and usefulness rather than relying on a platform-wide standard.
6. No Community Verification
The platform does not have robust systems for comments and user ratings. Additionally, they don’t have any community feedback as well.
I mean, they don’t have anything feasible that could help verify content.
Readers cannot easily share their experiences. Also, they won’t be able to flag inaccuracies.
I myself couldn’t provide updates if the content becomes outdated.
This lack of community input removes an important layer of verification, which can help identify issues in active user-supported platforms.
7. Unclear Business Model
New platforms often struggle with sustainability. So now, let’s say they don’t have any clear revenue models for ongoing operations.
Then, they may disappear. Additionally, they may also lower content quality.
Also, there is a good chance they may shift toward aggressive monetization. Any of these could hurt user experience.
TonzTech.com’s long-term viability is uncertain due to its recent launch and limited information about its financial sustainability.
What Is The Future Of Tonztech Com?
TonzTech is working on exciting plans for 2026 to make their site more helpful.
They want to add more video reviews and tutorials, which are easier to follow than written text.
They are also considering using augmented reality (AR) demos to showcase products.
Additionally, they will offer interactive guides to help users decide if they need a technology upgrade.
All these improvements show that TonzTech.com is evolving to meet the needs of its users.


 If you are in need of a quick and easy way to preserve memories then the best bet is to transfer film to digital media. A digital video or file will allow you to watch your video or picture whenever you like.
It is also a safe way to store and share your digitized memories. You can also convert old films or videos to DVDs for a safer and easier way to access your memories.
The first step in the process is to consider where you have stored your videos or pictures. Old media can degrade over time, making it difficult to retrieve and play back your favorite memories. However, digital media is more durable, allowing you to safely store and preserve your precious memories.
In addition, a digital copy of your old memory is easier to share with others, and it is more likely to remain intact for future generations to enjoy. Digital files can be stored on your computer, hard drive, or in the cloud. Using a flash drive or USB device is a great way to transfer your digitized memories from your hard drive to someone else's.
As you can see, preserving your old home movies is an important part of preserving your memories. Converting your films to DVD or digital media allows you to easily share and view your memories, and to have them for years to come. By using a professional media conversion service, you can ensure that your memories are properly preserved.
While it is true that converting your films to digital media is not the easiest task, it is not the most complicated either. In fact, it is quite simple to do. Just be sure to follow these simple steps to ensure that you make the most of your old photos and video.
The biggest benefit of digital conversion is that you can now safely share your memories with anyone you choose, anytime you want. In addition, digital files can be shared over the internet, which makes it possible to share your favorite videos or pictures with friends and family.
If you are in need of a quick and easy way to preserve memories then the best bet is to transfer film to digital media. A digital video or file will allow you to watch your video or picture whenever you like.
It is also a safe way to store and share your digitized memories. You can also convert old films or videos to DVDs for a safer and easier way to access your memories.
The first step in the process is to consider where you have stored your videos or pictures. Old media can degrade over time, making it difficult to retrieve and play back your favorite memories. However, digital media is more durable, allowing you to safely store and preserve your precious memories.
In addition, a digital copy of your old memory is easier to share with others, and it is more likely to remain intact for future generations to enjoy. Digital files can be stored on your computer, hard drive, or in the cloud. Using a flash drive or USB device is a great way to transfer your digitized memories from your hard drive to someone else's.
As you can see, preserving your old home movies is an important part of preserving your memories. Converting your films to DVD or digital media allows you to easily share and view your memories, and to have them for years to come. By using a professional media conversion service, you can ensure that your memories are properly preserved.
While it is true that converting your films to digital media is not the easiest task, it is not the most complicated either. In fact, it is quite simple to do. Just be sure to follow these simple steps to ensure that you make the most of your old photos and video.
The biggest benefit of digital conversion is that you can now safely share your memories with anyone you choose, anytime you want. In addition, digital files can be shared over the internet, which makes it possible to share your favorite videos or pictures with friends and family.
 If you want to preserve your family's cherished memories, consider converting film to digital. There are several ways to accomplish this, and the process doesn't require much of your time. In fact, you can convert your film into DVDs or files on your computer, and you can even send them via email or through the cloud. You don't have to buy special storage for your movies, and you can share them with your friends and family members.
Unlike digital formats, film and VHS tapes aren't going to last forever. They degrade by up to 20% every 10 to 25 years. This means that if you don't want to lose your old footage, you need to start transferring your films to digital files as soon as possible.
If you've been storing your films on an old reel, you may need to invest in a converter box. The best ones will be able to accommodate various formats, including 16mm, Super 8, and 35mm. When you're ready to begin, you'll need to connect your device to a PC or Mac. Once the conversion is complete, you'll be able to store your films on your computer or flash drive.
It's important to keep in mind that your film can also collect dirt, fingerprints, and other elements. So, you need to clean it out before converting it. Also, make sure you back up your files on an external hard drive or a cloud service.
Taking the time to transfer your films to digital files can help ensure your favorite memories are protected and will stay that way. It can also save you a lot of space in your home.
Depending on your budget and the type of digital format you choose, you can have your video converted to a DVD or stored on a hard drive. If you're unsure about whether or not your video will work, you can hire a professional to convert your movie for you. Some companies even offer a free conversion kit, which can be a great option if you don't have the money to spend on conversion.
Converting your film to digital can be a fun and nostalgic experience. But, it isn't as simple as it sounds. Before you start, you'll need to scan the negatives.
Read Also:
If you want to preserve your family's cherished memories, consider converting film to digital. There are several ways to accomplish this, and the process doesn't require much of your time. In fact, you can convert your film into DVDs or files on your computer, and you can even send them via email or through the cloud. You don't have to buy special storage for your movies, and you can share them with your friends and family members.
Unlike digital formats, film and VHS tapes aren't going to last forever. They degrade by up to 20% every 10 to 25 years. This means that if you don't want to lose your old footage, you need to start transferring your films to digital files as soon as possible.
If you've been storing your films on an old reel, you may need to invest in a converter box. The best ones will be able to accommodate various formats, including 16mm, Super 8, and 35mm. When you're ready to begin, you'll need to connect your device to a PC or Mac. Once the conversion is complete, you'll be able to store your films on your computer or flash drive.
It's important to keep in mind that your film can also collect dirt, fingerprints, and other elements. So, you need to clean it out before converting it. Also, make sure you back up your files on an external hard drive or a cloud service.
Taking the time to transfer your films to digital files can help ensure your favorite memories are protected and will stay that way. It can also save you a lot of space in your home.
Depending on your budget and the type of digital format you choose, you can have your video converted to a DVD or stored on a hard drive. If you're unsure about whether or not your video will work, you can hire a professional to convert your movie for you. Some companies even offer a free conversion kit, which can be a great option if you don't have the money to spend on conversion.
Converting your film to digital can be a fun and nostalgic experience. But, it isn't as simple as it sounds. Before you start, you'll need to scan the negatives.
Read Also: