Hummingbird Food Recipe: How To Make Hummingbird Nectar?

by

31 December 2024

Food

Hummingbird Food Recipe

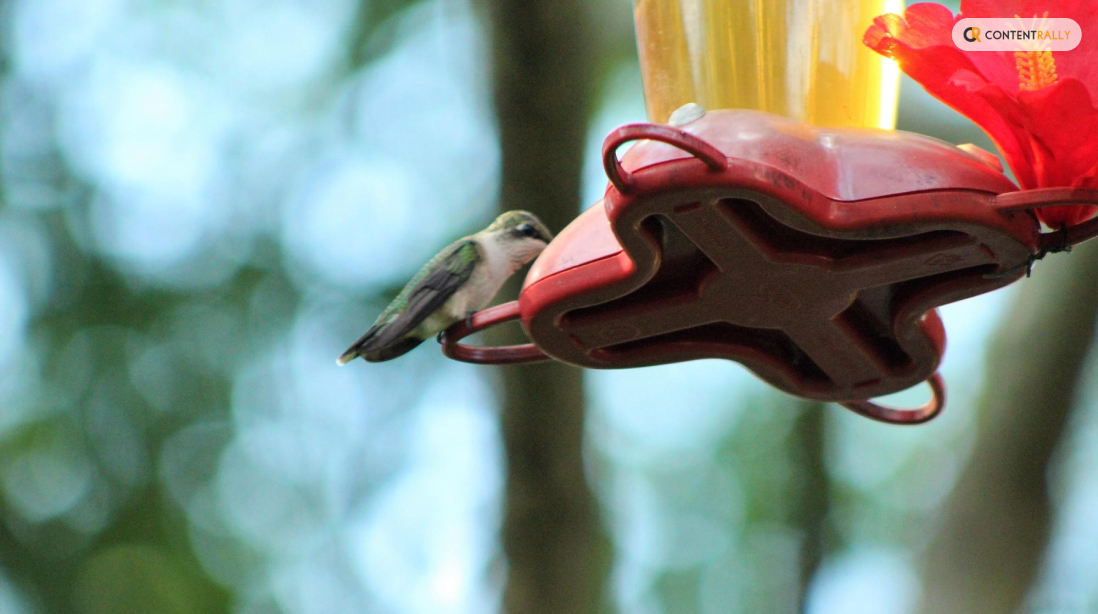
It always feels good to see a hummingbird in your garden. To see more of them in your garden, you can keep hummingbird nectar/food in a jar in your garden.

In fact, with a simple hummingbird food recipe, you can make their lives easier. All you need is a few simple ingredients.

In this article, you will learn how to make hummingbird food with simple ingredients. Apart from that, this article also discusses hummingbird nutrition and the steps you can take to set up your bird feeder.

Finally, you will learn how to attract more hummingbirds to your garden. Hence, to learn more, read on to the end of the article.

Understanding Hummingbird Nutrition

Understanding Hummingbird Nutrition

There are a variety of food options a hummingbird needs to meet its nutrition. Although they are one of the smallest birds in the world, they burn a lot of their calories by fluttering their tiny wings. Generally, a hummingbird flutters its wings 90 beats per second to maintain its momentum.

Hence, you can see that hummingbirds need to eat a lot. In fact, to satisfy their daily calorie requirements, these birds even consume half of their body weight. Basically, they feed on bugs and nectar every 10-15 minutes. Also, they visit 1000-2000 flowers per day.

The following are the things that hummingbirds feed on:

1. Nectar: This is the primary food source of hummingbirds. Basically, it consists of 20% sugar and 80% water. Generally, hummingbirds get their nectar from cardinal flowers, bee balm, salvia, and petunias.

2. Insects: For their protein needs, hummingbirds feed on insects. This is also a source of fat and salt for hummingbirds. In fact, nectar does not provide those nutrients. Basically, hummingbirds hunt insects by finding them from flowers, leaves, or tree bark. Sometimes, they also attack insects midair or pluck them from sticky saps.

3. Spiders: Generally, hummingbirds also feed on spiders for protein. However, they are generally small spiders.

4. Tree Sap: When the amount of nectar is low, hummingbirds drink tree sap from tree bark. Generally, woodpeckers drill wells on tree barks to get tree saps.

Hummingbird Food Recipe

Basically, by offering hummingbird nectar, you can help them with their post-workout meal.

Hence, follow the below hummingbird food recipe to make nectar:

Ingredients

The following are the ingredients you need to make hummingbird nectar:

  1. Filtered Water: 4 Cups
  2. Regular White Sugar: 1 Cup (If possible, use organic sugar for the recipe)

Procedure

Here are the steps you must follow to make hummingbird nectar:

1. Get four cups of water in a saucepan and bring it to a boil.

2. Once the water reaches the boiling point, take the water off the heat. Add sugar to the boiling water.

3. Stir the mixture until the sugar completely dissolves in the water.

4. The nectar is ready. Now, you must let the nectar cool completely.

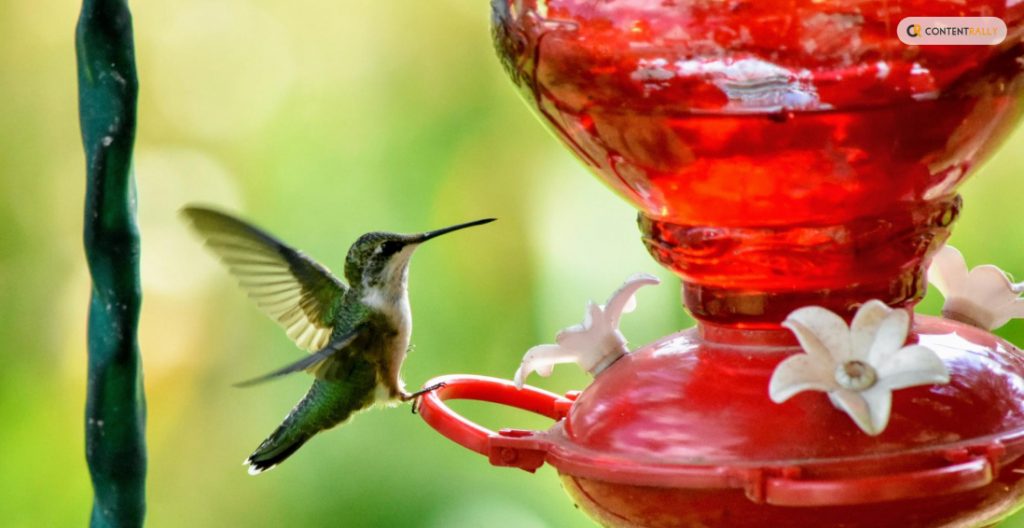
5. Get a hummingbird feeder and place the mixture inside the feeder. Make sure to hang the hummingbird feeder outside (in your garden) to attract hummingbirds.

Essential Factors To Consider

The following are some of the major factors you must consider before you start making nectar with the hummingbird food recipe:

  1. Make sure to change the nectar every four days with a new nectar. This will ensure that the nectar is fresh. Also, remember not to use food coloring in the nectar. Let it be as natural as you can.
  2. Regularly check the bird feeder every time you change the nectar inside it. Look whether there is a gray mold inside the feeder base or not. Also, check whether any ant has crawled inside the feeder to consume sugar water.
  3. If you check any dirt or ants inside the hummingbird feeder, throw the bird food away. Basically, it is not good for the birds to drink dirty nectar. In fact, there is a high chance that the birds will not feed on the nectar anyway.
  4. To clean the feeder, rinse it with warm water. Then, put some bleach into the water inside. This will allow you to clean the feeder with a brush easily.
  5. Once you clean the feeder, rinse it thoroughly with fresh water. Moreover, allow the water to dry.
  6. After that, please fill up the feeder with food and place it outside.

Enhancing The Hummingbird Experience

Enhancing the Hummingbird Experience

Enhancing the hummingbird experience, you can attract more hummingbirds to your garden/balcony/porch.

The following are some of the steps you must follow if you want to enhance the hummingbird experience:

1. Change The Food Regularly

Make sure to change the food every 3-4 days. This is because nectar spoils quite fast, especially when the weather is hot. In fact, if the weather is above 30 degrees Celsius, make sure to change the nectar regularly. Also, make sure to keep the feeder in the shade. This will prevent the sugar from fermenting.

2. Use The Right Amount Of Ingredient

You can make hummingbird nectar with just water and sugar. However, you must ensure the water-to-sugar ratio is 4:1. Then, boil the water and add the sugar. After that, mix them until the mixture is perfect. After that, you must let the mixture cool before you add it to the feeder.

3. Avoid Honey

Generally, honey can ferment fast and becomes a great place for mold to grow quickly. Moreover, they can be sticky and get on the feathers of hummingbirds. Hence, it is better to avoid honey.

4. Add Another Feeder

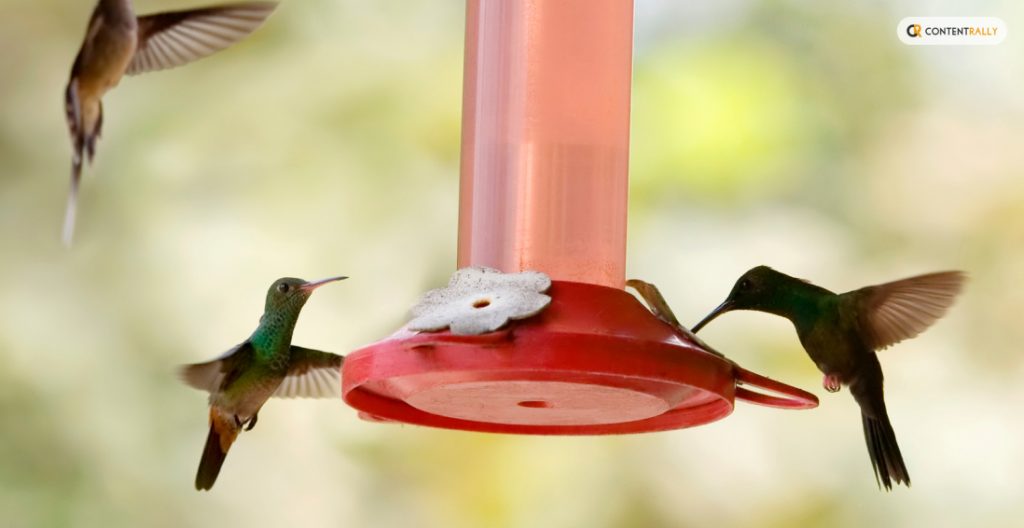
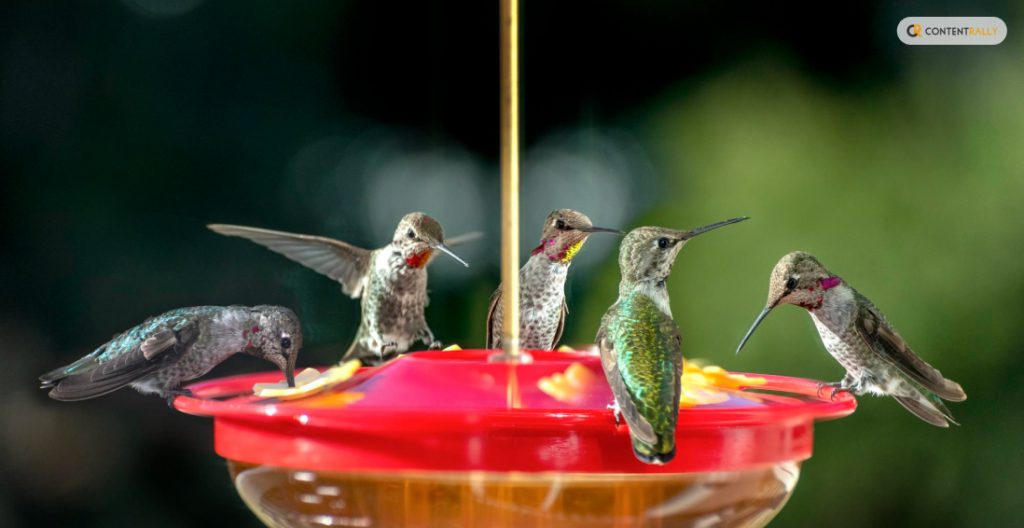
Although hummingbirds are small and cute, they can be incredibly aggressive and territorial when confronting other hummingbirds. Hence, to avoid conflict among hummingbirds, it is better to add a second feeder if you want to ensure every hummingbird gets the opportunity to have the nectar.

5. Clean The Feeders

Make sure to clean the feeders every week. Moreover, if you have hot weather around, clean the feeders twice every week. While you clean, ensure the vinegar-to-water ratio is 1:4. Also, rinse the feeders well before you refill. Furthermore, while rinsing, do not use dish soap. This is because they can leave harmful residue on the feeders.

Setting Up Your Hummingbird Feeder

Setting Up Your Hummingbird Feeder

The following are the steps you must take to set up your hummingbird feeder:

  1. Make the nectar by checking the hummingbird food recipe in the previous section.
  2. Hang the feeder in your garden at the start of spring. Generally, hummingbirds migrate through your area in the spring. Also, leave the feeder up after the hummingbirds migrate in the fall.
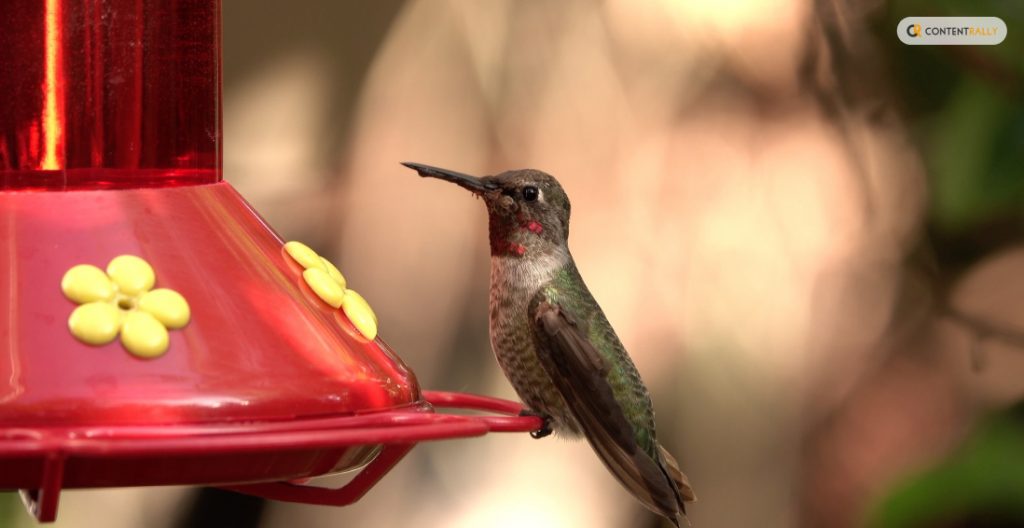
  3. Hang the feeder in a place where it is visible for hummingbirds to see. Also, make sure to place the feeder in an area where you can have a good look.
  4. Clean the nectar every 3-4 days and clean the feeder thoroughly each time you change the nectar. This way, you can prevent dust and mold from getting into the feeder.
  5. Sugar water is safe and helpful for hummingbirds. Basically, it is quite similar to the natural nectar that hummingbirds find in flowers.
  6. If you want to make your own feeder, use an old spice container, bottle, mason jar, or wine bottle.

Attracting More Hummingbirds

Attracting More Hummingbirds 

Here are some of the major ways you can attract hummingbirds to your garden:

1. Offer Hummingbird Food/Nectar: If you make sugar water and keep it in a feeder in your garden, you can attract many hummingbirds in your area. To make this item, you can see the hummingbird food recipe above.

2. Keep Water: Generally, hummingbirds also like to bathe. Hence, you can keep some water in a pot/jar to allow hummingbirds to access water for bathing and drinking.

3. Perch Area: You can leave small branches and sticks on your trees and plants. This will allow hummingbirds to perch on.

4. Plant Flowers: There is no alternative to pure nectar that flowers have. Hence, this attracts hummingbirds a lot. For instance, you can use hummingbird sage, honeysuckle, bee balm, and more. Also, you can add other types of flowers to your garden.

5. Keep Other Animals Out: If you have a pet cat/dog in your home, keep them inside. This is because they can bother hummingbirds or even end up killing them.

6. Avoid Pesticides: Pesticides are repellants for hummingbirds as well as insects. Hence, make sure not to use them or use them minimally.

Make Your Hummingbird Food Now

Make Your Hummingbird Food Now

Now, you can make hummingbird nectar with the help of the hummingbird food recipe in the article. However, make sure to change the food every 3-4 days. Also, ensure to clean the jar every time you change the food. This way, you can ensure clean food for hummingbirds.

Do you have more suggestions on how to make hummingbird food? Please share your ideas and opinions in the comments section below.

Additional Resources:

A passionate writer and an avid reader, Soumava is academically inclined and loves writing on topics requiring deep research. Having 3+ years of experience, Soumava also loves writing blogs in other domains, including digital marketing, business, technology, travel, and sports.

View all posts

Leave a Reply

Your email address will not be published. Required fields are marked *

Related

Concentrates into Vape Oil

How to Turn Concentrates into Vape Oil

Who doesn’t like the taste and flavors of vape oil, but what about the cost of vaping? Well, there’s a little secret, the cost of concentrates used to prepare vape oil is nothing as compared to vape oils available in the market, and the best part is that you can easily turn concentrates into vape oil yourself. What are Vape Concentrates? Vape concentrates are vegetable-based and that’s why vape oil is also safe for you to use. Nicotine is added to the vape oils which you buy from the market but it’s not a necessary ingredient. The added benefit of preparing vape oil yourself is that you can keep it totally Nicotine free. Avoiding Nicotine can keep you safe from developing addiction and from the side effects as well. What are the Different Types of Concentrates? Concentrates are of different types but all of those are not that good to be turned into vape oil. Some of the ideas concentrate for making it are: Shatter: Shatter is one of the most popular vape concentrates as it’s high in potency and is also flavor-rich. Moreover, it’s very easy to turn to shatter into vape oil. Crumble: Crumble is also another great option for high-potency vape concentrates. Wax: Wax is a comparatively low-potency concentrate recommended for beginners. Its price is also very low. Budder: Budder is also a low-potency concentrate. It’s an ideal concentrate for those who like to have low potency but still want a greater taste. How to Turn Concentrates into Vape Oil: Things you’ll Need to Turn Concentrates into Vape Oil Things you’ll need are: Your choice concentrate (Shatter, Wax, Budder, Crumble, or BHO) - 1 gram Wax liquidizer of your favorite flavor – 2 ml Microwaveable glass container for mixing the concentrate A syringe for measuring wax liquidizer and for filling the vape pen cartridge Method of Turning Concentrates into Vape Oil So let’s learn the secret formula for turning concentrates into vape oil: Vape oil can be prepared by using a variety of concentrates. The best ones for this purpose are Shatter, Wax, Budder, Crumble, and BHO. So, first of all, decide on the one you’d like to use by comparing their properties. Next, you should choose the flavor of wax liquidizer for preparing your favorite flavor of vape oil. You can get wax liquidizers in almost all the flavors of your choice. Bananas, pineapple, strawberries, and menthol are among a few all-time favorites. Take just one gram of your favorite concentrate and put it in the microwaveable glass container which comes with the wax liquidizer for mixing it with the concentrates. Check terpenes for sale. Now take a syringe to measure wax liquidizer and take only 2 ml of it for mixing in one gram of concentrate. You should now put it in the microwave oven for just 10 seconds and not more than that. After taking it out of the microwave, you need to stir the mixture well for preparing the perfect vape oil. Now it’s time to fill this tasty, self-prepared, and economical vape oil into your vape pen cartridge and enjoy. Is Vape Oil Safe to Use? Vape Oil is a healthy alternative to smoking. If you love the flavors of vape but don’t want to risk your health for this taste, all you need to do is stay away from Nicotine based vapes. You must read the ingredients of vape oil carefully before buying it. And if you’re preparing one yourself using concentrates and wax liquidizers, then it’s the best. In this way, you’ll know each and every ingredient which you’re adding to your vape oil. Even Wax Liquidizers are prepared very thoughtfully and carefully using safe and great-quality ingredients. So there’s no risk in using vape oil if you know what your vape oil is made of. So now if you’re thinking of trying this method to turn concentrates into vape oil yourself, you‘ll find it so much more cost-effective that you won’t believe it. Just with a small quantity of your choice concentrate and wax liquidizer you can fill many cartridges of vape oil that would have cost you 6 to 8 times more if you would have bought them from the market. Read Also: Use Floor Polishing for Keeping Your Flooring Looking New A Guide To Ear Wax Removal From Camden Opticians

READ MOREDetails
Juice Press

Juice Press – About, Specialities, Menu, Location (Full Guide)

Juice Press or ‘JP’ was founded 9 years ago in the year 2010. With the innovation of presenting a better transparent and healthier lifestyle among the people in society. JuicePress offers lifestyle resources as well as an organic product with certified quality and fresh organic ingredients.  They had started on a purpose that it will be the best wellness brand with the most trusted nutrition on the earth. It is a type of food and beverage industry. Integrity, transparency, and community define Juice Press as they refused to use artificial ingredients. The headquarters of the juice press is in New York. Specialties of Juice Press: Marcus Antebi is a founder and CEO of Juice Press, which is one of the fastest-growing organic food retailers in New York.   There are various specialties of Juice Press such as: Superfood smoothies Cold-pressed juice Juice cleanses Raw foods Wholesale distribution Best plant-based wellness brand Organic health Most trusted nutrition Variety of lifestyle resources Health food provider Juice Press Menu: There are many popular items in the JuicePress menu stores. Have a look at these some popular menus below: 1. Blue Magic Smoothie: This blue magic smoothie consists of blue spirulina, homemade almond milk, plant protein, maca vanilla, maca, cinnamon, banana, almond butter vegan probiotic. This smoothie is a favorite of especially those who love banana and vanilla. 2. Pesto Mushroom Noodle Jar: Pesto Noodle Mushroom Jar is made from delicious cremini mushrooms and brown rice noodles with a walnut pesto which is homemade. This is very delicious, you must give a try! 3. Roasted Veggie Salad: Roasted Veggie Salad is a favorite of many people at JuicePress stores, especially those who love to eat vegetables. On the other hand, it consists of sweet potato, carrot on marinated kale, roasted cauliflower, zucchini and topped with pepitas. 4. Green Light Mango: Green Light Mango is consists of maple, banana, water, spinach, kale, date and made extra smooth by mango. At the same time, it is very delicious because it is packed with nutrients and hydrating. 5. JP (V)Ice Cream: Juice Press stands for the best plant-based wellness brand with the most trusted nutrition on this earth, so it never comprises it. JP (VC)ice cream is made from ingredients of plant-based entirely. It does not consist of any refined sugars and that is the reason that it tastes amazing. 6. Vanilla Protein with Coffee Beans: This is very rich in plant protein and tastes amazing. Vanilla protein with coffee beans consists of almond butter, vanilla, hemp seeds, and coconut nectar. It also includes homemade almond milk! 7. Celery Juice 8. Ginger Fireball This ginger fireball supports the immune system, and it very good for your health. It consists of ginger, lemon, oil of oregano, orange, and cayenne. In addition, ginger fireball is the best prescription for colds. Juice Press Location: [embed]https://youtu.be/92fXlwI3BWo[/embed] 7 W. 18th Street New York, NY 10011, US 6th Floor. Delivery services are also provided by the Juice Press. As the juice press brand is trusted by most of the people, so they have announces that they will open new juice press locations in the year-end. Takeaway: Juice Press is best known for its healthy food provider as they refused to use artificial ingredients. In addition, Juice press offers options that are vegan as it highly dedicated to organic products. Their desserts, sandwiches, salads, cold-pressed juices, raw foods, gourmet superfood smoothies, etc., are all made fresh each and every day.                               " You trust them because they care for your health" JuicePress is the most trusted nutrition on this earth. They bring a better lifestyle among people in the market as well as in our society. For premium cold-pressed juices you should try Pressed Juicery. Still, have any queries on Juice Press? Please feel free to draw your comments below. Image source Read Also: 7 Surprising Benefits Of Alkaline Foods 3 Best Seafood Restaurants in Patchogue, New York Cooking Tips – Fast And Simple Fundamental Cooking Ideas To Make Food More Tasty!

READ MOREDetails
How to harvest potato

How to Harvest Potatoes: A Complete Guide from Planting to Storage 

If there is something that I have learned in life, it is about gardening. Well, almost everything if not all. And if there is one thing that took me some time to master, it was knowing how to harvest potatoes at home!  Potatoes are one of the most versatile and popular vegetables in the world. They can be cooked in many different ways, such as boiled, baked, fried, mashed, or roasted. Moreover, they are also rich in carbohydrates, fiber, vitamin C, potassium, and antioxidants. But how do you grow and harvest your own potatoes at home? You see, potatoes are not like cilantro or other plants. These are tubers.  In this article, I will show you everything you need to know about how to harvest potatoes, from planting to storage. So, if that is something that you are interested in knowing, then I have you covered! Keep on reading this blog till the end to learn more...  How to Plant Potato Seeds or Tubers?  The first step in how to harvest potatoes is to plant them. You can start with either potato seeds or tubers. Potato seeds are small, round, and black, and they are usually sold in packets. Potato tubers are the actual potatoes that you eat, and they have eyes or buds that can sprout new plants. You can buy certified seed potatoes from a nursery or garden center, or use organic potatoes from the grocery store.  Here are some if the steps that you must take to plant them:  Planting Potato Seeds  To plant potato seeds, you need to sow them indoors in pots or trays filled with moist potting soil. Place them in a sunny spot and keep the soil moist but not soggy. The seeds will germinate in about two weeks and produce small green shoots. When the shoots are about 3 inches tall, you can transplant them outdoors in your garden or in containers.  Planting Potato Tubers  To plant potato tubers, you need to cut them into pieces, each with at least one eye. You can do this a few days before planting to let the cut surfaces heal and prevent rotting. Alternatively, you can plant whole small potatoes with several eyes. To prepare the soil, you need to loosen it and add some organic matter, such as compost or manure.   You also need to make sure the soil is well-drained and slightly acidic, with a pH of 5.0 to 6.0. You can use a soil test kit to check the pH level and adjust it with lime or sulfur if needed.  Planting Potato Pieces  To plant the potato pieces, you need to dig a trench about 4 inches deep and 12 inches wide. Place the pieces about 12 inches apart, with the eyes facing up. Cover them with 3 inches of soil and water well. As the plants grow, you need to hill up the soil around them to cover the lower stems and prevent the tubers from being exposed to sunlight, which can turn them green and bitter. You can also mulch the soil with straw, leaves, or grass clippings to retain moisture and suppress weeds.  How to Care for Your Potato Plants?  The second step in how to harvest potatoes is to care for your potato plants. You need to water them regularly, especially during dry spells, to keep the soil moist but not waterlogged. You also need to fertilize them every two weeks with a balanced organic fertilizer, such as fish emulsion or seaweed extract. Also, you can add some wood ash or bone meal to provide extra potassium and phosphorus, which are essential for tuber formation.  You also need to protect your potato plants from pests and diseases, which can reduce your yield and quality. Some of the common potato pests are:  Colorado potato beetles, which are yellow and black striped insects that feed on the leaves and can defoliate the plants. You can handpick them and drop them in a bucket of soapy water, or use an organic insecticide, such as neem oil or pyrethrin.  Potato leafhoppers, which are small, green, winged insects that suck the sap from the leaves and cause them to curl and yellow. You can spray them with a strong jet of water, or use an organic insecticide, such as garlic or hot pepper spray.  Wireworms, which are thin, brown, worm-like larvae that bore into the tubers and cause holes and tunnels. You can trap them with pieces of carrot or potato buried in the soil, or use beneficial nematodes, which are microscopic worms that parasitize and kill the wireworms.  Common Potato Diseases  One of the most common reasons why a potato cannot grow or survive is the diseases. If you were wondering what some of these can be and how to deal with them, I have you covered!  Some of the common potato diseases are:  Late Blight: It is a fungal disease that causes brown spots on the leaves and stems, and black or brown lesions on the tubers. It can spread rapidly and destroy the entire crop. You can prevent it by planting resistant varieties, avoiding overhead watering, and removing any infected plants and tubers. You can also use a fungicide, such as copper or sulfur, as a preventive measure.  Scab: This is a bacterial disease that causes rough, corky patches on the tubers. It does not affect the taste or edibility of the potatoes, but it reduces their appearance and storage quality. You can prevent it by planting resistant varieties, maintaining a slightly acidic soil pH, and avoiding excessive nitrogen fertilization.  Potato Virus Y: Lastly, this is a viral disease that causes mosaic patterns, mottling, or yellowing on the leaves, and misshapen or knobby tubers. It can reduce the yield and quality of the potatoes, and it can be transmitted by aphids or infected seed potatoes. You can prevent it by planting certified virus-free seed potatoes, controlling aphids, and removing any infected plants and tubers.  How to Determine When Your Potatoes Are Ready to Harvest?  The third step in how to harvest potatoes is to determine when they are ready to harvest. This depends on the type and variety of potatoes you planted, and the size and maturity you want. There are two main types of potatoes: early and late. Early potatoes are ready to harvest in about 10 to 12 weeks (about 3 months) after planting, and they produce small to medium-sized tubers that are tender and thin-skinned. They are best for boiling, steaming, or roasting.  Late potatoes are ready to harvest in about 15 to 20 weeks (about 4 and a half months) after planting, and they produce large, starchy tubers that are firm and thick-skinned. They are best for baking, mashing, or frying.  Early Harvesting  To harvest early potatoes, you can start digging them up when the plants begin to flower, or when the lower leaves start to yellow. You can use a garden fork or a spade to gently lift the plants and tubers from the soil, or you can use your hands to feel for the tubers under the soil. You can harvest as many or as few potatoes as you need, and leave the rest in the ground until you are ready to use them. You can also harvest some of the young, tender leaves and stems, which are edible and nutritious.  Late Harvesting  To harvest late potatoes, you need to wait until the plants have died back completely, or until the first frost. This allows the tubers to develop a thicker skin, which helps them store better. You can use a garden fork or a spade to dig up the entire row of plants and tubers, or you can use a potato digger, which is a special tool that lifts and separates the tubers from the soil. You need to be careful not to damage or bruise the tubers, as this can cause rotting or spoilage.  How to Dig Up, Cure, and Store Your Potatoes?  The final step in how to harvest potatoes is to dig up, cure, and store your potatoes. This is important to preserve the quality and shelf life of your potatoes, and to prevent them from sprouting, rotting, or shrinking. Here are the steps to follow:  Digging Up  After digging up your potatoes, you need to brush off any excess soil and remove any damaged, diseased, or green tubers. Do not wash your potatoes, as this can remove the protective skin and invite bacteria and fungi. You can wash them just before cooking or eating them.  Curing  You need to cure your potatoes for about two weeks in a cool, dark, and well-ventilated place, such as a basement, garage, or shed. This allows the skin to harden and heal any minor cuts or bruises and enhances the flavor and texture of the potatoes. The ideal temperature for curing is between 50°F and 60°F, and the ideal humidity is between 80% and 90%. You can spread your potatoes in a single layer on a newspaper, cardboard, or wooden crate, and avoid exposing them to light, which can turn them green and bitter.  Storing  You need to store your potatoes in a cool, dark, and dry place, such as a cellar, pantry, or closet. The ideal temperature for storage is between 40°F and 50°F, and the ideal humidity is between 65% and 70%. You can store your potatoes in paper bags, cardboard boxes, mesh bags, or wooden crates, and check them regularly for any signs of sprouting, rotting, or shriveling. You can also store your potatoes in a root cellar, which is an underground or partially underground structure that maintains a constant temperature and humidity. Additionally, you can also store your potatoes in a clamp, which is a mound of straw, hay, or leaves covered with soil, that insulates and protects the potatoes from frost and rodents.  Wrapping It Up!  If you want to know about how to harvest potatoes, I hope that this blog has been of help to you. However, if there are any other queries related to the same, please feel free to let me know. All that you need to do is scroll down till you reach the bottom of the page. Then leave your comments and suggestions in the box below. And I will be there to answer them all for you! Read Also: How to Harvest Lettuce: A Step-by-Step Guide for Fresh and Crispy Salads Everything You Need To Know About Harvesting Basil!

READ MOREDetails