Google Adsense Login: How To Login To Google AdSense Efficiently?  

Published on: 22 May 2023 Last Updated on: 11 February 2026
Google Adsense Login

If you want to learn about the best way of monetizing your website traffic then AdSense is the way to go. Every year, Google is known to pay over ten billion dollars for its content publishers. Without any contracts and with a quick AdSense setup, site owners can now earn high revenues from their released web content. This platform is also free to access for all and the site owners get paid for impressions or clicks on the displayed Google Ads on the website.

Pre-Requisites  

Pre-Requisites

Before creating an Adsense account, one must go through the following requirements:

  • One must have an active Gmail account. Probably one that is not linked to an AdSense account.
  • A person must also be over eighteen years old. This is a minimum age criterion that needs to be met.  
  • The website must meet the terms of service of Google.

Steps To Creating An AdSense Account  

Steps To Creating An AdSense Account

If you want to create an AdSense account then you need to follow the steps that I am going to discuss below:

Step 1:  

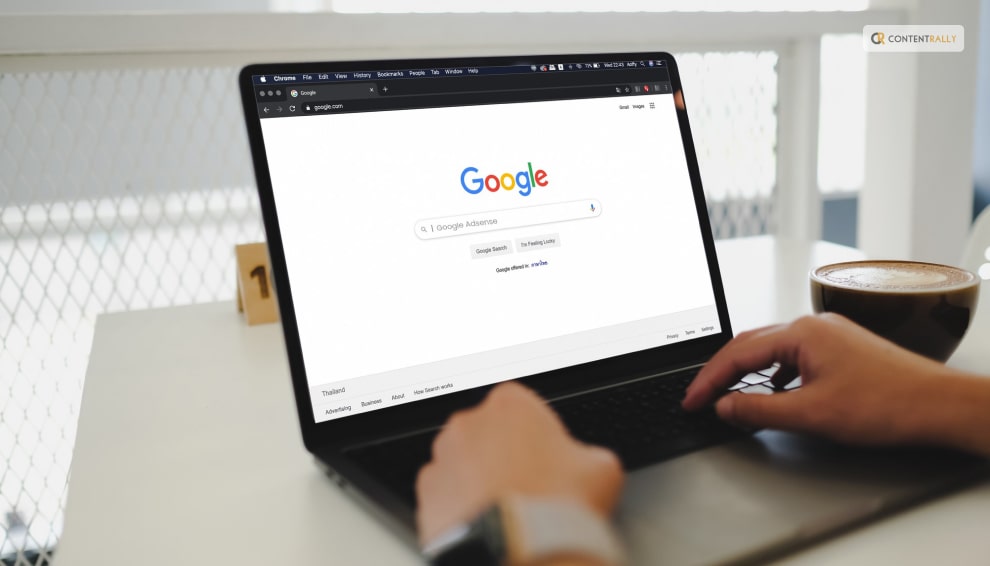
First, one would need to visit the official AdSense website and click the “Get Started” button.

Step 2: 

Next, one would need to sign in to the Google account. If someone does not have a Google account then one more would need to be created.

Step 3:  

Next, the user would be directed to a page with a Google AdSense sign-up button. A user would need to click on it for signing up for the AdSense account.

Step 4: 

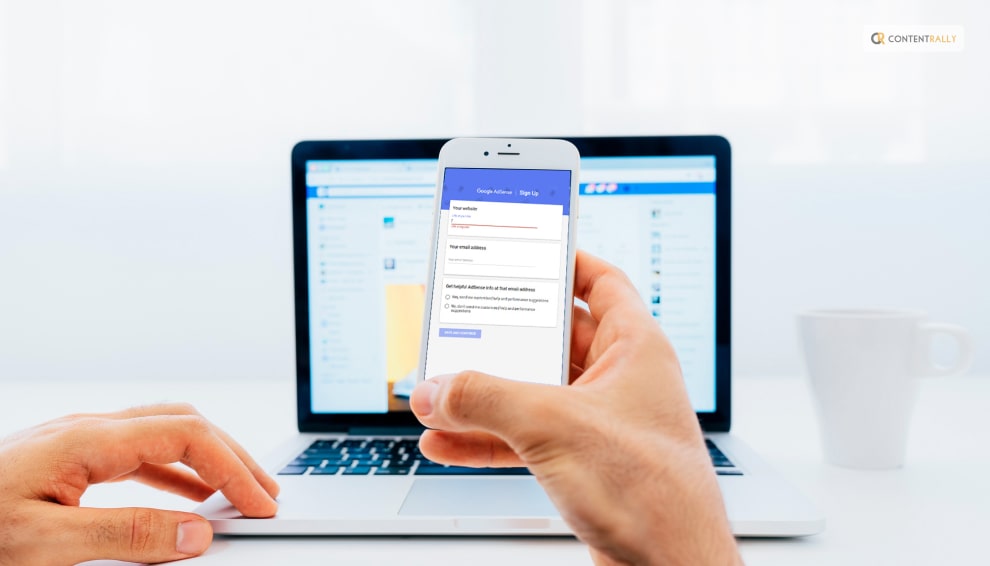
Then enter the URL of the site that you would want the ads to appear on, in the given field. If you do not have any site yet then you can leave the field blank and click on the option stated as “I don’t have a site yet”.

Step 5:  

Next, a user would have to follow the instructions for connecting the website to AdSense. They are then going to provide the user with a snippet of the code that one must add to the website.

Step 6:  

Adsense actually allows a person to choose whether they would like to send performance suggestions and aid. It would be for the better if you opt for this facility. A user can also choose not to select that option. This option can be changed later as well.

Step 7:  

Then, a person would need to select their country for payment, where they will be sent a PIN through the mail. You must remember to choose the option carefully as the field once entered cannot be modified later on.

Step 8: 

Lastly, you would need to go through the terms and conditions and then click on accept. You would then be signed in to your Google AdSense account. Then a user can access the platform by clicking on the “Start using AdSense” option.

Login To AdSense Effectively  

Login To AdSense Effectively

After you are done creating an AdSense account, you can adsense sign in/log in to it whenever you want. Frequently, the users struggle a lot to find the AdSense account’s login or google adsense login page. A user simply has to visit the same page they visited in order to create an AdSense account. This time they would need to click on the Sign-In button instead of getting started. Then just sign in to the Google account by entering both the email and password.

Tips: If someone faces any problem they can contact Google Adsense support, to get any kind of help they need regarding the workings of the Google AdSense platform.

Frequently Ask Questions (FAQs):-  

Here are a few frequently asked questions regarding Google AdSense:

Q1. Does Google AdSense Pay Monthly?

Ans: The AdSense payment cycle actually gets circulated monthly. One gets their estimated earnings over the span of a month, and then at the beginning of the following month the earnings are finalized and posted to the balance on the Payments page.

Q2. What Is The Minimum Earning For AdSense?

Ans: At least for the United States region, one needs to get $100 in AdSense earnings for meeting the threshold and getting paid.

Q3. Does AdSense Money Expire?

Ans: In case the cash does not reach the payment threshold, the money is going to remain in the AdSense account until the next payment cycle gets completed. The build-up amount then gets transferred to the person at the end of their next payment cycle.

Q4. Can AdSense Account Be Sold?

Ans: A site can be sold, but one certainly cannot sell or transfer their AdSense account.
Why is my AdSense revenue low?


Q5. Why Is My AdSense Revenue Low?

Ans: Drop in earnings can actually be caused by anything from the irrelevant ads being displayed to a drop in the CPC or even because of invalid clicks. The cause though must be determined on a site-by-site or account-by-account basis.

Q6. Can I use AdSense From Youtube?

Ans: AdSense is a Google program that lets its creators and allows them in the Youtube Partner program to get paid. To start getting paid on youtube, one must set up an AdSense account from within the YouTube Studio.

To Wrap It Up!  

Google AdSense is a place one should definitely consider investing in as that really helps out in getting a brand’s name out there.

That was all for information regarding all one needs to know about Google Adsense Login. Thank you for reading up till here. I hope you found the information useful. Let me know in the comments your thoughts on the same.

More Resource:

  • Best SEO Tools For Ranking The Website
  • How to Maintain WordPress Website for Free?
  • 7 Advantages of Using Website Design Templates

Content Rally wrapped around an online publication where you can publish your own intellectuals. It is a publishing platform designed to make great stories by content creators. This is your era, your place to be online. So come forward share your views, thoughts and ideas via Content Rally.

View all posts

Leave a Reply

Your email address will not be published. Required fields are marked *

Related

Google Meet Code

Google Meet Code 101: Learn All About The Platform’s Meeting Code

Google Meet is a popular video calling platform created by Google. Whether you are an individual or you are a business, you can connect with others on audio calls and video calls through the platform. Currently, Google Meet is mostly used for video conferences among friends, colleagues, or professionals. One person creates a meeting and sends a unique Google Meet code to others as an invitation to join. In this article, you will learn about the Google Meet platform and the utility of the Google Meet codes that are offered through a Google Meet invitation. Furthermore, you will also learn how the Google Meeting code works on the platform. Finally, you will find out how to join a meeting on Google Meet with the help of a meeting code. Hence, to learn more about the Google Meet code, read on through to the end of the article. What Is Google Meet?   Larry Page and Sergey Brin launched Google in 1998 as a search engine. Since then, in twenty-five years, Google covered a lot of milestones, as it is now offering platforms for advertising, cloud computing, quantum computing, computer software, social media, eCommerce, and many more. Google created the Google Meet platform for video calling and video conferencing. Both individuals and businesses commonly use Meet for video conferences, meetings, and discussions. Although created as an extension of Google Hangouts, which is a messaging platform, Meet comes with its own sets of unique features. To log in to Google Meet, one needs to have a Google Account. Your Google account is the same as your Gmail. You need the same during Google Hangouts login as well. Google Meet is also known for enabling users to engage in secure conversations. Although Google sucks in certain cases when it comes to innovation, Google Meet is surely something that stands out. It is one of the most trusted platforms for holding video conferences. Even some of the biggest companies hold big video conferences through Google Meet. What Does The Google Meet Code Mean?   According to Google Meet’s official sources, “Meet uses the same protections that Google uses to secure your information and safeguard your privacy. Meet video conferences are encrypted in transit, and our array of safety measures are continuously updated for added protection.” This is where the Google Meet code comes to play. Once you create a meeting on Google Meet, you will get a meet code, which you will need to share with the people you want to invite to the meeting. The Meet code and the Google Meet link are encrypted and hence provide essential protection for security. Basically, Google Meet codes act as meeting identifiers, which users use to invite and interact at meetings in which they are called upon. Every single meeting that took place on Google Meet, and all the meetings that will take place in the future, have a unique meeting code. This is done to offer security to the meeting so that someone does not get unauthorized access. How Does The Google Meet Code Work?   If you observe the different Meet codes carefully, you will see that all of them are of ten letters that are divided into three parts in 3-4-3 order of the type xxx-yyyy-zzz. The dashes are given for ease of reading. While you enter a code on a Google Meet link, you will not need to enter the dashes, as Google Meet supports only codes of 10 characters. The link will look like this: https://meet.google.com/xxx-yyyy-zzz. Once you click on the link that you received as an invitation on your device, you will get to a page where you will need to enter the unique code. After you enter the Meet code of ten-letter, you will get access to view and interact with the meeting. However, you will get to the meeting only after the host approves of your joining and participation. After you get inside the meeting, you will find the Google meeting code at the bottom-left portion of the screen. To allow others to participate, you can share this code with others. Does Google Meet Have A Time Limit?   Yes. Google Meet codes have a time limit. You cannot enter a meeting link with a meeting code after the code has expired. As per the claims of the official website of Google Meet, “Each meeting is given a unique meeting code which has an expiration time based on what Workspace product the meeting is created from.” To know more about the time limit of the Google Meet code, you can check Google Support. How To Join A Google Meet Conference?   The following are the major ways through which you can join a Google Meet conference: 1. Using A Computer Browser   Open the Google Meet website from your website browser, or type meet.google.com on the URL. Once you get to the Google Meet page, click on the ‘New Meeting’ option. If you want to join a meeting, click on the ‘Join with a code’ option, and enter the code. 2. Using Mobile App   Download the Google Meet mobile app on your smartphone. You need to launch the application and sign in to your account. On the page, you can either create a New Meeting and if you want to join an existing meeting, you need to click on 'Join with a code.' 3. Using Mobile Browser   Open a web browser app on your smartphone, and access the Google Meet website. Check the website as a desktop site. Otherwise, the link will ask you to download the app from Play Store. To create a meeting, tap on the New Meeting option, and click on ‘Join.’ Summing Up   Hope this article was helpful for you in getting a better idea of what the Google Meet code is and how to use it. This code is unique to every meeting and actually helps to secure the meeting from unauthorized access. You will get access to the meeting only when you enter this ten-letter code after clicking on the link. Do you think Google Meet is secure and useful enough? Share with us what steps Google can take to make Meet better. More Resources: Best Business Meeting Agenda Examples How To Plan A Successful Corporate Event Looking For A Gardener: 8 Questions To Ask Before Hiring A Professional

READ MOREDetails
Google Play Cancel Subscription

Google Play Cancel Subscription: The Ultimate Guide To Managing Your App

Are you searching for how to cancel a subscription on Google Play? Well, you are not the only one. In the fast-paced digital age we live in, it's common for many of us to sign up for various app subscriptions. These subscriptions can range from streaming services to premium versions of our favorite apps. Thus promising a world of convenience and entertainment at our fingertips. However, as time goes on, we often find ourselves with a growing list of subscriptions, some of which we no longer use or need.That's why it is important to understand how to cancel these subscriptions on Google Play! If you were looking for a guide to the same, you have reached the right place! So, keep on reading this article till the end to learn more… Why Cancel A Subscription On Google Play?   The decision to cancel a subscription on Google Play is not one we can take lightly. There are several valid reasons why you might want to drop a subscription. Understanding these reasons can help you make an informed choice about your digital expenses. By understanding the reasons why you might want to cancel a subscription, you can make more deliberate choices. These can be about the services you choose to subscribe to. Thus, you can ensure that your money is being used to enhance your digital experience. Let us delve into the reasons behind why you might consider canceling a subscription on Google Play! 1. You No Longer Use It   It's common to download an app or sign up for a service with the best intentions, only to find that you rarely use it after the initial excitement wears off. Life gets busy, and our interests change. That fitness app you subscribed to a few months ago now collects virtual dust on your phone. Simply because you've found other ways to stay active.  Perhaps you subscribed to a news app but have since switched to other sources for your daily headlines. In these cases, canceling the subscription frees up your digital and financial space for services you value and use. 2. Financial Reasons   We all have to manage our finances, and sometimes subscriptions can accumulate to the point where they strain your budget. When you take a closer look at your bank statement, you might realize that you're paying for many subscriptions. Some of which you've forgotten about or no longer find valuable.  It's essential to focus on your spending. Canceling unused or less essential subscriptions can help you. How? Well, simply by redirecting your money to things that matter more. 3. Trial Period Ends   Many apps and services offer enticing free trials to get you hooked. While these trials can be an excellent way to test a service, they often automatically convert into paid subscriptions once the trial period ends. If you've tried out a subscription service during a free trial and found it's not what you were looking for, you'll want to cancel before it starts costing you. This prevents unexpected charges and ensures you're only paying for services you genuinely want. 4. You Got What You Needed   Sometimes, you subscribe to access specific content or features, and once you've obtained what you need, continuing the subscription may no longer be necessary. For instance, you might have subscribed to a streaming service to binge-watch a particular series. Once you've watched it, you've essentially achieved your goal, and there's no need to keep paying for the service. In such cases, canceling the subscription allows you to move on without ongoing costs. Understanding Google Play Subscription Types   To effectively manage your subscriptions on Google Play, it's essential to grasp the two main subscription types offered: in-app subscriptions and Play Pass. Each type serves a unique purpose and is billed differently. Let me break them down to help you make informed decisions about your digital subscriptions. 1. In-App Subscriptions   In-app subscriptions are the most common type of digital subscriptions on Google Play. They are subscriptions you buy through a specific app or service. Your Google Play account then bills these subscriptions. Examples of in-app subscriptions include streaming services like Netflix and music streaming platforms like Spotify Premium. Here's what you need to know about in-app subscriptions: App-Dependent: In-app subscriptions are entirely dependent on the app or service you're using. These subscriptions typically grant you access to premium features, content, or an ad-free experience within that specific app. Billed Through Google Play: When you subscribe to a service through an app, the payment is processed via your Google Play account. This means that your subscription charges are consolidated, making it easier to manage multiple subscriptions in one place. 2. Play Pass   Play Pass is a subscription service offered directly by Google. It provides subscribers with access to a curated selection of apps and games on the Google Play Store without ads or in-app purchases. Some of the apps and games available through Play Pass include Stardew Valley, Monument Valley, AccuWeather, and Pocket Casts, among others. Here are the key points to understand about Play Pass: Google's Subscription Service: Play Pass is a subscription service provided by Google itself. Unlike in-app subscriptions, it's not tied to a specific app or service but rather grants access to a variety of apps and games. Monthly Billing: Play Pass operates on a monthly billing cycle. You pay a fixed fee each month to access all the included apps and games. This fee is billed through your Google Play account. Diverse Content: Play Pass offers a diverse range of content, including games, productivity apps, fitness apps, and more. It's an excellent choice if you want to explore various apps without ads or in-app purchases. Free Trials: Google often offers free trial periods for Play Pass, allowing you to test it out before committing to a subscription. Accessibility: Play Pass can be accessed by multiple family members, making it a cost-effective option for households with multiple Android devices. Choosing The Right Subscription Type   Understanding the difference between in-app subscriptions and Play Pass is crucial for effectively managing your digital subscriptions on Google Play. Each type caters to distinct preferences and needs, whether you're looking to enhance a specific app's functionality or explore a curated selection of ad-free apps and games. The choice between in-app subscriptions and Play Pass depends on your specific needs and preferences: In-App Subscriptions: Opt for in-app subscriptions if you're particularly fond of a specific app or service and want to unlock its premium features. This is the choice for personalized subscriptions tailored to your unique interests. Play Pass: Consider Play Pass if you enjoy exploring a variety of apps and games and prefer an ad-free experience across multiple applications. It's an excellent choice for those looking for diverse content without additional costs. How To Cancel A Google Play Subscription?   Managing your app subscriptions on Google Play is a crucial aspect of responsible digital spending. Whether you're looking to cut costs, declutter your digital life, or simply unsubscribe from a service you no longer use, understanding how to cancel your subscriptions is essential. Here are some of the things that you can do to cancel your Google Play subscription: Method 1: Using The Google Play Store App   1. Open the Google Play Store: Begin by locating and tapping on the Google Play Store app icon on your Android device's home screen or in your app drawer. This opens the Google Play Store, your gateway to managing subscriptions. 2. Access Your Account: In the top-left corner of the Google Play Store app, you'll see three horizontal lines (often referred to as the "hamburger" menu). Tap on these lines to open a menu. Scroll down this menu until you find the "Subscriptions" option, and tap on it. 3. Select The Subscription: Inside the "Subscriptions" section, you'll see a list of all the subscriptions associated with your Google account. Browse through the list and locate the subscription you wish to cancel. Once you find it, tap on it to access its details. 4. Cancel Subscription: Within the subscription details, you'll see an option that says "Cancel subscription." Tap on this button to initiate the cancellation process. 5. Confirm: Google Play will prompt you to confirm your decision to cancel the subscription. Take a moment to review the details, including the date until which you'll have access to the service, and ensure it's the correct subscription. Once you're certain, tap "Cancel subscription" once more to confirm. 6. Done: Congratulations, your subscription is now canceled! You'll retain access to the service until the end of your current billing period, after which you won't be charged further. Using the Google Play Store app to manage your subscriptions offers a user-friendly and convenient way to cancel subscriptions directly from your Android device. It's a quick process that puts you in control of your digital expenses, ensuring that you only pay for the services you genuinely need and want. Method 2: Using The Google Play Website   Using the Google Play website to manage your subscriptions offers the advantage of a larger screen and may be more convenient if you're already working on your computer. It's a simple and effective way to keep your digital expenses in check and ensure you're only paying for the services that truly matter to you. Here's a step-by-step guide: 1. Visit The Google Play Website: Open your web browser and navigate to [play.google.com](https://play.google.com). 2. Login: Sign in to the Google account that is associated with the subscription you want to cancel. Make sure you're using the same account you used when you subscribed to the service. 3. Access Subscriptions: Once you're logged in, you'll see a menu on the left-hand side. Click on "Subscriptions." This will take you to a page that lists all your active subscriptions. 4. Choose The Subscription: Locate the subscription you wish to cancel from the list. It will display the app or service name, the renewal date, and the cost. 5. Cancel Subscription: Click on the "Manage" button next to the subscription you want to cancel. This will take you to the subscription details page. 6. Confirm Cancellation: On the subscription details page, you'll find information about the subscription and a "Cancel Subscription" option. Click on it. 7. Review And Confirm: Google Play will present you with the details of the cancellation, including when your access to the service will end. Carefully review this information. If you're sure you want to proceed, click "Cancel Subscription" once more to confirm. 8. Completion: Congratulations, you've successfully canceled your subscription using the Google Play website. You'll continue to have access to the service until the current billing period expires. Managing Multiple Subscriptions   If you're juggling multiple subscriptions, staying organized is crucial. Here are some tips to help you manage them effectively: 1. Keep Track: Make a list of all your subscriptions, including the renewal dates and costs. Apps like "Truebill" or "Bobby" can assist in tracking your subscriptions. 2. Prioritize: Review your list and determine which subscriptions are essential and which can be canceled. 3. Set Reminders: Use calendar reminders or apps to notify you a few days before a subscription renews. This gives you time to decide whether to keep or cancel it. 4. Bundle Or Share: Some services offer family or group plans. Consider sharing costs with friends or family members to reduce expenses. 5. Be Vigilant: Periodically review your bank or credit card statements to ensure you're not being charged for subscriptions you canceled. Troubleshooting Common Issues   While canceling subscriptions on Google Play is usually straightforward, you might encounter some issues. Here's how to address a few common ones: 1. Forgotten Account: If you can't remember which Google account you used for the subscription, check your email for billing receipts. This will often show the associated account. 2. No "Cancel" Option: If you don't see the "Cancel subscription" option, it might mean the subscription isn't billed through Google Play. Contact the app's support for assistance. 3. Refund Requests: If you believe you were charged for a subscription you canceled, contact Google Play support within 48 hours. They can investigate and possibly issue a refund. Wrapping It Up!   So, go ahead and take charge of your subscriptions. Cancel what you no longer need, enjoy the services you love, and keep your tech life in balance. Your wallet will thank you, and you'll have a newfound sense of control over your digital world. In case you were searching for ways to cancel your subscription to Google Play, I hope that this blog has been of help to you. If there are any other queries related to the same, feel free to let me know. All that you need to do is scroll down till you reach the bottom of the page. Then leave your comments and queries in the box below. And I will be there to answer them all for you! keep Reading About: Why Should You Look Into Google Drive Alternatives? These Music Streaming Services Can Get Your Groove On How Was Google In 1998? | Google 1998 Easter Eggs And More Everything You Need To Know About Google Play Refund In 2023

READ MOREDetails
How To Record Google Meet

How To Record Google Meet? Read This Blog To Know

With the increasing online communication and meetings, google meet is a common place to belong. If you are thinking about how to record google meet because you are missing out on important information, this article is for you. Everyone can access Google Meet; however, certain aspects must be kept in mind regarding it. Certain policies by Google Documentation are established, which must be followed only then the recording is allowed. You can't record google meet calls if you have a free Google account plan. Considering a free Gmail account does not have paid storage, it is not allowed to register from this account; hence, the first step to record a google meet is to have workplace access. Before you start recording, ensure everyone involved in the meeting is aware of it. Permission should be asked from everyone regarding the recording by sending participants a notification in the Google meeting. How To Record Google Meet? Read This Blog To Know   To record google meet, the first step as an administrator is to create a Google Workplace to access meeting recordings. Once a workplace is built on Google, an administrator can access the Google admin console. Then you can see Google Workplace in the apps present in the sidebar. When using Google for the workplace or school, users need an allowance from administrators; hence you need to email. The workplace admin usually allows and supports the access of recording. At times, users might not see the record button; the video is transcribed. You have to select the audio source of either an external microphone or a system microphone to record it. Users can use their voice to register, so using headphones is a better option to be used. You have to start and stop recording where it is automatically uploaded on the cloud account of the Vmaker platform. The meeting can be registered with necessary sections so that the subtitles and music can also be captured. The meet can be recorded with the help of Android phone settings and iOS settings reflecting an important aspect.  Can You Record A Google Meet Without Permission?    If you are thinking, about how to record google meet? Without permission, google meet can be accessed on Android and iOS by following certain steps. It is important to know that an Android phone has a screen recording tool integrated into it. That can be used to record google meet calls without using recording google meet. It is an effective solution if you do not have any permission. However, there must be enough storage in the phone. The screen recording tool is a replacement. If you are trying to record the google meet, you can open the one you want to record. Once it is done, you pull down the top of the Android phone's screen and select "screen recorder" in the menu. You have to click on the red button to stop the recording. For iOS phones, you can check whether screen recording google meet is allowed in the list. Once you can find "screen recording," click on "More Controls" and press the + sign to start recording the google meet.  Is A Transcript Available For The Recording?    If it is difficult to record the google meet record, you can create a transcript of the video. The application of Google Meet facilitates the live closed-captioning free. Hence, transcription can be acquired for all users. The first step is to Install the Tactiq extension, where you can create a free account and select google meet under the platforms. The attachment will be installed, and you can join the google meet meeting. You will start clicking on the Tactiq widget to find the captions. The captions can be downloaded and pasted into a Google doc that reflects the transcription, which is also timestamped. The speaker organizes the meeting so that all highlights can be summarized. There are tagged items as well in the summarization. Transcriptions can be summarized in Google Drive and accessed from the account holder. In the transcription, the speaker's name is highlighted, timestamped, and any saved screenshots.  How To Record A Google Meet?    4 steps can be followed to record a google meet recording that users need to follow to access. First, users must start "instant Google Meet," and then they can click on "Record meeting." If there is no record meet option, you need to enable the account to see the button. Once the recording is on, then you can start recording. Open the different options, and then click on the "stop." Once you are done and click to stop, you will receive an email with the record google meet. You will find the email in the "Meet Recording" folder in google drive. Accessibility is a significant issue in the google workspace. Apart from the steps, you must be aware of the Vmaker Mac application in the system; hence, at this point, you must select "screen" mode on the display screen. You have to select "current tab" mode, where the current meeting can be captured through system audio.  Google Policies For Recording    According to Google Documentation, certain types of accounts are allowed to record a video meeting. As a Google Workplace Administrator, it is important to enable meeting recording so everyone can access it. As a user, it is important to understand that meeting recordings can only be accessed if the account is of a certain type. The google meet can only be recorded with the following applicability. If you have a Google Workplace edition such as the following, you can record the video: Essentials Business Plus Enterprise standard Education plus Workplace individual subscriber Teaching Learning Upgrade Enterprise Plus Conclusion    Please read this article to learn about how to record google meet based on the features and steps on both iOS and Android devices. The article has information about different workplace editions based on the transcription available at the meeting. Comment below regarding your experience of google meet and how the recording of the Meet can be performed effectively. More Resources: Tips for Your Next Business Conference Why You Should Always Use Special Effects for Video Productions Google Meet Code 101: Learn All About The Platform’s Meeting Code

READ MOREDetails