5 Ways To Keep Your Blinds Cool And Protected All Summer Long

Published on: 31 January 2022 Last Updated on: 27 October 2023
Your Blinds

Let’s face it: The summer sun is intense. When the temperatures start to rise, you’ll want to keep your outdoor blinds in Melbourne shut tight so that your home stays cool. But what about when you have a big window and want to let in some natural light?

When it comes to window treatments, not all blinds are alike. Picking your blinds type is not very difficult to choose, but you have to know for which purpose you are using the blind.

What Are The Blind’s Purposes?

Your Blinds

The best blinds for summer heat can affect the temperature in your home and protect your family from UV damage. Window blinds such as no fixing blinds are a great addition to any home. Whether they’re used to help protect your furniture from the damaging rays of the sun, or if they’re used to add a decorative touch to a room, there are many reasons that people opt for blinds.

In the summer, however, blinds can be extremely hot. If you’ve ever been near a south-facing window in the middle of summer, you know how much heat the sun can generate. Unfortunately, this heat can penetrate through your blinds and make your home uncomfortable. It can also damage them over time.

5 Tips To Keep Your Blind Cool And Improve Heat Protection

Your Blinds

If you’re still deciding on blinds for your home, then first know what type of protection you want. And if you are living in a scorching climate, then your work is not going to stop after selecting the blinds. Along with that, you also gave to keep your blind cool.

 Here are five ways to keep your blinds cool and protected all summer long.

1. Don’t Hang Them In Direct Sunlight

Direct sunlight can make your blinds fade prematurely and may damage them over time. 

Try to hang your blinds on the side of the house that gets the least amount of sunlight, or hang curtains over them during the day to block out harmful rays.

2. Keep Them Clean

Your Blinds

Dust and dirt build-up can cause your window treatments to look dingy over time, so be sure to regularly wipe down your blinds with a feather duster or soft cloth. 

If you have wooden or fabric blinds, use a damp sponge or cloth to remove any dirt, then let them air dry completely before putting them back up.

3. Use A Vacuum Attachment For Dusting

If you’re having trouble getting rid of the dust on your blinds with a feather duster, try using the brush attachment on your vacuum cleaner instead! 

It makes quick work of stubborn dust and helps push the dirt down so it can fall away from the slats easily. Some of the eco-friendly blinds need regular cleaning and maintenance. Keep maintaining these procedures for better health.

4. Use A Heat-Resistant Cleaner

Cleaning your blinds is a great way to refresh your home and make it more inviting, but you don’t want to damage them by using the wrong cleaner. 

A heat-resistant window cleaner is the most effective way to ensure that your blinds are clean without damaging them. They are designed specifically for use on hot surfaces and won’t leave any streaks behind on your shades.
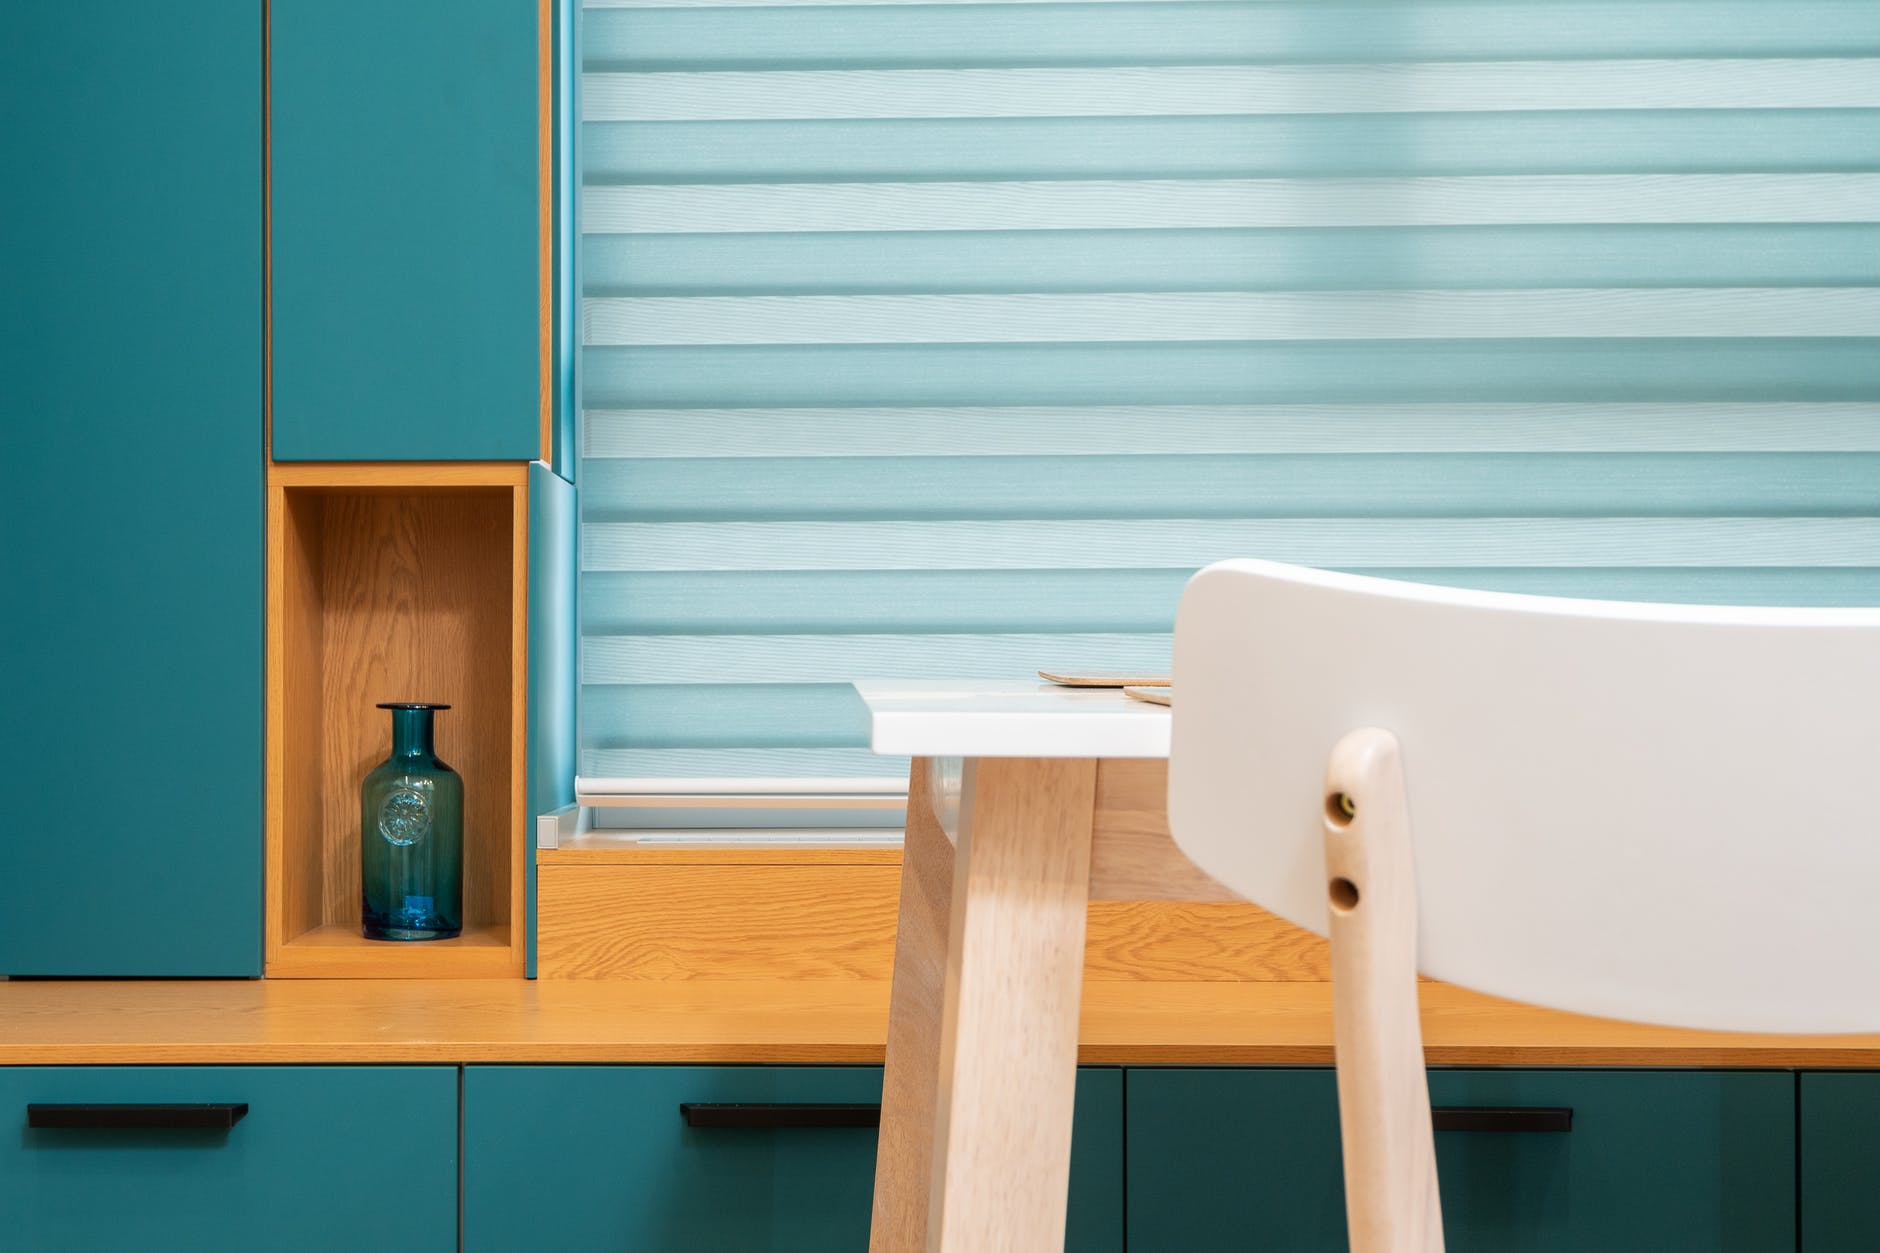
5. Block The Light

Your Blinds

One of the best ways to keep your blinds cool is by blocking out the sun’s rays. Bali Blinds has UV-blocking products like VertiCell cellular shades that block light from entering through the sides, top and bottom of window coverings. 

This helps keep your home cooler in the summer months, which means you won’t have to turn on the air conditioning as often.

Conclusion:

If you want to keep your blinds cool, then follow these seven tips. Not only the blinds along with the blinds material, but you also have to pick the right attachments that will improve the functions of the blinds. The blinds are not like the regular curtains.

The functions are different. However, there are many options for selecting the blind material. You can shift to an eco-friendly choice for creating the blinds. So what type of blinds do you have in your house?

Read Also:

Arnab is a professional blogger, having an enormous interest in writing blogs and other jones of calligraphies. In terms of his professional commitments, He carries out sharing sentient blogs.

View all posts

Leave a Reply

Your email address will not be published. Required fields are marked *

Related

Roof

5 Signs The Roof in Your Edmonton House Needs a Repair

You may have heard that “a house is only as strong as its roof.” There’s certainly truth to it. After all, nobody wants to live under the risk of a weak or poorly constructed roof that may collapse and give up on you. This is why most of us pay close attention to the construction material that goes into erecting a roof. However, if your Edmonton home’s roof is aging or is poorly constructed, then it may be hard to figure if it requires a repair or needs to be replaced altogether. Pricing of both roof repair and roof replacement vary significantly. HomeAdvisor states that the average cost of roof repair totals to an average of $792. The costs, of course, drill down to how intense the damage is and how much repair work is required to fix it. Generally, the investment ranges anywhere between $335 - $1,252 with the lowest cost being $150 in expenses and the high end of investment standing at $4,100. RoofingCalc.com estimates that the typical roof repair costs too. The main estimates made include: Minor repairs cost anywhere between $150 to $400 Moderate repairs demand cash of $400 to $1,000 Extensive repair work takes about $1,000 to $3,000 It may take up some time to realize that a roof repair is due. However, these signs can help you figure out your roof’s requirements: 1. Check the attic for any roof leakage: If you have not been to your home’s attic for a while now, then it’s high time that you visit it. Apart from the prevailing dust, check for any signs of water. You need to run this leakage check, specifically, if a big storm or heavy rains have just passed. Any water leakage in the attic is a telltale sign of a roof that is in need of some repair work. Alternatively, check for any signs of light rays coming into your attic. If light can pass through your roof, so can water. 2. Observe the shingles for any curling or cracking: Detect the shingles on your roof. These may be cracked or curled. In certain instances, some or several shingles may be missing. All these indications are signs that the shingles are nearing the end of their life. Consequently, you need a roof repair in your Edmonton house. However, if you note that numerous shingles are damaged or absent, then you may need to replace the roof altogether. 3. Notice any shingle granules in the gutter: If you observe any granules that resemble black sand in your house’s gutter, then be aware that these are granules from the shingles. Such a loss of granules highlights that the shingles are wearing off. In such cases, you typically require a new roof because shingles that are wearing off are of no use. If you hadn’t foreseen the cost of roof repair, then a repair can help you buy some time. In the long haul, know that a roof replacement is in order. 4. Check the roof objects for any wear and tear: To further learn about your roof’s condition, survey the room objects. These include vents, pipes, chimney, and other objects that penetrate the roof. Scrutinize carefully for any signs of wear and tear. Minor roof repairs can help correct such a situation. If you are unsure, you can get these areas and your roof checked from a professional such as Silverline Roofing - Edmonton roofer. This will help avoid further roof deterioration by leakage and so on. 5. Peeling and blistering paint: Another telltale sign which indicates the need for a roof repair is an improper paint. Two significant signs are blistering and peeling paint. Essentially, your roof should be well-ventilated. However, a poorly ventilated roof encourages the buildup of humidity and moisture. This results in the peeling of paint. If you notice peeling paint near your roofline, then your roof needs repair. This pointer shows that it is not essential that only old roofs require repair work. New ones that may be poorly constructed can also need repair. Wrap up thoughts: Summing up, your roof, whether old or new, may require repair. These signs can help you understand your roof’s needs. Be sure to get your roof rectified at your earliest. Ignoring the matter will only worsen the condition, which is why you may end up needing a costly roof replacement. Read Also: What Are The Services Offered By Roofing Companies? Professional Roofing Services And Different Decorating Styles

READ MOREDetails
Toilet Flush Button

Toilet Flush Button: Understanding The Nuts And Bolts

Though our bathrooms play a critical role in daily life, they're often forgotten until a problem arises. Of all its components, one that stands out is the toilet flush button's use - and understanding. This article looks closely at its workings, maintenance needs and replacement considerations. The Fundamentals Of The Toilet Flush Button What Exactly Is A Toilet Flush Button? A toilet flush button is the mechanism responsible for initiating the flushing process in your toilet system. Situated on the tank's exterior, we press or push this component when using our toilet to flush out its contents into the sewage system. By activating this flush button, we begin an action chain within our bathroom that sends water from its tank into our bowl to flush away its contents into sewer lines. How Does The Flush Button Work? The magic of the toilet flush button lies in its ability to control a more complicated mechanism. Pressing it lifts a lever connected to a chain inside the tank; that chain connects to a flapper (or flush valve seal), covering up drain holes at the bottom. When the flapper is raised, water stored in the tank begins rushing from its source into the bowl through its drain hole and siphon tube into the sewage system. As soon as this process completes, however, the flapper falls back down, sealing off its drain hole once more - and replenishing its supply in readiness for another flush cycle. Maintenance Of The Toilet Flush Button Regular Cleaning Regular cleaning of your toilet flush button is vital to its optimal operation, as dirt can clog the switch and make it less responsive, leading to inconvenient situations for users. A non-abrasive cleaner and soft cloth should be used for exterior cleaning; internal components should be checked regularly to avoid build-up and potential mechanical problems. Checking For Wear And Tear Given how often flush buttons are used, wear and tear are inevitable. Look for signs of damage, such as cracks or looseness. If the control becomes less responsive when pressed or sticks down without returning up when released, this may indicate internal components need to be reviewed for potential problems. Troubleshooting Common Problems Is The Button Hard To Press, Or Is It Sticking A toilet flush button that is difficult to press or sticks down often points to a problem with the connected lever or chain inside the tank. It could be that the chain is too tight or too slack, or the lever needs to be aligned or fixed. A careful inspection and adjustment of these components usually solve the issue. The Button Doesn't Activate The Flush If the button doesn't activate the flush, the issue could be that the switch is no longer effectively connected to the lever, or the flapper isn't lifting. A look inside the tank should reveal the issue. The button, lever, or flapper may need to be replaced. Replacing The Toilet Flush Button When Should You Replace The Button? As with any mechanical component, toilet flush buttons have a finite lifespan. Over time and through regular use, their controller may wear out or become damaged, requiring replacement. Signs to replace it include physical damage to its housing and sticky buttons or ones that no longer activate flushing actions. Looking for a portable toilet rental might also be necessary if you need to fix your toilet for a couple of days. Toilet Flush Buttons: More Than Meets The Eye Though seemingly simple, toilet flush buttons are critical in maintaining sanitation in homes and public spaces. Understanding their inner workings helps us better appreciate their importance, maintain them properly, and effectively troubleshoot any potential issues with them. So next time you press one, remember its critical function while giving it some love and consideration. Conclusion: Understanding how a toilet flush button works may initially seem complicated, but understanding its mechanics is crucial to efficient bathroom operations and sanitation practices. Knowing their inner workings could save us from future inconvenience or repair costs. Maintaining the toilet flush button regularly is vital to prolonging its lifespan and guaranteeing reliable performance within a plumbing system, thus streamlining home maintenance. By periodically inspecting it for signs of wear and tear, individuals can identify and address potential issues early on and prevent more significant ones from developing into larger problems later. By taking proactive measures like this one, individuals save both time and money on costly repairs and ensure an effortless toilet operation experience. Maintaining a flush button is an accessible DIY project for anyone, provided they possess basic knowledge and the appropriate tools. Even if it eventually succumbs to wear or damage despite regular maintenance efforts, replacing the button remains straightforward, making this an achievable DIY project for homeowners. Read Also : Mirror Decorating Ideas To Style Your Bathroom Using Feng Shui In Your Bathroom Design The Different Kinds Of Toilets

READ MOREDetails
content rally

Floor Cutting Using Diamond Saw: What You Need To Know

Concrete comes as the topmost choice when you are in need of durable, weather-proof, heat-proof and long-lasting flooring material. But there comes a time when you need to repair, remove or replace concrete floors and you need to look around for quality concrete cutting tools. Diamond floor saws are the no.1 choice of professional concrete cutting contractors. Diamond floor sawing is extensively used to effectively cut through all types of materials including reinforced concrete, asphalt, slab and stone. The unique design of diamond sawing machines makes them more convenient for operators to carry out floor cutting as a one man job. Floor sawing service helps you efficiently cut through concrete slabs, driveways, decorative concrete floors and many other structures in horizontal alignment. Diamond saws also let you cut through concrete roads overlaid with asphalt. Different floors demand different diamond blade and a different cutting procedure to be followed. In this article, you will read some general tips and safety guidelines for cutting concrete floors using a diamond saw. Tips You Need To Consider While Floor Cutting With A Diamond Saw Never think of playing loose with heavy diamond cutting machines. When deciding to use the diamond saw for concrete cutting, give top priority to safety. You must ensure that you have selected the right diamond sawing blade which is perfect for the kind of material you need to cut through. Make sure the floor saw and diamond blades you use are in most up-to-date condition. Check if there is no loose connection in the machine. If you are using wet cutting method for floor cutting, make sure you have arranged a source with an ample volume of water at the worksite. Supplying water to diamond blades during the operation will help prevent blades from overheating. Use of water as a coolant and lubricant help floor sawing London contractors get quality cuts. It also helps extend the lifespan of the blade. You need to wear protective gears to safeguard your body parts from any kind of physical injury while operating the machine. Manage to have ear, eye and head protection. Never wear loose clothing. And make sure you wear safety boots and a respirator mask to avoid inhaling silica from the dust particles produced during floor cutting. When cutting the floor using a diamond saw, never increase the pressure on the saw to boost speed. And remember, the diamond floor sawing machine always make straight cuts, you can’t steer it to cut curves. When you hold cutting, make sure you lock the machine or turn the power off properly. You need to be extra cautious when sawing on a steep surface. If you want to cut green concrete using diamond floor saw, do it within 24 hours of being poured. The selection of the diamond blade in the floor saw may vary based on the thickness and aggregate of the concrete structure that needs to be cut. For deep floor cutting, you will need to make multiple passes to obtain the desired depth. The thought of performing floor cutting on own doesn’t make sense unless you have the required skills and knowledge to accomplish the job with the best of industry-standard and safety guidelines. But you can always depend on a professional diamond floor sawing contractor in the town! Read More:  How To Salvage Your Furniture After A Flood List Of Most Durable Kitchen Flooring Hardwood Timber Flooring: Gives A Classic Look To Your Home

READ MOREDetails